Hello dear masters and craftswomen. I present to your attention a master class on making such an origami swan, and I called it "The Swan in Pink". How to origami a swan? We will make a pink drawing, select the swan with pink modules around the perimeter and put it on a round stand, and also glue small eyes. Please watch this video on how to make an origami swan. IN […]
Hello dear masters and craftswomen! Today I bring to your attention a master class on making a tricolor Swan from triangular modules. It seems that what else can you think of, what other options are there for making Swans using technology modular origami... But it turns out that there are still options, and this is not the last thing in my arsenal. The tricolor swan is so simple [...]
Hello dear masters and craftswomen! I bring to your attention a new master class on making a Swan in black from 3D modules. In the last lesson, you and I did the Swan in red, and now I decided to change the style a little and perform the Swan in black. The scheme is not complicated and will suit anyone, even a beginner in modular origami. Specially [...]
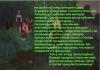
Hello dear masters and craftswomen! I bring to your attention a new master class on making a Swan in red shades. On the Internet, you can find a huge number of different schemes and master classes for making Swans using the modular origami technique. I’m sure you haven’t seen such a swan before. This scheme is quite simple and even [...]
Swan in blue. Video tutorials and diagram. Part 3. In the third part of the master class, I offer you two video tutorials and a detailed origami diagram of how to make a swan. The first video talks about how to make a swan neck and how to make a small stand. The second video talks about how to glue the swan better and faster. Lesson 6 (neck and [...]
Swan in blue. Video tutorials and diagram. Part 2. In the second part of the Swans in Blue Mater-class, we finish making the torso. I have prepared for you two video tutorials and a detailed scheme of origami swan from modules. To assemble a swan, you will need 1438 1/16 modules, of which: 317 - purple modules 471 - blue modules 552 - blue [...]
Swan in blue. Video tutorials and diagram. Part 1. I bring to your attention a new master class on making origami swan out of paper from 3D origami modules. The layout is rather unusual and the wing look is not quite classic. The photograph shows small through holes and a mesh pattern. Frankly, the scheme is rather complicated! Especially for this scheme, I [...]
“Rainbow Swan” diagram and video tutorials (part 3). The third part of the "Rainbow Swan" master class consists of three video tutorials on assembling the stand. And I also decided that the video tutorial on gluing "Rainbow Swan" will be very useful to you. Lesson 5 (support part 1) Lesson 6 (support part 2) Lesson 7 (support part 3) [...]
From ordinary colored paper and glue, which is in every home, you can make many wonderful crafts that will delight you and your children. For example, a paper palm tree would be a great option for beginners who want to do it themselves.
The process of making a palm tree from paper is entertaining enough to keep young children interested. In addition, he superbly develops the imagination and fine motor skills... A volumetric origami-style palm tree or a palm tree made of pieces of wire and corrugated paper will be a wonderful interior decoration. We have created detailed master class with photo and video materials, thanks to which you can easily cope with this task.
We make a voluminous palm tree out of paper with our own hands in MK
To make a palm tree out of paper, we need:

- Corrugated green paper;
- Regular colored paper Brown color;
- scissors;
- thin wire about 25 cm;
- glue.
First, overabout making a trunk for our palm. To do this, take some corrugated paper wire and plain brown paper.
1) We wrap the wire with a piece of corrugated paper, this is necessary so that the brown stripes do not slip when we crate them to the wire. And the shape of the barrel will be more durable.
2) Cut the brown paper into strips of about 2-3 cm each. Fold each such strip 6 times and create a fringe from them. To do this, make a neat cut from any edge.
3) Now glue the brown fringe to the palm tree frame. We put glue on the edge of the strip and wrap it tightly around the frame so that the base is not visible. We do this 3 times to make the palm tree more voluminous.
Leaves.In order to create foliage for our palm, we cut corrugated paper into strips of 1 cm and a length of about 6. Fold in half and cut out the leaves. Give each leaf an elongated shape similar to a palm leaf. The leaves need to be made in 2 sizes - the small ones will go to the top of the palm tree, and the large ones will serve as the main part of the crown.

Now all that remains is to assemble the finished palm tree from the parts that we made. To do this - Glue the leaves to the top of the finished trunk - first small, then large.
At the end, we fix the workpiece on the stand. And a hand-made palm tree is ready. You can decorate the base with fine colored stones or sand for a finished look.
Origami palm:
The volumetric palm tree made using the origami technique will also look original. For this you will need:
- 14 sheets of thick green paper,
- 16 sheets of yellow paper,
- Glue.
- clerical knife or scissors
To create a palm tree using this technique, we first need to collect the required number of modules. You will need 210 green modules and 243 yellow ones. To make a module we will use the diagram below.

After assembling the required number of modules, we begin to create our palm in stages.
Palm base:1) First, we need to make our palm tree an island on which it will stand. To do this, make up the first and second rows of each of the 9 green modules and turn them inside out.
2) On each corner of the second row module we put on one third module. A total of 18 green modules are needed.
3) We collect the fourth row by analogy with the third.
4) And in the fifth row, you will need to attach 36 modules.
Sand beach:1) Starting from the 6th row, we turn on the yellow modules.

2) It is necessary to form 6 and 7 rows, each should consist of 36 yellow modules.
Trunk:1) From the 8th row, the trunk of the palm tree begins to appear.
2) Distribute 18 yellow modules evenly. We insert them into the gaps between the modules of the first and second row, imitating sand.

3) In the 9th row, distribute 8 yellow modules and repeat this action for 19 rows in a row.
Palm leaves:1) Now we need to make the branches of our palm tree. In total, we need 6 identical leaves for this. To assemble one sheet, you need green modules - the first 2 rows should consist of 6 green modules each. The second row modules are put on backwards compared to the first. we do the third row as follows - 2 green modules are put on each one of the corners of the previous row. In total, you need to collect 12 rows in this way.
2) The other five leaves are collected in the same sequence.
Finish the creation of the palm tree by gluing the leaves to the top of the trunk.
Our original origami palm tree is ready.
Related videos
We have selected for you several illustrative and useful video tutorials on the topic of creating a palm tree from paper that can be useful and invite you to watch them.
From ordinary colored paper and glue, which is in every home, you can make many wonderful crafts that will delight you and your children. For example, a do-it-yourself paper palm tree will be an excellent option for beginners.
The process of making a paper palm tree is entertaining enough to keep young children interested. In addition, he superbly develops imagination and fine motor skills. A voluminous origami-style palm tree or a palm tree made of pieces of wire and corrugated paper will be a wonderful interior decoration. We have created a detailed master class with photo and video materials, thanks to which you can easily cope with this task.
To make a palm tree out of paper we need:

- Corrugated green paper;
- Plain brown colored paper;
- scissors;
- thin wire about 25 cm;
- glue.
Palm trunk
First, we need to make a trunk for our palm tree. To do this, take some corrugated paper wire and plain brown paper.
1) We wrap the wire with a piece of corrugated paper, this is necessary so that the brown stripes do not slip when we crate them to the wire. And the shape of the barrel will be more durable.
2) Cut the brown paper into strips of about 2-3 cm each. Fold each such strip 6 times and create a fringe from them. To do this, make a neat cut from any edge.
3) Now glue the brown fringe to the palm tree frame. We put glue on the edge of the strip and wrap it tightly around the frame so that the base is not visible. We do this 3 times to make the palm tree more voluminous.
Leaves
In order to create foliage for our palm, we cut the corrugated paper into strips of 1 cm and about 6 in length. Fold in half and cut out the leaves. We give each leaf an elongated shape, similar to a palm leaf. The leaves need to be made in 2 sizes - the small ones will go to the top of the palm tree, and the large ones will serve as the main part of the crown.

We collect a palm tree
Now all that remains is to assemble the finished palm tree from the parts that we made. To do this - Glue the leaves to the top of the finished trunk - first small, then large.
At the end, we fix the workpiece on the stand. And a hand-made palm tree is ready. You can decorate the base with fine colored stones or sand for a finished look.
Origami palm

The volumetric palm tree made using the origami technique will also look original. This will require
- 14 sheets of thick green paper,
- 16 sheets of yellow paper,
- Glue.
- clerical knife or scissors
To create a palm tree using this technique, we first need to collect the required number of modules. You will need 210 green modules and 243 yellow ones. To make a module we will use the diagram below.

After assembling the required number of modules, we begin to create our palm in stages.
Palm base
1) First, we need to make our palm tree an island on which it will stand. To do this, make up the first and second rows of each of the 9 green modules and turn them inside out.
2) On each corner of the second row module we put on one third module. A total of 18 green modules are needed.
3) We collect the fourth row by analogy with the third.
4) And in the fifth row, you will need to attach 36 modules.
Sand beach
1) Starting from the 6th row, we turn on the yellow modules.

2) It is necessary to form 6 and 7 rows, each should consist of 36 yellow modules.
Trunk
1) From the 8th row, the trunk of the palm tree begins to appear.
2) Distribute 18 yellow modules evenly. We insert them into the gaps between the modules of the first and second row, imitating sand.

3) In the 9th row, distribute 8 yellow modules and repeat this action for 19 rows in a row.
Palm leaves
1) Now we need to make the branches of our palm tree. In total, we need 6 identical leaves for this. To assemble one sheet, you need green modules - the first 2 rows should consist of 6 green modules each. The second row modules are put on backwards compared to the first. we do the third row as follows - 2 green modules are put on each one of the corners of the previous row. In total, you need to collect 12 rows in this way.
2) The other five leaves are collected in the same sequence.
Finish the creation of the palm tree by gluing the leaves to the top of the trunk.
Our original origami palm tree is ready.
Related Videos
We have selected for you several illustrative and useful video tutorials on the topic of creating a palm tree from paper that can be useful and invite you to watch them.

Gray and rainy autumn followed by slushy and frosty winter. Not better times for sun and beach lovers. But I was lucky in this regard, since I am not tied to a certain place and can work anywhere. Therefore, like a migratory bird, with the onset of the first signs of bad weather, I fly over to warm regions.
Today I am writing from beautiful Nha Trang in Vietnam. My vacation in Nha Trang began in November and will last until the very end of the cold weather. In fact, a wonderful place, because at this time of the year the climate is just perfect for a comfortable stay. Blue, clear sky, clean sand and palm trees, what else is needed for happiness. \u003d)
And then just a free minute stood out, and I, inspired and inspired by the wonderful view of a palm garden outside the window, will gladly take her to a useful task, namely, I will tell you how to make a modular origami palm tree.
We will not succeed in the details of how to assemble origami modules. And therefore, I very much hope that everyone who is going to start assembling this model already knows how to do it.
In total, you will have to collect 210 green and 243 yellow modules. The module size is standard.
So, the palm tree grows on the surface, so you need to start with it. The first, inner row, should consist of 9 green modules.
Now the first two rows, you need to turn inside out and on each corner of the second row, you need to put on one module in the third row.
The next row of 18 modules is green, then the fifth row of 36 modules is green. The next two rows are already yellow color... Each of them should consist of 36 modules.
And in order to collect the trunk of a palm tree, you need to evenly distribute 18 yellow modules, inserting them into the center of the island, between the first and second rows. In total, the trunk should consist of 18 rows.
The leaves of a palm tree are composed of six identical parts. The first and second rows consist of six green modules. Second row modules, you need to put on backwards on the front on the first row modules. And then the modules are put on one of the corners of each previous row.
The leaves will have to be glued to the trunk, otherwise nothing else.
Below is a diagram illustrating the assembly principle of the model.

That’s all.
The symbol of the New Year, and indeed of winter, is a tree. And the symbol of summer? Maybe a palm tree? Let's try to collect it using modular origami - palm turns out to be very beautiful.
For such a palm tree growing on the island, the following materials will be required:
- 14 sheets of green office paper,
- 16 sheets of yellow paper,
- super glue.
Instruments:
- utility knife or scissors.

Modular origami palm master class.
A total of 210 green and 243 yellow standard size modules (1/16 sheet) need to be assembled. The palm tree grows on the island. We start collecting from the island, i.e. from its center. The first and second rows - 9 green modules each.

We turn the first two rows inside out.

On each corner of the second row module we put on one module (one pocket) in the third row. There are 18 green modules in total.

Fourth row. 18 green modules.

Fifth row. 36 green modules.

The weed on the island is over. A yellow sand has begun - 36 yellow modules.

Seventh row - 36 yellow modules.

Palm trunk. Distribute 18 yellow modules evenly. We insert them into the gaps between the modules of the first and second row of the island.

Second row: 9 yellow modules.

A total of 18 rows of the trunk.

Palm leaves. There will be 6 identical leaves in total. The first and second rows - 6 green modules each. The second row modules are put on backwards compared to the first.

One sheet: third row - 2 green modules are put on each of the corners of the previous row. There are 12 rows in total.

The other five leaves are collected in the same way.

Glue the leaves to the top of the trunk. Origami palm from modules ready. Try to make other crafts from modules as well.

Marakova Katerina
Share this page with your friends
Origami is an extraordinary activity that is called paper plastic. The sheer amount of what can be done from an ordinary sheet of paper is simply amazing! Everything that is in the world of animals and in nature can be recreated in origami paper format. You can start learning origami with simple projects, for example, making a palm tree. In fact, there are many ways to make an artificial palm tree out of paper, from the primitive and small in volume to the complex tall structure made from paper modules.
In order to start creating a palm tree from paper origami modules, you will first need to learn how to make paper modules. How to make origami modules: take a white or colored A4 sheet, vertically divide the sheet into 8 parts, and horizontally into 4 parts, cut the resulting rectangles, bend the rectangle horizontally, bend and straighten vertically, bend the edges of the rectangle towards the middle and turn over, raise the protruding edges and bend on all sides until a triangle is obtained, unbend the small corners of the edges and bend them between the walls of the paper, the resulting module has two pockets and corners that will allow the modules to be attached to each other. Before making a palm from modules, you need to make at least 200 modules first.
To begin with, it is important to determine the colors used in the design of the palm tree. We recommend brown and green in two tones. Brown will be used for the trunk of the palm, one shade of green for the foliage at the top of the palm, and the lighter shade of green should be used as a stand (the stand can also be made of yellow or orange). The technique of forming a color scheme for a palm tree from modules is similar to how to make a palm tree from fabric - you need to put the colored pieces together and evaluate the resulting color palette.
When a sufficient number of paper modules of different colors are ready, you can start assembling them. Collect a palm tree from origami modules as well as other similar designs. This is similar, for example, to how to make a palm tree from balls - the assembly of the structure goes from the bottom up. A stand is formed, then the trunk of the palm tree and at the end - the leaves of the palm tree.
The most difficult and time-consuming stage in creating a palm tree from origami modules is in preparing a sufficient number of paper modules. How to make the palm tree itself from ready-made modules will take no more time than how to make a palm tree from tires. The main thing here is to understand the principle of creating paper modules and their fastening, and the rest is a matter of technology.
From ordinary colored paper and glue, which is in every home, you can make many wonderful crafts that will delight you and your children. For example, a paper palm tree would be a great option for beginners who want to do it themselves.
The process of making a paper palm tree is entertaining enough to keep young children interested. In addition, he superbly develops imagination and fine motor skills. A voluminous origami-style palm tree or a palm tree made of pieces of wire and corrugated paper will be a wonderful interior decoration. We have created a detailed master class with photo and video materials, thanks to which you can easily cope with this task.
We make a voluminous palm tree out of paper with our own hands in MK
To make a palm tree out of paper, we need:
- Corrugated green paper;
- Plain brown colored paper;
- scissors;
- thin wire about 25 cm;
- glue.
First, overabout making a trunk for our palm. To do this, take some corrugated paper wire and plain brown paper.
1) We wrap the wire with a piece of corrugated paper, this is necessary so that the brown stripes do not slip when we crate them to the wire. And the shape of the barrel will be more durable.
2) Cut the brown paper into strips of about 2-3 cm each. Fold each such strip 6 times and create a fringe from them. To do this, make a neat cut from any edge.
3) Now glue the brown fringe to the palm tree frame. We put glue on the edge of the strip and wrap it tightly around the frame so that the base is not visible. We do this 3 times to make the palm tree more voluminous.
Leaves.In order to create foliage for our palm, we cut the corrugated paper into strips of 1 cm and about 6 in length. Fold in half and cut out the leaves. We give each leaf an elongated shape, similar to a palm leaf. The leaves need to be made in 2 sizes - the small ones will go to the top of the palm tree, and the large ones will serve as the main part of the crown.
Now all that remains is to assemble the finished palm tree from the parts that we made. To do this - Glue the leaves to the top of the finished trunk - first small, then large.
At the end, we fix the workpiece on the stand. And a hand-made palm tree is ready. You can decorate the base with fine colored stones or sand for a finished look.
Origami palm:
The volumetric palm tree made using the origami technique will also look original. For this you will need:
- 14 sheets of thick green paper,
- 16 sheets of yellow paper,
- Glue.
- clerical knife or scissors
To create a palm tree using this technique, we first need to collect the required number of modules. You will need 210 green modules and 243 yellow ones. To make a module we will use the diagram below.

After assembling the required number of modules, we begin to create our palm in stages.
Palm base:1) First, we need to make our palm tree an island on which it will stand. To do this, make up the first and second rows of each of the 9 green modules and turn them inside out.
2) On each corner of the second row module we put on one third module. A total of 18 green modules are needed.
3) We collect the fourth row by analogy with the third.
4) And in the fifth row, you will need to attach 36 modules.
Sand beach:1) Starting from the 6th row, we turn on the yellow modules.
2) It is necessary to form 6 and 7 rows, each should consist of 36 yellow modules.
Trunk:1) From the 8th row, the trunk of the palm tree begins to appear.
2) Distribute 18 yellow modules evenly. We insert them into the gaps between the modules of the first and second row, imitating sand.

3) In the 9th row, distribute 8 yellow modules and repeat this action for 19 rows in a row.
Palm leaves:1) Now we need to make the branches of our palm tree. In total, we need 6 identical leaves for this. To assemble one sheet, you need green modules - the first 2 rows should consist of 6 green modules each. The second row modules are put on backwards compared to the first. we do the third row as follows - 2 green modules are put on each one of the corners of the previous row. In total, you need to collect 12 rows in this way.
2) The other five leaves are collected in the same sequence.
Finish the creation of the palm tree by gluing the leaves to the top of the trunk.
Our original origami palm tree is ready.
Related videos
We have selected for you several illustrative and useful video tutorials on the topic of creating a palm tree from paper that can be useful and invite you to watch them.
is one of the varieties of modules and is most often used in the modular origami technique.
For the manufacture of triangular module take a rectangular piece of paper.
Triangular modules can be folded from pieces of paper of different sizes - large and small. The size of the future product depends on this. It is convenient to use 1/16 or 1/32 pieces of a standard A4 sheet for triangular modules.

If the sides of an A4 sheet (long and short) are divided into 4 equal parts, and the sheet is cut along the outlined lines, then the rectangles will come out about 53 x 74 mm in size.
If the side of an A4 sheet is divided into 8 equal parts, and the short side into 4, and cut the sheet along the outlined lines, then the rectangles will come out about 37 x 53 mm in size.

You can also choose another size. Choose for yourself one size of a triangular module for your craft and stop on it.
Sequence for assembling a triangular module:

1. Fold a piece of paper in half lengthwise.

2. To outline the midline, bend across and straighten. Lay the corner up.

3. Bend the edges towards the middle.

4. Turn the paper over.

5. Fold the lower part up.

6. Fold the corners by folding them over the large triangle.

7. Unfold the corners and bottom.

8. Again fold the corners along the marked lines and lift the lower part up.

9. Fold in half.

The module has two pockets and two lower corners. Modules made in this way can be easily inserted into each other and you can get 3D figures as a result.