The skill of folding various figures from paper sheets - origami is several thousand years old. His homeland is China, where the first paper was invented. The art of folding paper crafts came to Japan five centuries later.
Initially, paper figurines were ceremonial and religious in nature. Since paper was a rare and expensive pleasure, only very rich and noble people could afford figurines from it. The samurai gave them to each other as gifts. Also, paper crafts adorned the burdens - food offerings in Buddhist temples. Over time, intricately folded figures became the main component of offerings and acquired a mystical meaning.
At weddings, paper butterflies accompanied the bride and groom and symbolized their pure souls.
Over time, paper became cheaper, and people of different classes and wealth could fold the figures. The number of options for figurines grew and at the end of the 18th century the first book was published with instructions for folding crafts.
The very name "origami" came into use in the 80th year of the 19th century from the two words "oru" and "kami", which means "fold" and "paper".
In the modern art of origami, there are several directions. One of them is modular origami. Crafts are created by assembling small parts folded in a certain way - modules. It is also called 3D origami. One of its branches is kusudama - the creation of volumetric balls.
This article will offer several master classes on creating paper balls from small modules. FROM detailed diagrams and a description of the work, even beginners in the art of origami can create such a beautiful craft.
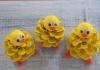
The first master class is quite simple and is devoted to creating a ball of flowers. It is very easy to make it. Even children can do this craft, which will have a beneficial effect on development fine motor skills their fingers, the ability to think logically and outside the box and develop imagination.
Origami ball made of flowers
You will need:
- Square paper. (You can use multi-colored squares from blocks for records. From such sheets of paper with a side of 7 cm you get a flower ball 13 cm in diameter);
- PVA glue;
- Paper clips;
- Lacing, ribbon or chain;

The first step is folding a petal for a flower.
Take a square of paper and fold it diagonally. The fold line is located at the bottom. It turned out to be a triangle.

Bend the right and left corners to the top so that the figure takes the form of a regular rhombus.

The fold lines and corners that touch along the center line of the rhombus must be expanded so that there are two irregular rhombuses on the right and left. (the fold lines will be in the center of the new diamonds).

Bend the protruding parts of the new rhombuses to the right and left to the front side (towards you).

Along the fold line (passes through the center of the diamonds) fold the corners of the workpiece so that it is inside.

Those halves of the folded corners, which are glued on the front side and fold the workpiece. Wait until they stick. One petal of the flower is ready.

For one flower, 5 such blanks are needed.

For a flower ball, you will need to make 12 flowers. Multi-colored or monochromatic - your imagination will tell you.

The next step is to create the ball.
First you need to collect 2 halves of 6 blanks each. For convenience, the flowers can be fixed with paper clips.

Then join both halves together. As long as the flower ball is secured only with paper clips, the placement of individual flowers can be changed. If the color combination turns out to be successful, then the next step is gluing the flowers.
The last stage is assembly.

Since the flowers in the center do not fit tightly, you can thread a ribbon or strings through this hole. At the exit, you can fix it with a beautiful bead or just tie it with a bow. Kusudama is ready to decorate your life.
The next master class will require more skill and time. The modules for this kusudama are more complex, but the result is worth the time and effort.
Origami superball from modules.

You will need:
- For training, double-sided paper measuring 15 x 15 cm (one side is white);
- Glue.
The first step is folding a double square.
Fold the paper diagonally with the colored side out. Expand.
Fold horizontally and vertically with colored side inward. Expand.

The photo shows the direction of further folding to create a double square.

The next step is to create a template for the module.
Arrange the square so that the blind corner is on top. Fold the right and left upper sides along the vertical median line. Turn over and fold on the second side in the same way.

Those pieces that were folded turned out to be triangular. They need to be flattened and wrapped inward.

Here's what happens.

Place the workpiece with a blind corner down (it looks sharp). Fold the right and left corners as shown by the arrows in the figure.

It turns out four sharp corners. Everything must be bent down.

The next item is folding the workpiece.
Now that all the necessary lines have been outlined, the entire workpiece should be expanded and positioned so that the white side looks at us, and the colored side is outside.
It is necessary to press the center of the workpiece (see photo).

With a careful study of the workpiece, four squares are visible on it, they must be folded along the marked lines. They are indicated in the photo in the form of red arrows.

The same arrows indicate the direction of folding - the corners start behind the triangle at the back. They should sit back to back. You must adhere to the marked fold lines and everything should work out.

This is how the blank looks from the white side. The next step is to bend the left and right corners in the direction of the arrow and bend the top corner down.

The first of the four squares is complex, you just need to fold the right corner with the left one (as if turning a page of a book).

For the second square, corners are also wound up behind the triangle, etc.


Make the third square in the same way. A blank with three folded corners looks like the image.

The last corner will be more difficult. Care must be taken to bend along the previously marked lines. Look at the photo.

Bend the right corner, bring the left side and bend the left corner.
Slightly spread the workpiece and carefully lower the upper sharp corner inward.


The origami module is ready and you can start creating the ball.

Bulk balls can be assembled from double modules (you need 32 pieces) or single (you need 40 pieces). The former are more original.
The double module consists of squares - 9 x 9 cm.
The green modules are made, as in the master class above, completely, and the yellow ones up to half. They must be left at the stage of sharp corners and not turned out.

Connect both modules as in the photo.
Assembling the ball.
Fold together the blanks from the two modules. Glue with glue. In a circle, 9 blanks are obtained.


The next row requires 6 blanks.

For the top of one half, another blank is needed. Paste it on.

Similarly, make the second half of the Super Bowl.

Grease the flat side of one of the halves with plenty of glue and attach a loop from a ribbon or lace.

Connect both halves and the Super Bowl is ready.

The next version is created on a stand of three blanks. It used squares 12 x 12 cm, 11.5 x 11.5 cm and 11 x 11 cm.

The rest of the modules for the ball are double. Connect them in the same way as the previous ones.
The next master class on creating a ball will differ in that the paper leaves will not be square, but rectangular. Sides 2: 1.

You will need:
- The paper is green and red (or any color of your choice);
- Glue.
For one ball, you will need 30 rectangular green and red sheets. There are therefore only 30 double modules. At first glance, this craft seems complicated, but it can be easily completed in a couple of hours. If you are just starting to master the art of origami, you should choose the size of the sheet 8 x 4 cm.The size of the ball will turn out to be 9.5 cm in diameter.
The first stage is the creation of modules.
Green module.
Fold the rectangle in half. Expand, and connect the right and left sides along the fold line.


Fold in half. The module is ready.

Red module.
Fold the leaf in half along the long side.

Fold line at the bottom. Bend the lower left corner up.

Bend it back (see photo). Corner inward.

Bend the corner on the other side (lower right). Bend the resulting triangle as in the photo.

This is what the finished red module looks like.

The next stage is the assembly of the workpiece from the modules.
Expand both modules and connect as shown.


Such blanks need 30 pcs.

The last stage is the assembly of the ball.
Apply glue to the ends of the modules. Connect the blanks with pink corners, insert into the pockets. First, connect the five blanks into a star.


Then connect the triangles around the asterisk. Add 1 blank each and close five triangles.


The next step is to add two more to the three available blanks - you get asterisks.

Again we got triangles.
The arrows in the photo show where it is necessary to add 1 more workpiece and where it is easy to connect adjacent modules.

Now, 1 blank is added to each sprocket.


Connect the last sprocket with glue and the ball is ready.


If you wish, you can swap the roles of the green and red sheets, and you get two modules of different colors.
After completing the creation of a kusudama, you can decorate it with various beads, ribbons, cords, sequins, attach pendants made of beads and crystals, or decorate with any other accessories of your choice.
The gorgeous origami balls will look great on christmas tree and in the form of a festive pendant on a Christmas tree and as part of the original garland. A modular product can be made iridescent and bright.
Such balls can be presented to family and friends, or you can bring them to the office or classroom as an element of Christmas decor. It is not difficult to master the wisdom of origami, but you still need a little patience.
Create modules for making a ball
Pre-made triangular modules are the "building material" for creating any volumetric products using the origami technique. It is not difficult to make them, however, as practice shows, the execution of the first ten figures takes some time.
Then the process becomes automatic, and they are created quickly. Then modular construction turns into a favorite pastime, and balls are just the beginning of a long journey.
First of all, it is worth taking an A4 sheet and dividing it into 16 or 32 identical parts. After that, you need to cut out regular paper triangles.

- We bend the rectangle in half lengthwise, after which it must be bent across.
- We bend the corners of the rectangle in the same way as when making a regular paper rectangle.
- The resulting figure must be doubled again, right in the middle to the outside, between the folded edges. The protruding parts must be folded, and the edges must be turned out.
- Finally, we bend the workpiece in half, and it takes on the required triangular shape.
To make an origami-style ball, you will need at least 280 of these modules, made from multi-colored sheets, previously divided into 32 rectangular pieces. This, of course, is a lot, but if you involve the whole family in the lesson, you will get wonderful creative gatherings with good music and pleasant conversation.
Modular creativity is very beneficial for children as more effective exercise for the development of fine motor skills is even difficult to imagine.
Making a beautiful ball

Now that we have a large set of "spare parts" in front of us, we begin to create our modular creation. The first three rows will consist of seven modules with beautiful color alternation.
In the fourth year, it is worth using fourteen modules already, putting on new blanks on each of the corners of the previous row. In the fifth row, seven more triangles will be added - the first of them is put on two corners of the previous row, and the next two - on one corner of each of the modules of the last row. Then again one module is put on two corners, then again one at a time, and so on.
From the sixth to the fifteenth row we save 21 modules in each, but, starting from the sixteenth row, we again begin to reduce the number of "triangles" by seven pieces, that is, each is already put on three corners of the previous row. So gradually you will create an original Christmas ball.
All that remains is to glue a beautiful bow to it. It will be great if you create a whole set of such colorful balls using the origami technique. On a Christmas tree, these handmade products will look more original than purchased toys. Modular creativity can be enhanced by creating other New Year's masterpieces.
Origami ball from modules. How to make a ball out of origami modules

You can simply make a New Year's origami ball from modules with your own hands from paper, you will get a wonderful Christmas tree decoration. The master class made by Olchik will tell you how to make a ball from origami modules. Origami ball consists of 280 triangular modules origami. Choose the colors for the paper ball without the help of others - you will need 7 colors of 40 modules each. The size of triangular modules is 1/32 of A4 sheet. 1st, 2nd and 3rd rows of 7 modules each, mix the colors as in the photo. If you use a ball for decoration, be sure to glue each assembly step with glue so that it does not crumble.
From the 6th to the 15th rows, 21 modules in each row.
Creator Olchik Source - http://stranamasterov.ru/node/835576?c\u003dnew_328,451 Material taken from origamka.ru
I present to you my new craft made of paper in technology origami modular: ball on the tree.
You will never find such a toy in a store, but making it yourself is simple and interesting.
Materials:
- Modules white - 80 pieces
- Color modules - 420 pieces (7 colors, 60 modules each)
- Satin ribbon narrow and medium
- Toothpick
- Cocktail tube
So, first, we collect the modules, the choice of color for the color modules is at your discretion. I used modules in green, blue, cyan, yellow, orange, pink and red.
We begin the assembly by assembling at the same time 3 rows of white modules, 14 modules in a row. Please note that the modules of the first row are located on the short side, and the subsequent rows are on the long side.
We close the modules in a ring.
In the fourth row, colored modules are used, which we put on 1 corner of the module of the last row. We arrange the colors in the order you like, the main thing is to stick to it in the future.
The next rows we also alternate from colored modules, as in the last row, shifting by 1 corner.
As the assembly progresses, we give the ball a shape, in total it is necessary to lay out 15 rows of colored modules.
Dear craftswomen - take a short break from work and see the interesting service salesscanner.com
Some time ago I discovered this service and I hope that it will be useful to you too. The main idea is that it collects in one place goods for sale from the top online stores of the Runet, that is, it allows you to buy quality goods at a significant discount instead of paying the full price.
We put on the last row of white modules in the usual way and shape the ball.
And now we take a toothpick, tie a narrow satin ribbon or thread to it, form a loop.
Place the toothpick in a cocktail tube and pass the tube through the entire ball.
We put out the toothpick, we remove the tube. We cut the tips of the toothpick quite a bit and hide it in the modules of the first row. Due to this, our ball will have a loop. And the design itself will not suffer.
From above, you can decorate the ball with a bow from satin ribbon... This is the master class: the origami modular ball on the Christmas tree is over. Until next time, and don't miss the new article - modular origami snowflake.

We all decorate Christmas trees on New Year, and everyone, of course, wants her to be the most beautiful in the world, and to please all the guests of your house and yourself. So, today we will make a beautiful toy from modules. We will create it from 300-400 parts, at your discretion. 100 modules in green and 200-300 modules in white. Also, the craft can be much smaller, depending on what kind of Christmas tree you have. So, the master class is called how to make a ball from modules with your own hands using a diagram and step-by-step instructions.
Let's get to work. For this we need:
1. Modules - green and white.
2. PVA glue.
3. Thread.
4. Lollipop stick, you can also use a toothpick or a regular match.


The first row - 14 modules in white. It is advisable to glue pva with glue, so that whatever disintegrates.

We collect the second row in the same way. On the third row, we begin to add 14 modules and alternate colors. We will have 28 modules. We put on a new module on each corner of the previous row. Alternating 2 through 1 (2 white, 1 green).

The fourth row - 28 modules. We shift each module by 1 corner in any direction, and so we continue to 11 rows.

We take 10 modules of white color and put on 3 corners of the previous row. Look at the photo.

The thirteenth row - 10 modules of white color, put on in the usual way.

We take a thread of any size and color, at your discretion, and tie it to sticks (toothpicks or matches)

We thread it through ours and tie it.

Now let's give our toy the shape of a ball. And all our toy is ready.

Now you can hang it on yours and it will delight everyone. You can also present it to the class teacher or school. And she will delight not only you, but all your friends and will decorate the festive evening. The toy can be made in any color of your choice, as well as choose a different pattern.


Winter and New Year's holidays are a special time when even adults begin to believe a little in a miracle, a fairy tale, make wishes and sincerely expect them to come true. And there's no need to talk about the mood of the kids.
Every family tries to decorate the house for the holiday and, of course, decorate the Christmas tree. And if you want the toys on your tree to be the most beautiful and original, try with your family to make various Christmas crafts with your own hands. Moreover, origami - this is one of the best extraordinary ways to decorate an evergreen beauty.


Gift from the Land of the Rising Sun
Origami became known to the whole world only in the middle of the last century, but in Japan, in its historical homeland, this art was known and loved since time immemorial. By the way, origami was a favorite pastime of noble people of the state, so they often practiced in it, and if someone from the upper strata of society did not know the artistic technique of paper folding volumetric figures, then he could be very ashamed of this, because he would be considered badly brought up.
Today, both children and adults are fond of origami, because it is so cool, interesting and simple to create beautiful crafts from paper with your own hands. Today you can make toys according to the classic traditions of technology (only one sheet of paper - plain and square, without the use of aids like scissors or glue), or you can slightly break the ancient rules, giving free rein to imagination and creativity. 
Japanese kusudams are perfect as New Year's toys. This was the name of the balls, which were once sewn from fabric in order to use them as a kind of containers for collecting and storing medicinal herbs or for incense. However, today kusudams are made like a modular origami ball - they just glue it from several individual modules from paper. In such a decor, you can embody any interesting fantasy and make it a wonderful decoration for a New Year tree.
Balls-balls…. Magic and miracle from nothing
Despite the apparent complexity, even a child can do kusudama. For those who doubt their abilities, there are many master classes with diagrams, as well as video lessons, in free access, in which you can examine in detail the whole process of creating crafts with your own hands.
So, if you are ready to get started, then you will need to prepare some materials and tools so as not to be distracted by anything else:
- of course, you will need the paper itself - keep in mind that you need to take square sheets. It takes 60 sheets of paper to make one ball of kusudama. The diameter of the future toy will depend on the diameter of the sheets (for example, if you take standard A4 sheets and make squares out of them, then you end up with an approximately 30-diameter ball, but from small stationery sheets - a very miniature ball);
- also prepare a pencil and a ruler;
- don't forget about scissors and glue;
- decor - at your discretion - a ribbon to hang a toy, beads, sequins, foil, etc.
Choose the color of the paper depending on what kind of DIY craft you want to do.

- First, you need to take your square and fold it. This must be done strictly diagonally.

- You will get a triangle, the side corners of which will need to be bent to the top. Just make sure you get it symmetrically.

- Next, try to carefully straighten each of these folded corners. As a result of your efforts, it should turn out so that the longitudinal fold will pass in the middle.

- Now you will be dealing with rhombuses. Their corners also need to be folded.

- After that, you will have a figure in your hands, on the sides of which there will be two small triangular envelopes. Each of them will have to be folded in half in turn, bending over the outer edges.

- It's time to use the glue. You need to carefully glue those narrow triangles that you get, so that the petal comes out.

- In the same scheme, model other petals of different colors, because there are five of them in each individual flower.

- Kusudama balls are complex designs related to modular or 3D origami, because the whole figure will consist of many identical parts or modules. For your craft, you need to make twelve colors.
The finished product can be sprinkled with glitter, decorated with small foil stamens, glue beads on it and attach a ribbon. Voila - a magic origami ball with your own hands is ready and will delight you, giving you a festive mood and a smile. 
You can also make any other Christmas toys using the origami technique. For example, it is very easy to cut eleven strips from a multi-colored sheet (width for A4 paper is approximately 19 mm). All the stripes will need to be collected in a pile by firmly joining them in the center (use threads or tape for this). Further, the inner edge of each strip must be bent towards the center and glued. So you get a beautiful volumetric toy.
Having looked at the diagram once, you will easily collect a star with six or nine rays, and flowers, and snowflakes, and Christmas trees. The main thing is just to start. Let the flight of your imagination allow you to embody the most beautiful and original ideas in DIY Christmas toys.
Marina Mironenko
The first time I tried to do something in modular origami technique... Very interesting technics... For work, I needed colored office paper, satin ribbon, transparent film (I took from a photo album, PVA glue.
First step. To begin with, I made blanks (triangular modules) .
Second phase. Ready modules connect in a circle. All connections modules glue for fixing with glue.

Stage three. Thus, we make four circles of different sizes and colors.

Stage four. After the circles have been made, we begin to glue them together, starting from larger to smaller.

Fifth stage. Following steps 1 to 4, we make four more circles, identical in size and color.

Sixth stage. Two blanks are ready.

Seventh stage. Cut out two circles from a transparent film, a little larger than the diameter of the inner circle of the small circle.

Eighth stage. We glue the film with PVA glue on the inner circumference of the small circle.

Ninth stage. From strips of red, 0.5 mm wide, we make six circles of the same size (quilling technique) and form small triangles from five circles.

Stage ten. We glue the parts together to form an asterisk.

Eleventh stage. We glue a satin ribbon to the star. When the ribbon is dry, glue it to one of the blanks, and then glue the blanks together.


Here's a suspension with an asterisk I got. Hope this the master class will be useful to you.