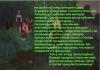
To use the preview of presentations, create yourself a Google account (account) and log into it: https://accounts.google.com
Slide captions:
Master class "Sheep" in the quilling technique. Performed by the teacher of the secondary school №1056 Bozyukova Eleonora Valentinovna
Program content: Teach children: Teach children to twist parts from strips of paper. Develop consistency in the work of both hands. Develop fine motor skills hands. Learn to assemble parts into a single whole. Learn to work carefully. Teach children to bring the work started to the end.
Materials and tools. For work we need: White paper A-4 Scissors Cardboard A-5 Tsv. PVA glue pencils
Technology and work sequence:
Let's prepare a lamb template. Cut and paste it onto cardboard
Take a sheet of paper, spill it 0.5 cm.
Cut into strips
We take one strip, we will twist a spiral from it, so that it is more convenient for the children to do this, you can use a match with a slot.
It turns out an open spiral, remove it from the match, you can fix the end with glue, or you can leave it that way.
We make several such blanks.
We compose the blanks on the template. We fix it with glue. We tint the background with colored pencils.
On the subject: methodological developments, presentations and notes
Recently, in the practice of preschool institutions, they began to use one of the types of arts and crafts - quilling or paper twisting. Having got acquainted with the simplest elements of quill ...
In this article we offer you another master class of paper crafts using the quilling technique (have you already done it?) - the "Lamb" pendant.
For work we need:
- quilling paper - 7 mm
- colored paper
- pVA glue
- scissors
- stick for winding spirals
- ruler with circles
- pen - corrector
- keychain pendant (with carabiner clasp)
Cut paper for "quilling" 74 cm long (3 strips) in half. Twist half of the strip (37 cm long) spirally onto a stick. To make the circles even and the same, we use a ruler with a circle of 14 mm.  In order to fix the end of the spiral, we use PVA glue, put a little glue on the edge of the twisted spiral and attach it to the whole spiral. By this principle, we make 6 more such spirals - wrap (there should be 7 in total).
Having made all 7 spirals, we proceed to glue them together. I prefer to glue the spirals together seam to seam, it turns out more neatly.  After gluing 7 spirals, proceed to cutting out the legs, ears and head of the lamb. For this we take colored paper, draw legs, head and ears on it, cut out.
Advice: it is better to draw with a simple pencil on the other (seamy) side of colored paper.
In order for all the parts to be proportional, you can make a pattern on unnecessary paper, then attach and circle. Next, we collect all the parts together to make a lamb.  We draw eyes. We take a pen - corrector, draw eyes, make pupils with a gel pen.
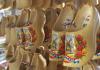
We make a loop for the suspension. And we attach the loop to the finished lamb.  And now ... our lamb made of paper using the quilling technique is ready!
If you like original gifts for the holidays, the creation of a souvenir using the quilling technique will only require patience, because even preschool children can learn to "twist paper". To get a lamb using the quilling technique, we need the following materials:
Paper strips for quilling white and blue flowers (can be replaced with colored copier paper cut into 5mm wide strips)
Glossy blue cardboard (if you like a different color - replace)
Wooden stick, scissors, PVA glue
Magnetic stripe
As you can see, there is nothing extraordinary in the list, everything is available. Before work, practice a little in winding paper strips: put the strip on the stick, press it tightly to the fingers of your left hand, and rotate the stick away from you with your right hand. The strip should be wrapped tightly. Then make another 3-4 turns and remove the paper roll from the stick.

Master Class:
1. Prepare a sketch, cut out the body of the sheep from cardboard. We make notes for the legs and head.
2. We bend the white stripes like this, then we wind the halves of the strip in one direction - these are the curls of our sheep, you will need a lot of them
3. Head: glue the blue stripes into one long strip (about 1.5 meters), then wind them into a wide wheel, glue the end of the thick roll to the previous row of paper. Remove the wheel, carefully squeeze out the middle of the wheel - make a muzzle.
4. Ears: Twist 2 strips into a roll, let it unfold slightly, glue the end of the strip. We take a roll, with our right hand we pull the paper to the side, with our left hand we tightly squeeze the roll, a drop is obtained.

5. Glue the ears to the head by the corners of the droplets, then glue the finished eyes and a curl. Glue the head on the body, glue the upper curls, a small beard under the head. We glue the bangs on the top of the head, and in rows of curls all over the body, starting from the back - slightly move the middle of some rolls with a stick
6. Legs: lightly squeeze dense blue rolls - you get a leg with a hoof, glue the strips on the legs.
Do you think that only professionals can create masterpieces with their own hands? No matter how it is! Quilling or paper rolling is not a new, but very popular type of needlework today. This art does not require a lot of money: you just need paper, imagination and a little patience. Using this technique, you can easily make a lot of beautiful and unusual craftseven if you are a beginner quillingist. Even a beginner can handle it!


By the way, those who are not familiar with this technique should start by making:
- flowers;
- snowflakes;
- animals;
- pictures;
- panels;
- magnets;
- postcards.
Do not try to do complex and skillful work at once. It is unlikely that you will succeed right away, and you will immediately be disappointed in your abilities.
Quilling lamb making lesson
 We bring to your attention a master class with step by step instructions for beginners to make a lamb using the quilling technique. To create a figurine, you need your own material:
- paper (special, for quilling);
- pVA glue;
- scotch tape (double-sided);
- cardboard sheet (thick);
- scissors (you can curly);
- ruler;
- pencil;
- toothpick;
- twist (if desired, replace it with a brush);
- sketch or template scheme;
- decorative ornaments (sequins, ribbons, bows).
And of course, don't forget about patience. If this is your first job in the quilling technique, you will have to try and show perseverance.
If you do not have the opportunity to purchase special paper for quilling - do not be discouraged! How to make it yourself? Very simple! Line a sheet of A4 size into strips of 0.6 mm. and cut them (diagram below). Quilling paper is ready!
As for the twist, a special tool for creating crafts, then it can be replaced with a brush, knitting needle or any other thin but strong object. And now let's start making a quilling lamb with our own hands!
Training
Let's start making a lamb using the quilling technique by creating a template. Take thick cardboard and cut out a blank for a lamb (shape is a circle). This form will become the basis of our product. To make it easier for you to work further, mark on the cardboard where the sheep's face, its eyes, ears and legs will be located. Well, those who do not know how to draw should take ready-made schemes.
Main part
Let's get down to the main work. Take special, already cut into thin strips, quilling paper. From them, using a twist (or brush), make 10-20 free circles (curly women) for the ram. If you want curls of the same size, you should use a ruler. Glue the resulting blanks on cardboard. It is better to use double-sided tape, as it is more reliable than glue to hold thin paper together.
Now let's move on to making a lamb's face. Take 3-4 strips of paper, and, slowly twisting them with a twist, you get a tight roll (circle). Let's move on to creating the ears. Twist circles from two strips and give them the shape of droplets (picture under No. 1). Making legs! Take 4 strips and twist them into a circle. Shape the rolls into an arrow shape.
And now is the time to tackle the quilling lamb's hair. Take a strip of paper and make a fringe (cut the paper vertically to the middle). Wind the blank on a toothpick, fasten the end of the paper with PVA glue. Then, straighten the fringe. It will look like a small flower.
Decorations
Glue the face, legs, ears and hair to your template. And now the fun part is jewelry! You can make lamb's eyes from two beads, and rhinestones will be an excellent decoration for your hair.

That's all! It's so easy to make a lamb using the quilling technique with your own hands. And this is not all the possibilities of this art form! You can make a magnet, brooch or a beautiful painting out of a figurine by adding a couple of elements.
I hope our mk with step-by-step instructions will inspire you to create your first masterpiece, and quilling will become your hobby. And here are some more photos from stylish ideas to create lambs using the quilling technique.

We also recommend watching these videos, in which you can also find detailed instructions for beginners on creating new crafts. In the first video you will learn the basics for beginners, and in the second video you will be offered a basic course in the basics of quilling.
Video: An object lesson on how to make a lamb using the quilling technique