Handicraft from improvised materials is a very simple and enjoyable activity. You can easily find materials and fixtures for making such an element as bees. In our article you can find a description of the most interesting design options for this decorative element with your own hands.
How to make a funny bee with your own hands from a kinder surprise: a master class

From such a simple material as kinder packaging, you can make funny and unusual bees that can be used as decoration. So, prepare all the necessary materials for creating bees:
- Empty container from kinder - surprise;
- Black insulating tape;
- Wooden toothpick with a sharp tip;
- Sheets of white paper;
- Reliable glue;
- Sharp scissors;
- Thin sharp knitting needle or awl;
- Thick thread or twine.
After preparing all the necessary tools and materials, proceed to the manufacture of bees. Take a thin knitting needle or an awl and use them to make two small holes in the egg container. It is necessary to make them in the end sides of the kinder, and one more hole should be made in the place where all the parts are fixed.
Thread a thick thread into the hole on the side surface, forming a small knot at the end. This thread will allow you to hang your bee in the air in the future. Insert a wooden toothpick into the holes located on the ends of the container so that the sharp end sticks out. This design will be the sting of your bee.
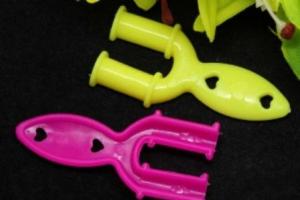
Now take black insulating tape into strips with a width of two to three millimeters. For the body of a bee, you will need three or four blanks. if you can't find the tape, you can use white construction tape. Stick it on and paint it black. With such black blanks, you need to glue the surface of the entire body of the bee, keeping the same distance between them.

From white paper, you need to cut out paired wings for your funny bee. They can be double or single - as your creative imagination tells you. Using glue, carefully and securely fix them on the back of the insect.
Now you need to start making the muzzle of your bee. From white paper, cut out two circles with a diameter of four or five millimeters. Glue them to the end of the structure above the sting. From the black insulating tape, you need to cut out small circles and stick them on the white blanks. If desired, you can simply draw the pupils of your bee with a black marker. If you wish, you can also blind the eyes of your bee from polymer clay or even mastic.

From the same insulating tape, cut out a triangular mouth and glue it from below under the toothpick sting. Add a couple of white teeth and your handmade or crocheted bee is ready.
We make an unusual and fluffy bee from pompons
We offer you another option for making the original bee from balls in the form of pompons with your own hands. For work, you should prepare threads of two colors: black and yellow. Also, to make a bee, you should stock up on thick wire for weaving with beads, brown adhesive tape, PVA glue, thick cardboard, scissors and two pieces of fabric measuring ten by five centimeters.

Make the belly of your insect first. Form two rings from cardboard sheets and wind threads around them. Use both yellow and black thread to create the bee's belly. form an oval pompom. After winding the threads, cut them with scissors, tie them with a thread.
You need to form the head of your bee from black threads. On the head, you can make antennae and eyes out of felt or paper.

The bee has six legs. Cut two pieces of eleven centimeters each, two pieces of ten centimeters and two pieces of twelve centimeters from a thick copper wire. Wrap each piece of wire with black fluffy thread on one side only. Now stick all the legs in pairs into your bee's chest.
Wings should be formed on the surface of your bee's chest. To do this, you can use fabric cuts or make them using the kanzashi technique.

Also, from pieces of thick wire, make antennae and a sting for your insect. Fix these structures on the surface of the head with PVA glue. Everything, now your unusual and funny bee is ready!
A selection of videos on the topic of the article
We offer you to watch several useful and thematic videos for the article. They will help you better learn the techniques of creating a bee quickly and easily with your own hands.
Master class with step by step photos: "Bees in a hive"
Author: Smolnikova Natalya Nikolaevna, teacher of MBDOU "Kindergarten No. 118", Cherepovets, Vologda regionWork description: The master class is intended for children of senior preschool age with the help of adults; teachers; creative people.
Purpose: The craft is designed to decorate the kindergarten area
Target: Creating a bee to decorate a kindergarten site
Tasks: Develop creative imagination, fine motor skills of hands; cultivate perseverance in the manufacture of crafts.
Material:
ruler, pencil
Glue gun
Scissors, awl
"doll eyes"
Capsules from kinder surprises
golden outline
Black self-adhesive paper
glass beads

1. On a beautiful sunny day, a buzz is heard in the meadow. Who is this? And these are working bees who collect nectar all day long. And I got the idea to decorate the kindergarten site to make bees and put them in a hive house.
In summer, the bees all day
Collect nectar is not too lazy.
They'll take it away later.
The beehive is your wonderful home.
A bee buzzes over a flower
And in a hurry to collect nectar.
All the nectar that will collect
Turns a bee into honey.
2. To make a bee, you need to take capsules from kinder surprises, previously pierced with an awl (for wire) either from below or from above. It depends on how you will attach the bee.
3. Then we draw a “self-adhesive” into thin strips of about 0.5 cm, then cut it.

After that, glue on the body.

If you make a bee with young children, then you can replace the "self-adhesive" with plasticine. In this case, roll out the plasticine into thin flagella, and “lubricate” it on the body.
4. Then we prepare glass beads for the nose and antennae, “eyes” -

and stick it all with a hot glue gun.

Or sculpt from plasticine.
5. Next, we prepare the wings, for this we take thin plastic, or a dense transparent cover from a file folder, or from gift wrapping.

Cut out the wings in a shape resembling "droplets". Then, using the outline, draw the membranes on the wings. When the contour dries (it is better to withstand a day), you can glue the wings to the bee.

You can stick it in different places, depending on whether your bee is sitting or flying. Insert wire.
6. You can make a whole “family” of bees in this way and populate them in a hive.
Handicraft from improvised materials is a very simple and enjoyable activity. You can easily find materials and fixtures for making such an element as bees. In our article you can find a description of the most interesting design options for this decorative element with your own hands.
How to make a funny bee with your own hands from a kinder surprise: a master class
From such a simple material as kinder packaging, you can make funny and unusual bees that can be used as decoration. So, prepare all the necessary materials for creating bees:
- Empty container from kinder - surprise;
- Black insulating tape;
- Wooden toothpick with a sharp tip;
- Sheets of white paper;
- Reliable glue;
- Sharp scissors;
- Thin sharp knitting needle or awl;
- Thick thread or twine.
After preparing all the necessary tools and materials, proceed to the manufacture of bees. Take a thin knitting needle or an awl and use them to make two small holes in the egg container. It is necessary to make them in the end sides of the kinder, and one more hole should be made in the place where all the parts are fixed.
Thread a thick thread into the hole on the side surface, forming a small knot at the end. This thread will allow you to hang your bee in the air in the future. Insert a wooden toothpick into the holes located on the ends of the container so that the sharp end sticks out. This design will be the sting of your bee.
Now take black insulating tape into strips with a width of two to three millimeters. For the body of a bee, you will need three or four blanks. if you can't find the tape, you can use white construction tape. Stick it on and paint it black. With such black blanks, you need to glue the surface of the entire body of the bee, keeping the same distance between them.
From white paper, you need to cut out paired wings for your funny bee. They can be double or single - as your creative imagination tells you. Using glue, carefully and securely fix them on the back of the insect.
Now you need to start making the muzzle of your bee. From white paper, cut out two circles with a diameter of four or five millimeters. Glue them to the end of the structure above the sting. From the black insulating tape, you need to cut out small circles and stick them on the white blanks. If desired, you can simply draw the pupils of your bee with a black marker. If you wish, you can also blind the eyes of your bee from polymer clay or even mastic.
From the same insulating tape, cut out a triangular mouth and glue it from below under the toothpick sting. Add a couple of white teeth and your handmade or crocheted bee is ready.
We make an unusual and fluffy bee from pompons
We offer you another option for making the original bee from balls in the form of pompons with your own hands. For work, you should prepare threads of two colors: black and yellow. Also, to make a bee, you should stock up on thick wire for weaving with beads, brown adhesive tape, PVA glue, thick cardboard, scissors and two pieces of fabric measuring ten by five centimeters.

Make the belly of your insect first. Form two rings from cardboard sheets and wind threads around them. Use both yellow and black thread to create the bee's belly. form an oval pompom. After winding the threads, cut them with scissors, tie them with a thread.
You need to form the head of your bee from black threads. On the head, you can make antennae and eyes out of felt or paper.
The bee has six legs. Cut two pieces of eleven centimeters each, two pieces of ten centimeters and two pieces of twelve centimeters from a thick copper wire. Wrap each piece of wire with black fluffy thread on one side only. Now stick all the legs in pairs into your bee's chest.
Wings should be formed on the surface of your bee's chest. To do this, you can use fabric cuts or make them using the kanzashi technique.

Also, from pieces of thick wire, make antennae and a sting for your insect. Fix these structures on the surface of the head with PVA glue. Everything, now your unusual and funny bee is ready!
A selection of videos on the topic of the article
We offer you to watch several useful and thematic videos for the article. They will help you better learn the techniques of creating a bee quickly and easily with your own hands.
Everyone loves surprises, so most kids are just crazy about chocolate eggs, inside of which there is a mini-container with a bright toy. Many craftsmen even know how to make a surprise from Kinder Surprise. If you are also interested in this topic, then below are several ways to make crafts from the chocolate eggs themselves and their containers, as well as a recipe for a delicious and beautiful cake with that name.
Craft “Bird”
There can be many answers to the question of how to make a surprise from Kinder Surprise. For example, if you have a few white feathers, watercolors, craft eyes, or two black beads on hand, you can make a funny chicken in a few minutes. You will also need a piece of red velvet paper or cardboard, from which the beak should be cut. Using watercolors, feathers or bird fluff should be painted yellow and glued to the container as wings. Then you need to add eyes and a beak. That's it, the chicken is ready. It can be given as a gift, used for decoration or hung on the wall in the baby's room or above his crib.
salt shaker
Do you know how to make a surprise from Kinder Surprise in the form of a salt shaker? You're probably wondering now that you didn't think of it yourself! But this idea literally lies on the surface. To implement it, it is enough to make several holes in the lid of the container and paint it with waterproof paints, for example, under Khokhloma.

Craft "Giraffe"
You can make an elegant giraffe from Kinder Surprise containers and ordinary cocktail tubes. To do this, use a permanent marker on the container to draw a pattern characteristic of the skin of a giraffe. 5 pieces 8-9 cm long are cut off from cocktail tubes. Holes are made in the container and “legs” and “neck” are inserted. From the tip, which happens on the laces for the hood, a muzzle is made. Attach it to the neck. With the help of glue, beads are fixed on the muzzle instead of eyes and ears. Thick yellow threads are braided into a pigtail using a piece of wire. When finished, insert this “tail” into the hole on the “croup” of the giraffe.
Craft “Matryoshka”
A case for a surprise toy can also be turned into a traditional Russian doll. To do this, cut out a face, pens and an apron from colored paper. These details should be glued onto the container, draw eyes and a mouth on the face, and decorate the apron with flowers or bright ornaments.
"Minion"
In recent years, cartoons have been created in Hollywood about all sorts of monsters and fantastic creatures, many of which are very fond of kids. For example, for sure, many kids will be delighted if you tell them how to make a surprise from Kinder Surprise in the form of minions. After all, it is quite simple! You will need a container hidden in the eyes, a permanent black marker, and a blue one. On the egg, they depict a jumpsuit, like minions. Glue on the eyes and draw glasses and a mouth with a marker. Everything - the toy is ready!

How to make a Kinder Surprise cake
Almost all children, as well as most adults, love it. If your little ones love chocolate eggs with a toy inside, then they can be pleased with a colorful cake.
Before you make a big Kinder Surprise, you must first bake 5-6 round-shaped cakes on sour cream, as usual. Then prepare a cream from 1 cup of cream, 250 g of cottage cheese, 3-4 tbsp. l. powdered sugar, 1 tbsp. l. maple syrup. To do this, the cream is whipped with powdered sugar until the mass thickens, the cottage cheese is ground through a sieve, the curd mass is added and injected into the cream.

Circles of different diameters are cut out of pre-baked cakes. Smearing with cream, spread the “details” on top of each other, and the upper layers are formed from part of the scraps folded in the form of a spiral (as a result, a structure resembling a pyramid on a tapering base should be obtained). The remaining pieces of cakes are ground, mixed with cream, and this “cement” is smeared on top of the cakes, giving the shape of an egg.
Mastic is prepared from powdered sugar with the addition of gelatin, water and lemon juice, as well as a small amount of oil (to prevent rapid drying), rolled out and pulled over the “egg”, cutting off the excess at the base. From the same material of the desired colors, letters are cut out, as well as decor for the base. If you wish, add a mastic “label” with the name of the child for whom the cake was prepared.

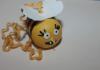
How to make a bee from Kinder Surprise
A plastic toy case that is inside chocolate eggs can be the basis for various crafts. For example, funny bees are obtained from it, which can be hung over a newborn's bed instead of mobiles. The simplest option will require a minimum of effort, and for its manufacture you will only need a fishing line, several containers, black adhesive tape about 0.5 cm wide (it can be replaced with electrical tape of the desired color by cutting it into strips), glue, beads for an eye, paper tracing paper, black felt-tip pen and wire for the antennae.
A laughing face is drawn on the case and eyes are glued on. Wrap the containers with duct tape to make striped bees. Wings are cut out of tracing paper, decorated with a felt-tip pen and fixed on the cases. Antennae is made from wire. With a needle heated on fire, I pierce the containers, and insert the antennae, tying the ends of the mustache from the inside into knots. Make a hole for the fishing line and hang the bee. If you want the craft to be more expressive, you can make insect paws from a black thin ribbon. To do this, the container is pierced in the right places, pieces of tape 5 cm long are threaded through them and tied at both ends into tight knots.
Bouquet
In recent years, sweet gifts with an unusual design have been very popular. For example, you can make a bouquet of Kinder Surprises. Those who have already done will cope with such a task without any problems. And even if you do not have such experience, learning how to collect such bouquets is not at all difficult. To do this, you will need crepe paper, glue, wooden skewers, green duct tape, wrapping paper, ribbons, and some kind of decoration item, such as a butterfly.

To make one flower, you need to cut 5 petals from corrugated paper a little more than the length of Kinder Surprise. Each of them needs to be bent and put on an egg, twisted at the base and fixed on a skewer. Then the “stalk” must be wrapped with adhesive tape, collect the flowers in a bouquet, wrap with floral paper, tie with a ribbon and decorate with a butterfly.
Sweet gift with toys
If you are interested in how to make a surprise from Kinder Surprise in the form of a bouquet, then you can also advise the option with the contents of the containers. To make it, the “egg” must be wrapped in a transparent floristic film and fixed on a skewer. Do the same with 5 miniature stuffing toys. Then you should collect all the “flowers” in a bouquet, with “Kinder Surprise” in the center and surround it with large leaves cut out of corrugated paper. At the end, you can decorate the bouquet with a ribbon tied in a bow at the base.
Now you know how to make Kinder Surprise the basis for an original craft and you can please your loved ones with an extraordinary gift.