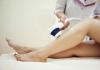
Step by step instructions removal of extended gel and acrylic nails
All women who have undergone the procedure of nail extension at least once had questions: “How to remove extended nails at home? How to save money on trips to the master? " It turns out that artificial material can be removed on your own, the main thing is to have endurance, stop on time, and also know some of the removal rules.
Features of removing gel and acrylic coating
Nail extension is made using two materials: gel and acrylic. Before removing extended nails, you need to ask the master what material he did the extension. After all, gel and acrylic are removed different ways... If there was a gel coating on the nails, then it can only be removed by sawing and nothing else. The gel does not dissolve, cannot be removed by any solvents. Acrylic, on the other hand, is best removed with a special tool, the so-called wrapping technique. With him there is no need to sit for hours over the nails. It's time to learn how to remove extended nails yourself.


Step-by-step process of removing the gel layer
If you decide to save money and not resort to the services of a master, then you should find out how to remove extended nails at home so that they are not damaged. Consider the step-by-step process for removing short artificial gel nails:
Step 1
Moisten a cotton pad with degreaser. Rub a nail with it.

Step 2
With a soft file of 220 grit abrasiveness, begin to remove the gel coating. Movements should be neat, you need to cut off the top layer slowly so as not to damage your own plate. Some girls mistakenly believe that it is better to remove the gel with an apparatus. But this is not the case. The device can simply damage the nail plate due to uncontrolled and very fast work.


Step 3
Periodically, you need to process the marigold with a cotton swab dipped in a degreaser. Since with frequent mechanical friction of the nail file on the edge of the nail, it heats up, we cool it with a wet cotton swab. In addition, by wiping the nail plate, you can see how the process is progressing, whether the nail file has reached the natural plate. Our task is to get as close as possible to the marigold.


Step 4
Then adjust the length of the marigold with a nail file. We are looking at the process of removing short gel nails. If the girl takes off long nails, then you need to first cut them with nippers, and only then level the surface. It is necessary to release the nail from the gel very carefully in order to preserve the layer of natural marigold as much as possible. It is not necessary to thin the nail completely. It's not scary if a small layer of gel remains, anyway, after 2.5 months, the nail plate will be updated, and the gel coating will be cut off. Many masters advise against removing the gel completely, otherwise the fingers will become too sensitive, they will react to any influences: cold or hot water, wind, blows, etc.
Step 5
If the gel layer has been completely removed, the nail plate is too thin, then to make it less sensitive, you need to apply a special strengthening coating on it. For example, the Global tool in 2-3 layers on a previously defatted nail. Then clean a little, let the plate dry. Thus, we strengthen the plate, give it the opportunity to heal painlessly.
Step 6
After sanding the gel at the end, you can use a 3-sided sanding-polishing. First, go through the toughest sanding, which smooths out what the file has done. Then you need to process the plate with the smoothest grinding surface.
If you did everything correctly, then the previously extended nail will remain firm, will not slip and react to external stimuli.
Remember! It is not acrylic or gel that spoils the nails, but a master who clumsily builds up nails, cuts off a thick layer of the plate, and then roughly and incorrectly removes the artificial covering.
Removing acrylic coating
To remove acrylic, we need:
- foil;
- nail file;
- boat, also known as tip cutter - removes excess length in one motion. In the absence of such a professional tool at home, you can use ordinary nail clippers. However, with them, the procedure will take longer and more painstaking;
- sponges;
- solution for removing acrylic material;
- pusher or orange stick;
- butter.
Removing the acrylic coating from nails is as follows:
Step 1
Use a boat to remove the length. During manipulation, you need to be very careful not to touch the front roller of the finger.


Step 2
File down the surface with a nail file, remove the shine from the coating.
Step 3
Moisten a cotton pad (sponge) in a solution for removing acrylic, put it on a plate and wrap the top of the finger with foil. Leave for 15–20 minutes.


Step 4
Carefully remove the foil, using a manicure spatula or an orange stick, remove the remnants of the acrylic coating, which already looks more like a jelly-like mixture. Remember that the foil does not need to be immediately removed from all fingers, since the acrylic will harden again, then you will need to reapply the substance. During the removal of acrylic, movements should be gentle so that the natural marigold remains healthy, not injured. Cut off the remains of acrylic with a soft nail file with abrasiveness of 180 grit and above. Then you should thoroughly wash your hands with soap and water, treat the nails with a soft brush.


Step 5
Apply oil to cuticles, nails and skin around them and rub in thoroughly with massage movements.

- Nail specialists advise girls to wear glasses before removing artificial nails at home. The sharp edges of acrylic can easily injure your eyes if the pieces start to bounce off during cutting.
- When removing extended nails, in no case should you rush, you should calculate your time. Take it with a margin, you will need at least 2 hours to remove the built-up layer.
- It's okay if a little of this material remains on the nails after removing the gel. With the regrowth of nails, correction will still be carried out, the length will be removed, so the acrylic will be cleaned off soon.
- Before removing the extended nails, you need to prepare the work surface: cover the table with a small towel so that the dust falls on it.
- Some women do not know how to properly remove biogel from nails. The procedure is similar to removing the acrylic coating, but only in this case, a special solution is used to remove the biogel.
- After removing the extended layer, natural marigolds need to be cared for: regularly nourish the cuticle with oil, moisturize the skin, do restorative hand baths with sea salt, olive oil, and decoctions of plants. It is also recommended to cover the nails with protective varnishes so that the fingers are not sensitive. Hand contact with household chemicals should be avoided. And to quickly strengthen the nail plate, activate its healthy growth, it is recommended to introduce more calcium, iron and natural vitamins into the diet.
Removing extended nails is a very important procedure that goes on a par with the extension itself. The health of the entire nail plate depends on its correct implementation. In no case should you rip off artificial nails. The main thing is to be patient and follow all our instructions for removing gel and acrylic. And the video instructions of the processes of removing acrylic and gel will help to make the procedure correctly and safely.
Probably, every representative of the fair sex dreams that her fingers are decorated with strong, healthy and long nails of an ideal shape. However, the reality is that at best one woman in five can boast of naturally beautiful marigolds. The rest, for various reasons, have to be content with short manicure and mask imperfections with decorative varnish or fancy designs.
Fortunately, the nail industry does not stand still, constantly inventing new technologies, thanks to which any fashionista can become the happy owner of flawless nails of any desired length and shape. And one of the most popular today ways to create a spectacular, and most importantly, persistent manicure is gel extension. Thanks to this procedure, you can carelessly walk with beautiful, neat and well-groomed nails for several weeks, without worrying about the safety of the coating in various unforeseen situations. However, sooner or later the moment comes when it is necessary to part with beauty. There may be several reasons why you have to remove extended nails, but there are only two ways to solve this problem: you can contact the master, or you can try to carry out the necessary manipulation yourself. And how to do it correctly, and will be discussed further.
How to remove gel nails at home
Gel nail extension is a procedure during which natural nail plates are covered with a special viscous polymer substance that hardens from the action of an activator or when irradiated in an ultraviolet lamp. Gel build-up can be done on tips or in shape.
It should be noted that removing gel nails is much more difficult than, for example, acrylic nails, since the gel does not dissolve in acetone or any other solvent. But if you make some effort and properly organize the process, you can do without the help of a specialist. The main thing is to understand that the main goal is to remove the artificial coating without harming your own nails. You should not try to tear off the tips by picking them up with forceps or tweezers, otherwise you risk not only experiencing very painful sensations, but also violating the integrity of the upper layer of natural plates. To avoid undesirable consequences, you need to take a responsible approach to the procedure, and the first thing you should do is to prepare everything you need for work, namely:
- protective mask or respirator (optional);
- special tip cutter or nail tweezers;
- a brush or soft brush to cleanse the nail plates from the particles of the frozen gel;
- degreaser (primer) and cotton pads;
- 2 nail files (one with an abrasiveness of 80-100 grit, and the other with an abrasiveness of 150-180 grit);
- buff for polishing natural nail plates.
You will be doing the main work with nail files, so they should be given special attention. When choosing such tools, forget about glass, plastic and paper products. Metal files are also not the best option. All of the listed manicure accessories are designed for processing natural nail plates, and you simply cannot cut the frozen polymer with them. Nail technicians use either special machines or professional gel nail files. If desired, they can be purchased at a specialized store. They will cost more than ordinary files, but they will last much longer.
Armed with the necessary tools, you should prepare a comfortable place to work. The main requirements are that it must be well lit and even so that tools can be laid out on it (this can be a small table located by the window or next to the lamp). After that, proceed with the procedure itself:
- Take a pair of tweezers or nail cutters and carefully cut the free edge of the nail using the tip of your fingertip. You should shorten the extended plate as much as possible without damaging your own nail or skin. Try to keep the blades of the tool parallel to the surface of the nail, but do not try to squeeze or bend it, as this can damage the integrity of the natural nail plate.
- Now you can proceed to the next step - removing the rest of the gel nail attached to the natural plate. Before performing work, it is recommended to wear a protective mask or respirator to prevent the smallest particles of polymer substance (gel dust) from entering the respiratory tract.
- In order to get rid of the remaining gel, you will need the toughest nail file. Take it by the handle (this will help you avoid damaging the skin on your fingers). It is advisable to fix the other hand that you will be processing so that the finger with the sharpened nail remains stationary. Press the file with the working side to the surface of the nail and move it in one direction, removing the hardened gel in layers. Do not forget to periodically brush the formed dust from the plate in order to be able to see the result. By the way, if you have a device for a hardware manicure, then you can remove the gel coating much faster by choosing a suitable cutter.
- When cutting an extended nail, you need to constantly monitor its condition in order to notice the difference between the artificial coating and the natural plate in a timely manner and not accidentally damage the latter. When in doubt, use a little trick: dampen a lint-free cloth with a degreaser (primer) and wipe your nail with it. In this way, the uncut part of the nail will immediately show up and you will see the border. If the gel layer is already very thin, then set aside the coarse file and use a less abrasive tool.
- Continue to cut the coating, but with less pressure, so as not to injure your own nail plate. In no case try to pick up the remaining gel by force, carry out the treatment until it is completely removed. Although, if you have very thin and brittle nails, you can leave a small layer of artificial coating on them - this technique will help give them strength and elasticity. Just keep in mind that the layer of the cured gel must be even.
- Treat all nails in the same way and get a manicure. Gently remove the overgrown cuticle (first soften it, and then move it to the edge of the base of the nail with an orange stick), buff the nails with a buff to eliminate all irregularities, and correct the shape of the free edge. At the end of the procedure, apply a moisturizer or cosmetic oil to your nails and the skin around them.
At first glance, the instructions presented above may seem rather complicated, but, unfortunately, nails extended with gel using the classic technology (using a UV lamp) can only be removed by cutting. However, not so long ago, an alternative material for building up appeared - biogel. It is versatile, non-toxic and has firming properties. And most importantly, it can be removed without intense mechanical stress. It is enough just to cut off the free edge of the extended plate and slightly file the main thickness of the coating, and the rest is removed using a special solution. True, you must be sure that your nails were grown with biogel, and not with another material, otherwise you will hardly be able to achieve the desired result by acting in this way. In order not to waste time and effort, check the information regarding this issue with the master who performed the extension.
Home ways to care for nails after removing extensions
Whichever extension material you use, and whichever way you remove the gel coating, keep in mind that natural nails need intensive care after removing artificial materials. Perfect for these purposes:
- Natural masks... They can include a variety of vegetable oils, herbal extracts, dairy products and vitamins. The main task of such masks is to strengthen the nail plates and restore their structure. It is not difficult to carry out such procedures: you just need to apply the prepared composition to the nail plates and the skin around them, and after 15–20 minutes wash your hands with water. The recommended frequency of sessions is 2-3 times a week.
- Massage... To improve the condition of the nails after removing the extended ones, it is necessary to systematically massage the upper phalanx of each finger with soft circular movements in turn. To increase the effect, you can pre-lubricate the skin around the nail plates with cream or oil.
- Healing varnish... Thanks to the vitamins, proteins and other useful substances it contains, it effectively strengthens the nail plates and accelerates their growth. This tool can be used as an independent coating, applying it daily after removing the previous layer, and as a base for decorative varnish.
- Paraffin baths... Such procedures, if performed regularly, can significantly improve the general condition of weakened nail plates, restore their elasticity and strength. To carry out the manipulation, you need to prepare a small container with heated cosmetic paraffin and for a few minutes lower fingers pre-lubricated with a special cream into it. Then you should put on textile gloves and walk like that for about 30 minutes. After the session, you need to remove the paraffin, wash your hands and treat your nails with oil.
Removing gel-extended nails is a rather laborious and complex process, the correctness of which depends not only on the appearance, but also on the health of your own nails. Therefore, if you are not sure that you will be able to cope with this task on your own, contact a professional for help.
Many of us wear extended claws, and sometimes the question arises - how to remove the extended nails ourselves if there is no way to get to the master? This procedure is quite feasible at home, but it must be remembered that your own nails do not deteriorate as much from wearing artificial nails as from a careless, rough process of removing them. Therefore, you should be patient in this matter and act very carefully.
If your fingers are decorated with gel nails, then their "end" will come only under the file, and no solvent can soften them. To cleanse your own nail plate from such decorations, you will need:
- Cutting pliers (aka nippers).
- Coarsely abrasive files (two, with numbers 80 for 100 grit, and 150 for 180 grit).
- A brush for sweeping away the sawn dust from the fingers.
- Buff bar for smoothing the nail.
- Safety glasses or glasses.
- Nail polish remover and cotton pads.
- Nourishing hand cream.
Let's start independently removing the artificial decoration from the nail plate.
How to remove extended nails from gel
 We put on glasses, because when biting off the hard gel, the cuttings "shoot off" and can injure the eye with sharp chips along the edge of the cut, be careful. We bite off the claws, without touching the real ones, and proceed to the most unpleasant thing - cutting the top layer. We take an abrasive file, the one that is larger, and carefully, with sufficient effort, saw the gel coating, sweep the interfering crumbs and dust with a brush and check the progress of the process. Removing artificial nails from gel is a painstaking process.
When it turned out to cut off the main part of the gel, wet the disc in nail liquid and slide it over the nail plate, this will allow you to find the cut line and the thickness of the remaining layer. The remaining artificial nail is carefully sharpened with a smaller file. When the crust from the gel becomes very thin, it will begin to exfoliate itself, you can not completely remove it, but leave it as a strengthening layer. It remains only to trim the corners of the nail and polish it with a buff to shine and smoothness. The skin in the area of \u200b\u200bthe nail, dried with a gel saw cut, is abundantly smeared with hand cream.
Read also: How to strengthen nails after extensions
Removing extended nails is a very long and painstaking process, and fractures and cracks of the grown nail may occur. Be careful and don't hurt yourself.
The procedure for removing acrylic claws will be easier as you can soften the acrylic artificial nail yourself. The accessory list is similar to the gel list, but different:
- A pair of files of different abrasiveness.
- Manicure scissors or nippers.
- Acrylik remover dissolving suspension (or nail polish containing acetone).
- Aluminum foil and cotton pads.
Back to the table of contents
How to remove acrylic extended nails
 Remember to be safe and careful, wear glasses when biting off the ends, and in no case tear off the artificial covering on your fingers, even if it is badly peeled off! Removal of extended nails should not cause injury!
If your acrylic claws are covered with a protective layer of gel, then take a rough file and remove this layer by cutting. If there is no gel, and also after removing the protection, you need to soften the acrylic coating. To do this, abundantly moisten a cotton pad with a suspension or acetone for nails (the acetone content is required!) And wrap the nail in it. To avoid drying out of the liquid, tightly close the nail and disk with aluminum foil, protruding one phalanx of the finger. We do this on all fingers of one hand at once. Waiting for a doughy result is 40 to 50 minutes.
After dissolving, acrylic can be easily scraped off with a nail file or spatula, and its small residues are removed with a cotton pad soaked in one of the liquids. A little speed is needed here, since acrylic tends to harden again, so it is better to open your fingers one by one. At the end of this cleaning procedure, wash your hands well with soap, polish your own nails, and then generously grease the skin of the hands and around the nails with a rich cream.
or acrylic, then even before performing the procedure, be sure to read the information about how to properly remove extended nails so as not to harm natural nail plates... As you know, nails can quickly become brittle and peeling after numerous modeling procedures to artificially increase their length. Nevertheless, according to recent studies, the structure of dense stratum corneum is actively destroyed not so much by the build-up procedure, as by incorrect methods of removing hardened gel or acrylic from them.
Of course, if you have enough free time for a regular visit to a beauty salon, you can entrust the beauty and health of your fingers to a professional master, who will perform the modeling of artificial nails flawlessly, and properly clean the natural plates from gel or acrylic when required. But if you plan to always make gel or acrylic nails at home, then carefully read step by step master classes with photos and visual video lessons on how to remove extended nails yourself.
Immediately, we note that the methods for removing acrylic and gel are noticeably different. Gel-grown nails are somewhat more difficult to remove than acrylic nails and it will not be possible to simply make them soft and pliable with a special liquid. Therefore, you will have to spend enough time to properly filing. But hardened acrylic can be easily soaked in nail polish remover and get rid of acrylic nails as quickly as possible. By the way, many women still remove acrylic-extended nails with acetone. But this method can lead to dryness, flaking and cracks in the skin of your fingers.
Too often, it is not advisable to lengthen your nails with extensions. Be sure to take 2-3 week breaks between procedures so that the natural nail plate has time to recover. If you notice that the nails become brittle, exfoliate and turn yellow, then to restore their health, do paraffin baths, masks with vegetable and essential oils, regularly perform a special massage (at the end of the article we will tell you about these procedures in more detail).
♦ HOW TO REMOVE NAILS WITH GEL IN THE HOME CONDITIONS
We spreadon the manicure table the following tools and materials for the procedure :
▪ Nail tweezers or tips cutter;
▪ Soft brush or brush for cleaning nails from gel dust;
▪ File with abrasiveness 80/100 grit;
▪ File with abrasiveness 150/180 grit;
▪ Buff for polishing nail plates;
▪ Acetone and cotton pads.
❶ It is advisable to first put on safety glasses so that fragments of gel nails do not get into your eyes. Now, with a tip cutter (or tweezers), piece by piece, bite off the extended free edge. Be careful as you can accidentally bite off a piece of the natural nail plate;
❷ Before we start filing nails, let's better show the border between the extended and natural plates. To do this, you need to slightly moisten a cotton pad with acetone and gently run it over the surface of the nail, trying not to touch the periungual skin; 
❸ Take a file with a coarse abrasive (80/100 grit) and start cutting off a thick layer of gel, moving the tool in one direction. Periodically brush dust off the nail, monitoring the gradual thinning of the gel coat. By the way, if you have a set for hardware manicure and pedicure, then you can remove the main layer of the extended nail with a machine, choosing a suitable cutter. During the procedure, dust rises, so it is advisable to wear gauze mask on the face; 
❹ As soon as the thick layer of the hardened gel is removed, take a file with a fine abrasive and very carefully continue to file the surface of the nail, reducing the pressure; 
❺ As soon as the natural plate is noticeably manifested, change the file to a buff and start polishing the "native" nail; 
❻ To make sure all the gel has been removed from the nail, apply a thin layer of degreaser to the plate surface with a brush. Any remaining gel coat will show up immediately; 
❼ At the end of the procedure, we treat the nails and the periungual area with a nourishing cream, and apply an emollient oil to the cuticle. 
♦ HOW TO REMOVE ACRYLIC NAILS IN HOME
For the procedure, we need the following tools and materials:
▪ Manicure nail clippers;
▪ File with abrasiveness 80/100 grit (laser, but metal is quite suitable);
▪ Buff for nail polishing;
▪ Ten cut pieces of 12x7 mm aluminum foil;
▪ Pack cotton pads;
▪ Orange sticks;
▪ Special agent Acrylik Remover or nail polish remover.
Step-by-step procedure:
❶ Bite off the extended free edge of each nail with nippers. Grab a small piece each time with the tool, being careful not to damage the natural nail plate. At this moment, keep your hands away from your face so that small pieces of acrylic do not get into your eyes or wear safety glasses; 
❷ Now we take a nail file with a large abrasive and, moving the tool in one direction, we cut off the protective topcoat to "get" to the acrylic; 
❸ Now we need to thoroughly soften the acrylic layer of the extended nail in order to quickly remove it and not damage the natural plate. To do this, we dip a cotton pad in Acrylik Remover, put it on the nail and tightly wrap the upper phalanx of the finger with a piece of foil, twisting the upper corners so that the product does not evaporate. We do the same procedure with each finger; 
❹ After about half an hour, you can remove the "covers" from all fingers and after making sure that all the acrylic has turned into soft jelly, quickly remove it with orange sticks or a pusher; 
❺ Now you can moisten a cotton pad with nail polish remover and thoroughly wipe each nail plate; 
❻ Then you can polish all your nails with a buff and wash your hands thoroughly with soap; 
❼ It remains to rub a moisturizing, nourishing cream into the nails and periungual skin, and then treat the cuticle with an emollient oil. 
♦ HOME CARE FOR FINGERS AFTER REMOVING EXTENDED NAILS
☛
Paraffin baths.
We highly recommend doing such restorative baths immediately after removing the extended nails and regularly once every few weeks. Before the procedure, we grease our fingers with a special cream and put them in a wide container with heated cosmetic paraffin. After the procedure, you need to wrap the handles with cling film and put on warm gloves on top. After 30 minutes, remove the film, wash off the paraffin and rub a nourishing cream into the skin;
☛
Hot manicure.
A very useful procedure for strengthening brittle, damaged nails. The product contains useful components, minerals, vitamins, which easily penetrate the nail plate and restore it. It is advisable to include a hot manicure in your regular home spa to improve nail condition;
☛
Masks for nail plates.
After removing the extended nails, it is useful to rub masks into the nails and periungual area, which are easy to prepare at home. These masks include sea \u200b\u200bsalt, lemon juice, sea buckthorn oil and one of essential oils (bergamot, rosemary, ylang-ylang, eucalyptus, geranium). This procedure helps to strengthen weak nails, restore their structure and eliminate yellowness;
☛
Massage.
During the recovery period of the nail plates after building, daily massage the upper phalanx of each finger in a circular motion, rubbing a nourishing cream into the skin and nails;
☛
Biogel.
If frequent building procedures have led to delamination of the nail plates, then it is useful to seal them with biogel to restore the structure. To do this, apply a thin layer of biogel to each nail and seal the end of the free edge, protecting weak nail plates from damage.
♦ VIDEO LESSONS FOR BEGINNERS
Dear girls! Please share with beginners your secrets, experience, tips for building and caring for nails after the procedure.
If you want to place your photos and videos on the topic on the site, please write a message to us by email: This e-mail address is being protected from spambots, you need JavaScript enabled to view it. Home
ALSO FIND OUT ...
You can't surprise modern girls with anything. In the context of constantly rising prices for cosmetic services and in the continuous rush of a dynamic life, they have learned to independently build up nails with gel, do the correction of extended nails at home and generally do without the help of a manicure master. But is the resulting savings in time and money worth the effort? And can you completely refuse to visit the salon? For example, how to remove gel nails at home? Many people ask this question only when it is time to remove extended nails. And although it would be nice to think about such things in advance, even before the nails were extended with gel at home, we will not moralize, but simply try to help you remove the gel nails at home.
Can gel nails be removed by myself?Even if you have grown nails for the first time in your life and have absolutely no idea how to handle extended nails, it will not hurt to remove them without consequences and harm to natural nails. And, wherever the extension procedure takes place - in a nail salon or at home, you must be sure that it was carried out in compliance with all safety rules. Remember how gel nails are extended: a soft, almost liquid material hardens under the influence of ultraviolet radiation. At the same time, its strength and adhesion to the natural nail becomes much stronger than the natural nail itself. So we have at least one piece of news for you:
It is the gel nails that are most difficult to remove, and this complexity almost does not depend on the location of the removal procedure. Unlike acrylic, nail extension gel does not dissolve in acetone or other solvents (which would still be undesirable to use on the skin).
You are probably aware that manicurists put prices in the price list not only for extension and correction, but also for the removal of gel-extended nails. And this approach is fully justified: in order to remove even just one nail extended with gel, you need to spend time cutting it, and this, depending on the thickness of the nail and the amount of material used, can take from 5 to 15 minutes. So count how much you have to tinker with one client who decided to get rid of the build-up. But there is also a second, good news:
In the same way as the master does in the salon, you can remove the gel nails at home by yourself. In addition to desire, time and accuracy, you will need special tools for this.
How to remove gel nails at home? The process of removing gel-extended nails consists of two successive stages: the maximum shortening of the artificial nail and the actual cutting of the remaining gel layer. Accordingly, very different devices are needed to perform these tasks:
- Nail clippers (not for the cuticle, just for the nail plate!) Or sturdy manicure scissors.
- Two nail files with different abrasiveness: more (from 80 to 100) and less (from 150 to 180).
- Dust brush, goggles for eye protection - optional at home, but handy accessories.
How to remove gel-extended nails yourself
To remove gel nails at home, choose a place in the house where you will not disturb anyone, where there are no exposed food or soft textiles, and where you will not be disturbed for a long enough time. It can be a bathroom with good lighting and at least a small flat table. Put the tools in front of you so that each of them is at hand at any time, and get to work:  Intensive care and additional protection will be required for your hands not only immediately after removing the gel nails, but also over the next couple of weeks. At this time, use cuticle cream and oil as often as possible, wash dishes and wash only with rubber gloves. You can apply firming preparations to your nails daily if there is no gel left on them. Otherwise, you can limit yourself to mechanical protection.
How to remove gel nails without cutting
Unfortunately, gel nails extended according to the classical technology using an ultraviolet lamp can only be removed with a file, at least in the salon, at least at home. But recently, an alternative material for nail extension has appeared - the so-called biogel. Without going into the details of its advantages and disadvantages, we note that to remove it, you can do without cutting. But for this, you must be 100% sure that your nails are extended with just such a material. If in doubt, it is better to check with the master who did the extension.
If your guess is confirmed, then you will not have to completely cut the nails extended with biogel. It will only be necessary to cut off their free edge and slightly cut off the main thickness of the material. And everything else is removed using a special solution designed to remove such nails. Its composition differs from the solution for acrylic, so be careful and do not mix it up so as not to waste time, money and effort in vain. But in any case, no matter what material the nails are built up, and in whatever way you remove them, remember that after removing the nails, special care is needed.
Manicurists recommend doing paraffin baths and other "hot" procedures. These techniques have this name not only because it is desirable to do them in hot pursuit, but also because they use heated substances that are absorbed into the nail plate and strengthen it. This intense support is not pampering, but a guarantee that your natural nails will look good and stay healthy after you remove the extended gel nails. Take care of yourself, be healthy and beautiful!