1. DIY Christmas cards ("Herringbone")
The Christmas tree is an indispensable attribute of the holiday. Therefore, postcards with her image will be especially appropriate. In addition, such postcards can be very easy to make.
Christmas tree applique can be made from plain or multi-colored strips of paper. Even a small child can make this New Year's craft with his own hands.
Strips of paper can be replaced with colored tape or tape. It also turns out very beautiful New Year's cards.
A more complicated option is the New Year's card "Christmas Tree" made of paper tubes.
It is very easy to make a Christmas tree application using purchased stickers. Even a two-year-old can do this craft for the New Year with their own hands.
Simple and effective - homemade New Year's cards "Herringbone" from ordinary buttons.
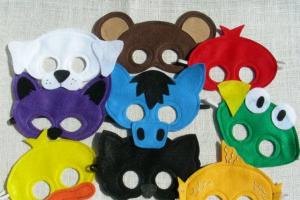
You can also embroider a Christmas tree with threads. Only in this case, the New Year's card should be made of high-density paper or cardboard. Pre-holes must be carefully done with an awl. The simplest version of the Christmas tree, see the photo below.
A more complex version of a postcard for the New Year with a Christmas tree made of threads. To make this New Year's craft with your own hands, you will also need sequins.
By the way, you can embroider with threads not only a Christmas tree, but also something else, New Year's. For example, here is such a cute deer.
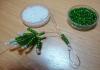
An original DIY New Year's card can be made from a fern leaf or any other plant similar to it. For example, branches of cypress. Just take the top part of the leaflet and glue it on the postcard. This will be a Christmas tree. You just have to decorate it with sequins or confetti made with a colored paper hole punch. Instead of confetti, you can stick multi-colored pieces of plasticine on the Christmas tree. This part of the work on making a homemade New Year's card will be possible even for a baby.

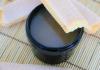
I don't know what this herb is called. Grows along roadsides like a carpet. Very common in central Russia. Snow is depicted with semolina and some sparkles are added.

The Christmas tree is made of fern, 2-3 branches are glued on top of each other.

There is also a fern. But I cut off the sharp tips for him and collected a twig from individual leaves.

2. Do-it-yourself voluminous New Year's cards "Herringbone"
We offer you several ways to make voluminous New Year's cards "Herringbone" with your own hands.
Option 1.
You can find instructions for making such cute voluminous Christmas trees.
In order to make such a voluminous postcard for the New Year, you need to print it on a printer and cut out Christmas tree blanks
The technique for making volumetric Christmas trees is similar to the method for making Christmas balls. Only you do not need to glue them completely, instead stick the Christmas trees on the card.
Option 2.
A very beautiful DIY Christmas craft, accessible in terms of complexity to a preschooler, is a voluminous New Year's card "Herringbone". The Christmas tree is made of strips of rectangular paper folded like an accordion.
Here are two more voluminous postcards with a Christmas tree made from a triangular sheet of paper folded like an accordion. Simple and tasteful!
Option 3.
Another voluminous New Year's card. Again, this New Year's craft for children is attractive not only in appearance, but also in ease of manufacture.
To make such a New Year's card with your own hands, print templates on two sheets of cardboard or thick paper and use the detailed instructions from the photos below. It is better if the sheets of cardboard are of different colors.
At the end, decorate the Christmas tree to your liking. Volumetric New Year's card is ready!
Option 4.
Christmas tree origami. We suggest you make a voluminous New Year's card decorated with a paper Christmas tree made using the origami technique. To make the card look more elegant and festive, choose prettier paper for your Christmas tree. Well suited for this New Year's crafts with your own hands, special paper for scrapbooking. By the way, making such an origami Christmas tree is much easier than it seems at first glance.
Option 5.
There is an easier way to make an origami Christmas tree. Detailed instructions in the photo below.
Option 6.
A voluminous New Year's card can be made with your own hands from corrugated paper.
Option 7.
The elements of the New Year's card in the photo below are made using the quilling technique.
3. Postcards for the New Year with your own hands ("Christmas balls")
Do-it-yourself Christmas cards with the image of Christmas balls look good. Christmas application "Christmas balls" can be made of bright paper and decorated with ribbons.
Beautiful Christmas balls are obtained from colored strips of paper. Cut an unnecessary glossy magazine (flyer) into thin strips, stick them on a white sheet of paper. After that, cut out circles of different sizes from the resulting striped paper. Decorate your Christmas card with them.
Christmas balls can be made not only from paper, but also from buttons.
Original volumetric New Year's cards depicting Christmas balls
To make such a New Year's card with your own hands, print out the following template.
On each square, use a compass or a suitable sized round-bottomed object to draw a circle. Cut out all the circles, then use the following instructions for making Christmas balls. Only you do not need to finally glue the balloon, instead stick it on the card.
Another New Year's decoration - a garland of flags, will look spectacular on a New Year's card. Flags can be made from paper or fabric, and then glued or sewn onto a postcard.
Even very young children can make a New Year's card with their own hands with the image of a multi-colored garland of fingerprints.
And from a handprint you can make a New Year's card with Santa Claus.
1. On any surface that does not absorb paint (for example, a regular baking sheet), make a rectangular frame (the size of your postcard) from adhesive tape or electrical tape.
2. Apply the paint evenly to the surface. Draw some picture on the New Year theme with a cotton swab.
3. Attach a piece of paper. Do-it-yourself postcard for the New Year is ready!
4. Do-it-yourself volumetric postcard for the New Year "Snowman"
Separately, I would like to talk about this original, voluminous postcard for the New Year. Making such a snowman out of paper is very simple. Even a preschooler will cope with the task. It is necessary to cut out three circles of different sizes from thick white paper. It is desirable to shade the circles along the edge so that they stand out better from each other. This can be done using a crushed lead from a pencil or shadows. Also cut out a scarf, pens, a carrot nose, eyes and buttons from colored paper. Glue successively all the parts of the snowman onto the blank of your New Year's card.
Here is the original postcard made by the scrapbooking master.
And here are the variants of this voluminous New Year's card made by children.
5. Do-it-yourself voluminous New Year's cards
On the page cp.c-ij.com/en/contents/3058/list_15_1.h tml On the CREATIVE PARK website from CANON, you can download ready-made paper models of voluminous New Year cards. All you have to do is print them out, cut them out and glue them according to the instructions.
On this site you can also find a large number of templates for making ordinary New Year's cards with your own hands.
Another way to make voluminous New Year's cards
Craft "New Year's card 2008"
We invite you to make an original and at the same time very easy-to-make New Year's card with your child. It can serve as the best gift for your beloved grandmother for the holiday.
You will need:
Thick colored paper or colored cardboard
- glue
- scissors
- simple pencil, ruler
- optional: colored markers, glitter for decoration
Instruction:
1. Take two sheets of thick colored paper or cardboard in different colors, such as red and green. One sheet will be the outside of the postcard, the other the inside. The inner sheet should be slightly smaller than the outer one.
2. Fold both sheets in half.
3. On the inner sheet, make 8 shallow cuts parallel to each other as shown in the figure.
4. Bend inside the sheet part of the resulting valves (see figure).
5. Glue a second sheet of paper on the outside.
6. Cut out the numbers 2, 0, 0, 8 from colored paper. Before gluing them onto the inner flaps, make sure they are inside the card when it is closed. The craft is ready! You can decorate it with glitter and paint with colored markers as you wish.
6. New Year's crafts for children. New Year's application
Postcards decorated with New Year's appliqué made of rice grains are very tender.
7. Postcards for the New Year with your own hands. Christmas cards with snowflakes
Another idea for a DIY New Year's card is a card decorated with a snowflake cut out of paper.
If you have paper lace napkins at home, then you can cut snowflakes out of them.
8. New Year paper crafts. New Year cards made in the technique of iris folding
Original New Year's cards using the iris folding technique are offered by the Land of Masters website. The name of this technique - iris folding - can be translated as "rainbow folding". The drawing is filled with thin paper strips, which, superimposed on each other at a certain angle, create an interesting effect of a twisting spiral.
The name of this technique - iris folding - can be translated as "rainbow folding". The drawing is filled with thin paper strips, which, overlapping each other at a certain angle, create an interesting effect of a twisting spiral. - a template based on a triangle, which you can build yourself or print ready-made. For gluing, use a glue stick.
First, get acquainted with the technique of building an iris pattern. For this work, the template is built on the basis of a triangle with a base of 14 cm and a height of 16 cm. The step is 1 cm. These dimensions can be changed at your discretion.
- Cut strips of paper in three colors. The width of the strip should be twice the pitch, plus an allowance of 2-4 mm. For our step, the width of the strip is 22-24 mm. The very first stripes should be a little wider, as they cover the outer contours of the Christmas tree. It is difficult to calculate how many bands you need right away. It is better to cut them in the process of doing the job.
- Fold each strip in half lengthwise.
- Cut out five strips for the trunk of different shades in the size of 35x20 mm. Fold them in half.
- Draw a Christmas tree silhouette on the cardboard. Carefully cut it out using a utility knife or scissors. Draw or print the iris pattern.
- Lay the cardboard on the template with the wrong side. The cut-out silhouette may be slightly larger than the pattern. Secure the template, for example, with paper clips. All work will be done from the inside out.
- Do the stem first. Lightly grease the area of cardboard around the slot on the right side with glue. Glue the first strip. The fold line on the strip should line up with the line on the template. To glue the second strip, you can glue the cardboard on top, bottom and the previous strip with glue. To prevent the strips from opening, they can be slightly glued in some places. Sometimes this technique does not use glue, but small pieces of adhesive tape, which fix the strips along the edges.
- Fill the entire trunk with stripes.
- Take the longest and widest strip. Just put it to work first. The fold line should be along the first line of the iris template. If the strip is too long, cut it. Glue the strip, smearing a little glue on the cardboard along the edges of the slot.
- Glue a strip of a different color so that it matches the rightmost line of the template.
- Glue the third strip from the bottom along the bottom border of the template.
- Prepare the next strip of the first color. First, attach, measure the desired length, cut, then glue. Glue smear not a strip, but the places of gluing! Use a little glue, just to make the strip “grab”.
- Glue the second strip of the second color, aligning it with the next pattern line.
- Glue the second strip of the third color along the next line. Continue gluing in the same order. Strictly clockwise, strictly alternating the selected colors. Each time the stripes will become shorter and shorter. At the end, small scraps cut off at the very beginning will go into action. When a small empty triangle remains at the end, cover it with a piece of paper in one of the three colors.
Now you can flip the work and admire the result. You can glue garlands and decorate the Christmas tree as you wish. We completed these and other Christmas trees at the master class on 12/13/2007 in about one hour. HAPPY NEW YEAR!
Do you want to make a nice gift for your relatives, friends, acquaintances for the New Year? A beautiful postcard is always needed.
To pleasantly surprise the person you are preparing a card for, you can make a card with your own hands, decorate it as you like and give it as a gift.
There are many ways to make a beautiful postcard with your own hands, and there are some simple, but very beautiful and original ones here.
Choose what you like best. You can try to make one of the suggested options or borrow an idea to make something of your own.
In any case, any person will be pleased to receive such a gift.
New Year's cards handmade. Corrugated paper tree.

You will need:
- corrugated paper
- scissors
- decorations, optional

1. Fold a sheet of thick paper in half.
2. Mark the place where you will glue the corrugated paper, or simply draw the outline of the Christmas tree with a simple pencil.
3. From corrugated paper, cut out several rectangles of different sizes.
4. Glue each rectangle as shown in the image.
* If you wish, you can decorate the postcard with an asterisk (ready-made or cut out of paper), stickers, sparkles, etc.
How to make a voluminous postcard
A very beautiful DIY Christmas craft, accessible in terms of complexity to a preschooler, is a voluminous New Year's card "Herringbone". The Christmas tree is made of strips of rectangular paper folded like an accordion. But there is one nuance here. If you carefully examine the photo, you will see that the tiers near the Christmas tree are made of strips of paper of different widths: the widest at the bottom, the closer to the top, the narrower. In addition, the depth of the fold of the accordion is also different. The lower strips of paper are folded into an accordion with a large "step". The higher to the top, the smaller the bend depth.


Another voluminous New Year's card. Again, this New Year's craft for children is attractive not only in appearance, but also in ease of manufacture.

To make such a New Year's card with your own hands, print templates (template-1 and template-2) on two sheets of cardboard or thick paper and use the detailed instructions from the photos below. It is better if the sheets of cardboard are of different colors.


At the end, decorate the Christmas tree to your liking. Volumetric New Year's card is ready!

How to make DIY Christmas cards
New Year's card "Snowman"

From white paper, cut a wide strip with a curly edge. It will be a snow hill. Glue it to the bottom of the card. Attach white acrylic letters to the center of the pre-made snowmen.
Postcard "Congratulations to Santa Claus"

The basis for this postcard will be paper with a pattern. Cut out the elements of the face of Santa Claus from paper in different colors. Glue them. Tint Santa's cheeks with pink chalk. Glue the face to the heavy paper card. Glue the card onto the larger folded paper so that the pattern looks like a border on the right and bottom of the card. Write a congratulation.
Postcard "Christmas tree in retro style"

Sew the edges of the heavy paper Christmas tree on a sewing machine. Decorate the tree with snowflakes. For a simpler version of the card, glue the Christmas tree with an additional layer of thick paper to get a three-dimensional image.
Scrapbooking. New Year cards.

You will need:
- thick colored paper or colored cardboard
- scrap paper
- PVA glue
- pen, felt-tip pen (or other similar object)
- decorations

1. First you need to know exactly what size the tree will be, and, starting from this, cut several rectangles of different widths from scrap paper.
2. Using a pen or other cylindrical object, roll each rectangle into a tube (widthwise). Secure each tube with glue so that it does not unwind.

3. Glue the tubes together.


4. Prepare the base for the card and glue your pre-prepared Christmas tree to it.

5. Decorate to taste.

Children's New Year cards

You will need:
- colored cardboard (green and red)
- sequins or rhinestones
- wrapping
- black pen or marker
- scissors
- stapler
- decorations

1. We make a Christmas tree. Prepare green paper and cut it in half (crosswise).

2.
Make a blank by folding a thick sheet of paper (of any color) in half - this will be the basis of the postcard.
3.
From one half of green paper, make an accordion that will play the role of a Christmas tree. Fasten one end of the accordion and glue the Christmas tree to the base of the card.

4. Prepare wrapping paper and cut out a small rectangle from it, it will act as a stump.

5. Decorate to taste.

Beautiful New Year cards

You will need:
- thick colored paper or colored cardboard
- a clerical knife or a shaped hole punch (for cutting out an asterisk)
- needle
- a pencil and a ruler (to mark the places where the thread is threaded)
- sequins


Making New Year's cards. Origami Christmas trees.

You will need:
- colored paper (can be thick paper)
- colored cardboard (for the base of the postcard)
- button, ribbon and other decorations to taste.


Creative New Year cards. Christmas tree from ribbons.

You will need:
- colored cardboard
- scissors
- stickers (in this case in the form of stars)
- decorative ribbons, scrap paper or clippings from colorful magazines

1. Fold a piece of colored cardstock in half to make the card base.
2. Cut out a tree trunk from brown paper.
3. Glue the stem to the base (in the middle).

4. Start cutting your colorful paper strips into several pieces of varying lengths.
5. Glue all the pieces onto the trunk (top), starting from the bottom, with the longest piece.
6. Decorate the Christmas tree as you wish.
New Year's cards in quilling technique

You will need:
- colored cardboard
- paper strips for quilling (preferably several shades of green)
- scissors
- white crepe paper or napkin
- toothpicks (for winding paper strips)
So, let's start making a postcard:


How to make a New Year's card from round napkins

You will need:
- colored cardboard
- scissors
- round napkins (or double-sided colored paper)
- Double-sided tape
- decorations to taste

1. To make a Christmas tree, you need half a circle. To do this, fold the round napkin in half and cut it.
2. Fold a semicircle as shown in the image.
3. Using double-sided tape, glue the layers of the Christmas tree.
4. Glue the Christmas tree to the base of the card
5. Decorate the tree to your liking.
New Year's voluminous cards

You will need:
- colored cardboard
- scissors
- pencil and ruler
- decorations


1. Cut out triangles from colored cardboard - these will be your Christmas trees.
2. Prepare two sheets of thick paper. Fold both in half - one will serve as the base of the card, and the other as its inner part.
3. The diagram shows how to cut out “steps” from the sheet for the inside of the postcard, on which you will then need to stick Christmas trees.

4. After you have glued the Christmas trees, decorate them and the rest of the card to your liking.
New Year's greetings. Postcard from circles.

You will need:
- colored paper
- stationery knife
- colored cardboard

1. Take a sheet of A4 paper (plain or color). Draw a large circle on it with a compass.
2. Cut out the circle.
3. Fold the circle in half and make cuts in a checkerboard pattern (see picture). Cuts should be made in a circle - start at the fold line and move to a point a little further than the middle.

4. Expand the circle and glue the thread to the crown.
5. Glue the circle to colored cardboard folded in half (postcard base).
* You can glue small red circles to the thread so that they hang down from the top of the tree.
6. Decorate your postcard as you like.
Now you can not only give this postcard, but also decorate the New Year tree with it.
New Year's cards (master class)

You will need:
- colored cardboard
- buttons
- Red ribbon
- pencil or pen
1. Prepare the base for the postcard by folding colored cardboard in half.
2. Draw a circle on the base using a compass or pencil and any small round object.

3. Prepare the buttons and start gluing them carefully along the drawn circle.
4. Cut off a piece of red tape and stick it where you like.
Ready! Everything is very simple, but at the same time beautiful and neat.
Design of New Year's cards. Bright lanterns.

You will need:
- scrap paper (or plain thick paper)
- scissors
- paints (you can use watercolors)
- brush
- a set of markers
- simple pencil
1. Prepare the base for the postcard. Fold a thick sheet of paper in half.


2. With a simple pencil, draw a wavy line on one side of the card. Curls can be added.
3. Now draw the lanterns on the line.


4. Color the lanterns with paints or multi-colored markers.
5. Add an inscription, for example, "Happy New Year!".
Christmas cards with snowflakes
Another idea for a DIY New Year's card is a card decorated with a snowflake cut out of paper.

If you have paper lace napkins at home, then you can cut snowflakes out of them.

Postcard with New Year's embroidery.

Such a postcard will not leave indifferent even the most fastidious recipients. After all, here you invest your strength and soul not only to assemble the finished parts and give them a festive look, but also create these very details with your own hands. For embroidery, you can choose any pattern that matches the theme of the new year. It can be Santa Claus, a cheerful snowman, a festive tree, Christmas balls, a symbol of 2017 - the Fire Rooster and more.
To create such a New Year's craft, you will need: glue, scissors, embroidery, satin ribbons, and other decorative elements, if desired.
As in the first option, we first prepare the base of the postcard and give it the desired shape. Then we paste the embroidery and decorate the edges of the picture. This can be done in the following ways: use satin ribbon, half beads, rhinestones and sparkles. Such a postcard in itself is already a finished product and does not require special additions in the form of sparkles and sequins, but if it seems to you that they will only complement the overall look, then add it. If the card is intended for a friend, sister or mother, you can use a satin ribbon bow, such a decor will give the product a great prettiness.
Postcard from colored threads
 Handmade card with a Christmas tree made of colored threads
 The forest beauty is the main symbol of the New Year. And in such an unusual incarnation, both adults and children will like it! To create a craft you will need:
- three sheets of cardboard or thick paper
- scissors
- PVA glue
- Double-sided tape
- dense threads of different colors
- colored pens
- ruler
- decorative beads
- paper snowflakes
- ribbon
Fold a sheet of colored cardboard or thick paper in half. It will serve as the basis for the postcard. Cut a rectangle out of paper of a different color, stick it closer to the top of the card. Cut out a triangle from the third sheet of cardboard. Wrap it with multi-colored threads, fixing them on the back of the tenderloin. Decorate the Christmas tree with shiny balls of multi-colored beads and glue the tree to the postcard. Decorate the craft with an elegant ribbon and do not forget to print and stick a congratulatory inscription.


It is customary to give postcards for all holidays marked and not marked on the calendar. This applies to large religious holidays such as Easter or personal and small ones such as the day of acquaintance or a big purchase. All memorable dates need postcards and the New Year is no exception. As you know, you can’t buy something made directly by human hands in a store and you won’t meet another one. Everything is unique.
We offer you to please and surprise your friends and acquaintances, colleagues and friends with New Year's cards. And to this we are attaching a selection of ideas for inspiration on the theme of New Year's cards.
Idea number 1. Christmas card with a Christmas tree in a skirt
This is a large postcard. If you plan to write some kind of wish, and then print it on a printer, then this should be done before decorating.

So, what you need to create a card with a Christmas tree from corrugated paper:
2. Corrugated paper.
3. Scissors.
5. Double-sided tape and / or PVA glue.
6. Simple pencil.
Let's start by preparing the base for the postcard. To do this, take cardboard or thick paper, bend it in half. In principle, the standard move for a postcard. Next, on one of their halves, make a rough sketch of the future Christmas tree. This can be done with a couple of lines.
Now let's prepare the corrugated paper. You need to cut it into strips about one and a half centimeters high, and in length, curl this value because how fluffy the Christmas tree needs to be. We suggest taking a third of the planned length for allowance. The strips should be of different sizes to keep the triangular shape of the Christmas tree. That is, both the shortest and longest strips should be available.

Now you need to glue the strips of corrugated paper into place. It is better to start from the lower tiers and gradually rise up. Focusing on the marks made earlier and using glue or double-sided tape, glue the strips by slightly picking them up. To get a kind of skirt with tails.
When finished, you can decorate the top of your Christmas tree with a star and glue on glitter, rain, bows, or something like that.
You need to pick up some elements or come up with kind words. To make your postcard even more impressive for the addressee.
Idea number 2. New Year card and some scrapbooking
In this option, it is better to print out the wish in advance or print it on a separate piece of paper, which can also be beaten and presented in an original way.

So, what do you need to create a postcard:
1. Thick colored cardboard or paper. A4 size will suffice.
2. Scissors.
4. Elements for decoration, at your discretion.
5. Scrap paper.
6. Any object shaped like a pencil.

Scarpbooking postcard, for beginners
Decide on the size of the future Christmas tree. And based on this, plan how much paper you need. More precisely, how many and what size do you need to cut rectangles from scrap paper.

Then, as you have decided on the number of rectangles and cut them out, you need to roll each one into cylinders. The basis of which will be a pencil or something cylindrical, which you have at hand. You need to twist the tubes in the direction of the width, and so that they keep their shape, after you remove the base, you need to fix the structure with glue.

After each rectangle is twisted into a tube, you need to connect all the tubes together with glue. Naturally, one should adhere to approximately the shape of a Christmas tree, that is, a triangle.

Now let's deal with the base of the postcard. Take the prepared sheet of cardboard or thick paper and bend it in half. Now you need to glue the Christmas tree on one of the halves. But before that, the glue on the Christmas tree should grab and dry enough.

After the Christmas tree is glued to the base of the card, it's time to decorate it. For this purpose, you can use all kinds of decorations - buttons, miniature bows, ribbons, beads, rivets, sequins, sequins, in a word, whatever your heart desires.

Decorations can be glued on double-sided tape.
Don't forget to write something nice to the addressee inside.
Idea number 3. New Year's card in the style of "children's hands"
This idea is perfect for little needleworkers and needlewomen. She is uncomplicated, but sweet and open, just like a baby soul. Let's not hesitate, call the kids and get started.

1. Colored cardboard. We suggest taking the classic combination of colors: red and green. But you are free to change them.
2. Sequins, rhinestones, sequins.
3. Wrapping paper or candy wrapper.
4. Black thin marker.
5. Scissors.
6. Double-sided tape and / or PVA glue.
7. Elements for decoration, at your discretion.
8. Stapler.
9. Hot glue.

Let's start by preparing the base for the postcard. To do this, take the red cardboard and simply bend it in half. You can cut off the corners of the resulting rectangle a little. This will make your message more interesting.

We make a Christmas tree. You will need to take green cardboard, and bending it in half, then cut it. From one half, bend the "accordion". Determine the width of the "step" yourself. We recommend at least one centimeter and no more than three. Grab one of the ends of the "accordion" with a stapler, you can apply two staples for reliability.

Now let's make a stump. To do this, cut out a simple rectangle from wrapping paper or candy wrapper. If you use the latter, then do not forget to first iron it through a plain piece of paper. This will help straighten the wrapper.
Now you need to glue the Christmas tree to the base of the card. Hot glue is perfect for this purpose. It is better not to trust this operation to children. Under the free end of the Christmas tree, fill the stumps and glue it too.

Advice. Since the thermal gun heats the rod to a sufficiently high temperature, the child can get burned or ruin the whole work with an inaccurate movement, it will be a shame.
It's time to decorate the Christmas tree. Glue the decorations you prepared on the crown. Don't forget to put something big and pretty on top of your New Year's beauty.
Give your child a marker and let him write some simple and kind words on a postcard and let him make a couple of mistakes, where would he be without them?
Idea number 4. New Year's card in the style of "minimalism"
We offer you a postcard with a Christmas tree in a minimalist style for consideration and inspiration. At first glance, a simple and even modest postcard becomes quite complex upon closer examination. But you're not looking for easy ways, are you?

So, what do you need to create a minimalist greeting card?
1. Thick colored cardboard or paper. A4 size will suffice.
2. Stationery knife or shaped hole punch.
3. Thread with a needle. It is better to take the color of the thread in contrast to the main color of the postcard. And the type of thread can be taken similar to "iris".
4. Pencil and ruler.
5. Sequins.
6. Scissors.
New Year's card for children with their own hands
Let's start, as they say, from the beginning. Fold the cardboard sheet in half. Now on one of the parts we need to make some sketches. This applies to the location of the top of the Christmas tree and the Christmas tree itself. The field of how you conditionally placed the Christmas tree on the half of the postcard. Carefully cut through the top of the tree. If you have a shaped hole punch, then this task will not take you much time. Well, if there is no hole punch, then first draw a star, then carefully cut it out with a clerical knife. By the way, before starting work, it is better to update the tip of the blade.

After you are done with the star. Take a thread with a needle and, guided by your marks, start making stitches. Remember to string enough sequins onto the thread after piercing the paper. It is not desirable to pull the thread strongly and it is also not desirable that it sag.

Now you need to make notes through the cut out hole of the sprocket. So that its location can be seen inside the postcard. Use a sticker in the form of an asterisk and any other, not necessarily of this form, the main thing is that it is not clear what kind of sticker it is when the card is closed.

That's all. Write something good inside and feel free to give!
Idea number 5. Postcard with a Christmas tree in origami technique.
Origami is a very complex and interesting technique. Her Asian roots give her a certain charm and mystery. At the mention of this technique, complex structures and intricate schemes immediately pop up in memory. But do not worry, the Christmas tree proposed below is not an aerobatics figure. You will definitely deal with it.

So, what do you need to create a card with an origami Christmas tree:
1. Colored thick paper, but not cardboard.
2. Colored cardboard.
3. Double-sided tape and / or PVA glue.
4. Elements for decoration, at your discretion.
Let's start with the base of the postcard. Gently fold a sheet of multi-colored A4 cardboard (you can also use another one) in half.

Tip: Be aware that some cardboard sheets tend to crack when bent. This greatly affects the aesthetics of the postcard itself. If you have the trouble of running into such cardboard, then the bend can be decorated with figuratively cut colored paper or ribbon, or even braid.

So, now you need to fold about three origami modules. Depending on the original size, you can make more or less modules. Accordingly, the Christmas tree will be larger or smaller.
Let's start from an example. Take three squares of construction paper or scrapbooking paper. You can print any image you want on thick paper. The sides of the square, as we said above, can affect the size of the Christmas tree. In our case, 20 centimeters. The square needs to be folded diagonally, then expanded and bent again diagonally, crosswise.

You conditionally noted four triangles, now you need to fill two opposite each other inward. Now press the resulting triangle to any surface and, having marked for yourself the conditional center of the figure, bend the lower corner parallel to the marked middle. Repeat the procedure with the second corner. The module is ready. Add two more. You can take a different color paper.

Let's start assembling the Christmas tree. Glue the origami module onto the base of the postcard. You can use glue or tape. The formation of the Christmas tree must be done from top to bottom, as if putting the next module into the previous one.

The next step is to fill in the details of your postcard. Choose how and what to decorate yourself. As an example, we offer bows and buttons.
Idea number 6. Postcard with ribbon - herringbone
This idea is also minimalist. And it is not overly complex. If you are looking for ideas to work with kids, then this idea is perfect for you.
So, what do you need to create a card with a ribbon Christmas tree:
1. Thick colored cardboard or paper. A4 size will suffice.
2. Scissors.
3. Double-sided tape and / or PVA glue.
4. Elements for decoration, at your discretion.
5. Decorative ribbons, scrap paper or clippings from bright printed pages.
6. Stickers. In this option, it is important to take stickers in the form of stars.

Let's start, respectively, with the preparation of the foundation. To do this, bend a sheet of cardboard in half. Among the prepared materials, look for paper or tape that is closest in color to brown. We will decorate the trunk of the Christmas tree. The ideal option would be to cut a very elongated trapezoid out of brown paper. Glue the Christmas tree trunk onto one of the halves of the base. Try to place it exclusively in the middle of the sheet.

After you have completed work with the trunk, you need to pay attention to the crown of the tree. Namely, cutting the prepared material into strips. Each next strip should be longer or, accordingly, shorter than the previous one. It is better not to change the width. We suggest cutting strips of approximately 1.5-2 centimeters.
Now that you have visualized how many strips you need, you need to cut off the corners of the cut ribbons at an angle of about 45 degrees. So that, in general, the tapes already placed in their proper places are a triangle with a very pointed apex. It is better to do this not for each tape separately, but for all at once, with one, so to speak, notch.

Glue a star-shaped sticker to the very top of your Christmas tree. On this we can consider the work on this postcard completed. But you can add details with decorative elements. It's up to your taste.
Idea number 7. Christmas card with original Christmas tree
And one more idea for inspiration for a variation of the New Year. The idea also does not differ in multi-step and high cost of materials. And at the exit, the original and cute decorations of the New Year's card. If you take pastel or, as makeup artists like to say, nude shades, then the card will have a fairly bright female character. Such a card would be an appropriate addition to a gift for a woman of middle age and older.
So, what do you need to create a greeting card with an original Christmas tree:
1. Thick colored cardboard or paper. A4 size will suffice.
2. Scissors.
3. Double-sided tape and / or PVA glue.
4. Elements for decoration, at your discretion.
5. Round napkins or double-sided colored paper.
The first thing we do is smooth across the cardboard. Here is the main part of the postcard ready.

Now let's make a Christmas tree. For this purpose, you need to take a double-sided napkin in the shape of a circle and divide it exactly in half. In the future, you will need only one part to create one Christmas tree. Well, if you could not find suitable napkins, then you can make paper for this purpose yourself. The main thing is to decide what size your Christmas tree seems to you.
Since it must be borne in mind that the average printer is able to print any picture only on A4 format. Accordingly, based on this, it is necessary to calculate the size of the future Christmas tree. Alternatively, you can use thick double-sided paper.
In favor of the printed option: if you print only a semicircle, the size of the Christmas tree will increase to 20-25 centimeters.

So, you have decided on the paper and in front of you lies a semicircle. In order to fold the Christmas tree, you need to do a fairly simple operation. Step back about 3-5 centimeters along the even edge of the semicircle and make an inconspicuous mark for yourself. This is where the top of your Christmas tree will be located. Now "accordion" smooth the paper. Step width is about five centimeters. Experiment with it. You may be satisfied with other options.

It makes sense to fix the resulting folds so that the Christmas tree does not strive to free itself like a spring. This can easily be done with double sided tape. When your hand becomes more confident in folding the accordion, you can pre-fix the tape on a semicircle of paper.
Now you need to glue the Christmas tree on one of the halves of the next postcard. This can be done with tape or glue.
Optionally, add details to the card, decorate the Christmas tree with decorative elements.
We have all been familiar with children's books since childhood. Which, without knowing it yet, were the founders of modern trendy 3D. Turning over the next sheet, we met with foxes, wolves or Koloboks, which, as if alive, rose above the book pages. Agree, then for us it was almost magic. We have grown up, and now we can try on the mantle of a wizard simply by making voluminous postcards for the New Year.
So, what you need to create a New Year's card with a 3D effect:
1. Thick colored cardboard or paper. A4 size will suffice.
2. Scissors.
3. Curly scissors (optional).
4. Pencil and ruler.
5. Stationery knife.
6. Elements for decoration, at your discretion.
Let's start making 3D cards for the New Year
From colored cardboard, you need to cut out several triangles; for this purpose, take curly scissors. In the future, these triangles will become the crowns of trees. It is not necessary to make them the same, you can experiment with the sizes.

Now let's get down to preparing the base of the postcard. For this purpose, you need to take two sheets of cardboard and paper. Cardboard will play the role of the base, and paper will be the inside of the postcard. And bend them in half
A sheet of paper that will play the role of an inner liner must first be drawn, and then cut with a clerical knife or scissors. The marks are applied perpendicular to the fold of the paper and are something like steps, namely stumps for poor Christmas trees.

The crowns of Christmas trees prepared in advance now need to be glued into place. To do this, open the inner insert of the postcard, you should get something like steps, and stick Christmas trees on them. Have you already understood the principle of the postcard?


We invite you to familiarize yourself with the idea for creating a very original greeting and not only a New Year's card. But still, it will look like the usual sheets folded in half. However, here is a completely different principle. But the recipient will definitely like it.

So, what do you need to create a dynamic New Year's greeting card:
1. Thick colored cardboard or / and paper. A4 size will suffice.
2. Scissors.
3. Stationery knife.
4. Compass.
5. Thick enough thread.
On a standard sheet of A4 paper, draw a circle using a compass. Then cut it out. Now fold the resulting circle in half and with the help of scissors make cuts that are arranged in turn and reflect the contours of the circle. As you move away from the center, the incisions should become longer.

After that, you need to straighten the circle. Glue a thread to the center of the circle. To make the product more interesting. The thread is threaded through the top and circles of cardboard of a contrasting color are glued to it. The thread is positioned so that the glued circles are located under the base of the circle. Now, if you pull the string, the design will turn into an unusual garland shaped like a Christmas tree. And inside it will playfully see bright circles.

Now you need to glue the Christmas tree after returning it to the folded state. When gluing, make sure that you do not glue too much, and the Christmas tree has the opportunity to unravel. The base to which you will glue your dynamic Christmas tree can be made from cardboard folded in half.
That's basically it. You have got an unusual and dynamic postcard, it remains to write congratulations and give them.
Idea number 10. New Year's cards, decorated with double-sided tape with a backing
We offer you several options at once under one heading. Since they have a common element, all variants use double-sided adhesive tape with a backing as a basis for decorating and fixing elements.
So, what do you need to create a New Year's greeting card using double-sided tape:
- Double sided tape with backing.
- Thick colored cardboard or paper. A4 size will suffice.
- Scissors.
- Shaped hole punch, optional.
- Ribbons, cord or thick thread.
Option 1. First you need to prepare the basics for postcards. This is very easy to do - you just need to take a few sheets of cardboard and bend them in half. You can make not only rectangular shapes, but the simplest and most familiar just like that. Triangular or cardboard ones will also be quite original, just keep in mind that not all decor elements look equally good, for example, on a round shape.
Video, DIY New Year cards
Then we will prepare the elements for decoration. From colored paper, cut out many circles from colored cardboard using a shaped hole punch. It is desirable that the size is different. Well, if there was no hole punch on the farm, you can simply cut everything out with scissors. True, this will take more time, but we are not looking for easy ways, are we? It is better to take paper that is hard and different in color. The ideal option would be to use colors that are several tones different, but within the same shade. You can take paper imitating a mirror surface and introduce it as an addition.

Now you need to take the prepared base of the postcard and stick adhesive tape on it. By creating a semblance of a circle on the sheet. Then remove the protective layer from the scotch pads and glue multi-colored circles. Repeat this process as you add more layers. Try to alternate circles of different sizes. The number of layers is up to you. Add them until you get the desired result. Then simply tie a colorful ribbon with a bow and glue it at the top, making the mugs glued in layers into a kind of wreath.
Option 2. Quite a minimalist option. Good for men or guys. You will need a prepared postcard base, on which you will stick a piece of adhesive tape, and on it a square of plain cardboard. Decide on the size yourself. Place a slightly colorful ribbon bow at the top of the cardboard square. It will turn out some kind of stylization of the image of the gift.

Option 3. Cut out several rectangles of various shapes from colored cardboard. They must be wrapped with a thread in the manner of wrapping gifts with ribbon and leaving a bow on top. Then glue the postcards in a row along the bottom edge of the blank on the double-sided cattle. You can succinctly add "Happy New Year!"
Simple New Year's cards with your own hands. Ideas for creativity
Idea number 11.
This is an extremely interesting idea. Because even the thought of stapling paper is already surprising. This idea is based on an appliqué that is fixed in place with a machine stitch. Naturally, the line can also be applied manually, and you can find a certain charm and originality in this. Both options should be tried, as different stitching techniques can give a completely different look to the postcard.

So, what do you need to create a New Year's card decorated with a sewing machine line:
1. Sewing machine. In principle, you can make stitches by hand.
2. Thick colored cardboard or paper. A4 size will suffice.
3. Scissors.
4. Additional decorations at your discretion.
Let's get started.
Now cut out decorative elements from any type and coloring paper. It can be Christmas trees, balls, stars. And the paper can be plain or colorful, monochrome. Wrapping, for scrapbooking, simple, printed on a printer or colorful pages of old magazines. Then fold all the elements on top of each other and sew with a typewriter. Try to fix all the layers with one line. Take a bright thread so that it can be clearly seen against the general background. Set the thread tension to the lowest setting.
You can have one element or make many layers. Experiment to your heart's content. The line can be succinctly arranged or made many by crossing them.
Video, Do-it-yourself greeting cards for the New Year and Christmas
Here is a selection of ideas we got this time. We hope that you have found something for yourself among the proposed ideas. Give more cards and fill them with warm wishes and kind words. Happy New Year!
Guys, we put our soul into the site. Thanks for that
for discovering this beauty. Thanks for the inspiration and goosebumps.
Join us at Facebook and In contact with
In stores today you can find New Year's cards for every taste. But the editorial website believes that homemade ones are much warmer. After all, when we make a thing for someone with our own hands, we put our love into it.
Below we have collected ideas for beautiful, original and, most importantly, “quick” New Year cards, the creation of which does not require any rare materials - beautiful paper, cardboard, and colorful ribbons and buttons lying around the house.
Volumetric Christmas trees
Volumetric Christmas trees made of white and colored paper are so simple to make that you can make them at the last moment. Read more on the Bog&ide blog.
Make 3D Christmas trees even faster. All you need is a ruler, sharp scissors and cardboard. This blog shows how to cut them.
Penguin
We really liked this penguin, well thought out. You will need black and white cardboard (or white paper), an orange paper triangle and 2 miniature snowflakes that we all know how to cut out. The eyes are, of course, the highlight of the postcard, and you will have to look into the hobby store for them (or tear them off an unnecessary children's toy, with the consent of the children, of course).
gifts
For this cute and simple postcard, you need 2 sheets of cardboard, a ruler, scissors and glue. As well as pieces of wrapping paper that you have left over from gift wrapping, ribbons and ribbons. The manufacturing principle is very simple, but for those who want more details, we advise you to look at this blog.
Santa Claus
A friendly Santa Claus (or Santa Claus) can be made in just half an hour. The red hat and pink face are strips of paper pasted onto a card or gift bag. Fur hats and beards are obtained as follows: you need to take drawing paper and simply tear off strips of the desired shape to get uneven edges. Stick on a postcard over the red and pink stripes. And then draw two squiggles - a mouth and a nose - and two dots - eyes.
simple drawings
Irresistible in its elegance, the idea is to draw Christmas balls with patterns with a black gel pen. The main thing here is to draw the correct circles and mark the lines for the patterns. Everything else will not be difficult - the stripes and squiggles that you draw when you are bored.
The same principle that underlies the postcard with black and white balloons. Simple silhouettes, painted with simple patterns, this time in color - this is best done with felt-tip pens. Warm and very nice.
Lots and lots of different trees
A couple more ideas from the Bog&ide blog. For the first, you will need decorative tape or colored cardboard (with or without glitter - now you can easily buy these at the stationery store or hobby stores). For the second - elegant straws for drinks and good glue.
Here you can use paper or cardboard with a pattern left over from children's crafts, or wrapping paper for gifts. Christmas trees are sewn in the center - this is not necessary at all, you can glue them. But if you really want to, then you must first make holes with a thick needle along the ruler, and then sew with a thread in 2 rows - up and down, so that there are no gaps. Draw a snowball with white gouache.
A laconic and stylish idea is a grove of Christmas trees, one of which is glued to double-sided foam tape (and therefore rises above the rest) and decorated with a star.
For this card, you need 4 or 3 layers of cardboard (you can do without red). As a color layer, you can use not cardboard, but paper. In the upper, white one, cut out a Christmas tree (a clerical knife will do well) and glue it on double-sided tape for volume.
A round dance of Christmas trees from various remnants of cardboard, scrapbooking paper, wrapping paper is tied with a simple ribbon and decorated with a button. Try playing with colors and textures - there are an incredible number of options here, using different colors of ribbons, paper and even fabric.
Wonderful watercolor so in the spirit of the New Year and Christmas! A simple watercolor sketch is within the power of everyone, even those who last painted with paints in their school years. First you need to outline the patterns with a pencil, color them in, and when it dries, gently wipe the pencil sketches and supplement the patterns with a felt-tip pen.
Winter landscape
For this postcard, it is better to use structured cardboard, or you can get by with plain, smooth cardboard - it will still turn out spectacularly. Cut out the snow landscape and moon with sharp scissors and paste onto a black or navy blue background.
Another white and green variant of the winter landscape that will take a little more time. If you find velvety cardboard (remember, crafts were made from this at school), it will be great, if not, you can just paint the Christmas trees with a felt-tip pen. Snow - Styrofoam disassembled into peas. You can also make circles out of cardboard with a hole punch and glue them to the postcard.
hugging snowman
The author of the My kid craft blog made this snowman with her children. The snowman throws up his hands happily when the card is opened. Wishes can be written inside. It will be interesting for children to make an application (and paint their hands and a hat), but for those who want everything to be fast, the blog has ready-made parts that can be printed on a color printer and simply glued together.
More snowmen
Snowmen, inquisitively peering into the starry sky, will look more advantageous if they can find a bright ribbon for a scarf.
For the postcard on the left you need unpainted cardboard, white drawing paper and foam tape with which you will stick the snowman. Snowdrifts are made simply: you need to tear off the drawing paper so that you get a ragged wavy edge. Fill it in with a blue pencil and blend it with anything, even with a finger or a piece of paper. Also tint the edges of the snowman for volume. For the second you will need buttons, a piece of fabric, eyes, glue and colored markers.
You will want to keep such a postcard for a long time. And all you need is circles of cardboard, a nose and twigs of colored paper. All this must be collected using double-sided bulk tape. Draw eyes and buttons with black paint, and a snowball with white gouache or watercolor.
Balloons
Balls are one of the main symbols of the New Year and Christmas. These are made from velvety colored paper and ribbons. But balls are such a win-win option that you can afford to fantasize here: make balls from patterned paper, wrapping paper, fabric, lace, cut out from a newspaper or a glossy magazine. And the strings can simply be drawn.
Another option is to stick paper with a pattern on the inside of the card, and cut out circles on the outside with a sharp stationery knife.
Volume balls
For each of these balls, you will need 3-4 identical circles of different colors. Fold each in half and glue the halves to each other, and the two extreme halves to the paper. Another option is colored stars or Christmas trees.
colorful balls
Wonderful translucent balls are obtained using a regular pencil eraser. It is worth to begin with to outline the outlines of the ball with a pencil. Then dip the eraser into the paint and leave marks on the paper. Fun and beautiful.
Postcards with buttons
Bright buttons will add volume to postcards, as well as evoke subtle associations with childhood.
New Year's Eve is the best few weeks of the whole year! And the New Year's pleasant fuss - the choice of gifts, the preparation of the menu and the festive program, etc. - gives simply unforgettable impressions that you “live” for a long time.
Close people always want to give not just a gift, but also a part of themselves, to put their whole soul into New Year's greetings, to present not an ordinary present, but warmth and care. New Year cards 2019 in scrapbooking style do a great job with this! A handmade gift, even if it is a postcard, will convey much more bright feelings than a souvenir bought from a store.
It is customary to give colorful cardboard postcards for any holiday, and the New Year has always been and will be an excellent occasion to follow the good old tradition of giving greeting cards to relatives, friends, colleagues and acquaintances. A postcard, especially a handmade one, will be a significant gift for everyone.
Such a present is able to give joy not only to the recipient, but also to the one who gives a postcard made with his own hand, with all love and warmth. Our site will be happy to share with you some tricks, which you will not be ashamed to present even to the boss.
Postcard "Outside the window winter"
To create a postcard you will need:
- bright cardboard;
- white cardboard;
- thick paper with a pattern;
- scissors;
- glue;
- cotton buds;
- glitter, silver and green paint;
- figured hole punch;
- stationery knife;
- a suitable picture (instead of it, you can cut out a word or phrase from cardboard as desired);
- thread, needle.
Step 1. Colorful cardboard should be made in the form of a square, and a slightly smaller square should be cut out of paper with a pattern (preferably suitable for the theme of the house, but you can also take just brown or green paper). Double stitch or hand sew the paper to the cardboard. Slightly "age" the edges of the paper, moving away from the cardboard and tugging at the free edges with your fingers.
Step 2 Using scissors and a utility knife, cut out a window with opening transoms. You should glue the window in the center of the future postcard, and place a picture of a suitable size and theme under the window.
Step 3 Cut out grape leaves from cardboard and glue them randomly around the perimeter of the window.
Step 4 From cotton buds it is necessary to cut off cotton rounds and, gluing them one to one, create a semblance of a bunch of grapes.
Step 5 It remains only to slightly tint the leaves with green paint, sprinkle the card with sparkles and decorate with silver paint.
New Year card with mittens

To create a postcard with mittens you will need:
- cardboard;
- knitted white braid (lace braid);
- narrow white lace;
- a small strip of paper with a wish;
- stationery knife;
- glue;
- scissors;
- beads, pompoms, braid, etc. for decoration.
Step 1. A rectangular sheet of cardboard should be folded in half and stick or stitch on it the front and inside of the future postcard - multi-colored squares of scrapbooking paper. Since the theme is New Year's, red and green colors are best suited.
Step 2 From thick paper or cardboard in a contrasting color, cut out two mittens and glue them in the center of the front of the card. On the base of the mittens, you can glue a braid with small pom-poms. Take a thin cord, tie it in the center with a bow, and glue the free ends to the base of the mittens.
Step 3 At the bottom of the card, glue a ribbon and a strip of paper with a congratulation. You can artificially age the parchment by passing the paper over the candle (it's best to lightly scorch the edges).
Step 4 It remains to decorate your postcard and a wonderful present for the New Year is ready!
Christmas card with a Christmas tree

To create an original postcard you will need:
- cardboard for postcards rectangular;
- cardboard for the Christmas tree of a triangular shape;
- scrapbooking paper in different colors;
- lace braid;
- multi-colored threads for knitting;
- bright colored ribbon
- glue;
- scissors;
- a narrow strip with a printed wish for a happy new year;
- figured hole punch for cutting snowflakes;
- beads for decoration.
Step 1. First, fold a rectangular sheet of cardboard in half to make a postcard blank. On the front side, glue scrapbooking paper the entire length and width of the front of the card. If the paper is not glued, but stitched on a typewriter, it will turn out more beautiful and original.
Step 2 In the very center of the front side of the postcard, you need to glue a rectangular or square sheet of paper of a different color, suitable in size for the Christmas tree blank. It is better to choose a New Year's theme in paper color.
Step 3 It's time to make a colorful bright Christmas tree. To do this, take threads of different colors and different thicknesses and wind them around a triangular cardboard blank, periodically smearing them with glue. The threads should thickly envelop the triangle so that there are no empty spaces left. Glue the Christmas tree in the center of the card.
Step 4 Now we can decorate our postcard. The Christmas tree can be “dressed up” in shiny beads, and a small golden star can be “hoisted” on the top of the head. Using a figured hole punch, make white snowflakes and glue them randomly. On the base of the Christmas tree in the full width of the front side of the postcard, glue a ribbon with a bow tied in advance on it. From the bottom of the ribbon, lace braid will look good. Don't forget to include a New Year's resolution on the card.
Below you will find many ideas for creating a truly sincere gift for the New Year, which will not be shameful to give to a friend, soulmate, and relatives.