Or briefly, the WTO has already been discussed in this blog.
Let me remind you; WTO is work with iron in products.
I am often asked the question: how to remove excess raids (surplus on fabric from darts, for example) from some operations in products with natural fibers?
The main thing when carrying out such work in the manufacture of products is calmness and patience.
At the beginning of the practice, it will take a long time, but I assure everyone that with time and experience anyone will be able to learn how to perform such operations quickly and efficiently.
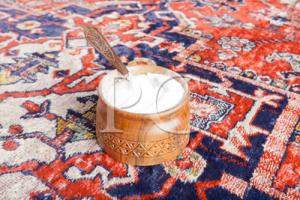
WTO sutyuzhivaniya surplus from the tuck, I propose to consider when sewing classic women's trousers from a fabric that includes 60% wool.
First, we stitch the tuck from top to bottom.
Here's what happened:

We arrange the detail of the cut of the trousers so that the tuck is in our direction
and iron the tuck itself, after slightly wetting it from the sprayer / pulverizer

Then we iron the tuck in the direction we need.
In this case, to the middle seam. 
And after that we already moisten / splash a little lower in a circle of tuck
and start sutyuzhivat slack on the fabric.
To do this, in a large circle (counterclockwise, if you are left-handed, then clockwise) rearrange the iron, slightly stagnating in place to allow the slack to dry and decrease ...

Rearranging... and ironing...

round....

Then we make a small circle, i.e. already closer to the center where our tuck ends ...

And we capture the center a little .... and again .. we stop the iron ...

We complete the circle...

If you still have at least a little excess on the material, then repeat all the operations again.
As a rule, to repeat, you only need to "walk" in a small circle and stand a little with the iron already in the middle ...
The detail of the product should eventually turn out to be even and dry.


Let's compare what happened and what needs to be worked on...
Darts are used in the manufacture of all types of products for men, women and children. According to the location, the tucks can be elbow, shoulder, upper, on skirts and trousers - along the waist line, on the front - along the waist line, directed up and down. Darts can be split, continuous, can turn into folds and tucks (Figure 6.6).
Figure 6.6 - Processing tucks
Undercuts are usually used in women's and children's dresses, coats to create a loose fit, replacing darts on the front of the dress, skirts, sleeves. Darts and undercuts in the product must meet the following requirements: symmetrical arrangement on the parts, tight fit of the allowances of the part, no slack at the ends and material flow due to a difference in its thickness, the presence of a bartack at the ends of the lines.
The cut tucks are ground, starting from the cut of the part, with a seam 7-10 mm wide, reducing the width to nothing and ending the line 10-15 mm below the cut. If the tuck is located in the middle of the part, it is ground down, starting and ending the line 10-15 mm from the ends of the tuck. The ends of the tucks are fixed. The tuck is ironed out, sutyuzhivaya slack at the end and fixing it in products with a lining with a strip of material with an adhesive coating. It is possible to lay a strip of material when grinding the tuck, followed by notching and bending this strip to one side (photo 6.13, a, b, c, d, e, f, g, i)
 but)
but)
 b)
b)
 in)
in)
 G)
G)
 e)
e)
 e)
e)
 g)
g)
 And)
And)
Photo 6.13 - Processing a split tuck
Continuous tucks are ground in the same way as split ones, according to pre-applied markings (fold lines and ends). The tucks are ironed or ironed, placing the middle line along the stitching seam (photo 6.14, a, b).
 but)
but)
 b)
b)
Photo 6.14 - Processing a continuous tuck
In products made of woolen suit and coat fabrics, a strip of fabric is placed along the entire length of the tuck. When ironing the tuck, the allowance is placed on one side, and the strip on the other, which is necessary to obtain a uniform thickness in the tuck area (photo 6.15, a, b, c, d, e, f, g).
 but)
but)


 G)
G)
 e)
e)
 e)
e)
 g)
g)
Photo 6.15 - Processing a tuck with a strip of fabric
Continuous darts are used in products made of thin fabrics, as well as in outerwear made of dense and thick fabrics, if the length of the tuck is not more than 160 mm. Seam allowances for split and non-cut darts can be stitched or stitched in products made from materials that are difficult to WTO.
In products made of artificial materials (furs, leather, suede, quilted fabrics, raincoat fabrics), as well as from natural leathers, furs, suede, tucks are made with an overlay seam with open or closed cuts or are ground down without laying strips of fabric.
Connecting the components of the shelves and back.
In accordance with the design of the shelves and the back of the product can be one-piece or consist of several parts. The components of the shelves and the back can be connected with stitching, stitching, false seams with closed sections, etc., which is due to the technical description for the model.
For example, consider the processing of a split back, consisting of two halves. The middle sections of the back are equalized and stitched with a seam 10 mm wide along the right side of the back, starting from the cuts of the neck, without tension and fit of the parts. The seams are ironed or ironed according to the description on the model.
When connecting the parts of the parts of the shelves and the back of the fabric in a strip and a cage, it is necessary to adjust the pattern on the parts so that it matches on the parts of the parts or is located symmetrically to the seam line.
Molding of shelves and back parts by wet-heat treatment.
The purpose of this operation is to give the shelves and back a three-dimensional shape corresponding to the design of the product. It is performed using special or universal presses with special pillows, as well as irons. The shape of the parts is given by suturing and pulling the corresponding sections of the parts, their cuts. The amount of suture and retraction is laid down in the design of the product when developing the model (Figure 6.7).

Figure 6.7 - Forming shelves and backs by WTO
At present, when developing the design of products, the shape of the parts of the shelves and backs in most cases is provided with various design solutions, which leads to a reduction or even elimination of operations for molding these parts during HTO.
To fix the shape given during the WTO and to protect the sections from stretching, in order to maintain the shape and size of the design lines, an adhesive or non-adhesive edge is laid along the sections of the parts. The location of the edge, the degree of edge tension, the amount of fit of parts on the edge are determined by the design, taking into account the type of material and are indicated in the description of the model. As a rule, the edge is laid along the cuts of the armhole of the shelves and the back, the shoulder cuts of the shelves, the cut of the neck of the back, i.e. cuts cut at an angle to the warp thread and easily stretched. The edge is laid at a distance of 3-5 mm from the cuts of the parts.
Features of processing tucks in the manufacture of light women's clothing:
1. Darts are made continuous.
2. Grind tucks without additional strips of fabric.
3. In products made of cotton fabrics, tucks are not ironed during processing, they are only laid in the right direction or laid out, and ironing is carried out during the final WTO of the entire product.
4. The bartacks at the end of the tucks are replaced by tying the ends of the threads into knots.
5. If the tucks are sewn (or squandered), then the finishing line is performed without fasteners at the ends of the tucks (this rule is also used in outerwear) The ends of the finishing lines are brought to the wrong side, tied.
Undercut processing
1. Cutting out undercuts.
2.1. Undercut stitching.
studfiles.net
2.4. Methods for processing darts and undercuts
Darts are used in the manufacture of all types of men's, women's and children's assortment. According to the location, the tucks can be elbow, shoulder, upper, on skirts and trousers - along the waist line, on the front - along the waist line, directed up and down. Darts can be split, continuous, can turn into folds and tucks.
Split tucks are ground, starting from the cut of the part, with a seam 7-10 mm wide, reducing the width to nothing and ending the line below the cut by 10-15 mi. If the tuck is located in the middle of the part, it is ground down, starting and ending the line 10-15 mm from the ends of the tuck. The ends of the tucks are fixed. The tuck is ironed out, the slack at the end is sutured and it is fixed in products with a lining with a strip of material with an adhesive coating. You can also lay a strip of material when grinding the tuck, followed by notching and bending this strip in one direction.
In products made of woolen suit and coat fabrics, a strip of fabric is placed along the entire length of the tuck. When ironing the tuck, the allowance is placed on one side, and the strip on the other, which is necessary to obtain a uniform thickness in the tuck area.
Continuous darts are used in products made of thin fabrics, as well as in outerwear made of dense and thick fabrics, if the length of the tuck is not more than 160 mm. Seam allowances for split and non-cut darts can be stitched or stitched in products made of materials that are difficult to wet heat treatment.
In accordance with OST 17-745-78, the unification of the main parameters of straight continuous darts in products for men, women and children was carried out. The unification of the shapes and sizes of tucks made it possible to create a semi-automatic machine for their grinding.
Darts, turning into soft folds, can be made in the form of tucks, one-sided and two-sided soft folds. Darts, turning into a one-sided fold, grind along the marking line, first across the allowance, and then along the sides.
Darts, turning into oncoming soft folds, grind off from the transverse marking line with one line. The seams of the tucks are ironed only in the area of grinding. The ironed tuck is fixed with a line.
Folded tucks (tucks) are ground in the same way as uncut tucks, along the marking line.
Undercuts are usually used in women's and children's dresses, coats to create a loose fit, replacing darts on the front of the dress, skirts, sleeves.
In the undercut, one section of the part is cut out longer than the other to the depth of the tuck solution. A line is laid along this cut on a two-needle lockstitch machine with a gathering device. Then the sections of the parts are ground down (like tucks), a line is laid along the sections with assemblies. Depending on the model, the undercuts are also connected with a stitching seam. If the distance between the lines exceeds the width of the seam allowance, a strip of material is placed under the seam line from the inside.
2.5. Methods for processing finishing elements of clothing
braids, stripes, inlays, flounces, frills, appliqués,
puffs, ruffles, embroideries, etc.
The processing of parts with a finishing strip of fabric consists of the elements of connecting the strip with the part and sealing the ends of the strip. The strip is sewn on a two-needle machine with a distance between the needles of 12, 19, 28 and 32 mm, with the sections folded on both sides with the help of a device and the strip is fed from a roll.
If the finishing strip during further processing reaches the cut of the part, then its ends must enter into the seams of the stitching of these parts; if, according to the model, the strip of fabric does not reach the cut of the part, it is adjusted to the markup. Then the strip is cut off and the free end is sewn on a sewing machine, bending immediately inward. When stitching a strip of fabric along a closed contour, the end of it is adjusted by bending the sections inward by 1-2 mm from the cut and going to the other end of the strip by 7-10 mm. Individual strips can be adjusted using the fixture at the same time as the piping.
Finishes are such parts that are connected to the main part without bending the sides. These trims include braid, lace, cord. For stitching braid along straight and slightly curved contours, a two-needle machine 852x10 cells is used. with fixture 1-22 MOMZ TsNIIShP, and for adjusting the finishing braid on a part with one bent cut - a machine 803x6 class. with fixture 1-58 MOMZ TSNIISHP.
To stitch lace on a detail with a patch seam, use the device 1-37 MOMZ TSNIISHP, which is installed on a machine of 335 cells. firm "Minerva", performing shuttle zigzag stitches and having a knife for cutting sections of parts near the line.
To finish parts with a cord or shaped braid, a special foot with a hole for a cord or braid fed into cassettes or bobbins is installed on the sewing machine. The stitching of a braid or cord on a part can be done so that the stitching is not visible from the front side.
The processing of frills, flounces, frills, peplums consists of connecting their parts with stitched seams 2-5 mm wide with and without overcasting of sections, depending on the properties of the fabrics; registration of open sections of parts with edge seams with overcasting; stitching open or swept cuts, edging or melting cuts. In flounces, capes and basques, it is possible to design cuts with overstitched seams if there is a lining or an underlined strip of fabric
Flounces, frills are sewn parallel to the cuts on a two-needle machine with a shirring device, the distance between the lines is 1-4 mm. Shuttlecocks and assemblies are connected to the main parts with stitching, stitching, overhead seams and can be sewn into finishing tucked seams and folds.
Ruffle with finished edges is sewn in parallel lines in the middle with shirring, the distance between the lines is 2 mm. Then the quilling is sewn onto the detail along the intended line in the middle between the lines.
To obtain a frill with a figured edge, the line is laid in zigzag lines. Line parameters are taken according to the model.
Puffs can be made on the machine by laying parallel stitches on the right side with loose stitches using the guide foot. At the beginning and end of the line, they are fixed, the fabric is evenly collected on the lower threads. To protect the lines from blooming under the puffs, lay a lining from the main or lining fabric. The ends of the lines forming the puffs must subsequently fall into the seam or they are closed with folds. Puffs for relief can be made with a cord.
Applications are applied to parts using a two-head semi-automatic zigzag stitch with simultaneous trimming of the stitch, and also applied by duplicating with an adhesive film.
Embroideries on the details of the product are filled on special machines and semi-automatic machines. On semi-automatic machines, the embroidery pattern is set by the program.
Materials such as suede, velveteen, felt, split leather, etc. can be used as finishing products. Transfer patterns are also used for finishing by thermal printing (transferring a pattern from paper to fabric at a pressing temperature of 180-200 ° C).
Task 3. Establish methods for processing clothing details.
Based on the study of methods for processing clothing parts, establish various processing methods for the selected item and present in accordance with the table. 4.2.
Table 4.2.
Parts processing methods
Task 4. Choose a progressive processing method for one of the clothing items.
The choice of a progressive processing method and the sequence of operations are based on the study of processing methods. The sequence of compilation - in accordance with the table. 4.3, 4.4
Table 4.3.
Technological sequence of parts processing
(name selected items)
Requirements for a lab report:
1. Study the constructive variety of clothing details.
2. Study processing methods: slices, fill in table 4.1.
3. Establish methods for processing clothing details: valves, pats, leaflets, shoulder straps, straps, belts, belt loops, patch pockets, yokes, inserts, darts, undercuts, finishing elements (braids, shelves, inlays, flounces, assemblies, ruffles, appliqués , puffs, embroideries, etc.), fill in table 4.2.
4. Choose a progressive processing method for one of the clothing details, fill in table 4.3.
5. Draw conclusions, write down in the report.
Test questions:
1. How are sections of parts processed depending on the type of fabric?
2. More advanced methods for processing small parts (valves, leaflets, shoulder straps, etc.).
3. What are the methods of processing the upper edges of patch pockets?
4. What are the types of tucks and methods of their processing?
5. What are the finishing elements of clothing and their processing methods?
1. Gvozdev, Yu.M. Chemical technology of leather products. M.: ed. Academy, 2006.
2. Kryuchkova, G. A. Technology of sewing and knitwear. M.: ed. Academy, 2009.
3. Terskaya, L. A. Technology of cutting and sewing fur clothes. M.: Academy, 2004.
studfiles.net
20. Processing of tucks in various products.
To give the product a certain shape in accordance with the figure of a person, as well as for a better fit of the product to the figure, tucks are made on the main details. The solution of tucks and their number depend on the tightness of the fit of the product. Depending on the location on the product, the tucks are divided into upper and from the waist line. The top darts are located from the shoulder seam, neck, armhole or side seam. These darts are necessary to obtain the bulge of the product in the chest area. Darts from the waist line are necessary to obtain a fit of the product according to the figure in the waist area. According to the processing method, tucks can be split and continuous. In a light dress, the tucks are continuous. Depending on the model, the darts can turn into soft folds, they can be replaced by darts-tucks, folds, undercuts and embossed seams. The tucks coming from the cut mark the parts from the inside along the auxiliary pattern with three lines, and those located in the middle of the part - with four lines: the middle, side and lines that determine the beginning and end of the tuck. The part is folded with the front side inward along the midline, first the tucks are swept along the side line, and then grinded. The tucks coming from the cuts of the parts are ground, starting from the cuts, and ending strictly at the transverse lines that define the end of the tuck. Darts, located in the middle of the part, grind off, starting from one of the ends. Depending on the model, the tucks can be stitched on the front side. Stitching is performed with silk threads at a distance; provided by the model. In this case, the upper thread is brought inside out and tied with a knot. Darts, turning into soft folds, are also marked from the inside with three or four lines. Darts, designed along curly lines, must be swept away before grinding. The length of the running stitch is 1.5 cm. The basting threads are removed after stitching, the tucks are ironed on one side, depending on the model.
21. Processing coquettes and their connection with the product.
Coquettes come in various shapes: straight, oval and curly. According to the method of connection, coquettes can be stitched and overhead. The lower edge of the yoke can be stitched and detached, and also trimmed with piping, frill, frill, lace, etc. Processing overhead coquettes with straight edges. On the yoke, a hem line is drawn, and on the main part, the line of the edge of the yoke. The cut of the coquette is bent towards the wrong side along the intended line, in products made of woolen and silk fabrics it is swept up with straight stitches 1-1.5 cm long and ironed, and in products made of fabrics on which traces of the weaving threads are difficult to remove, they are ironed without preliminary swaging . The yoke is applied to the main part, aligning the folded edge of the yoke with the marked line on the main part. In products made of woolen and silk fabrics, the yoke is basted with hand stitches 1.5-2 cm long and adjusted at a distance provided by the model. The threads for overcasting the edge and basting the coquette are removed, the seam of the connection between the coquette and the main part is overcast. The lower edge of the coquette is ironed.
studfiles.net
3. Processing of tucks and undercuts.
The tuck is swept from the end to the wide part, and grinded from the wide part to the tip. When sewing, the line should come to naught well by the end of the tuck.
When ironing, tucks are laid out on two or on one side. When ironing darts in one direction, the fold of the fabric from the inside should always be directed towards the middle of the front or back. If the products are made of thick fabric, then the tucks are cut and ironed on two sides.
Features of processing tucks in the manufacture of light women's clothing:
1. Darts are made continuous.
2. Grind tucks without additional strips of fabric.
3. In products made of cotton fabrics, tucks are not ironed during processing, they are only laid in the right direction or laid out, and ironing is carried out during the final WTO of the entire product.
4. The bartacks at the end of the tucks are replaced by tying the ends of the threads into knots.
5. If the tucks are sewn (or squandered), then the finishing line is performed without fasteners at the ends of the tucks (this rule is also used in outerwear) The ends of the finishing lines are brought to the wrong side, tied.
Undercut processing
Undercuts are a kind of darts and a finishing element of clothing. Undercuts can be on the bodice, skirt and sleeves - depending on the model.
Undercuts, both simple and curly, are treated with a seam, stitching to the edge and stitching of any width, depending on the style.
When processing undercuts with a seam or edge stitching on the front side of the product, the undercuts are made 1 centimeter shorter than necessary, and the line is continued beyond the undercut by 1 centimeter.
When processing an undercut with a stitch of any width, the upper and lower undercut lines are turned with a piece of the same fabric, then cut along the undercut line, the lower side is assembled into an assembly and the upper undercut line is sewn onto it.
1. Cutting out undercuts.
The undercut is designed so that one of its cuts is longer than the other (to form gathers or folds).
2. Gathering at undercuts with gathers.
According to the allowance of a long section of the undercut, two parallel lines are laid (1 and 1 ′), the lower ends of the threads are pulled together; the formed assembly is straightened evenly (or according to the model). The length of the sides of the undercut is equalized.
2.1. Undercut stitching.
The undercut is ground down, equalizing the cuts of the sides (by analogy with the grinding of split tucks). The line is laid from the side of the assembly.
2.2. Seam processing.
The seam is directed to the sides without gathers, ironed. If provided by the model, then adjust the undercut allowance for the part.
3. Processing undercuts with folds.
Unlike gathered undercuts, pleated undercuts have pleats instead of gathers on the long side of the undercut.
studfiles.net
Lesson summary on the topic "Processing tucks"
Lesson topic: Nodal processing of a skirt. Darts.
Lesson Objectives:
Educational: to acquaint students with the types and purpose of darts, to form students' knowledge and skills in processing darts in a light dress;
Educational: to cultivate a culture of work and a sense of responsibility;
Developing: to develop attentiveness and accuracy, observation and independence in work.
OUUN - To form the ability to compare objects in shape, design and features of the material. Develop logical and spatial thinking.
Basic concepts: darts, constructive lines.
Teaching and visual aids: a mannequin, one half of which is wearing a garment without darts, the other half is a garment with darts, sewing samples (unusually large) of the step-by-step processing of darts, slides, video clips.
Lesson type: combined.
Intersubject communications: history, drawing.
Preparatory stage: students are given the task to collect material about the styles of clothing from different historical eras. Preparation for the lesson consists of independent work of students with additional literature, preparation of an electronic presentation and individual consultations of the teacher.
On the board: the topic of the lesson, the epigraph; cards with line names, cards with measurements and calculation formulas, sizes of women's clothing, a drawing of a straight skirt.
Lesson plan (2 lessons of 40 minutes).
Organizational moment (1 min.).
Presentation of the topic and purpose of the lesson (1 min.).
Knowledge check (5 min.).
Presentation of new material (together with students) (10 min.).
Questions to consolidate knowledge (5 min.).
Exercise “Processing a tuck” (18 min.).
Physical culture minute (1 min.).
Practical work No. 1 “Technology for processing tucks”; Practical work No. 2 “Production of samples for processing tucks” (35 min.).
The final part of the lesson, summing up and grading (3 min.).
DURING THE CLASSES
1. Greeting students, roll call, checking the readiness of jobs.
2. Sounding the topic of the lesson. The epigraph to the lesson (written on the blackboard) is read by the teacher: “People are not born with skill, but they are proud of the acquired craft” (proverb).
From history: Tailor and furrier are one of the most difficult professions associated with the art of dressing a person. Since ancient times, these crafts have been taught since childhood. The study was long and difficult. The work of a tailor in the XIV-XVII centuries. It was quite hard physical labor. But with the advent of universal sewing machines, sewing has become much easier.
The purpose of our lesson: with the help of modern sewing equipment and tools, learn how to mark darts on fabric and process darts on the details of garments.
3. In order to restore the concept of a drawing in the memory of students, students are offered a task at the blackboard (4 people):
1) Cards with the names of the lines are fixed on the board with the help of magnets - chest line, waist line, horizon line, hip line, life line.
The task is to correctly select and arrange the cards on the mannequin and the skirt drawing and show the direction of conditional lines for taking measurements and building a drawing;
2) Cards with measurements and calculation formulas are fixed on the board: Sat: 2 + Pb, Zp, Dts / 2, Di.
The task is to correctly select and place the cards on the lines of the drawing of a straight skirt;
3) A drawing of a straight skirt is fixed on the board.
4) The size of women's clothing is written on the board: 158-96-104.
The task is to explain what these numbers mean.
The rest of the students observe the performance of the task, determine its correctness and point out errors if they are made.
Additional questions:
On what scale is a drawing of a garment built?
What dimensional signs are divided in half when recording?
4. What is a tuck and why is it needed? To answer this question, consider the costumes of different historical eras.
Students show slides prepared for the lesson. Attachment 1
The women's costume of ancient Greece was very simple. The fabric was fixed on the shoulders with a knot or special clips and girdled at the waist, thereby creating large volumes in the chest and hips. All lines of the female figure were hidden by drapery (a garment without darts on a mannequin). Over time, the costume changed, became more refined, elegant. But large volumes still hid the female body. Modern fashion makes many demands on clothes, and first of all, convenience and practicality. The emergence of new materials contributed to the development of modern youth fashion - clothes that are super-tight, bright and beautiful (a garment with tucks on a mannequin).
How to get a product from flat parts that corresponds to the three-dimensional forms of a female figure? This is the main task of the sewing process. Of the means by which this problem is solved, the most common are tucks, they help to create the necessary fitting of the figure.
Conclusion: Excess fabric on the figure is removed in tucks.
Before continuing the lesson, let's write down the topic and set ourselves the task of finding out: what are the tucks in terms of location and design (we will present the data in the form of a diagram).
Darts can be made from the cut and in the middle of the part. Shear darts - 1 - (Fig. 1, garment with darts) have the shape of a triangle and are used in waist and shoulder products. Three tucks are located along the waist line in belt products - front, side and back (drawing of a skirt, samples of garments). By design, these tucks are divided into split and continuous. Split tucks are used when processing products from thick inexpensive fabrics (sewing samples).
The darts in the middle of the part - 2 - (Fig. 1, a garment with darts) are rhombus-shaped and are used mainly in shoulder products.
On the model, tucks are shown with the help of constructive lines in the direction of the tuck seam (Fig. 1, Appendix 1). The number and shape of darts depends on the style and size of the product. To summarize what has been said, students are offered a diagram (Fig. 2, Appendix 1).
From history: Since ancient times, boys have been taught the craft of a tailor. The business was passed down from father to son. When the student could sew and finish the costume himself, he was awarded the title of master. Such a suit in all craft workshops was called a “masterpiece”.
Marking out tucks.
The tucks coming from the cut are marked with chalk or soap on the wrong side of the part (drawn in a notebook) with three lines: the middle line, the side line and the line that limits the end of the tuck (Fig. 3, Appendix 1). The tucks located in the middle of the part are marked with the help of four lines: middle, side and lines that define the beginning and end of the tuck (see samples of step-by-step processing).
To process the tuck, the part is folded along the midline with the front side inward. So that the layers of fabric do not move during processing, the tuck is cut off with pins, placing them perpendicular to the seam line (students work with samples). Basting is carried out along the side line, starting from the top of the tuck to the cut of the part. And they grind from the cut to the top, gradually reducing the line to nothing. At the beginning and at the end of the line, a bartack is made (Appendix 2).
If the tuck is located in the middle of the part, the basting and grinding of its sides starts from one of the vertices.
The fold of the tuck and the seam are ironed. Then the part is unfolded, the tuck allowance is folded to the side and ironed. For darts located vertically, the allowance is ironed towards the middle of the product, for horizontal and inclined darts - upwards. The fabric allowances at the cut tuck are ironed out (Appendix 1, sewing patterns). At the top of the tuck, after grinding, a slack of the fabric (bulge) is formed, it is sewn from the wrong side with an iron with moisture.
5. Physical education
6. Questions to consolidate knowledge:
What are darts used for?
Which suit has more darts: women's or men's?
In what products are cut tucks performed?
How do tucks show on a model sketch?
How are the tucks on the details planned?
How are tucks ironed in products?
Looking at someone else's work, you will not be full. (Proverb)
7. Exercise. Cutout processing.
Equipment, materials and tools: a piece of cotton fabric measuring 25x30 cm, scissors, threads, a needle, tailor's pins, a thimble, a ruler, a sewing machine, an ironing table, an iron, samples of postoperative processing of tucks. instruction cards.
Work order:
TB when working with hand tools, when working on a sewing machine, when working with an iron;
In the middle of the flap of fabric, on the wrong side, outline a tuck: length 18 cm, a solution of 8 cm (4 cm from the middle of the tuck to the left and right), draw the sides of the tuck.
Fold the part with the front side inward, chop the tuck with pins, sweep, combining the sides of the tuck, starting from the top to the cut.
Stitch the tuck along the side line, starting from the cut to the top, gradually reducing the line to nothing. Make stitches at the beginning and end of the stitch. Remove basting threads.
Fold the tuck and iron the seam. Press the tuck to one side. Seal the slack at the top of the tuck from the wrong side.
Attach the sample to the album.
Self-control: the dimensions of the tuck correspond to the specified ones; the stitching line is even, starts from the cut of the fabric, ends at the fold, at the top of the tuck; bartacks are made at the beginning and at the end of the line.
During the exercise - targeted rounds of students' workplaces:
bypass to check the start of work;
bypass for the purpose of individual instruction with lagging students - explanation of the educational material, showing the implementation of work methods.
Analysis of student work.
8. Physical education
9. Practical work No. 1. Technology for processing tucks.
For students, cards of different levels of complexity were developed with questions and tasks on the topic (Fig. 4). For an “Excellent” mark, you must complete all tasks.
Work order:
In tasks No. 1 and No. 2, circle the letter of the correct answer;
Task number 3 to complete with a pencil.
10. Practical work No. 2. Making samples of processing tucks.
For students, cards of different levels of complexity with tasks on the topic were developed (Fig. 4). For an “Excellent” mark, you must complete all tasks.
Equipment, materials and tools: pieces of fabric measuring 17x20 cm, scissors, threads, a needle, tailor's pins, a thimble, a ruler, a sewing machine, an ironing table, samples of step-by-step processing of tucks, task cards.
Work order:
1) Familiarize yourself with the drawings - diagrams of tucks;
2) To process the given tucks;
3) Check the quality of the work performed;
During the execution of the assignment - targeted walks of students' workplaces to check the start of work;
rounds to check that students are complying with TB rules;
walking around to check the correctness of the work being done;
Lesson on the topic "Processing the fastener in the side seam of the skirt with braid - a zipper."
Educational element, time Educational material indicating tasks Guidance for mastering the materialUE - 0 Objectives: To consolidate the material on the topic: "Preparing the sewing machine for work."
Familiarize yourself with one of the ways to process a fastener with a braid - a zipper.
Learn to process the fastener in the side seam with braid - a zipper. Read the objectives of the lesson carefully.
UE - 1 Perform a test on the topic "Mechanical Science".
1. Specify the sequence of operations when starting work on the manual sewing machine with numbers in the left column.
Conduct a peer review. Lower the presser foot. B. Insert the bobbin into the bobbin case. B. Thread the upper thread. D. Pull the bobbin thread up through the hole in the needle plate. E. Holding the upper and lower threads with your left hand, make 2-3 stitches, turning the handwheel towards you with your right hand. E. Insert the bobbin case into the hook.
Mark with a plus sign the correct answer2. The long groove of the needle when it is installed in the needle holder must be turned: a) to the left; b) to the right; c) for the person working behind the machine; d) towards the shuttle; e) from the top threading side.
Write the missing word.3. The larger the number of the machine needle, the __________ the needle itself: 4. Such a line is considered to be of high quality, in which _________ __________ and the tension of ___________ and _____________ threads are regulated.5. Check the correctness of the answers in Appendix No. 16. Evaluate your work according to the scheme. 9-10 correct answers - "5"; 7-8 answers - "4"; 5-6 answers - "3"; Fewer - "2" Enter the result in score sheet.
Skirts are usually fastened with hooks, buttons, and zippers. The most common and convenient zipper. It is used when sewing any skirts. In a skirt, the zipper can be located in the left side seam, in the seam on the back or front panel of the skirt. Such a fastener is practical and aesthetic. Correctly sewn, it is hidden in a seam, fold or incision line, lies smoothly and does not tighten the fabric. The length of the zipper should correspond to the length of the fastener, and the color of its braid should correspond to the color of the material of the product. Zipper braid is usually sewn on a sewing machine using a special foot
Work individually UE-3 Goal: Perform practical work using an instruction card and a graphic image
1. Sweep the side cuts of the skirt. Bend the unstitched side cuts of the skirt to the wrong side along the marked lines, sweep and iron
Refer to Appendix No. 2 Work individually, pay attention to the graphic image.
UE-4 2. Baste the zipper. b) close the zipper and bast its second side so that the folds of the fabric, converging, completely cover the zipper links. Refer to Appendix No. 3 Work individually, pay attention to the graphic image. front side) 0.1 ... 0.2 cm from the lightning links. The line at the end of the fastener should run perpendicular to the side seam or at an angle at a distance of 0.2 ... 0.5 cm from the last zipper linksb) sew the edge and lower ends of the zipper tape to the seam allowance. c) check the correctness of the work performed according to Appendix No. 4
Evaluate your work according to the scheme: score "5" - for independent high-quality implementation of the product with the specified sizes and frequency of finishing set by the teacher. Score "4" - for independent implementation of the product with slight deviations from the established requirements for accuracy and frequency of finishing, which, after remark teachers can be eliminated without spending a lot of time. Score "3" - for the independent implementation of the product with significant deviations in accuracy and frequency of finishing, but which can be used for its intended purpose after its completion, which requires a significant investment of time. Score "2" - for non-fulfillment work.
Enter the result in the score sheet. Work individually, pay attention to the graphic image.
UE-6 Purpose: debriefing.1. Read the lesson objectives again. Have you achieved your goals?2. Evaluate your work in the lesson, enter your assessment in the final sheet.3. At home, continue working on the project (write down all the work that you did in class when processing the fastener in the side seam of the skirt with a zipper.) 4. Write down the task in the diaryAppendix 1.
1. 1-B; 2-E; 3-B; 4-G; 5-A; 6-D.2. b; e.3.thicker.4. stitch length; top and bottom.
Appendix 2
1. Note - means to fix the folded edges of the part with a running line. 2. Iron - reduce the thickness of the seam, fold or edge of the part.
Appendix 3
Baste means to connect parts of parts or small parts with the main part with a basting line.
Appendix 4
Self control. Check: 1) the uniformity of the width of the stitching of the zipper; 2) whether the zipper links are closed by the folded edge of the fabric; 3) the accuracy of the work.
Lesson number 5. Topic: "Industries of modern production
Goals and objectives of the lesson
In the lesson, we will explain the concepts of "world community", "scientific and technological revolution", "megalopolis", "social inequality", "Internet", "information revolution". Let us characterize modern society, analyze its positive and negative aspects, and discuss the role of technological progress in the development of human society. We will continue to learn how to make a comparative analysis, solve problems, participate in discussions, evaluate events and phenomena from different points of view. During the lesson, we will try to express our attitude to the world of entrepreneurs and think about the relationship between material and moral interests.
Plan for studying new material:
Modern production, its distinctive features. composition of modern society. Problems associated with modern production. Economy, its role in the life of society.
Let's think...
What is modern society? What can we be proud of, and, conversely, what problems urgently need to be addressed by humanity in the modern world? We will talk about this in the lesson.
1. Modern production and its distinctive features
Task: working with the material of the paragraph and additional material, characterize modern society, complete the tasks and answer the questions.
Questions for the class:
What are the forecasts of modern scientists about the future of human society? List the characteristics of modern society. What industries are leading today? How has the nature of the work of modern people changed? How is work control organized? Describe the state of development of television and telephone communications. What are the plans for the future of these industries? What new inventions did you learn about during the lesson? What is the author's conclusion?
List the technologies you already know how to use. How does technology help you?
2. The composition of modern society
In the 21st century, most of the world's population lives in cities. What is it connected with? Why have megacities become a symbol of our time? What role does agriculture play in this? Describe the composition and interests of the people of modern society.
Let's draw conclusions...
Composition of modern society
These are people of various professions: programmers, managers, designers, etc.
Main requirements: high level of knowledge, skills, professionalism and responsibility.
Modern man has great opportunities for an interesting and dignified life.
3. Problems associated with modern production
Unfortunately, not everything is so smooth and cloudless in the modern sky. What are the consequences of the transition to a new production? How does a person feel in it?
Let's play a game called Debate. I will now introduce you to two positions regarding technological progress. Your task: 1. Divided into groups, defend a certain point of view. 2. Try to convince the opposite side in your favor.
Position one:
“Technology helps a person to live easily and interestingly. Airplanes and trains carry people anywhere in the world. Food processors relieve housewives from housework. TV tells and shows what is happening in the world.”
Position two:
"Yes it is. But computers for many replace communication with other people. Waste from production pollutes the air and water around people. Tons of harmful substances are dumped into the ocean. And the existing nuclear weapons can destroy the Earth several times. Contradictions between developed and developing countries are growing. Social inequality has not been eliminated.”
Summing up the lesson
Continue the phrases: I like in modern society ... I am worried in modern society ...
Homework:
Learn § 4 of the textbook, complete a creative task: imagine that you are a photographer and you need to make a photo essay about modern society. What photographs would you take to show the main, characteristic features of modern society? Present the work in the form of a collage and present it.
infourok.ru
3.7.3. Processing darts from the waistline
Continuous darts (Fig. 44) are processed in the same way as breast darts - with a strip of fabric along the entire length, placing it on the side of the side cut. Before ironing, the allowance for the tuck and the strip of fabric at waist level are laid out and pulled back for a better fit of the tuck.
The processing of split darts from the waistline is similar to the processing of split chest darts. Darts that turn into folds are ground to a marked line, depending on the model. When grinding the tuck in the area that turns into a fold, the line is finished at a right or obtuse angle to the fold. The ironing of the tucks is performed simultaneously with the ironing of the folds.
Tuck-tucks create soft tails on the product at the top and bottom of the waistline by sewing them on the front or back side of the waistline, depending on the length
from the model. Ironing is performed only on the stitched area.
3.7.4. Shelf processing
WITH CUT-OFF SIDES
To obtain a tighter fit of the product in the waist area and to facilitate the implementation of wet-heat treatment in products made of woolen fabrics containing woolen fibers mixed with synthetic fibers, the shelves are designed with cut-off side parts.
The processing of the shelves begins with the processing of the front tucks, after which the connection is made. 44. Processing darts Dine the sides of the pocket cut end-to-end along the waist line with oblique stitches 10-12 mm long or
with adhesive tape. Then the main and side parts of the shelf are folded with the front sides inward, equalizing the cuts, and stitched along the side with a seam 10 mm wide. The seam is moistened and ironed out (Fig. 45).
3.7.5. Processing relief seams
Relief seams, having both a constructive and decorative purpose, can be of various types: stitched, stitched, overhead with a closed cut, stitched, with a hole, with edging, etc. Relief seams are made using paws with a guide ruler.
Stitch relief seams have a width of at least 10 mm. Seaming is performed with equalization of cuts and control marks from the side of the most direct cut with bartacks at the beginning and at the end of the line. Sections of one seam are ground from top to bottom, and the other - from bottom to top. Wet-heat treatment of seams is carried out in accordance with the requirements of technical specifications - they are ironed or ironed. Ironing the seams is performed according to the model. In vertical embossed seams, seam allowances are often ironed towards the middle of the part. Before sewing for educational purposes, it is recommended to sweep the sections with a 9 mm wide seam on a special machine or with straight hand stitches, aligning them with the combination of control marks. When sweeping, the product is placed on the table (when processing products of a straight and extended silhouette) or lifting it above the table (when processing products of an adjacent silhouette). One seam is made from top to bottom, and the other from bottom to top, the most oblique cut of the part should be on top. When sewing, the line is placed next to the basting line and is performed along the most straight cut.
There are two types of stitched relief seams: stitched from the front (Fig. 46, a) and from the wrong side (Fig. 46, b). Depending on the model, embossed seams can be located on the details of the coat in one or more parallel rows. Before grinding the relief seam from the wrong side, its direction is marked with chalk, then the part is folded along the marked line with the front side inward and stitched parallel to the fold, retreating from it by 2-4 mm.
Rice. 45. Processing a duplicated shelf with a cut-off side part
The following relief seams are performed parallel to the first using a foot with a guide ruler. Raised seams on the front side
in the same way as described above, but the lines are laid on the front side of the part. Figured relief seams are built up, interrupting the line at the corners.
Rice. 46. Processing stitched embossed seams:
a - stitching on the front side; b - the same from the wrong side
Laid-on embossed seams with a closed cut are processed on parts consisting of two parts, or on solid parts. In the first case, one of the cuts is first processed with a hem seam with an open cut. The width of the allowance depends on the width of the finishing stitch. The cut of the upper part is folded and swept from the side of the allowance on a special vehicle at a distance of 10-15 mm from the fold. Then the seam is ironed from the side of the folded cut. The machined edge is applied to the lower part of the part, equalizing it with the cut, one part is basted on the other according to the control marks and adjusted with a finishing line. To make a relief seam on a solid part, an allowance equal to twice the width of the finishing line and the seam allowance is required. On the marked line from the side of the allowance, the part is bent and swept at a distance of 10-15 mm on a special vehicle. After ironing, the upper part of the relief seam is applied to the lower one, combining them along the marked lines, basting one part on the other, and then adjusting.
Stitch relief seams can be processed on parts consisting of one or two parts. When making a seam on a two-piece part, the parts are first connected with a stitching seam with a width depending on the finishing stitch and the type of stitching seam (with an open or closed cut). After basting on a special machine, the seam is ironed from the wrong side. The finishing line is laid on the front side along the seam. Adjustment relief seams on a solid part are performed with an additional strip of fabric in the following ways.
1st way. A relief seam line is applied to the shelf from the wrong side and transferred to the front side. On the wrong side along the line of the relief seam, a strip of thin woolen, cotton or linen fabric is applied with a width equal to twice the width of the finishing line plus 20-30 mm and cut in length along the weft thread. The middle of the strip should coincide with the line of the relief seam (Fig. 47, a). The strip is fixed with pins to prevent shifting and fixed with a machine stitch, laying it along the intended line from the front side of the shelf. Then, along the line, the shelf is folded in one direction, and the strip in the other, and the relief is sewn along the main part from the side of the wrong side at a distance of 3-5 mm from the fold (Fig. 47, b). The strip is folded to the side, the seam is swept out, ironed from the wrong side, placing the shelf along the table. Then a finishing line is performed (Fig. 47, c).
Rice. 47. Processing of tuning continuous embossed seams
2nd way. The shelf is folded with the front side inward along the intended line of the relief seam and stitched at a distance of 3-5 mm from the fold, while placing an additional strip of fabric under the shelf so that its width on the right is equal to the width of the finishing line plus 10 mm (Fig. 47, d ). The relief seam is swept out, ironed, then the finishing line is performed (Fig. 47, e).
3rd way. After stitching the relief of the shelf at a distance of 3-5 mm, a single or double strip of fabric is applied to the fold, fixing it on a special machine with a zigzag stitch (Fig. 47, e). Sweeping, ironing and finishing stitching (Fig. 47, g) are performed in the same way as when processing in the 1st method.
Embossed seams with a cord are processed in the following way. A strip of cushioning fabric is placed under the main fabric and the first line is laid along the marked line from the front side. A cord is inserted between the fabrics and a second line is laid, tightly bending around it with the upper part. The seams are processed using a single-horned foot. The number of rows of sewn-in cord depends on the model.
Embossed seams with edging can be performed both on a solid part and on a split one. The processing process consists of two stages: attaching a double-folded strip of finishing fabric at a distance of the width of the piping to one part and fastening the second part to the stitching of the piping.
studfiles.net
Practical work - Tailoring - Working with fabric
instruction card
Tools and accessories: work box, product cut.
1. Stitch the shoulder darts, starting from the shoulder cut to the end. Iron the shoulder darts on both sides.
2. Iron the shoulder darts towards the center of the back, ironing the slack at the end of the darts through a lightly damp iron.
Note: The chest straps are processed in the same way. darts. They are ironed towards the bottom of the product.
Stitch the tuck fold, starting from the shoulder cut, iron it to the center of the back (a).

Note: If the tuck is opposite, then it must be ironed out (b).
self control
Check:
- length and width of tucks;
- the accuracy of bartacking at the end of the lines;
- the correctness of the ironing of the tucks.
- Where should you start grinding tucks?
- In what sequence is the wet-heat treatment of tucks performed?
- How is the slack at the ends of the tucks tied?
- What is the sequence of processing the tuck coming from the armhole?
instruction card
Processing of side and shoulder cuts
Tools and accessories: work box, cutting details.
Work sequence
- Stitch the side seams from the front, slightly pulling the fold of the fabric at the tuck.
- Iron seams, overcast with a zigzag seam or diagonal overlock stitch by hand.

Note: On thin fabrics, side cuts can be ironed. In this case, the stitched sections are ironed towards the front, and then two sections are overcast at once.
- Stitch shoulder sections from the side of the shelf.
- Iron the stitching sections towards the back, overcast them.

Note: Shoulder sections can also be processed flat-iron. In this case, the sequence of processing them is similar to the sequence of processing side slices.
self control
Check:
- whether the sewing seam is sewn evenly along the side and shoulder;
- accuracy of overcasting side and shoulder sections;
- accuracy of wet-heat treatment of side and shoulder sections.
- How to process a shoulder cut with a flat iron?
- What is the sequence of processing the side cut with a zatyuzhka?
- What is the size of the allowance for the side and shoulder cuts?
"Serving labor", S.I. Stolyarova, L.V. Domnenkova

Practical work Instruction card Performing the second fitting Tools and accessories: work box, product. Progress of work: Put on the product, chop it with pins along the fastener line, aligning the middle lines. Check the correct processing of the side and shoulder sections, their direction. Check the length, direction of the tucks, the accuracy of their processing. Check the fit of the product along the armhole, neck. Check the symmetry of the patch pockets. Check the length of the product ....

There are various types of pockets: overhead, welt, in-seam, internal. The most commonly used pockets are overhead and welt. In appearance, patch pockets are simple and complex, they can consist of one, two or more parts. The figure below shows the most common types of patch pockets: a - simple, b - with a facing imitating a valve, c - with an opposite fold, ...

Undercut facings are used to process armholes, necklines and other cuts that have the shape of oval lines, corners, etc. (cutouts with a cape, square). They are cut out after trying on the product, when the shape and size of the cutout on the part has already been specified. The direction of the shared thread in the facing and the details must match. Practical work: Instruction card Making undercut facing of the neck Tools and accessories: working ...

Instruction cardTools and accessories: work box, product cut. Sequence of the work Processing the bead with one-piece picks 1. Overcast the cuts of the picks on the sewing machine with a zigzag seam or a hem seam with an open cut. 2. Bend the headband to the front side along the bead fold line, sweep the lower cuts of the headboard, grind. Straighten the corners, turn right side out, sweep the sides along the line ...

After the first fitting and correction of defects, the product is prepared for the second fitting: tucks are processed, pockets are processed and basted, side and shoulder sections are ground and overcast, sides and finishing details are processed. Then, wet-heat treatment of tucks, shoulder and side seams, sides and finishing parts is performed. Moist-heat treatment of the product Moist-heat treatment is an important part of the technological process of manufacturing clothes. Appointment…
www.ktovdome.ru

Products.
1. Stitch the shoulder darts, starting from the shoulder cut to the end. Iron the shoulder darts on both sides.
2. Iron the shoulder darts towards the center of the back, ironing the slack at the end of the darts through a lightly damp iron.
Note: Breastplates are treated in the same way. darts. They are ironed towards the bottom of the product.
Stitch the tuck fold, starting from the shoulder cut, iron it to the center of the back (a).

Note: If the tuck fold is opposite, then it must be ironed out (b).
self control
Check:
- length and width of tucks;
- the accuracy of bartacking at the end of the lines;
- the correctness of the ironing of the tucks.
Questions
- Where should you start grinding tucks?
- In what sequence is the wet-heat treatment of tucks performed?
- How is the slack at the ends of the tucks tied?
- What is the sequence of processing the tuck coming from the armhole?
instruction card
Processing of side and shoulder cuts
Tools and accessories: work box, cutting details.
Work sequence
- Stitch the side seams from the front, slightly pulling the fold of the fabric at the tuck.
- Iron seams, overcast with a zigzag seam or diagonal overlock stitch by hand.

Note: On thin fabrics, side cuts can be ironed. In this case, the stitched sections are ironed towards the front, and then two sections are overcast at once.
- Stitch shoulder sections from the side of the shelf.
- Iron the stitching sections towards the back, overcast them.

Note: Shoulder sections can be processed and flattened. In this case, the sequence of processing them is similar to the sequence of processing side slices.
self control
Check:
- whether the sewing seam is sewn evenly along the side and shoulder;
- accuracy of overcasting side and shoulder sections;
- accuracy of wet-heat treatment of side and shoulder sections.
Questions
- How to process a shoulder cut with a flat iron?
- What is the sequence of processing the side cut with a zatyuzhka?
- What is the size of the allowance for the side and shoulder cuts?
"Serving labor", S.I. Stolyarova, L.V. Domnenkova

Practical work Instruction card Performing the second fitting Tools and accessories: work box, product. Progress of work: Put on the product, chop it with pins along the fastener line, aligning the middle lines. Check the correct processing of the side and shoulder sections, their direction. Check the length, direction of the tucks, the accuracy of their processing. Check the fit of the product along the armhole, neck. Check the symmetry of the patch pockets. Check the length of the product ....

There are various types of pockets: overhead, welt, in-seam, internal. The most commonly used pockets are overhead and welt. In appearance, patch pockets are simple and complex, they can consist of one, two or more parts. The figure below shows the most common types of patch pockets: a - simple, b - with a piping imitating a valve, c - with an opposite fold, ...

Undercut facings are used to process armholes, necklines and other cuts that have the shape of oval lines, corners, etc. (cutouts with a cape, square). They are cut out after trying on the product, when the shape and size of the cutout on the part has already been specified. The direction of the shared thread in the facing and the details must match. Practical work: Instruction card Making undercut facing of the neck Tools and accessories: working ...

Instruction cardTools and accessories: work box, product cut. Sequence of the work Processing the bead with one-piece picks 1. Overcast the cuts of the picks on the sewing machine with a zigzag seam or a hem seam with an open cut. 2. Bend the headband to the front side along the bead fold line, sweep the lower cuts of the headboard, grind. Straighten the corners, turn right side out, sweep the sides along the line ...

After the first fitting and correction of defects, the product is prepared for the second fitting: tucks are processed, pockets are processed and basted, side and shoulder sections are ground and overcast, sides and finishing details are processed. Then, wet-heat treatment of tucks, shoulder and side seams, sides and finishing parts is performed. Moist-heat treatment of the product Moist-heat treatment is an important part of the technological process of manufacturing clothes. Appointment…
Lesson structure | Teacher activity | Student activities | Note |
Preparation for active cognitive activity. | 1 A sample of what product is on the table in front of you? | Sample detail of a straight skirt. | |
2 How did you come to this conclusion? | By the presence of recesses. | ||
3 Define the darts on this sample. | Darts located on the waist line are called waist. | ||
4 Why do you need a tuck at the waist line? | In order to remove excess tissue, which is formed from the difference between the volume of the hips and the volume of the waist. The tuck is necessary to give the product the shape of the human body. | ||
5 What is a tuck and what shape does it have? | Wedge-shaped seam, from the inside of the fabric, giving shape to clothing. The tuck has the shape of a triangle | ||
6 How should waist darts be placed on the waistline? | 2 tucks on Z.p.yu. 2 on the right southeast, located at the same distance from the center. | ||
7 In order for the tuck to add volume to the part, what needs to be done? | Sew a tuck. | ||
From this we can conclude the topic of the lesson: | Dart processing | ||
If we know the topic of the lesson, can we start doing this work? | |||
Statement of cognitive tasks | What everyone has to learn, learn, solve the question: Why is this necessary, i.e. definethe purpose of our lesson. Let's think: how can you sew a tuck? Here is a sample: the end result is stitched tucks. A solution needs to be found:the sequence of work on the processing of tucks | ||
Search for ideas, selection of the best. Discussion. Assimilation of new knowledge (additional information on this issue) | Stage 1 How to fold a tuck? | On the wrong side so that the control lines are aligned (can be stabbed with safety pins) | The teacher leads the discussion of the solution to the problem and provides students with additional Information according to the studied material. |
Stage 2 Sweep the tuck from the wrong side. You should monitor the alignment of the control lines. Sweep should be from narrow to wide | Basting Darts | new material |
|
Term: Sweeping | Basting is the temporary connection of parts with running stitches. | Repetition |
|
How are assessments carried out? | Estimating work is carried out with a needle, in one thread. Stitch length 1 cm, distance between them 1 cm. Work begins with a knot, ends with a bartack. | ||
Stage 3 Term: Stitching | Sewing-connecting individual parts or making a connection in the part itself with a machine stitch. | Repetition |
|
Grind tucks starting from the cut to the end of the tuck. The line should come to naught (strictly along the marked lines) At the beginning and end, make bartacks with a machine stitch or tie the ends of the threads. | Seaming darts | new material |
|
Stage 4 Wet heat treatment First iron the tucks (on the edge), and then iron towards the middle of the part. At the end of the tuck, take off the slack from the wrong side, in circular motions of the iron (with moisture). On the front side, you can fix the iron only through the iron. | Carrying out wet heat treatment of darts. | new material |
|
New term: sue- compact the fabric to create a shape, remove the slack in the fabric. | New term |
||
Stage 5 Self control: Verify: 1. The length and width of the darts (they must be the same). 2. The evenness of the line and the smooth transition of the tuck to nothing (the correct processing of the end of the tuck). 3. The quality of wet heat treatment. Avoid fabric wrinkling and las (fabric shine) | reasoning and conclusions. |
||
The purpose of the lesson: It is technologically correct to learn how to process tucks (one of the nodes of the skirt), while remembering that every detail, the node of the product, processed with high quality, gives a beautiful, aesthetically made thing. Nodal processing lessons should help in the implementation of a creative project. | |||
Independent work. | We turn to the implementation of practical work: processing tucks on the sample. | ||
Before starting work, we repeat the safety rules when working with a needle, iron and on a sewing machine | Instructional map: tuck processing |
Routing.
SKIRT. Cutout processing.
- FOLD darts from the wrong side of the fabric, combining the lines.
- SWEEP AWAY darts from the wrong side.Sweep should be from its narrow part to its wide.
- STAND tucks. Grind the tucks from the cut, at the end the line should come to naught (strictly along the marked lines). At the beginning and end of the line, make bartacks or tie the ends of the threads.
- REMOVE BASING STITCHES.
- WET-HEAT TREATMENT.First press the darts (on the edge), and then iron them towards the middle of the part. At the end of the tuck, close the slack from the wrong side, in a circular motion of the iron.
TERMINOLOGY.
TRUCK - a wedge-shaped seam from the wrong side of the fabric, giving shape to clothing.
or - a constructive technique by which a three-dimensional shape is achieved.
SWEEP AWAY - Temporarily connect the parts with running stitches.
GRIND – connect individual parts or make connections inside the part with machine stitching.
IRON - reduce the thickness of the seam, fold folds, edges.
IRON - fix the fabric laid from the seam of the grinding part.
SUIT - compact the fabric to give the part the appropriate shape, remove the slack in the fabric.
SELF-CONTROL. VERIFY:
Length and width of darts(they must be the same).
The evenness of the line and the smooth transition of the tuck to nothing.
The quality of wet-heat treatment(avoid creasing the fabric).
6. How should waist darts be placed on the waist line? 2 tucks on Z.p.yu. 2 on the right southeast, located at the same distance from the center. 7. In order for the tuck to add volume to the part, what needs to be done? Sew a tuck. 5. What is a tuck and what shape does it have? Wedge-shaped seam, from the inside of the fabric, giving shape to clothing. The tuck has the shape of a triangle.
From this we can conclude - The topic of the lesson: PROCESSING darts
II stage. Statement of cognitive tasks
Where is this type of work useful? Why do you need to know this, i.e. it is necessary to determine the purpose of our lesson. The purpose of the lesson: Technologically correct to learn how to process tucks (one of the nodes of the skirt), while remembering that every detail, the knot of the product, processed with high quality, gives a beautiful, aesthetically made thing. Nodal processing lessons should help in the implementation of a creative project.
III stage. Assimilation of new knowledge
Here is a sample: the end result is stitched tucks. It is necessary to find a solution: to determine the sequence of work on the processing of tucks.
Work steps Terms 1. How to fold a tuck? 2. How to sweep a tuck? 3. How to sew a tuck? 4. How to carry out wet-heat treatment of tucks? 5.How to check the quality of the work performed? - Sweep Stitch Iron, iron, sue -
IV stage. Primary check of understanding of the studied
Safety regulations. Set match. 1. T.B. when working on a sewing machine 2. T.B. when performing manual work 3. T.B. when performing wet-heat work A. Before turning on the iron in the network, check the serviceability of the cord; Make sure that the cord does not touch the soleplate of the iron; Turn off and turn on the iron plug with dry hands, holding it by the body and holding the socket; When finished, turn off the iron; Put the iron on the stand. B. Hair must be tied up; Do not place scissors on the platform; Do not lean close to moving parts of the machine; Do not keep your hands close to the needle; Make sure that there are no pins on the seam line and in the product. B. Do not hold the scissors up; Pass the rings forward; Put scissors on the table with closed blades away from you; Do not take the needle into your mouth; Do not stick a needle into work clothes; Avoid losing the needle.; When working with a needle, use a needle bar;
V stage. Application of knowledge and methods of action
Practical work: Processing tucks on a sample. 2. Summing up the work: Self-control. Checking the work of the teacher. 3. For home: Making a sample in the album.
Thanks for attention!