To set up printing of pattern No. 302 of A4 format, use "Test Square No. 2"! The test square is located on the first sheet in the pattern file .
Pattern of a men's vest. A vest of an adjacent silhouette, on a lining. Welt pockets on the front and a deep V neckline. A back with an average seam, in waist tucks details of a lap are issued. Fastener central on five buttons.
Length of the product on the middle seam of the back in finished form 57 cm (the neck is deepened by 4 mm).
General gains: Pg 6.8 cm, Fri 6.0 cm
Fabric consumption: width 140-150 cm, length 1.1 m - 1.4 m for the top fabric and 0.5 m for the lining. Fabric consumption is given with a margin in case of errors during cutting and sewing.
Pattern details are given with processing allowances.
The degree of complexity of tailoring - “For advanced”
When buying a pattern, a file is attached with a description of tailoring, with the necessary consumption of fabric, materials and accessories, and with a view of the layout of parts on the fabric.
The pattern in your order will be in two print options:
1. For printing on A4. You need to print the pattern on a regular printer on A4 sheets, then glue the sheets, cut out the pattern and you can sew!
2. For printing on a wide-format plotter. The details of the top pattern are located on a sheet measuring 60 * 134 cm. The details of the lining pattern are located on a sheet measuring 60 * 47 cm.
We were inspired to create this pattern by photos from the Internet. It was “inspired”, because we do not pursue the goal of completely repeating what we saw: on the contrary, our goal is to create a unique product.The photo from the Internet may differ from the model of the product, the exact image of the model is shown in the technical drawing.
Yana 11.12.2019 05:38:57
Hello!
Tell me the size for OG - 103, OT - 86.
Thanks to.
Administrator: Hello, size 52 will fit you
Peter 10/20/2019 20:57:10
Hello, tell me how to increase the size 58 pattern for Og 125 cm?
Administrator: Hello, gradation by size is a complex procedure, we cannot give such advice remotely.
Try adding volume at the side seams. 2 cm to each side cut, 8 cm in total. Sew the layout and see if the result suits you.
Hope 09.11.2018 01:55:04
I sewed a men's vest size 56. Just the length for my husband. To make a pocket and put it on the lining, I watched YouTube. It turned out well. Heavily closed vest. At the request of her husband, she changed the armhole and neckline. The pattern will still come in handy. Thanks!
Administrator: Hello, great!! Let your husband wear it with pleasure!
Thanks!
Naumova Nella 03.10.2018 04:15:28
Good afternoon, I sewed a vest 56 and 52 in size, the pattern goes to a very slender figure, the undercut, if a person with a tummy should be minimal, look carefully at the photo under the model, it turns out that way, the selection does not lie down protruding, even if you make a landing on the selection then I still can’t lay it out, it seems that you need to cut off the shoulder by 1 cm boldly, then it will only lie correctly and the armhole is also very deep. it turns out the bottom is very tight, the top is all wrinkled
Administrator: Hello, thanks for the feedback! Could you send a photo of the finished product to please, we will look at the fit
Anatoly 27.09.2018 03:32:25
Hello! Registering on your site is no easier than joining the cosmonaut corps. Either the picture is not the same, then the gaps, then the white ones. Why these difficulties? Question.How to buy a pattern for a men's vest 56 р.
Administrator: Hello, for the purchase you need to put the vest model of the right size in the shopping cart. Our instructions will help you decide on the size -
At the time of placing an order, you will be offered a registration form, where you will need to enter your data (name, email, password) to create a personal account on the site and send order notifications.
Payment is made through the Robokassa electronic payment system. After payment, links to download patterns in pdf format will be sent to you by e-mail specified when ordering, and download links will be available in your account on the site.
22.03.2018 21:19:27
Tell me, if you take size 52, is it suitable for a full man who is not tall? FROM 108
Administrator: Hello, OT 108 is 60 size.
And the model is up to size 58.
52 size will be small for you at the waist 108

Isabella German 01/27/2018 15:30:39
Good afternoon!
The question has long been tormenting: what is the rationale for placing the details of the pattern for the plotter at 600 mm in width?
This is illogical: the A1 format is 594 mm wide and one could use it, but 6 mm does not fit in any way. Therefore, you have to print on A0 format with a width of 841 mm, cutting off 241 mm of paper and throwing it into the trash. This is a cosmic amount of paper, it is a pity. Is it possible to place the parts so that the pattern for the plotter fits on the A1 format? In general, I noticed that often the arrangement of parts is not optimal. I want to conserve resources.
Administrator: Hello, the smallest plotter (which uses a 610mm paper roll) can print a maximum width of 600mm. We are just at this width and lay out our patterns in order to make the most of the paper. When printing, it is necessary to choose not the width of the A1 format, but the width of 600 mm.
Sergey 11/20/2017 16:16:20
Hello! The photo of the vest sewn according to your pattern is slightly different from what Beckham is wearing) Why? Or is it a sample of how to sew Don't?
Administrator: Good afternoon! We use this photo for a visual demonstration of the model, the pattern may differ slightly from the photo. An exact representation of the model is shown in the technical drawing.
The vest is a decorative addition to a modern suit. Its shape, lines and proportions are closely linked to the jacket. The design of vests is basically carried out according to the calculations adopted for the design of jackets, with some minor deviations. At present, a vest can have an independent meaning and be worn without a jacket. If the vest is an addition to the jacket, its back is made of lining fabric. With an independent value of the vest, its back is made from the fabric of the top.
Single-breasted vests can be combined with a single-breasted or double-breasted jacket, double-breasted - with a single-breasted jacket.
Measurements of the figure (see Fig. 74) to build the construction of the base of the vest, see:
Ssh = 20.5 Shg = 19.2 Vpr.z = 21.4
Cr \u003d 50 Dt.p \u003d 55.6 Dp \u003d 36.1
St \u003d 44 Shs \u003d 20.4 Wb \u003d 24.1
Sat = 52 Dt.s = 45.5 Vv.zh = 23
The height of the waistcoat cutout Vv.zh is determined from the point of the base of the neck to the desired level of the vest cutout on the midsagittal line in front.
The height of the cutout of the vest is not constant and depends on the style and design of the costume as a whole.
Structural allowances, see:
Pg = 2.5...3.0 Pd.t.s = 1
Fri = 2.5...3.5 Pd.t.p = 0.5...0.7
Ps.pr \u003d 4.5 Psh.throat \u003d 1.3
The distribution of measurements Cr in sections, cm: to the width of the back - 20.4 - 2 = 18.4; to the width of the armhole - 50 - (18.4 + 17.2) = 14.4; to the width of the shelf - 19.2 - 2 \u003d 17.2.
Allowance along the chest line Pg \u003d 2.5 cm is attributed to the armhole.
The width of the sections of the vest in the drawing:
- backs = 18.4 + 1 = 19.4 cm;
- armholes = 14.4 + 2.5 = 16.9 cm;
- shelves = 17.2 + 1 = 18.2 cm.

To build a vest, a right angle is built with a vertex at point A (Fig. 83, a).
The level of the waist line is determined by the segment
AT \u003d Dt.s + Pd.t.s \u003d 45.5 + 1 \u003d 46.5 cm.
The level of the chest line in the first way is determined by the formula
AG \u003d Vpr.z + 4.5 \u003d 21.4 + 4.5 \u003d 25.9 cm.
The level of the chest in the second way is determined by the formula
TG \u003d Wb - 3.5 \u003d 24.1 - 3.5 \u003d 20.6 cm.
The level of bulge of the blades determines the segment
AU \u003d 0, ZDt.s \u003d 0.3 x 45.5 \u003d 13.7 cm.
The length of the vest is determined by the segment
AN \u003d AT + (8 ... 10) \u003d 46.5 + 10 \u003d 56.5 cm. (TN \u003d 8 ... 10 cm).
Up from point A vertically and to the right horizontally lay 0.5 - 0.7 cm (points A0 and A01).
Deflection of the midline of the back at the waist line ТТ1 = 3 cm. Abduction of the midline of the back at the bottom line НН1 = 2.5 cm. lay 5 cm (point H11). From point H1, lay 2 cm horizontally to the right (point H12). Points H11 and H12 are connected by a straight line. The middle line of the back is drawn through points A01, Y "1, T1, H11 and H12; it intersects with the line of the chest at point G10. From the point G10 to the right, lay the width of the back G10G11 = 19.4 cm, then lay off the width of the armhole G11G4 = 17 cm and the width of the shelf G3G4 = 18.2 cm (in accordance with the preliminary calculation).
A vertical line is drawn through point G3 (half-skid line), which intersects with the horizontal from point A at point a1, with the horizontal from point T at point T8; with a horizontal line from point H to point H4. From point H4 down along the line a1H4 lay 5.5 cm (point H5). From point A to the right, horizontally lay a segment equal to the segment G10G11 (point a); from point a1 to the left lay a segment equal to segment G3G4 (point a2). Points G11 and a, as well as G4 and a2, are connected by lines.
Back neck width
A01A1 \u003d Ssh / 3 + Psh.throat \u003d 20.5 / (3 + 1.3) \u003d 8.1 cm.
Back neck height
A1A2 \u003d A01A1: 3 + Pshov \u003d 8.1 / 3 \u003d 3.7 cm.
Back armhole height
G11P2 \u003d 0.5Dp + Ps.pr + 0.5Pd.t.s + 1 (for moving the shoulder seam) \u003d 0.5 x 36 + 4.5 + 0.5 + 1 \u003d 24 cm.
Deflection of the shoulder line A2A20 = 1 cm. To build the line of the shoulder cut of the back, points A20 and P2 are connected by an auxiliary straight line. From point P2 along the line P2A20, a segment P2P1 \u003d 1.5 cm is laid to the left. From point A2, a smooth concave line is drawn tangent to the straight line A20P1. From the point G11 to the right, lay the segment G11G5 = 0.5G11G4 + 3.5 = 0.5 x 17 + 3.5 = 12 cm.
Auxiliary point 1 is located on the bisector of the angle П2Г11Г4, Г 111 = 0.25Г11Г4 - 0.7 = 0.25 x 17 - 0.7 = 3.5 cm.
Point P3 is located at the intersection of the horizontal line from the point Y and the line G11a. From the point P3 to the left, a segment P3P31 \u003d 2.5 cm is laid horizontally. The armhole line of the backrest is drawn through points P1, P31, 1 and G5.
The side cut of the back is built on the vertical from point G5, which intersects with the waist line at point T3, and with the bottom line at point H21. Up from point H21 lay 0.5 cm (point H2). To the left of the point T3 lay 1 cm (point T2). Points H12 and H2 are connected by a straight line. The line of the side cut of the back is drawn through the points G5, T2 and H2.
In adjacent products, including a vest, tucks are designed along the waistline. The sum of solutions of tucks along the waistline is determined by the formula
Σv \u003d (Sg + Pg) - (St + Pt) \u003d (50 + 2.5) - (44 + 2.5) \u003d 6 cm.
From the sum of the tucks Σv, the difference in the lengths of the segments TT1 and GG10 is subtracted. Segment GG10 = 1 cm; TT1 - GG10 = 3 - 1 = 2 cm.
Σv - 2 \u003d 6 - 2 \u003d 4 cm - the sum of the solutions of three tucks.
The tuck solution on the back is 0.3 x 4 = 1.2 cm; the side tuck solution is 0.5 x 4 = 2 cm; the solution of the front tuck is 0.2 x 4 \u003d 0.8 cm.
Darts on the back are built on a vertical line from point G11 to the bottom line. The upper end of the tuck is located below the G11 point by 5.5 - 7.5 cm.
To determine the point A4, the segment a1a2 is divided in half, i.e. a1A4 = a1a2/2. Through point A4, a vertical is drawn down to the intersection with the waist line (point T4). From the point T4, a segment is laid vertically upwards, which determines the position of the highest point of the neck A41.
T4A41 \u003d Dt.pI + 2 \u003d 45 + 2 \u003d 47 cm.
To build the shoulder seam, the shelves from point a2 vertically down lay the segment a2P4 \u003d aP2 + 1 cm. Points A41 and P4 are connected by an auxiliary straight line and, continuing to the right, lay the segment A41A42 \u003d 1 cm.
The length of the shoulder cut A42P50 = A2P1 - 0.5 cm.
The bevel of the line of the shoulder cut P50P5 = 0.7 ... 1 cm.
The bevel line starts at a distance of 4.5 cm from the P50 point. Point P6 is located at the intersection of the horizontal line from point U with the vertical line a2G4. Segment P6P61 = 2 cm. Auxiliary point 2 is located on the bisector of the angle P6G4G5, Г 42 = Г 111 - 1 cm.
The line of the armhole of the shelf is drawn through the points P6, P61, 2 and G5.
The deflection of the side cut of the shelf on the waist line T3T31 = 1 cm. From point H21, 1 cm is laid upwards (point H3). The side cut is carried out through the points G5, T31 and H3.
The classic vest provides pockets with leaflets. The front edges of the leaves of both the upper and side pockets should be on the same vertical. To determine the slope of the leaflet from points G3 and T8, respectively, lay down 2.5 cm along the half-drift line, i.e. G3GZ0 \u003d 2.5 cm; T8T80 = 2.5 cm.
Points G30 and G4 and points T80 and T7 are connected by auxiliary straight lines.
To build the rear end of the upper leaflet from the point G4 along the line G4G30, a segment G4K40 = 2.5 cm is laid to the right. The length of the leaflet is determined by the segment K40K30. The length of the upper leaflet is unified according to the size of the product, cm: for sizes 44 - 48 - 8; for 50 - 54 sizes - 9 - 9.5; for 56 - 64 sizes - 9.5 - 10.
Through point K30, a vertical is drawn down to the intersection with the line T80T7 at point K10. The width of the upper leaflet is determined by the segment KZ0K3 = 1.5 cm. The line for attaching the leaflet is determined by the segment K3K4 = K30K40 (built parallel to the line K30K40).
To build a side leaflet from the point K10 along the line T80T7 to the left, lay the length of the side leaflet K10K20 \u003d K3K4 + Z cm. The width of the side leaflet is determined by the segment K10K1 \u003d K30K3 + 0.5 cm.
To build the front tuck, determine the position of the point T71, through which the line of the middle of the front tuck T4T71 \u003d 3 cm passes. From the point T71 to the left and right, half the solution of the front tuck is laid. The upper end of the tuck does not reach the chest line by 7 cm.
In a classic vest, a drawstring strap can be designed, which is sewn with the front end into the tucks on the back.
Vera Olkhovskaya
Fold the fabric in half, matching the edges. Place the aligned edges parallel to the edge of the cutting table where you are standing.
Establish one of the cuts. As a result, the osnovirovanny cut should be perfectly even to perpendicular edges.
Opening a men's vest
We start cutting from the back (Fig. 1). The starting angle - the angle from which the drawing begins (in Fig. 1 it is the upper left one), must be straight, so the angle between the edges and the ground cut is ideal for starting work.
Step back from the osnovlennoy cut seam allowance 1 - 1.5 cm and draw the original horizontal line parallel to it.
Down from the original horizontal set aside Ds(measure the length of the back) and draw a horizontal waist, and from the waist - up dB(measure barrel length) and down 5 cm. Draw horizontal lines at the waist, barrel level and bottom. In the proposed model, the distance from the waist to the bottom is 5 - 7 cm.
We build the germ on the original horizontal. Its width for the vest
1/3 Ssh + 2.5cm
Root depth
1/3 sprout width
Middle seam. It may not be if the back is cut out of the lining, but if the back is cut from the same fabric as the front, the middle seam is necessary.
So, for the middle seam at the waist and bottom, step back to the right along 3 cm. This is an average value, you may have to deviate more, but it is better to clarify this on the fitting. "Threes" connect a smooth curve with a point at the level of the shoulder blades.
To find the level of the shoulder blades, divide the distance from the midpoint of the barrel level sprout into three parts and go up one third. From this point, the curve of the lumbar bend begins - it connects with the "troika" at the waist.
Now turn to the top point of dividing the middle seam from the sprout to the barrel. A smooth bend also comes from it, shortening the sprout by 0.5 cm.
Shoulder in a men's vest
Shoulder is constructed as usual: serifs are made with a “compass” and their intersection forms a shoulder point. Of course, instead of a “compass”, a centimeter tape and honed chalk are used.
The first notch: the leg of the "compass" at the lateral point of the sprout, the solution of the compass Dp + vyt.
The second notch: the leg of the compass at the middle point along the waist (if there is a middle seam, then on the middle seam), the solution of the compass Vpk +2 cm.
Such an increase in the VPK is necessary, first of all, for stooped and overweight men. In case of an error, you can correct the position of the shoulder cut at the fitting.
Now we will limit the back in width. From the intersection of the middle seam with the level of the barrel, set aside:
back width to armhole W +2 cm
and back width to side seam 1/2 (Sg + Pg) minus 3 cm
Note that both values are plotted along the same horizontal line.
From the end point of the smaller segment along the level of the barrel (Ws + 2), draw a perpendicular with a length 9 cm up, and from the end point of the larger (from the middle seam to the side) segment - perpendicular down to the intersection with the bottom level.
As you guessed, the “nine” is one of the points of the armhole, and the right angle at the level of the barrel is the angle of the armhole. The length of its bisector 3.5 cm.
The armhole is also formed smoothly, and the side cut with a deflection 1 cm.
 vest shelf
Extend the horizontal of the barrel by the width of the shelf with seam allowances
1/2(Sg + Pg) + 3 cm + 3 cm
The last 3 cm are the allowances for the seams - the allowance for the back will be 1 cm, for the shelf - 2 cm.
Attention: the seam allowances are located between the back and the shelf, so the width of the shelf itself will be
1/2(Sg + Pg) + 3 cm
To the extreme right point along the horizontal barrel, build a perpendicular line - this is a half-skid. To the right of the half-skid on 3 cm position the edge of the bead vertically.
From the half-skid to the left, measure again according to the level of the barrel
W + 2 cm
From the obtained point, raise a perpendicular of length 5 cm for the corner of the armhole. Bisector from the corner of the armhole of the shelf - 2.5 cm.
Patterns of men's clothing
Now you can build a neck, the width and height of which are the same and equal to the width of the sprout. And in order to make a cutout of the depth you need, measure the distance from the jugular cavity to the point of convergence of the shelves and set aside the resulting segment along the half-slip from the lower point of the neck. After that, you can draw a cutout curve.
The shoulder point of the shelf, as for the back, is looked for at the intersection of two serifs.
First radius Dp
Second radius NPP +1
Connect the end point of the shoulder cut to the point "5" at the top of the perpendicular angle of the armhole with a deflection 2 cm and the armhole line can be drawn.
The next operation is a side seam with a deflection in 1 cm and go to Figure 2.
Dart on the shoulder cut of the back is built in the same way as on women's products, but since men are prone to a slightly greater stoop, the tuck solution can be increased to 2 cm. The distance from the tuck to the sprout is 5-6 cm, the length of the tuck is 7-8 cm.
Seam allowances: the neck-sprout and the armhole are cut out of the line, the edge of the bead 0.7 - 1 cm, The shoulder and side seams of the back - 1 cm, the bottom of the back - up to 3 cm. The shoulder and side seams of the shelf contain "adjustment allowances" and therefore increased to 2 cm. The bottom of the shelf is processed by turning and therefore 1 cm is enough. Separately It is worth mentioning the allowance for the middle seam of the back. As you can see, it expands unevenly towards the bottom. It is enough to leave 2 cm, cut off the rest.
Pick and turn trimmed after trying on the details of the cut. It should follow the contour of the neck, the edge of the side and partially the bottom. If the vest is made without lining, then you will also have to cut out the facings of the sprout and armholes. The facing of the sprout and the pick can be one piece, as in a ladies' vest.
All processing details are cut out from the remaining lunges and therefore can consist of several parts. If there is not enough lunge area for turning and picking, they can be cut from another fabric of a similar color.

The image of an elegant man can bewitch any representative of the opposite sex. A sophisticated classic suit, shoes polished to a shine, discreet accessories, a fashionable haircut attract the eyes of many beauties. Of great importance in creating a harmonious image of a successful and fashionable person is the style of a men's vest.
Vest as an element of men's wardrobe has a lot of different options. Depending on the preferred style of clothing, a man will be able to choose an individual vest for himself. But, if there was no unique thing in the mall, you should not despair! You can sew the perfect vest yourself.
For this you need:
- choose a style;
- decide on the fabric.
The counters of modern stores are ready to offer a fabric that meets the requirements of the most fastidious fashionista.

Different colors, textures, composition can complicate an already difficult choice.
 The fabric for the vest should be chosen based on the style.
Types of men's vests
Let's figure it out what types of men's vests exist:
- solo vest;
- vest - leather jacket;
- classic vest;
- vest-coat;
- knitted vest;
- insulated vest.
Solo vest draws all attention to itself. This option should fit the figure, but be wide in the armholes so that the lower layer of clothing looks neat. The model visually tightens and makes the figure slim. A standard pattern for such a vest will not work. Lapels, stand-up collar, round neckline will make the item sophisticated.
Vest - leather jacket will complement the brutal image in biker style. Ideal for any time of the year. You can wear it with both T-shirts and various jumpers.
 Classic vest
will be an integral part of a classic suit for business meetings, trips to theaters and official receptions. Such a thing made of thin material will be a great addition to any man's wardrobe. It is worn with or without a jacket, on a shirt, longsleeve, jumper. Sewn classic vests can be from different fabrics: from knitted to cashmere.
Classic vest
will be an integral part of a classic suit for business meetings, trips to theaters and official receptions. Such a thing made of thin material will be a great addition to any man's wardrobe. It is worn with or without a jacket, on a shirt, longsleeve, jumper. Sewn classic vests can be from different fabrics: from knitted to cashmere.
To emphasize belonging to a bygone era of luxury will help stylized vest-coat. There will be an opportunity to shine in such a unique thing at the New Year's carnival.
Knitted vest is able not only to complement the image of a modern man, but also to warm in cool weather. You can wear it with long sleeves or long sleeve shirts.

Insulated vest It will be a full replacement for a jacket in the cold season. As a rule, it is sewn with a lining on a synthetic winterizer, supplemented with a hood. You can wear a vest on a warm jumper, longsleeve, shirt. It all depends on the air temperature. In the most severe frosts, such a vest can also be worn under a winter jacket. Another option for a warmed men's vest - tweed . Thick material will keep you warm in cold weather. You can wear it with a classic pantsuit or with jeans.
Attention! When choosing a style, it is worth considering the features of the male figure. For stocky men, wraparound vests are not suitable. On tall ones, solo vests will look great.
Fabric choice
The choice of material depends on the type of vest chosen. Let's analyze the most popular types of fabrics.

Woolen cloth - made from natural animal hair. It can be sheep, merino. The raw materials of cashmere goat and Peruvian llama - alpaca have the highest value. To reduce the cost of the material, cotton or synthetic fibers are added to the composition. This fabric has a high degree of wear resistance. Over time, it does not lose its aesthetic qualities. The content of wool in the structure of the fabric may be different, but the more natural fiber is contained, the warmer the thing will be.
 Knitted
The fabric is presented in various shades and textures. Material with rhombuses, stripes, coarse knit is perfect for everyday vests. Its composition can be different: from synthetic fabrics to natural cotton and wool.
Knitted
The fabric is presented in various shades and textures. Material with rhombuses, stripes, coarse knit is perfect for everyday vests. Its composition can be different: from synthetic fabrics to natural cotton and wool.
Advice! This season, gray and burgundy vests are at the peak of popularity.
From tweed sew warm clothes. It contains wool fibers that will keep you warm in cold weather. The fabric is soft and pleasant to the touch. Its surface is covered with small villi.
Advice! In order for a tweed vest to please for a long time, and the material does not roll down, it is necessary to choose canvases from boiled wool.
Shiny, lined synthetic fiber fabrics are not suitable for a solo vest. The biker jacket is sewn from genuine leather, you can also use its environmentally friendly counterparts. To sew a masquerade frock coat, you need to stock up on brocade.
Taking measurements
Before you start sewing, you need to take measurements correctly. The quality of the sewn product and its fit on the figure depend on this. This will require a centimeter tape, a small piece of cord, a sheet of paper, a writing object.
 Tie the cord around your waist: it should not hang out, but you should not tighten it tightly either. Then proceed to measure the parameters, the measured person should stand straight:
- Chest circumference - measurements are taken along the lower edges of the shoulder blades along the most protruding points of the chest.
- Waist circumference - measurements are taken through the narrowest point at the waist (along the tied cord at the waist).
- Hip circumference - The measurement is taken at the widest point of the hips.
- Shoulder Width - from the base of the neck to the edge of the shoulder.
- Front length to waist - it is necessary to take measurements from the base of the neck to the waist line along the protruding points of the chest.
- Back length to waist - We take measurements from the base of the neck to the waist along the back.
- Back Width - the distance between the extreme points of the shoulders is to be measured.
Important! In order not to forget the parameters, record each measurement on a piece of paper.
Pattern preparation
Let's take a classic men's vest as a basis. Its cut should match the model of the jacket and complement it harmoniously. Patterns from magazines do not give a detailed description of the technology, the required size can not always be found. Let's take an example of how to properly cut a men's vest.
 To prepare a pattern for a classic men's vest, we take a sheet of paper, or special millimeter paper for patterns:
- We retreat from the top of the sheet 7 cm and write X.
- From X draw a line parallel to the edge to the right.
- From X we retreat down the length of the back to the waist. Add 1.3 cm for seams. We write 1.
- From 1 up, measure half the length of the back to the waist. It will be 2.
- From 1 down, we retreat down 7.5 cm. This will be 3.
- To the right of 2 and 3 we draw horizontal lines.
- We divide the segment X2 in half and write 4.
- From 1 we measure 1.3 cm to the right. We mark 5.
- We connect 4 and 5.
- From 5 we measure 1.3 cm to the right. We write 6.
- From X we retreat to the right 9 cm. This will be 7
- From 7 we retreat upwards 2.2 cm. We write 8.
- At the intersection of line 4 - 5 with 2, we write 9.
- From 2, we set aside ½ of the chest volume to the right and add 7.5 cm. We write 10.
- From 10 draw a vertical line. It should be parallel to the X-3 line.
- From 10 to the right, we retreat 1/3 of the length between points 2 and 10. We write 11.
- From 11 draw a line vertically up and down.
- We place 12 at the intersection of lines from 2 and through 11.
- We place point 13 at the intersection of lines 10 and 1.
- To the right of 2, measure to the right ½ of the width of the back and add 1.3 cm. Here it will be 14.
- Up and down from 14 draw a line.
- From 14 we retreat 2.5 cm down. There will be 15 here.
- Down from 11 we measure 2.5 cm and write 16.
- Segment 15 - 16 is marked in half. Mark point 17 in the middle.
- We lead a vertical line from 17, connect it with a segment 1 - 13.
- We set aside 1.3 cm to the right and left from 18. On the left we write 20. On the right - 21.
- Through 17, 20, 19 and 17, 21, 19 we draw smooth lines.
- On the connection of X and 10 we write 22.
- From 22 we set aside 9 cm to the left. Here we note 23.
- From point 10 we set aside 2.5 cm upwards. We write 24.
- We connect 23 and 24.
- Up from 15 we measure 15 cm. We write B.
- From 11 upwards we retreat 15 cm. We mark C.
- Segment B - C is divided in half and we write D.
- We combine 8 and 9.
- From point 8 set aside 10 cm to point D. Mark 25.
- From 23 we measure a length equal to the distance between 8 and 25. We put a point 26.
- From 27 to the left we measure 5 cm. We write 28.
- From 28 down we retreat 5 cm. This will be 29.
Round off sharp corners. The pattern is ready.
Attention! Any vest is not fastened to the lowest button!
Assembly of finished parts of the vest
 Having built a pattern, sewing a vest is easy.
- We lay out the pattern on the fabric and carefully circle it.
- Cut out every detail.
- We start sewing from the middle seam of the back.
- Sew the side seams.
- By analogy, we build a pattern of the wrong side. We sew it from ordinary lining fabric.
- Each seam is ironed well.
- We apply the lining to the main fabric of the vest. The front sides remain inside. We combine armholes, edges and pin with pins. You can sweep.
- We sew according to the markup.
- Cut off the fabric. Left for allowances. We leave 1 cm of fabric at the seams. On the lines of the armholes, we carefully make small incisions so that the fabric lies elegantly.
- Turn the vest inside out and sew the shoulder seams.
- The vest must be properly straightened, ironed and basting around the entire perimeter of the product.
- On the left side we make markings for four loops. Their width depends on the diameter of the selected buttons.
- Overcast each loop on a sewing machine. If there is no special tool for cutting loops, you can use the blade. You have to be careful with it!
- We combine the left and right shelves, sew on the buttons.
Important! We make all notes and diagrams of details on the wrong side of the fabric.
We steam the product. The men's vest is ready, always be beautiful and elegant.
At present, the vest is widely used both as a classic element of a men's suit - "troika", and as a comfortable uniform.
The military, police, traffic police, Ministry of Emergency Situations, as well as PZhT employees, photographers, hunters and fishermen (and many others) cannot imagine their lives without a comfortable and practical vest.
We looked at it the other day, now it's the turn of a men's vest pattern.
Without further ado, let's get started!
We build this vest, based on the main pattern of a men's vest.
The increase in the half-girth of the chest of the main chest pattern was 4.5 cm; for the same model, it will be 10 cm and distributed as follows:
4.5 cm - the same as on the main pattern of the vest;
1 cm = expansion of the details of the shelf and back along the lines of the middle;
2 cm = expansion of each part in the middle by 1 cm;
2 cm = expansion of details in the area of the lines of the side cuts by 1 cm;
0.5 cm = finished zipper width.
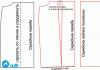
On the front and back halves, from the shoulder cut line to the bottom line, draw a vertical cut line to expand the details.
There will be no tuck - the width of the vest will be regulated by a drawstring in the drawstring along the bottom cut.
Move the part along the cut lines.

Vest ordinary
Parallel to the shelf line, 0.5 cm from it, we build a new shelf line.
Parallel to the line of the back, 0.5 cm from it, we build a new line of the back.
We expand the shelf and back along the line of side cuts by 1 cm, and in the bottom area the expansion comes to naught.
Raise the shoulder line (look at the diagram) and lengthen it by 1 cm.
We draw the lines of a new neck (look at the pattern of the vest pattern). We draw a yoke on the back. We translate the tuck on the bulge of the shoulder blades to the cut of the coquette.
We extend the line of the middle of the back by 6.5 cm. We draw the line of the bottom perpendicular to the line of the middle of the back and to the line of the side cut.
Measure from the waist line to the bottom line the length of the new line of the side cut of the back. Let's put this distance on the line of the side cut of the shelf from the waist line down.
We increase the value of the length of the side cut of the back by 1 cm. We set aside this distance along the line of the middle of the shelf from the waist line down.
Let's draw a new line for the bottom of the vest pattern.
On the shelf, mark the lines that limit the drawstring. The distance between these lines is 2.5 cm.
Let's draw the indispensable side and chest pockets of the vest, "bandolier" and "epaulettes".