Used in the decoration of various items and clothing, pompons are most often made from threads, strips of fabric or tulle. The simplest technique involves collecting a large bundle of textiles and pulling it in the middle with a strong thread.
Do-it-yourself pompom from threads is almost ready. It remains to trim the edges with scissors to form a neat ball.

Using Forms
There is also a more complex technique that allows you to make a neat pom-pom of any size. As a form, you should take 2 circles of cardboard with cut out centers.

The size of the pom pom depends on the wall thickness of the mold. The bases are folded together and wrapped with thread. Then the forms are moved apart, the threads are tightly pulled together in the center and the workpiece is cut between the cardboard inserts. So the product is more accurate.

Pompom on a fork
A convenient basis for creating original small-sized balls is a fork. This decoration will be an excellent solution for scarves, baby booties and blouses. They are also used as an unusual decor for blankets and bedspreads.

To create a pom-pom, the thread must be wound around the teeth to the desired volume and pulled with a fastening thread between the central teeth of the fork. You get a kind of bow, the arcs of which can be cut both on the device and by removing the product from the fork.

paper decoration
Beautiful voluminous paper pompoms are most often used in holiday themed decor. Formed balls may differ in material, color, size, density and edge design. The lighter the material used, the better, the more airy and beautiful the decor will be.

The most commonly used corrugated pompoms are made of thin corrugated paper. This material is available in a wide range of colors and has an original structure that makes the pom-poms look like flowers.

For manufacturing, it is necessary to cut out 8-10 squares of the desired size from paper, folding them one on top of the other. The resulting stack is folded with an "accordion" and pulled in the middle with a fastening thread.

Then, scissors form the edges, rounding them or vice versa, forming an acute angle, and straighten the paper, forming a ball.

An even more affordable option are napkin pom-poms. The principle of operation is the same as in the case of using paper, only the squares are already formed, and the material itself is lighter and more pliable. The disadvantage of napkins is the excessive fragility of the material and a limited choice of colors.

Pompoms from bags
For outdoor use, decorations are made from weather-resistant material - plastic bags. Such products can serve as decoration or be used by cheerleading teams at various competitions.

Depending on the purpose, choose the type of packages that are best suited for the task.

So pompoms for cheerleading are best made from packages of "t-shirts", which will allow you to form comfortable handles on the product. And products from garbage bags will be more voluminous and strong.

When creating pompoms for a support group, a stack of bags is folded in half, collecting the handles into one bundle. The handles are fixed with tape, thus fixing the pompom itself.


As you can see, you can make an original decoration at a minimum cost. Material for creating an unusual decor can be found in every home. It can be plain or craft paper, napkins, fabric, tulle, rain, mock-ups and much more. And the principle itself is extremely simple.
Polyethylene bags are used not only for waste disposal. You can make an interesting accessory to decorate the apartment - pom-poms from garbage bags.
Polyethylene and ecology
Many plastic bags are produced every day. Used in stores as packaging material and for garbage collection. Not all are reusable.
Few people think about their harm:
- Polyethylene products are dangerous for the environment and living organisms living in it. The production uses toxic lead and other hazardous metals.
- Once in the soil, it decomposes for 500 years. In reservoirs, it has a detrimental effect on local inhabitants. Fish and birds take the particles of the bags for food and swallow them. This leads to death.
- When plastic is burned, hazardous substances are released into the atmosphere. They pollute the air and affect climate change. They enter the lungs of a person, causing diseases.
Packages are rarely sent for recycling. More often than not, they end up in landfills along with the rest of the waste.
This is especially true for trash bags. For safe use, they must be free of harmful substances and decompose quickly.
Making pom-poms
Garbage bags can be used to make interesting accessories that will decorate your home or come in handy for other purposes. One of these crafts are pompoms. They are easy to make with your own hands.
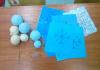
For this you will need:
- polyethylene bags;
- cardboard;
- Scotch;
- ruler;
- scissors;
- pencil or pen;
- decorative elements.
The sizes of garbage bags are selected depending on the purpose of further use. Small items are used as a bright accent in the interior, when decorating a Christmas tree and as a keychain. Larger bags are needed when making cheerleading pompoms.

The color is chosen based on personal preference. But bright colors are better. White products will replace paper snowflakes on the Christmas tree.
small size
To create a small pom-pom, follow a certain procedure:
- Cut off the top and bottom of the package.
- Use scissors to make stripes. They should be long and narrow.
- Cut out 2 rings from cardboard with small slits in the middle. We connect together.
- We wrap the rings around the entire circumference with each strip. You can add decorative elements in the form of satin ribbons or metallic threads. They will decorate the pompom.
- After wrapping the rings with scissors, cut the bag along the edges of the circle.
- We tighten the thread in the middle so that the strips fit snugly against each other.
- We take out the cardboard rings, fluffing the resulting pompom.
You can attach a thread to the center by hanging the decoration anywhere on a special hook.
Large size
For large items, you need a lot of trash bags. The manufacturing method is different from the previous one:
- Stack 10-15 bags on top of each other. When using different colors, alternate layers in the resulting stack.
- Cut off the top and bottom along with the ties.
- Fold again, but in half. The edges must be aligned.
- We open packages. Cut in half along the resulting fold.
- From above and below on each side we make cuts of 15 cm. Width - 2 cm. An untouched strip should remain in the middle.
- We find the center of the packages and firmly bandage them with tape so that they do not fall apart.
- We fluff the accessory by separating the strips from each other.
For cheerleading, you need a second similar pom-pom.
Mat
From garbage bags you can make a one-piece home accessory - a bright rug. You will need:
- ready-made pompoms;
- mesh as a basis;
- threads;
- marker;
- scissors.
Follow instructions:
- We count the required number of blanks.
- On the grid we make markings for details with a marker. It is possible to create an individual pattern with bright colors.
- We fix the pompoms on the basis with the help of threads. We cut off the ends.
- Delete unnecessary mesh edges.
The resulting rug will fit into the living room or hallway. Dust should be wiped several times a month with a damp cloth.
Garbage bags are used not only for their intended purpose. You can get creative with their use. Get bright pompoms that will decorate the house.
This article will tell you how to make do-it-yourself pipedasters, saving the budget and bringing a bright touch to any holiday.
The very name "pipidastr" is a rather rare word in Russian, which has become used more and more often in colloquial speech. Translated from English, it means “brush”, “anther” or “panicle”, made of thin threads. In other words, such a furry little thing, which is used to dust off fragile objects.
The initial version provides for its manufacture from a synthetic material - polypropylene. Dust pans are made from almost any suitable material. For especially valuable items, anthers made of fluff or feathers are best suited.

Another meaning of decoration is a cheerleading pom-pom. They are waved by girls in between sports competitions, attracting the attention of spectators.
In other words, cheerleading pimps are big, colorful pompoms. Shaggy design is easy to do yourself. Moreover, this occupation does not require special skills and abilities. P.S.: We wrote about how to make pompoms with your own hands from different materials.
Pipidastra from plastic bags

In order to make pipidastra from bags, you will need to take a fairly large number of them. The more bags you use, the bigger the pom-pom will be. The cheapest option is to use trash bags. The most beautiful option is holiday packages for wrapping gifts, or wrapping roll paper.
Step by step instructions with photo

Below are the different options for making shaggy:
Method number 1


This is interesting: if the strips are short, you will get a pompom, and if you cut the ribbons long, then there will be a sultan.
Method number 2


Method number 3

Pipidastra from New Year's rain
Pom-poms, for the manufacture of which rain was used, look the most impressive. They shine beautifully and shimmer, especially if material in contrasting colors was used.

- The raindrops are neatly stacked in a bunch, of the desired thickness.
- Tie in the center with a strong thread. Several pieces are made of such blanks - the more there are, the more magnificent the panicle will turn out.
- A stick-holder is attached to the place of dressing. During attachment, it is desirable to distribute the bundles around the stick, then the panicle will look more neat.
- The length of the raindrops of the sultan is corrected - they are cut to the required size.
- Wrap the stick on top with beautiful adhesive tape or wrapping paper.
Pipidastra from yarn for washcloths

To create fluffy designs, the threads used when knitting bath washcloths are perfect. They have a wide range of colors and are easy to use. To build one pom-pom, one hank will be enough.

- Turn the four-legged stool upside down.
- Start winding the rope around two legs.
- Find the middle of the winding and tie a secure knot in this place.
- Cut the resulting loops on the sides.
- Attach the handle with thread and tape.
- Decorate the handle.
Colorful pompoms are gaining more and more popularity. They are not only an indispensable attribute in cheerleading. They are used in bright shows and at children's matinees. Handmade, they will decorate any holiday and save the family budget.
How easy it is to make a decoration with your own hands, a visual video will help.
Video: Cheerleading pipidastra
Depending on what material the pom-poms are made of, they can be used as a decoration for a hat, scarf and other clothes, i.e. as a winter accessory for warm clothes, also, for example, using paper pom-poms, you can decorate a room or make an accent in interior. This article will present master classes with detailed instructions for making pompoms from yarn and other materials.


Attention to the video
This article will present a selection of videos in which the masters will share the secrets of making such accessories. We will talk about several options for making fluffy and paper pompoms.
How to make yarn pompoms
In order to make a voluminous, fluffy, soft pom-pom that can be attached to a hat as a decoration, you will need synthetic, melange or woolen yarn, as well as a sheet of thick cardboard and scissors.
First of all, you need to decide what diameter of pom-pom you plan to make, then you should cut out two circles of the desired diameter from a sheet of thick cardboard, i.e. if the diameter of the planned pom-pom should be equal to fifteen centimeters, then the diameter of two circles should also be equal to fifteen centimeters. In the center of the two circles, it is necessary to cut out circles with a diameter of about three centimeters and make an incision in order to make it more convenient to wind the yarn. You can not make a cut, then you need to wind the threads with a needle.
Next, you need to put two prepared circles on top of each other and then you can start wrapping the cardboard circles tightly with thread. When all the rows are completed, it is necessary to cut the threads of yarn in the middle with scissors. Next, the thread, which is located between the circles of cardboard, must be tied into a knot. Then you need to remove the cardboard, trim the length of all the threads, and the product is ready.
A pom-pom made of threads can be one-color or multi-colored, it all depends on the chosen thread color.


Making a fur pom-pom
In order to make a pompom from fur, you will need: fur, filler, needle and thread, as well as scissors and ribbon. First you need to lay out the fur, then a fur circle should be cut out of it, from the wrong side, the workpiece should be sheathed with large stitches. Then you need to prepare a small amount of filler and tie it with a ribbon. After that, the prepared filler must be placed in the middle of the fur circle, and the tape should be placed outside. Then you need to tightly pull the circle and tie a knot. Ribbon is needed in order to sew or tie a pompom.


How to make paper pom poms
In order to create a festive atmosphere or just decorate the interior, you can make paper pompoms. For work, crepe or thin wrapping paper, thin wire or thread, scissors are best suited. First you need to cut the paper into sheets twenty centimeters wide, thirty centimeters long. Each pom pom will require eight sheets of paper to make. Eight sheets of paper should be laid on top of each other, then the sheets should be folded like an accordion, so that the fold width is one and a half centimeters. After that, the workpiece must be bent in half, and the place of the bend must be tied up with wire or thread, then the edges of the workpiece should be cut off on both sides. Next, you need to carefully straighten all the layers of paper and the product is ready.


From packages
It is easy and simple to make pompoms with your own hands from ordinary bags. To work, you will need bags, scissors and adhesive tape.
First you need to prepare the packages, stack them in a pile, combining all sides. In order for the pompoms from the packages to turn out bright, it is necessary, stacking the packages in a pile, to alternate colors. After the packages are laid, cut off all sharp corners and cut the packages at the soldering points. Then the stack should be folded in half and cut in the middle with scissors. Then on both sides you need to make cuts, the main thing is that the strips are the same. Next, the stack must again be bent in half, then twisted and fixed with adhesive tape, and you're done.


It is this question that can suddenly and sharply arise on the eve of any holiday if you are a happy parent of a kindergarten-age child.
Sultans are made from corrugated paper or polyethylene, from ribbons or from film from old video cassettes (who still have those) or from New Year's rain. For a child, it is better to make them on a stick, to firmly hold this attribute in a child's pen.
For the manufacture of rain sultan on a stick we will need the following materials:
- New Year's rain (the amount depends on the necessary splendor of the rain broom),
- 2 barbecue skewers (pens or pencils will also work fine)
- scissors,
- a knife with a small ribbed blade (if you need to shorten the stick),
- adhesive tape (preferably transparent),
- hot glue gun (optional)
We measure the length of the sultan we need, rewind the bundle of rain with tape. Leave the tail the same length and cut off.
We bend in half - one bunch of rain for the sultan is ready!

We make the required number of bunches, the splendor of the broom itself will depend on their number.
It is better to make several small bunches of 4-5 to evenly distribute them around the stick. So the craft will look much neater.
It is better to use transparent tape, then a glue gun is not needed. I only had packing tape left, and in the morning the child had to be sent to kindergarten with ready-made sultans, so I had to use hot glue.
We cut the sticks, if necessary, to the desired length.

Prepared bundles of tinsel we fasten it tightly with tape or fasten it with hot glue to the tip of the stick with a whisk in the opposite direction from it.

From above, you can additionally fix everything together with adhesive tape, while we strive to pull it harder and put the skeins tighter.
After you have checked that the rain is firmly attached to the stick, you can decorate the handle of the sultan a little.
You can cover it with foil, but it is better to wrap the foil on top with transparent tape. It looks, frankly, not very. And since there is still a month of rehearsals ahead and I want to make it not only strong, but also beautiful, I decided to wrap the whole stick with the same rain using hot glue.
We wind the rain not only around the stick, but also 1-2 turns on top so that the stick is not visible, and the broom itself looks like a single whole.

Of course, the question may arise, why not wrap the stick with ribbons? Of course ... But here I was not guided by my own imagination, everything depended on the task set by the educators of my miracle!
like this rain sultan on a stick turned out!


I was glad to help!