Shellac (gel polish) is a relatively new technology in manicure that allows you to create a stable, bright and effective coating for women's nails. Its application requires a special ultraviolet lamp for drying, so the procedure is rarely performed at home. Removing the coating is somewhat easier. Many women do it on their own, in this way saving money on visiting a beauty salon. So, how to remove shellac at home? What tools and means will be required for this?
There are two methods for self-removal of shellac: using foil and without it. The list of tools and consumables that will become necessary to complete the procedure depends on the chosen technique.
To remove the coating by the foil wrapping method, it is necessary to prepare:
- food foil;
- jojoba oil or grape seed oil, needed to soften the cuticles;
- liquid for splitting varnish;
- orange stick;
- nail file for polishing the nail;
- cotton pads.
When using techniques that do not require the use of foil, the last item from the list of necessary materials is excluded. The rest of the above list does not change. More nail polish remover should be prepared.
Interesting to know: an orange stick can be replaced with an ordinary cotton swab, nail polish remover - with acetone, instead of grape seed oil, an ordinary baby cream or hand cream is often used.
Shellac removal process at home
As mentioned above, shellac is removed with or without foil. Acetone is often used instead of nail polish remover. Let's consider each of these methods in more detail.
Removal with foil
The shellac removal procedure begins with a thorough treatment of the skin around the nails with a protective cream or oil, which will avoid the negative effects of solvents on it. Wash your hands thoroughly, apply a protective substance and rub it into the skin. After that, the nail is polished with a polishing file, while removing the top top layer of the coating. This can be omitted, however, chemical-resistant TOP will put a woman in front of the need to process gel polish with a solvent for a longer time.

After the TOP is removed, it is necessary to apply a solvent liquid to the nails. To do this, cotton pads are moistened in acetone, slightly squeezed and wrapped around each finger that needs to be processed. If there is a French manicure, the disk should completely cover the tip of the nail from the treated side.
The superimposed discs are fixed to the nail with pieces of foil, wrapping it around each finger in a circle and giving the foil the necessary shape. Each nail should be in a kind of case that does not allow the solvent to evaporate from the cotton pad. At the same time, it is recommended to hold your hands with the back of your hand up, slightly raising your fingers. This will ensure that liquid vapors reach the tips of the nails.
Discs treated with acetone should be kept on the fingers for about 15 minutes. After that, the foil is removed and the result is evaluated. Gel polish should come off in shreds. Departure of an even and dense coating layer indicates the need for longer processing.
The outgoing varnish is removed with an orange or cotton swab moistened with acetone. In addition, it is permissible to use a metal manicure spatula. Insufficiently dissolved traces of varnish can be removed by re-treatment of the nail with acetone or filed off with a nail file designed for polishing nails.
How to remove the coating without foil
To remove gel polish without foil wrapping, you will need a small container filled with solvent liquid or acetone. The preparatory stage is no different from the above method. The nail is also processed with a nail file to remove the TOP, hands are thoroughly lubricated with a protective cream or oil.

After that, the fingers are immersed in the liquid so that the nails are completely lowered into the solution. In this position, they are kept for about 8 minutes, after which they are removed, wipe their hands with a dry cloth and remove the outgoing varnish with a stick or a pusher. Unremoved traces of the coating on the nails are again immersed in a solvent agent for 1-2 minutes, after which the cleansing attempt is repeated again.
After the complete removal of the varnish, the hands are thoroughly washed in running water and treated with products to moisturize the skin and restore the structure of the nail. This is necessary, since the treatment with chemicals containing acetone leads to damage to the nail plates. In this case, the nail becomes ugly and brittle.
This is important: removing shellac by immersing your fingertips in a solvent composition is possible only if there are no lesions on the skin and symptoms of skin diseases. Even the most harmless solvents have a certain irritating effect and can aggravate the course of the disease.
Removal with acetone
To remove shellac yourself, the use of acetone is possible, but not desirable. The fact is that the solvent is a rather aggressive chemical substance that can adversely affect human health. With local contact (immersion of nails in a liquid), local and general allergic reactions may occur, such as urticaria, angioedema, anaphylactic shock. In addition, the substance greatly dries the skin and disrupts the structure of the nail, which further requires measures to restore it.
In addition to the above, while being near a container with acetone, poisoning with its vapors is possible. In this case, the victim develops edema of the respiratory tract, respiratory failure, damage to the central nervous system. In order to avoid such phenomena, it is recommended to think in advance about how shellac can be removed without the use of toxic chemical compounds. If the decision is made to use acetone, it is necessary to use respiratory protection equipment while being near the container or carry out the procedure with maximum access to fresh air.
Where to buy and how much do shellac removers cost?
The popularity of shellac also determines the widespread use of means for removing it. The compositions have significant differences in price, quality, volume, country of origin and their chemical components. Today, you can buy the necessary liquid in cosmetics stores, beauty salons, online stores. For example, Yandex Market offers about 70 types of liquid, the cost of which varies from 50 to 1500 rubles. The goods are delivered within Moscow and the Moscow region.

Approximate prices for various funds are presented in the list below:
- Lafitel - 122 rubles;
- Severina - 455 rubles;
- Ganni gel polish remover - 200 rubles;
- Domix - 129 rubles;
- CND shellac - 1500 rubles;
- Dream - 55 rubles;
- Acetone - 20 rubles.
When calculating the budget, you should include in it not only the cost of the nail polish remover itself, but also the amount of financial costs required to purchase other consumables: hand cream, cotton swabs, foil, and others. In some cases, visiting a beauty salon may be more cost-effective than buying the necessary funds for personal use.
Nail restoration
It's no secret that shellac itself does not damage nails. However, in the process of removal, a rather serious chemical effect is exerted on the structure itself and the skin near the nail. This requires certain measures aimed at restoring damaged tissues.
Herbal bath

After the manicure has been removed, the nails are restored by applying herbal baths. To strengthen the plates, herbs such as yarrow, nettle, crushed oak bark are used.
To prepare a solution, 1 tablespoon of dry raw materials is poured into a 0.5 liter container, poured with boiling water and infused for half an hour. The resulting composition is filtered through gauze and, if necessary, heated. The temperature of the infusion should be 36-38˚С.
The nails are immersed in the resulting broth, kept for 15 minutes, after which the hands are wiped dry with a towel. The procedure is repeated every other day, the total number of baths should not exceed 10-12 times.
Iodine bath

Once the shellac has been removed, the nails can be repaired with iodine. As a rule, baths with the addition of this component also include other restorative elements. Below are popular recipes for nail regeneration.
- Iodine and salt: add 3-4 drops of iodine and 1 tablespoon of salt to 200 ml of water. The components are mixed, after which the phalanges of the fingers are immersed in the resulting product. The duration of the procedure is no more than 15 minutes. Baths are done every other day for 1-2 weeks.
- Iodine and medicinal herbs: 5 drops of iodine are added to the herbal decoction, the preparation of which was described in the section above. The treatment process is no different from that when using purely herbal formulations.
- Oil, water and iodine: to prepare an oil-iodine bath, you should take 1 glass of water (200 ml), 2 tablespoons of vegetable oil and a teaspoon of an alcoholic solution of iodine. Iodine is added to water, mixed, after which the resulting substance is mixed with oil. To do this, the composition is heated in a water bath. The exposure time of nails in such a bath is 7-10 minutes. The procedure is repeated every other day, for a week.
It is worth noting that when using iodine, it is unacceptable to violate the treatment regimen in a big way. An increase in the number of procedures or the concentration of the active substance may not have the best effect on the state of health.
beer bath
Beer nail bath is a decoction of chamomile flowers made on beer. The drug is easily made at home. To do this, take 250 ml of dark beer, heat it up without boiling, pour 1 tablespoon of dried chamomile flowers with the heated drink. The liquid is insisted for 15 minutes in a water bath, after which it is filtered and cooled.
It is necessary to use the bath daily, for 15 minutes a day. The result is noticeable within a few days after the start of treatment. Such baths do not pose a danger and can be used prophylactically for a long period of time.
lemon bath
A bath with lemon juice allows you to restore the structure of nails, whiten them and accelerate growth. To prepare it, you need to mix 100 grams of glycerin, 2 tablespoons of lemon juice and 1 tablespoon of honey. The mixture is heated to a comfortable temperature, after which the phalanges of the fingers are immersed in it. The duration of the procedure is 15-20 minutes. The frequency of execution is every other day. The course of treatment is 2 weeks.
salt bath

To prepare the solution, table or sea salt is used. A tablespoon of the mineral is dissolved in 200 ml of water heated to 40 ° C, after which the composition is considered ready. The phalanges of the fingers are immersed in salt water and kept in it for 20 minutes. After the procedure, it is recommended to rinse your hands and treat them with cream.
Interesting to know: a salt bath becomes healthier and more pleasant if you add a few drops of aromatic essential oil to it. In addition, almost any restorative components can be added to the solution: iodine, a concentrated decoction of medicinal herbs, citrus fruit juice.
From the foregoing, it is clear how to quickly remove shellac and restore nails after exposure to gel polish removers. Using the knowledge gained, every woman can keep her nails in a well-groomed and healthy condition for many years.
Lyubov Ivanova
Reading time: 5 minutes
A A
How to remove shellac from nails, what methods of removing shellac coating exist, and whether it can be removed at home, you will learn from the article.
Every girl is familiar with such a novelty of manicure as a shellac coating. Shellac is an innovative nail polish that has the properties of a gel. A durable nail coating developed by an American company is popular all over the world. Compared to regular nail polish, shellac lasts longer on nails, averaging about three weeks.
Distinctive features of the shellac coating are that the application occurs without cutting off the top layer of the nail. At the same time, a special technology is observed using an ultraviolet lamp and professional tools (base and top).
Shellac gives the master incredible scope for design. Drawings, sequins, rhinestones and other decorative elements, the effect of broken glass, a classic or colored jacket - all this can decorate shellac-coated nails. The procedure is more in demand than a manicure with ordinary varnish and extensions. Unlike extensions, shellac is a more gentle option, it damages the nail plate less, and is not inferior in effectiveness.
The main advantage of shellac manicure is durability. It is also associated with the features of removal. Regular nail polish remover won't work. Manicurists strongly recommend seeking help from a beauty salon, but sometimes this is not possible. For example, a manicure was damaged during a vacation or a nail master cannot accept it in the near future. Then there is a need to remove shellac yourself at home. This is real if you know the features and follow the rules for removing shellac.
Methods for removing shellac without a special liquid

To remove shellac without resorting to the help of a specialist, you will need the following tools: acetone or acetone-containing nail polish remover, isopropyl alcohol, aluminum foil, cotton pads or cotton swabs, and an orange stick are also suitable. Technical acetone should not be used. It injures the skin, cuticles and even the nail plate.
Consider two simple but effective ways to remove shellac without a special liquid.
Option number 1
Before the procedure, make sure that the product does not cause allergies. To do this, apply a small amount on the inner surface of the elbow. If after ten minutes there is no redness or irritation, carry out the procedure.
Prepare the components necessary for the procedure. Split cotton pads and cut into two halves - semicircles. If ordinary cotton wool is used, small cotton pads are formed. 10 squares are cut out of foil so that everyone can wrap a finger. Wash your hands in warm water with soap, this will degrease the skin and allow for a more effective procedure.
- Moisten the cotton with plenty of nail polish remover. Apply the moistened swab very carefully, avoiding contact with the skin and cuticles to prevent burns.
- Wrap the nail with cotton tightly applied with foil. To fix cotton sponges, ordinary office rubber bands are also suitable. Do this with each finger.
- The design is left on the nails for 10-15 minutes, after which it is removed alternately from each finger. It is recommended to remove cotton wool with rotational movements, so it will be possible to remove more varnish.
- Most of the coating should come off the nail immediately after removing the foil, the remains are removed with an orange stick.
An orange tree stick can be replaced with a pusher - this is a metal spatula for pushing back the cuticle. The pusher will need to work more carefully, gently press on the tool, since the metal can damage the nail plate when pressed hard. If the shellac does not lag behind the nail plate, the procedure is repeated for several minutes.
The shellac removal procedure is completed by polishing with a buff (this is a polishing block that is softer than a file, helps smooth out uneven nails, and bring the manicure to perfection). They remove the smallest remnants of the coating, and the shape of the nail is honed. A polishing file will also work. To prevent dryness and thinning of the nails, cuticle oil is applied with light massage movements.
Video instructions
Option number 2
The second method is easier and faster than the first, but has disadvantages. It is less gentle, and aggressively affects the nails and skin of the hands.
- Before the procedure, wash your hands with warm soapy water. The upper shiny layer of shellac is sawn off with a grinding file.
- The skin around the nails is smeared with a greasy cream. For 10 minutes, immerse the nails in a bath with acetone or concentrated nail polish remover. You can immerse one at a time, if the size of the container allows, soften the coating on both hands at once.
- Carefully remove the film of varnish with an orange stick, try not to damage the nail plate. Wash your hands thoroughly in warm water using mild soap.
- As in the first option, we treat the nails with a buff and lubricate the cuticle with special oil.
After the transferred stress nails and hands need recovery. To do this, lubricate them well with a nourishing cream. To make the skin of the hands recover faster, become tender and soft, make a special mask that will moisturize the skin of the hands and nourish it with useful substances.
The listed ways to remove shellac at home will help save money and not resort to a visit to a nail salon.
Professional methods for removing shellac

It is easier to remove the shellac coating than the gel that is used for extensions. In order for the procedure to pass quickly and without negative consequences for the nails, you should contact the specialists in the salons. In nail salons, specialized tools are used that will allow:
- Completely remove the gel polish from the nail plate without leaving even the thinnest film. The thin transparent layer of coating remaining on the nails will spoil the future manicure, deprive it of both aesthetics and strength.
- Prepare the base for the next manicure, which will allow you to look perfect.
- Strengthen nails with nourishing and moisturizing ingredients.
To simplify the task of removing shellac, professional kits are used. They are suitable for both salon and home use.
The standard set contains a shellac dissolver, an orange stick, disposable nail sachets, a professional nail file and cuticle oil.
In specialized salons, only professional products are used and the technology for removing shellac coating is as follows:
- Shellac remover is applied to cotton sponges that look like ordinary fingertips. They are put on each finger and fixed with Velcro. Thus, the liquid gradually corrodes the coating without affecting the skin.
- After 10 minutes of exposure, the sponges are removed, and the remnants of the softened gel are removed with an orange stick.
Video tips
Professional masters use high-quality products in their work, which during the procedure saturate the nails with caring components. Immediately after this, you can apply a new coating, this will not damage the nails.
Types of liquid for removing shellac

The choice of liquid for removing shellac should be taken very seriously. A durable coating is difficult to remove, so some liquids act aggressively not only on the varnish, but also on the nail plate.
Any shellac remover contains acetone or its analogues, for example, acetylate, solvent. These chemical compounds break down gel polish well, but the side effect of use is the dryness of the nail plate. Another component often included in many liquids, isopropyl alcohol also adversely affects the nail.
To neutralize or reduce the negative impact of chemical elements on the nail, well-known brands supplement the composition of liquids with vitamins A and E, petroleum jelly, glycerin, disinfectant additives, plant extracts and essential oils.
Useful for nails are castor, lemon, almond oils, tea tree extract, decoction of wheat germ. Some manufacturers produce such a nutrient liquid with the name “smart enamel”, because it provides safe comprehensive care and promotes a healthy appearance.
If the product does not contain nutrients, it is imperative to use cuticle oil after each shellac removal procedure. This will prevent overdrying of the cuticle and nail plate. It is strongly not recommended to remove the coating with concentrated acetone. It aggressively affects the nail plate, provokes delamination of the nail and, penetrating the body through the skin, poisons with toxins. In order not to harm your health, use a quality shellac remover.
Consider the most popular liquids.
- Liquid firm CND (Shellac) gently removes varnish in an extremely short period of time - 8 minutes (standard 10-15 minutes). The vitamin E and macadamia nut oil included in the composition moisturizes, preventing overdrying of the nail plate and cuticle and the appearance of white spots on the nails. Some brand liquids have a pleasant smell (CND Product Remover).
- Manufacturer color Couture entity One releases goods in containers with a very convenient dispenser. The protective layer of the nail plate creates lanolin, which prevents dryness and irritation.
- Company fluids Gelish Harmony, Jessica Gelation,GelFx Orly dissolve the varnish in 10 minutes without harming the natural nail plate.
- Firm Astonising produces liquids that are suitable for removing not only shellac, but also gel polish and acrylic.
- More versatile brand tools
If it is not possible to go to a nail salon to remove shellac, please be patient and use the means available, and perform the procedure at home. The main thing is to follow the rules for removing shellac, which we described in the article.
Shellac is a nail coating consisting of liquid gel and professional varnish. Recently, the number of fans of shellac is becoming more and more. This is due to the fact that with the help of this technology a bright manicure is obtained, which makes the nails not only beautiful, but also protects them from the effects of aggressive factors and helps to strengthen the nail plate. But is it possible to remove the annoying coating at home?
How long does shellac last
But nothing lasts forever under the moon ... This also applies to Shellac gel polish. Although this coating is considered strong enough, sooner or later it should be removed, as the nail gradually grows back, the varnish itself loses its original appearance. Technology developers and material manufacturers guarantee that shellac will stay on nails for 2 weeks.
But life always makes its own adjustments. According to some women, the varnish lasts much longer - up to 3-4 weeks. Others complain that after a few days there was no trace of a chic manicure: the coating cracked, peeled off, faded, etc.
There are three reasons why shellac quickly lost its "marketable" appearance.
- The coating technology was violated (for example, the nails were not degreased before the procedure, the exact drying time under a UV lamp was not maintained, etc.).
- Poor quality, damaged or expired materials used.
- Gel polish after application was subjected to rough physical exertion or aggressive chemical attack from "thermonuclear" household products.
- The plates on which the product was applied were already thin, weak or even damaged from the very beginning (for example, strong delamination or creases at the tips). Some persistent lovers of their “natural nails” force the master to work with obviously poor-quality “source material”. Naturally, complaints about shellac that quickly peeled off at the site of damage to the nail are unjustified here. And not a single master will give guarantees for such “forced labor”.
How not to remove the cover
Many women, in order to save money, try to remove shellac on their own at home. It is quite possible to do this. However, the process of removing the coating must be carried out correctly, otherwise, instead of the promised strengthening of the nails under the influence of shellac, you can completely lose them or introduce an infection into them.
It is strictly forbidden to cut off the coating mechanically using abrasive materials or, even worse, wire cutters. This is fraught with the fact that the nail plate will be subject to severe thinning and injury. Accordingly, the nails will become weak, brittle, and will grow poorly. In addition, inflammation of the periungual bed is possible.
You should also not try to use gasoline, kerosene, acids, etc. as a solvent for shellac. Firstly, the effect on the coating will be minimal, and secondly, the skin of the hands and nails will suffer greatly from aggressive chemicals.
When using "barbaric" methods of removing the coating, the nails require long-term treatment
Shellac Removal Tools
Gel polish removal kit includes convenient caps
However, if there is no such set in the house, shellac can be removed using improvised means. To do this, prepare:
- Remover or acetone (nail polish remover).
- An orangewood stick or pusher.
- Soft nail file (150/180 grit).
- Soft buff for nails.
- Cleaning brush.
- Cotton discs. They should be cut into four pieces.
- food foil. It must be cut into pieces measuring 7x10 cm.
To remove shellac yourself, you can use improvised means.
How to remove it correctly: step by step instructions with a photo
- First, be sure to wash your hands to completely remove sebum from the surface of the nails.
The presence of fatty contaminants on the nail plate will worsen the softening process of shellac
- To facilitate the removal of shellac with a file, you can remove the top layer of the coating.
The top layer of shellac is removed with a soft nail file
- Soak a cotton pad thoroughly with nail polish remover.
- Apply the moistened disc to the nail plate.
A cotton pad soaked in shellac remover is applied to the nail
If the composition of the removing liquid contains acetone, then Vaseline or natural oils can be applied to the cuticle and side ridges around the nail, which will prevent the chemical from penetrating into the pores.
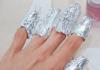
- Then the phalanx must be tightly wrapped with prepared food foil in order to fix the sponge well. If there is no foil in the house, then adhesive plaster can be used instead.
The foil keeps the cotton pad in place and prevents the shellac remover from evaporating.
- All fingers are treated in a similar way. The duration of the funds for shellac should be an average of 10-15 minutes. If a liquid that does not contain acetone is used as a solvent, then the time period can be increased, since the nail will not undergo severe drying, and the coating will soften more. In order to better remove shellac, fingers can be slightly warmed up with a UV lamp or a hair dryer, heating pad, etc.
Nails on all fingers are prepared for removal of the coating in the same way.
- After that, the foil and cotton pad should be removed. The coating must be removed with a wooden stick or a pusher (it is better to give preference to an orange stick - so the probability of damage to the nail plate is low). If acetone was used as a solvent, then the pusher should not be metal!
Remove foil from fingers one at a time. Only after the shellac has been removed from one nail, you can remove the wrapper from the next.Shellac is removed from each nail with a wooden stick or pusher
- Sometimes shellac is not completely removed. Those areas of the nails from which the varnish has not been removed well can be cleaned with light movements without pressure with a soft nail file.
Removing shellac residue with a soft nail file
- The next step is polishing the nail plate with a manicure buff.
- The resulting dust is removed with a brush.
- After the shellac removal procedure, the nails and cuticles look somewhat dried. To soften and moisturize them, it is recommended to apply a few drops of oil (for example, olive oil). Each phalanx should be well massaged.

The type of application, developed by an American company, very soon topped the top nail procedures. The girls immediately appreciated the convenience of using shellac. It is fast, easy to apply, and the nails remain well-groomed and beautiful for a long time.
Is it possible and how to quickly remove gel polish or shellac at home with ordinary acetone or nail polish remover? Or do you have to go to the salon to do it? Can! We'll tell you how.
general information
Shellac allows you to diversify manicure design, apply different patterns and decorative elements, experiment with a classic or colored jacket.
The procedure replaces the usual varnish coating and even extensions. Compared to the latter, shellac is more gentle, even on short nail plates it looks quite impressive.
The application procedure is more expensive than a regular manicure with painting, but the result is worth it.
Girls do not save, happy going to the master. After almost an hour, the hands become well-groomed, and the nails become elegant.
The only thing that can upset is another trip to the salon to remove shellac. The procedure takes time and money.
But what if for some reason your master does not work, and the manicure already looks completely unpresentable?
For such cases, the most resourceful girls and fashionable bloggers began to experiment. It turned out that finding a way to remove Shellac on your own is not so difficult.
Everyone has all the necessary tools at home. Among them are conventional lacquer removers., some cling film and your patience.
Removal with foil
To better imagine the procedure, let's see how professional nail masters do gel polish removal.
In their practice they use:

- A special liquid that dissolves varnishes.
- Professional disposable sponges, more like miniature bags. They are tightly attached to the nails.
- Wooden orange sticks.
- Professional nail file.
- Cuticle oil.
This entire professional set can be replaced with homemade tools.
Cotton pads or sponges will be used as bags. We will fix them with ordinary food foil.
An orange stick can be replaced with a pusher - a double-sided metal tool designed to push back the cuticle.
There is a pusher even in the most modest manicure set. And the last thing we need is acetone or nail polish remover but quite concentrated.
Our list of must-have tools for removing Shellac at home looks like this:
- acetone;
- pusher or orange stick;
- foil;
- cotton wool or cotton pads.
Before you begin, wash your hands thoroughly with soap and water. This is necessary to degrease them, which will allow the acetone to do its job.
If you miss the moment, then the shellac may come off poorly. You'll have to do it all over again after a while.

The instruction is as follows:
- We form sponges from cotton wool that will cover the entire nail plate.
- Cut the foil so that you can wrap your finger with it.
- We begin to dip the cotton wool into the liquid in turn, put it on the nail, wrap it with foil.
- Funny compresses should be kept for up to 15 minutes.
- Watch your favorite movie for now or think about what other manicure you can do.
- You can massage your fingertips a little.
Don't be scared when you see your nails after the cotton has been removed. They will look unsightly, as if you have been walking with a manicure for a long time, but there is simply no time to remove the varnish.
It is possible that Shellac will not be completely removed. A special wooden stick or pusher will help here. Carefully remove any leftovers.
It's good if you have a home nail file. It can be used too. After suffering stress, your nails need to be restored.
Wash your hands again with soap and apply a moisturizing or nourishing cream. You can also use a special cosmetic oil.
The video shows how to properly remove shellac from nails in this way at home, because it is easy to remove it yourself at home:
Removal with acetone

How can you remove shellac at home without foil and how to do it at home? Acetone.
The second method has its advantages and disadvantages. Itself the procedure is much easier.
You will be able to observe directly the process of destruction of the varnish, which will allow you to control the process.
But this method is not so gentle. We will need:
- a small container where you can hold both hands at the same time;
- nail polish remover;
- cream;
- orange stick, pusher;
- bafik or grinding nail file.
Before washing off shellac, wash your hands thoroughly.
- We cut off the top shiny layer of the coating with a nail file for grinding.
- Pour liquid.
- Lubricate the fingers with oily cream.
- Dip your fingertips into the container. We hold for about eight minutes.
- Remove the softened gel polish with a pusher.
- Wash your hands again, apply cream.
After removal, it's time to think about a new manicure. A very interesting design is obtained if you do
Every girl wants to be beautiful and well-groomed, and the condition of her hands plays an important role in this. To extend the life of a manicure, many of the fairer sex use a special coating called shellac. This substance is something between a varnish and a gel. As a result, the manicure looks very impressive and lasts at least 3 weeks. It is important to take into account that the process of removing the coating from the plate requires certain skills. How to remove shellac at home? Let's talk!
What is shellac
 For the manufacture of shellac, the same base is used as for ordinary varnishes. However, it contains additional ingredients that prolong the life of a manicure or pedicure. As a result, the coating on the nails lasts at least 3 weeks. It is necessary to remove shellac from nails only because they grow quite strongly, and the manicure becomes less accurate.
 Since shellac is not a simple varnish, its application requires the use of special tools and special skills. First of all, you need to be careful, all movements should be as accurate as possible. Only in this case, the manicure will look attractive. In addition, shellac solidifies in a special device - an ultraviolet lamp.
Today you can find such a coating in different colors, which allows you to achieve the perfect manicure that can easily fit into any image. In addition, the tool can be an excellent alternative to nail extensions.
Shellac contains no harmful components that can disrupt the structure of the nail plate. This varnish is completely harmless and suitable for all girls.
Shellac removal technology using foil
The most popular way to quickly remove shellac is to use foil. It is used by many masters. To implement this technology, you should arm yourself with the following devices:


To remove shellac at home, you need to follow these steps:

If, after performing the above manipulations, a transparent base was present on the nails, you need to thoroughly wipe them with a cotton pad, after wetting it in nail polish remover.
Should be considered:

Do not be afraid that after this procedure, the nails will not look too attractive. This can be corrected in just a few days with careful care. Daily it is recommended to treat the nail plates and skin with oil. Baths made from salt, honey, etc. are very useful.
Nail polish removal technology without the use of foil
To remove the cover, follow these steps:
- Fill the dishes with nail polish remover, it must certainly contain acetone.
- Saw off the shiny coating from the plate. To do this, you need to use a special file.
- Treat the skin around the nails with oil or fat cream.
- Place your fingers in a bowl of nail polish remover. This must be done in such a way as to achieve immersion of each nail.
- It is recommended to keep fingers in the container for 7-8 minutes.
- Softened shellac should be disposed of with a wooden stick.
How to remove shellac without foil - video
How to remove shellac without acetone
The use of acetone can cause serious damage to the structure of the nail plates, making them more brittle and unattractive in appearance. What can replace this substance? Conventional nail polish removers are ineffective because they do not have strong enough softening properties. The use of such compounds will lead to the fact that the manicure will become less shiny, but the coating itself will not go anywhere.


- To replace acetone, it is recommended to buy a special remover. It is sold in specialized stores. The undoubted advantage of this composition is its high efficiency. In addition, it does not have an unpleasant odor and gently affects the nail. The composition of such products contains vitamins and useful elements that provide nails with complete care.
- Some girls use isopropyl alcohol to remove shellac from nails. It can be bought at hardware stores. This tool is very inexpensive and helps to effectively cope with the remnants of manicure.
It is important to consider that isopropyl alcohol is highly concentrated and can cause severe skin irritation. Therefore, extreme caution must be exercised when using it. It is important to ensure that the composition does not get on the skin. In addition, it is not recommended to keep it on the nails for more than a quarter of an hour.
Features of using a special set

To facilitate the process of removing shellac from nails, you can purchase a special kit that is designed for this. Thanks to this, it will be possible to minimize all negative effects on the nail plates. As a rule, the composition includes:
- orange sticks;
- comfortable sponges in the form of pockets;
- a special liquid that helps remove shellac from nails.
To use these devices, you need to follow these steps:

Through this procedure, it will be possible to minimize the negative consequences. This will help protect the nail plates. In addition, shellac can be removed more efficiently, which avoids the use of a buff.