Knitting a blanket with knitting needles is not an easy undertaking, it requires painstaking work and perseverance. But if you manage, you will become the owner of a unique, beautiful and very practical thing.
This article is intended for persons over 18 years of age.
Are you over 18 already?
What you need to know if you decide to knit a plaid with knitting needles?
A plaid is a beautiful thing, both from a practical and aesthetic point of view. It is always nice to lie down on damp autumn or frosty winter evenings, wrapped in a warm blanket. Especially if he is bound by his own hands or the hands of a loved one.
As an element of decor, a well-knitted plaid also looks chic. And almost every housewife sooner or later comes up with the idea of knitting it herself. A full-fledged one for yourself or a small one for your beloved daughter's doll.
Let's figure out what we need to have in order to get this beautiful and cozy item.
We will need:
- knitting needles, the diameter depends on what product we want to knit;
- high-quality strong threads;
- basic knitting skills;
- free time and patience.

Naturally, the speed of knitting depends on your skills. With a well-placed hand, everything will go relatively quickly. But for beginners, it’s better not to rush and do everything thoughtfully and carefully.
Preparing for knitting:
- We decide on the color and dimensions of the product. If you are not going to store your work in a closet and use it solely as a blanket, then you should consider how the plaid fits with the interior of the room. It is good when the work of your hands is combined in color with curtains, furniture and carpet. But do not take the color one to one. The product should not merge with the interior and lose its individuality.
- We select the material.
- We choose the scheme and method of knitting.
You can knit as a whole blanket at once, or in separate pieces - the so-called motifs. The latter option is more convenient, since you do not have to carry a huge and uncomfortable wad of thread. You just make small squares, and then connect them together in the final. There are no problems with the search for knitting patterns now.
On the Internet, it is easy to find options for a light or dark plaid, described step by step and even a description of the process in the form of a video lesson.
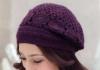
Before work, you should definitely pay attention to how to tie the edge. It is not necessary to do this, but a properly tied edge significantly increases the durability of the product. In addition, the strapping, if done correctly and neatly, will make the craft not only warm, but also incredibly beautiful. And the skills acquired in the process will come in handy if you decide to knit a hat.
How to knit a plaid with large knitting needles?
This summer, bedspreads made from thick yarns have become a real hit. Perhaps this is not the most practical product in everyday life, but it is definitely an excellent fashionable solution in terms of interior.
For knitting, it is best to use tops. An alternative name is combed tape.
Advantages:
- you can knit both with knitting needles and just with your hands;
- the product is soft, airy and quite light;
- raw wool adds a stylish charm.

There is truth and cons, especially painful for beginners:
- combed tape is not a finished yarn, so it breaks quite easily during work;
- untreated wool is heavily coughed up, loses its shape and breaks into fibers during knitting;
- tops products cannot be washed, and their cleaning with the help of chemistry is very problematic.
If all these factors do not suit you or you doubt your skills, then it is better to pay attention to spun wool:
- after wet-heat treatment keeps a constant shape of the product;
- practically does not tear, also does not break up into fibers and does not fluff;
- Gentle hand wash in lukewarm water is possible.
There are only two cons: slight stalling during operation, and if the thing is large, then it must be cleaned strictly in dry cleaning.
For knitting, in addition to the material, you will have to look for especially thick knitting needles. It is better to search in specialized stores.
How for beginners to knit a plaid with knitting needles from squares?
For a beginner needlewoman, the knitting method from squares is the most optimal. It has the following advantages compared to knitting a whole blanket with one fabric:
- simplicity - knitting a small comfortable square is much easier than a hefty clumsy sheet;
- insurance against mistakes - if you spoil the workpiece, you can easily and calmly dissolve it or even throw it out and start over, but screwing up the whole canvas is already very unpleasant;
- mobility - knitting can be easily thrown into a purse and knitted anywhere in a free moment: even at work during a break, even at a movie show;
- a flight for creativity - you can easily apply any knitting patterns or different materials for each square and not be tormented by the question of how to coordinate the square pattern with the general pattern of the plaid, but in a one-piece bedspread you will have to adhere to strictly defined patterns initially, and not step aside.
Square knitting is a great way to practice different styles and end up with a chic knitted blanket.
What schemes are needed to knit a plaid with knitting needles?
Description of a few simple popular schemes:
- fringe blankets;
- plaid with a heart;
- plaid fragments.

To understand how to knit, it is best for beginners to watch master classes, where they will explain and show the knitting methods of each pattern step by step. It will not be difficult for more experienced needlewomen to figure out the descriptions of the schemes using dry numbers.
How to knit a blanket for a newborn: patterns
Handwork has always been especially appreciated. Each handmade product bears the mark of uniqueness. Even if the master does everything according to the same scheme, then each work has its own exceptional features. Therefore, knitting a baby blanket for a baby who has just been born is a great idea.
As a rule, the main colors are traditional:
- pink for a girl;
- blue for a boy.
When starting to knit a blanket for a child, remember that the blanket should not only be beautiful, but also pleasant to the delicate skin of the baby. Therefore, it is important to think about what yarn the product will be made of.
Most often knitted from plush yarn. It is soft, fluffy and skin-friendly. Great for heavy knit patterns. If you try hard, you can knit a great themed gift. For example, analogues of jacquard. More classic beautiful schemes are also popular:
- bedspread with hearts;
- in the form of a mermaid or Winnie the Pooh;
- two color options.
With such a gift, you can safely go to an extract from the hospital.
How to knit a plaid with knitting needles from the remnants of yarn?
It happens that a lot of leftover yarn has accumulated at home. And it's a pity to throw it away, and it's not clear what to do with it. If you use knitting motifs, then it is quite possible to put everything on a blanket. You don’t even have to worry about what kind of yarn to knit from. Inconsistency in materials will not be a problem. By beautifully arranging the sectors, you can get an excellent visual assortment: here is a square of plush yarn, squares of "grass" around, and everything is tied with a woolen thread. Or if all the yarn is the same type, but different colors - knit a great double-sided woolen blanket.

Knitting a plaid on the sofa
Furniture cover dimensions:
- on the sofa - 140 × 200 cm;
- on the bed - 270 × 270cm;
- on a chair - 112 × 168.
Dimensions are approximate and may vary depending on the furniture model.
How to knit a plaid with braids?
Plaids with braids have several advantages at once:
- the complexity of the circuit can vary from very simple to the level of extra-class masters;
- the volume of the picture;
- the strength of the product as a whole.
From the easiest options for beginners, you can make such a bedspread:
- Weave braids: 4 rows, weave braids and 4 more rows and weave again.
- Then 6 knit loops and the same number of purl loops for the space between the braids.
The drawing is simple, but voluminous and looks great. If we take red (blue) and white yarn, we will immediately get Christmas motifs. For beginners, knitting with braids will be somewhat difficult, since this style is not very suitable for patchwork work. You will have to knit with a whole blanket. But if you get used to it, you can make a mermaid tail and a drawing with a voluminous bunny.
How to knit a large plaid with knitting needles without seams?
One of the highest levels of skill is knitting a plaid without seams. Such a blanket will have to be knitted very carefully and carefully. Any mistake will lead to large volumes of corrections.
Such blankets are knitted in a solid color scheme for adults. Seamless knitting is durable. Such a blanket is perfect for its intended use - to warm in the cold season. Colors are often chosen soothing: white, turquoise, gray.
Real home comfort is created by the hands and soul of the mistress of the house. All interior items, accessories and small details reflect the character and habits of their owners. The most pleasant atmosphere in the house is when every little thing in the interior gives aesthetic pleasure and gives home peace. The most "warm" and "hospitable" interior items will be knitted bedspreads with squares. They warm in the literal and figurative sense of the word!

Style Combination
Crocheted bedspread made of squares- this is such a versatile thing that it can be harmoniously combined with almost any style in the interior. It is important at the initial stage to choose the right colors, sizes and patterns.

- For modern modernity or minimalism, a bedspread of discreet colors and not too pronounced texture is suitable. You can use synthetic or cotton yarn. Wool next to an abundance of metal and plastic will be inappropriate.

- Textured styles such as boho, provence or country will perfectly accept a patchwork style bedspread with original floral motifs and fringes. Suitable yarn from natural and synthetic materials.

- The classic loves luxury and grandeur in everything - the bedspread is no exception. Complex and intricate patterns, the addition of gold or silver threads, beads, beads and other chic are real attributes of luxury. A classic-style bedspread will become the central element of the entire interior.

- Simplicity and conciseness - this is the loft style. Cotton or wool yarn and soft monochrome colors.

Choose the color of the bedspread
The harmonious combination of colors is one of the basic rules of the interior. Therefore, before you purchase yarn and begin to create your masterpiece, you need to thoroughly consider the color scheme.

Several standard combinations:
- Blue curtains, snow-white tulle and blue-green pillows on a sofa or bed. The color scheme of the bedspread can be kept from any of the above colors or differ by several tones.
- Beige for pillows and curtains, chocolate carpet with black edging on the floor A dark bedspread or beige with a pattern to match the edging of the carpet is perfect.
- Contrasts are allowed, but appropriate and harmonious. For a white room - blue, red, blue, wheat. For beige - the color of ripe berries and rich shades of fresh greens.

Optimal size
Compliance with the size of the product and the dimensions of the furniture for which it is intended is very important. The bed should be covered almost to the floor, otherwise the view will be unfinished and even clumsy.
For armchairs and sofas, options are possible when only the back and the seat are covered, or the furniture is covered completely, including the armrests and even the back.

The standard size of a bedspread for a double bed is 220*240 cm, for an armchair 130*170 cm, a small sofa 150*210 cm, a corner sofa 240*260 cm, a cot 170*240 cm.

All parameters are strictly individual and depend on the dimensions of the furniture. It is very easy to adjust the size of the bedspread connected with squares. If necessary, you can always add a few more missing squares to a practically finished product.

Basic principles of knitting
On my own granny square pattern, as it is commonly called, is not very complicated. Even a novice needlewoman can quickly master it. The basis of any crochet square is a simple single crochet. Having mastered this technique, you can proceed to more complex elements with several crochets and air loops.

The symbols on all crochet patterns are basically the same. It will not be difficult for you to deal with any pattern. But before embarking on complex patterns, fully master the simple basic knitting techniques. Otherwise, from a pleasant process, the creation of an exclusive bedspread will turn into a tedious and endless process.
From the basic patterns, no less attractive bedspreads are obtained than from complex and textured ones.

Crocheted bedspreads with patterns
Several knitted square patterns for beautiful and original bedspreads.


Knitted patchwork bedspreads look original and fun.

A soft blanket for a baby crib. It can also be used as a soft warm blanket.

With a bedspread, pillowcases on sofa cushions, curtains on the windows or a tablecloth will look harmoniously.
Crocheted pillow and bedspread patterns


Your product will be even more beautiful and refined if it is decorated with knitted flowers and finished with openwork frills.


Don't forget and about the wrong side. Of course, if you knit an openwork bedspread, and sometimes plan to use it as a thin blanket, you can leave the wrong side as it is. But it is better to sew a fabric to the wrong side of the furniture bedspread. Choose the material of the appropriate color range and soft texture. The lining should not deform the product, but look like a natural base.

The entire process of making a bedspread usually takes from one to three months. Spend at least 1 hour a day knitting while watching your favorite movie or series. Time will fly by unnoticed and very soon an exclusive interior detail created by your own hands will appear in your house.

Of course, such a coverlet can also be purchased to order, but it is much more pleasant to make it yourself - by putting your soul, love and painstaking work.

Unusual knitted bedspreads with squares
The fantasy of interior designers and craftsmen knows no bounds. New ideas for knitted bedspreads with squares are constantly emerging.

Knitted bedspread
Very stylish and beautiful in the interior look bedspreads knitted. A huge number of simple and complex motifs allow you to create unique products.

original version
The budget and original version is Blanket made from old wool sweaters. Everyone in the wardrobe will surely have a couple of knitted items that are obsolete or out of shape. A sweater or cardigan is a voluminous thing and takes up a lot of space in the closet, and if the family is large, the problem becomes more global.

There is no need to throw things away - sew a bedspread. Unzip the sweater and cut out squares. The size is not fundamentally important, you can use the same parts or combine small and large.
Sew all the details by hand or on a sewing machine. Along the edge, you can carefully sew, braid, fringe, just bend or overlock. The cover is ready! Minimum investment of time and money.
Bright drawings of animals
When creating a blanket for a nursery, you can deviate a little from the traditional "grandmother's square", knitted in a circle. Use original and fun motifs. For example, squares with colorful animals. All elements are knitted with a single crochet, the color of the threads is selected according to the pattern. Solid squares and with a pattern are stitched in a checkerboard pattern. Your child is sure to love this blanket!

Blanket-plaid with a cheerful muzzle
Decorate one of the corners of the children's bedspread in the form of a cheerful and good-natured face of a bear cub, kitten or other animal. The product will be an excellent bedspread and a blanket at the same time, and bright convex elements will be of great interest to a newborn child.

Creating an interior on your own is always pleasant and exciting!


Do you like to decorate your house with original things? Looking for any opportunity to make something interesting? We offer you the idea of making a knitted blanket with your own hands - it will add mood and bring zest to your interior, warm you with its warmth on a cool evening.
Knitted plaid is one of the trends of recent years. And no wonder. The possibilities of using a stylish little thing are great: a plaid is used as a bedspread and a blanket (which is especially important in the off-season), it can become a temporary cover for furniture, a warm and soft rug on the floor, create a cozy and inviting atmosphere in the house, you can wrap yourself up in it, sitting at TV with a cup of hot coffee…
There are also many options for making a knitted blanket - here you can give free rein to your imagination. Thicker or thinner, small or large, classic or playful, square or oval, coarse or fine knit, with or without complex embossed patterns - the choice is not limited.
You can knit a blanket in a variety of ways. Not only with knitting needles and crochet, which are familiar to us, but even with our hands. Surprised? Meanwhile, the latter option is becoming increasingly popular today, and it is not at all difficult to implement it. But first things first.
Plaid knitting and crochet
You can knit and crochet a lot.
The hook gives more opportunities for creativity: they can make a variety of patterns and options. With the help of a hook, it is easier to move from motif to motif, if we are talking about a large solid blanket (not connected by fragments).

Plaid crocheted. Photo: pinme.ru

Plaid crochet from "grandmother's" squares. Photo: yandex.by

Openwork crochet plaid. Photo: livemaster.ru
Knitting needles in knitting a plaid can be used both circular and ordinary (pair). In the latter case, the plaid will consist of several squares that are sewn together. Their pattern and color may not match - then a patchwork-style product comes out.
The simplest knit is garter. However, you should not use only this one - the edges of the blanket will bend. It is convenient to knit a plaid with a Canadian elastic band: it is easy to count the loops, and if you lose count, you can immediately see it. Knitting with an elastic band is elastic and resistant to wear (it is she who is knitted with cuffs and the bottom of sweaters, etc.). It will not be difficult for advanced knitters to knit a plaid with braids and other embossed patterns. Of course, it is worth mentioning that they will need more yarn than plain knit blankets - but what a result! It is preferable to use knitting that will look good on both sides, because the wrong side of the blanket will be visible.

Knitted plaid. Photo: mywishlist.ru

Plaid of knitted squares. Photo: yandex.ru

Knitted plaid. Photo: tekstilprofi.com
If you are still new to knitting and are afraid not to guess the width of the future blanket, first make a small test sample. Cast on twenty stitches and knit a few rows together with pattern fragments (if one is planned), then measure the number of centimeters of the sample in width and calculate how many loops you need to dial to get the desired size blanket.
The standard size of the blanket is 1.5 x 2 m. For reference, this blanket is suitable for a single bed. A smaller blanket (1.3 x 1.7 m in size) will cover the chair well. On average, the manufacture of a product will require about 1.5-2 kg of yarn (depending on the type of yarn, patterns and size of the blanket). In any case, it is better to buy yarn with a margin, as there is always a risk of making a mistake in the calculations. And the remaining balls will always find a use!
As for the composition of the yarn, it is better to focus on "breathable" options - those from which your skin will not have to sweat, namely, those containing natural ingredients, such as cotton, wool. Blankets made of yarn with wool will warm you in the cold winter. Cotton models are light, soft, do not irritate the skin, perfectly breathable - ideal for summer. By the way, cotton yarn is great for crocheting. For beginner knitters, mohair can be a real salvation: a fluffy thread helps to hide traces of irregularities and mistakes in knitting. You can stop at a mixture of angora and acrylic. If you want to give your interior a special flair, choose the option from "". Such blankets are not only very original, but also soft and pleasant to the touch.
Plaid hands
Hands usually knit (or “weave”) a blanket of super-thick yarn. However, you can do without knitting needles and a hook when creating a blanket from ordinary yarn with your own hands - then the product turns out to be openwork, very openwork!

Plaid from super thick yarn. Photo: dekodiz.ru
Blankets made of extraordinarily thick natural wool yarn , mostly merino, conquer more and more hearts of needlewomen (and not only) with their interesting, catchy look. When you first see such a plaid, you might think that this is a designer thing that is not available in independent execution. In fact, knitting a blanket from thick yarn is not difficult. You can use special giant knitting needles, or you can weave it with your hands. Most often, a thick plaid is knitted with a simple viscous, without patterns. The knitting technique on the hands is no different from the usual one: the basic loops are first thrown over one hand, then transferred to the other, which serves as an incoming knitting needle.
You can learn how to knit a plaid with your hands from the video.
When using hands instead of knitting needles, knitting turns into a kind of game: you must agree, it's fun to pick up loops on your hands! Well, if you connect a child to an unusual activity, then the blanket will turn out to be doubly “warmer”.
On average, it takes about 3 kg of yarn to create a thick yarn blanket. For a product about a meter wide, 15 loops are collected (hands are enough for them). In terms of time, if it takes about 5 days to knit a blanket from ordinary yarn, then it takes only 1.5 hours to weave a blanket from thick yarn with your hands. And that's just for beginners! Advanced needlewomen spend less than an hour on the process.
Baby blanket
To create a children's blanket with your own hands, you should especially carefully approach the choice of yarn. First of all, it must be hypoallergenic. So, if you do not know for sure whether your baby is allergic to wool, then it is better to refuse this component in the composition of the yarn. In addition, wool is prickly - also not the best option for a child, especially a very small one. For a lightweight plaid, it is better to choose cotton yarn. Too fluffy yarn should be discarded, as particles of pile and fluff may end up on the body and face of the child.
It is difficult to say exactly what a plaid is. This is a large shawl, and a blanket, and a cape, and a bedspread. One thing in common: the blanket should be warm, soft, not heavy and not parky. Making a blanket with your own hands is a thankful task in the truest sense of the word - it will be warm and cozy. And figuratively: a really good branded blanket costs somewhere up to $400, and the materials for the most expensive home-made one will cost half or three times less. Or maybe 10-20 times cheaper. Or for nothing - a blanket can be made in various ways.

A classic knitted plaid can be knitted or crocheted. It is difficult to knit a large blanket for the entire double bed (pos. 1 in the figure) without a car: you need very long knitting needles and it is easy to get lost when counting a huge number of loops. Manually at home in a free evening, it is possible to knit a smaller plaid on the needles on an armchair (pos. 2) or on the shoulders. It is easier to knit a large blanket of extra-thick yarn (pos. 3): in general, knitting needles are not needed for knitting it (see below), and a number that fits in the ordinary mind comes out 1-2 loops. But a thick plaid is not a cheap pleasure, although here resourceful craftswomen come up with unusual ways to reduce the cost.
It is more convenient to crochet a large one-piece blanket: it is easier to switch from motif to motif of knitting with this tool, which allows you to get large, solid, fairly detailed things, pos. 4. And at the same time, it is convenient to crochet small fragments, which are then either tied into the cloth with the same hook (pos. 5), or sewn with threads (pos. 6), or knitted manually with ties, pos. 7.
The children's blanket is knitted from hypoallergenic yarn (wool is an allergen). It is better to weave a blanket for a baby on a bed (see below) and impose pompoms on it (pos. 8), there will be both a blanket and a play mat - no matter how you indulge, you won’t hurt yourself. A budget option and an easy-to-use version of a blanket for the smallest ones is hand-knitted from fleece, also see below. Such a blanket will not last long, just as long as the child grows up.

And, finally, the “super-budget” version of the plaid is comfortable, durable, but not for show (say, at the dacha) - sewn from old knitted things, see fig. on right. In order for a plaid made of worn rags to serve for a long time, warm well, get dirty a little and warm well, materials for it must be prepared, see below.
We knit a blanket ...
... spokes ...
Knitting is not such a complicated science. It is more difficult to get used to not straying from the loop count, which makes the thing uneven and can wrinkle. The principles of knitting are simple:
- The loops of the first row (base loops) are thrown onto the outgoing knitting needle;
- The first basic loop is cast by hand;
- To throw on the 2nd and following loops, the end of the knitting needle grabs the thread of yarn and passes it into the previous loop until the required number of loops crawls onto the outgoing knitting needle;
- The second row is knitted, throwing loops from the outgoing knitting needle to the incoming one;
- When the loop is thrown, the end of the outgoing knitting needle grabs the thread, thus forming the loops of the third row;
- There will be a new loop front or back, depending on which side the outgoing knitting needle bypasses the incoming one;
- If the thing is large, the second (idle) incoming knitting needle is pushed into the loops of the third row as they are formed;
- When the 2nd row is knitted, the next ones are knitted according to paragraphs. 3-7, only the working and idle outgoing knitting needles change roles from row to row.
To get started, watch a selection of videos, after which (or better - during which) you can start knitting:
Video: how to learn to knit
Video: knitting basics
Video: types of loops for knitting
Patterns for a plaid
On the one hand, knitting a plaid is easier than knitting a sweater - a simple rectangle is knitted. On the other hand, it is more difficult: there are many loops, it is easy to lose count. In addition, the blanket should be more voluminous (to be warmer), and weigh less. It is also highly desirable to reduce yarn consumption. And the last condition: oddly enough, but the blanket should be stronger than a sweater or mittens and stretch less. Who remembers the times of shortage of bed linen, also remembers that over the summer the sheet, which is covered in the heat instead of a blanket, wore out faster than the same one on which they lie. And if the blanket stretches, then it will warm up worse, and it will more likely rub off. Therefore, not every knitting pattern is suitable for a plaid.
For beginners, it is better to knit your first plaid with a scythe (see fig.):

Oblique knitting satisfies all the above requirements, and its motive is simple:
- 6 purl loops - a path between the strands of the braid;
- 3 facial loops - one strand of braid;
- 3 more facial loops - another strand of the braid;
- weaving of strands - the idle and working outgoing knitting needles are interchanged through the loop (see the figure on the right), i.e., while the weave is knitted, the loops on the incoming knitting needle A are dropped alternately one by one, then from the knitting needle B, then from the knitting needle C.
A very good blanket is obtained if you tie it all with a Canadian elastic band (Canadian): the paths are narrow, it is easy to count the loops, and if you get lost, you can immediately see. In addition, this knitting is called an elastic band because it is elastic and resistant to wear (cuffs, cuffs, sweater hems, etc. are knitted with it): a plaid knitted with an elastic band fits very neatly as a bedspread, and you can wrap yourself in it as you like. True, it will take more yarn for an elastic band than for a braid (approx. 3.5 kg versus 2.5 kg for a blanket for an adult). How to knit with a Canadian, see next. video clip:
Video: pattern for knitting a plaid “Canadian gum”
Patterns and motifs for knitting a plaid with knitting needles can be found in abundance in the vastness of Runet. If you choose the appropriate option yourself, pay attention to the patterns for knitting hats - the technical requirements for them are the same as for patterns for plaids. Simply, if you knit a blanket, keep the number of loops in all rows the same according to the width of the blanket. One loop of regular yarn is 3-6 mm; from here the number of loops in a row is calculated. For example, how to knit a very beautiful, not very complex and quite economical in terms of yarn consumption pattern for a hat, which is also quite suitable for a plaid, see next. plot.
Video: beautiful knitting pattern suitable for a plaid
Note: in practice, the number of loops for knitting a blanket is not calculated in advance. Knit and knit the first row, counting the loops until the desired width is obtained. The next rows are knitted for the same number of loops.
... crochet ...
The principle of crocheting is somewhat different from that of knitting needles: we make a basic loop, we stretch a thread into it, forming the next one in a row, etc. The finished ligature comes off the tool immediately. Crocheting topologically complex things (clothes, gloves, whole furniture covers) is much more difficult than knitting, or even impossible. But as for things that are flat (unfolded) or small decorative fragments, crocheting them is much simpler and easier than knitting. For example, a crochet plaid is knitted in the same way as a scarf - the technical requirements for the motive are the same, you just need to give more loops per row:Video: crochet example
Note: you can start crocheting big things only by mastering knitting to automaticity - since there is no incoming knitting needle, it is impossible to get the same loops only with diligence and attention, the thing will go askew.
It is better for beginner knitters to get used to the hook on small decorative details, which can then be sewn onto the same blanket or somewhere else. For example, how to crochet a heart, see the video below:
Video: crochet heart for plaid decor
Or, say, the basis of so many decorative knitted items is a circle. How to crochet it, see another video tutorial.
Video: crochet circle
Knowing how a circle is knitted, it will no longer be insurmountable difficulties to crochet flowers. Baby blanket for a flower girl - what little princess will not be delighted with it? Even if she is a real Baba Yaga on a pot.
Making a blanket for a child from crocheted flowers is, in principle, not difficult, but the work is painstaking:
- They prepare a knitted base evenly (without a pattern), or buy a ready-made inexpensive thin knitted plaid;
- Knit flowers;
- Knitting the core, leave tails of yarn 10-15 cm each;
- Weave flower tails into the base, like a tone (see below).

Another useful knitting operation that is easy to crochet and impossible to knit is to weave a tone thread (tone) into a finished knitted thing, see fig. below. In addition to decorating, this is a way to literally “full teapot” (sorry - tea caddy) to perform 2-level knitting (see below), the highest class of knitting skill. More precisely, its imitation: the tone thread is taken thick, fluffy, but not tenacious - mohair, etc. Diverging after weaving, it will overlap the warp and create the full impression of volumetric knitting.

This technique is useful for tying a blanket for a newborn in a crib and in a stroller. Knit (you can also crochet) square fragments of the base; maybe not very even. You can take cotton yarn for the warp - it is cheap and hypoallergenic. A hypoallergenic tone (mohair, synthetic winterizer, etc.) is also woven into each square of the base, and then the fragments are woven (also crocheted) together, see fig. right below. In the crib, the body of the child under such a blanket will breathe freely. In the stroller, it will easily fold as it should along the seams of the plexuses. At the same time, the seams will overlap in a fluffy tone, and there will be no blowing through them.

The simplest way to weave knitted square fragments into a plaid is as follows:
- Binding threads are prepared from the same yarn from which the warp is made, with a length of 5 sides of a square fragment;
- Bend in half;
- The ends of the first binding thread are crocheted into the first adjacent loops of the warp of a pair of squares;
- In the next pair of loops, the connecting threads are crossed, etc., each time crossing the connecting threads;
- In the loops of the next pair of squares, the tails of the first connecting thread and the ends of the second are drawn (2 threads per loop until the tails run out;
- The tails of the last connecting thread in the row are bent to the sides and carried out into the transverse loops of the extreme squares;
- Weave the next row of squares in the same way;
- Similarly, the squares are woven across.
...and just hands...
With hands without knitting needles and a hook, they usually knit a blanket made of extra-thick yarn, see below. However, with hands without knitting needles and a hook, you can also knit an openwork plaid from ordinary yarn. Very openwork: women's shoulders under it on the strong half act about the same as slender legs in fishnet tights. Keep in mind. And how to knit an openwork plaid with your hands without knitting needles and a hook, see the video:
Video: knitted blanket with hands - without knitting needles and hooks
…very fat

A thick plaid made of extraordinarily thick natural wool yarn (mainly merino) is a recent development: the first samples appeared on sale 3-4 years ago. In 2016, the thick plaid reached its peak of popularity, which has now noticeably waned and, speaking in modern terms, the trend of declining demand continues. The reason is that it is very expensive, and there is only one advantage over the usual one: a luxurious, catchy look. $400 for a quality thick blanket is still cheap, and prices for products from leading manufacturers start at approx. from $600.
Merino extra-thick yarn on AliExpress costs approx. from $40 per kg; for an adult blanket it will need approx. 3.5 kg. In terms of volume, it will be as shown in Fig. on the right, so add on the door-to-door delivery of easily damaged and dirty cargo: in this case, it is better to keep Rospost in mind as a last resort. In total, it comes out somewhere around $ 200-250 materials for a thick do-it-yourself plaid. Synthetics instead of merino is not an option: it is difficult to knit, creeps in the product.
Knit with extra-thick yarn by hand using the so-called. giant knitting needles, pos. 1 and 2 in Fig.:
Patterns are possible the most simple, for example. braid, see above. How to knit a thick plaid of extra-thick merino yarn, see the video:
Video: knitting a plaid of thick merino yarn
Most often, a thick plaid is knitted evenly (without a pattern) with your own hands, literally, without knitting needles. The base loops are thrown over one hand (pos. 3) and transferred to the other (pos. 4 and 5), which serves as an incoming knitting needle. It turns out easier, faster and even smoother than on giant knitting needles. There is only one drawback: suddenly something is urgently urgent (the child is crying, the doorbell is ringing) - it will take from 3-4 minutes until you get out of these loops yourself. you can see a visual animation of how a thick plaid is knitted with hands without knitting needles.
Note: expensive extra-thick yarn is the main obstacle to making a thick blanket. Here a female trick comes to the rescue - how to roll ordinary yarn into a thick blanket suitable for knitting, see another video:
Video: making thick yarn for a plaid
Pompom blanket for kids. And not only
If we talk about such qualities of a plaid as sophistication and elegance, a pom-pom plaid on a woven basis gives much more opportunities for their embodiment in a product than a knitted plaid made of extra thick yarn. The advantages of a children's pompom blanket are discussed above. And for an adult plaid they are:
- Easier to do - you don't need to have any complex job skills at all.
- Weighs approx. 1kg less than a fat one of the same size.
- Warms up better.
- Thanks to the openwork base, it ventilates more freely and allows the body to breathe more.
- The cost of materials is at least half as much as the cheapest for a thick blanket.
There are two drawbacks to a pompom blanket. The first is difficult to wash and clean. Therefore, a pompom blanket is mainly for children for little ones or, for adults, for neat owners. The second is that it requires some production equipment to make it. However, it is simple, inexpensive and more than affordable for making with your own hands.
pom poms
Let's talk about the carrier base of the plaid with pom-poms a little further. In the meantime, about the decorative - actually pompons. Some homemade ones for a blanket are not necessarily suitable, because. you need a lot of pompoms, more than a hundred or even several hundred.
A well-known method for making a pom-pom on a disposable, removable 2-ring cardboard mandrel is shown in Fig.:

The outer diameter of the mandrel is equal to the diameter of the pompom; the diameter of the hole in it is half of it. However, in this way you can make a pompom on a hat. If you need a lot of pompoms and exactly the same, then due to the inevitable errors in marking and cutting out the mandrel rings, this method is unsuitable.
Large pompoms for a blanket or rug should be made on a permanent mandrel, see fig.:

Moreover, the rings must be cut with a circular drill from durable sheet plastic, and their edges should be carefully sanded so that they do not cling to the threads. To avoid trimming the pom-poms, make an initial cut in the coil with the tips of scissors until the edges of the rings show. Not more than 3-4 threads are cut at a time. Finally cut with a razor blade or, better, a new sharp mounting knife.
Note: memorize the pose highlighted in red. We'll need it soon.
It is possible that small pompoms will be needed for the plaid. For an adult - fill in the gaps between large ones and thereby make the blanket warmer and more attractive. For a nursery for the smallest (for example, for a one-piece blanket for a newborn), large pompoms are not needed at all.
It will not work to wind the base of a small pom-pom onto the rings - they will be required too small. There will also be few turns in the wind, and the pompom will come out sloppy. Small pom-poms, 2-3 cm in diameter, are made instead of a mandrel on a 4-prong table fork, see fig.:

Warp and knit
According to the described method, small pompoms can be prepared at once. Large ones are made one at a time when the base of the plaid is ready. In general, a pompom plaid is made in 5 stages: a) making a loom; b) warp weaving; c) tying the base; d) tying pompoms; e) fringe formation. The stages are simple, but each has its own subtleties.
Machine
The machine for weaving the base of a plaid with pompons is a wooden (plywood) shield (pos. 1 in the figure) or a frame (pos. 2). The frame will take a lot less material and work on it is uncommonly more convenient, but it needs to be made by someone with at least elementary carpentry skills.
Frame material - timber from 60x60. Corner joints - half-wood reinforced with diagonal pairs of self-tapping screws. Along the contour of the machine, nails 100 or 150 are not completely driven in with a step equal to the diameter of the pompom. If pompoms of 2 sizes are used - the diameter of the larger one.

Weaving
The base of the plaid is woven from knitting yarn, usually along and across (orthogonal weaving), pos. 1, 2, 3 and 5). The number of threads in the longitudinal or transverse row is at least 3. First, all transverse rows are braided with one thread, then all longitudinal, again transverse, etc. The ends of the threads are tied outside the weave, on the outline of the nails. If you use multi-colored yarn (according to 3 and 5), you can get a base (wrong side of the blanket) with color tints.
The basis of orthogonal-diagonal weaving (pos. 4) will make the blanket much stronger and warmer with little additional material consumption. It will be possible to impose small pompons on the crosshairs of the diagonal beams, which will also enhance the decorative effect. In this case, all small pompoms are knitted first, and then all large ones.
In orthogonal-diagonal weaving, there should be 2 orthogonal (longitudinal-transverse) per 1 diagonal thread. Weave for this like this:
- cross thread;
- Longitudinal thread;
- Diagonal thread;
- cross thread;
- Longitudinal thread;
- Thread of the opposite diagonal;
- cross thread;
- Longitudinal thread;
- Thread along the initial diagonal (p. 3);
- etc.
Base binding
All intersections of the warp beams are tightly tied with a strong twisted thread, pos. 5. Only pompom ties (see below) will not keep the base from spreading! Knit across. Tails of tying threads of at least 3-4 cm should fall on the future front side (from which there will be pompons, pos. 6).
The imposition of pompoms
Pompoms are imposed while the base is still on the loom, pos. 7. In order for the pompoms to hold firmly, they are knitted while the mandrel rings are not completely removed (“red” pos. in the figure with the pompom manufacturing scheme!) Knit pompoms on the base like this:
- When dressing the "waist" of the pompom, the ends of the dressing thread (bandage) are left 20-25 cm each;
- The ends of the bandage are carried into the base crosswise from the intersection of its bundles;
- Tighten the bandage until the pom-pom is in place properly;
- Tie the ends of the sling with a simple straight knot;
- The ends of the bandage are brought up (back to the pompom) crosswise from the places of entry into the base;
- Spend the ends of the sling under the "waist" of the pompom crosswise;
- They are brought out over the "waist" and firmly tied;
- Cut the ends of the bandage to the length of the pompom threads;
- Remove the mandrel rings from the pom-pom blank;
- Make the next pompom, etc.
Fringe
The fringe of a pom-pom plaid is very simple. The contours of the nails of the machine are cut in the middle with bundles of the base, the product is removed - the pompom blanket is ready.
Note: for more information on how to make a pompom plaid on a frame yourself, see the video below:
Video: an example of making a pompom blanket
Simple blankets: knit and sew
We connect
A very young child, for example. newborn, and the smallest pompoms on the blanket will seem too big. But soon the baby will grow up and he (she) will need a bigger, thicker, softer and more interesting blanket. In the meantime, mom is not up to complicated needlework. In this case, it is better to knit a blanket for a newborn by hand on bundles of fleece pieces - no skill is needed, but a little more time and inexpensive material.

The technology is extremely simple (see Fig.):
- We are preparing a template from a dense material 10x10 cm with marking the sides in centimeters, pos. one.
- Cut the fleece into pieces approx. 20x20 cm, i.e. with an allowance of approx. 5 cm per side, pos. 2.
- We impose a template, pos. 3.
- We cut along the edges of the fringe into ribbons 1x5 cm, pos. 4.
- We remove the corner squares, pos. 5.
- We knit ribbon after ribbon (pos. 6-8) of 2 adjacent squares.
- We tie it square by square in the same way, until we get a ribbon the length of the width of the plaid.
- We make the next ribbon (perhaps in a different color) and tie it to the first in the same way.
The ribbons are tied one to the other until the plaid grows in length as needed. You can, of course, impose ribbons from multi-colored squares - it's a matter of taste and the availability of material. Instead of fleece, baize, flannel and other fabrics certified for children's use will go. You can combine pieces from different materials at random - they will be enough for the natural life of such a blanket.
We sew
You can sew a blanket that looks unassuming, but warm, from old knitted things, cutting them into patches. It is only necessary that later the flaps do not shaggy and crawl under the stitching thread. For this, things “sentenced” to a blanket need to be prepared - dumped. And in order for things to fall off, they must be woolen with the addition of no more than 10-15% viscose or polyester. Fell things on the material for the blanket in the washing machine:
- Lay in a textile bag for gentle washing. It is in the textile! If the bag is mesh, the tows can disable the washer. It is quite difficult to fix it yourself, although it is possible.
- The washing machine is set to the longest washing mode and things are washed with wool powder. After washing, the tows are carefully removed from the bag.
- Dry prostrate in a horizontal or slightly inclined position (on a stand, without hanging).
- Shake well. On the street, standing with your back to the wind: allergenic dust will fly from the washed!
25.10.2017 26 748 0 Igor
skillful hands
A plaid is a very popular product, interest in which increases significantly in the autumn-winter period. Classic "checkered" options are no longer relevant. Volume, softness and naturalness of the material are in fashion. Therefore, a large-knit merino plaid has become a real hit of home comfort and stylish photos. The main objectives of this product is to decorate the interior and provide its owners with warmth and softness.
Content:
How to choose a blanket?
These blankets do not miss the opportunity to appear on the pages of glossy magazines, and bloggers can no longer imagine their photos without a “blanket” beautifully thrown on the sofa. And we have no choice but to rush to look for a great copy for our home. So where can you get it?
The founders of this "innovation" was the American company Modern Wool, which is still working. In addition, they produce hats, scarves, pillows - everything is very thick and merino. The disadvantage of this company for the Russian consumer is the lack of delivery to Russia and significant prices. The situation is approximately the same with a rather young Ukrainian brand, oriented primarily to the West.
It's good that Russian manufacturers are not far behind. Reasonable price, good quality and the possibility of different purchase options are the distinguishing features of a domestic seller.
How to knit a large knit blanket?
If for some reason it was not possible to choose a suitable model, this project can be carried out independently. To do this, you just need to tie it with your hands, with a little effort.

Types of thick yarn for knitting a plaid
The material plays the greatest role in this process, because if it is of poor quality, then it will not be possible to get any pleasure from the finished product. Thick blankets are made from merino wool. Its undoubted advantage is the absence of causticity and hypoallergenicity, which makes it an ideal option even for children's things. It should be borne in mind that this is a rather expensive material, which will have to be spent heavily.
Such material is divided into 2 types: raw unspun or processed spun wool. Each of them has a number of pros and cons, evaluating which you can make the right choice.

Raw tops or combed tape
It is a ribbon formed from woolen fibers. Its width can reach 5 cm. This material is suitable for crocheting or knitting a lot of things: hats, scarves, sweaters, etc.
Among the advantages are:
- The ability to use hands as a tool, instead of knitting needles or a hook. It can be inconvenient to move huge knitting needles, so your own hands are often used instead.
- Such material has high airiness and softness;
- Often the effect of raw yarn creates a special chic and piquancy to the product.
But there are also a number of disadvantages:
- Sometimes the tops are torn in the process of work, because it is not a finished yarn, but only a raw material for it. Therefore, it does not have all the qualities of the finished product, in this case, strength.
- The following follows from the previous statement: knitting can be accompanied by deformation of the combed tape, its separation into individual fibers, and the formation of pellets.
- Due to the technical features of the top, it cannot be washed, and it will also be difficult not to damage the product during dry cleaning.
spun wool
The processed material has the best characteristics in this regard. It is already completely ready for use, and its thickness is from 0.5 to 2 cm. The main difference from tops is a special mechanical and thermal treatment, which ensures the twisting of the thread and its stalling. This allows for many benefits.
Advantages:
- The wet-heat treatment carried out allows the future product to retain its original shape and not stretch during operation.
- It is protected from splitting into fibers, thread breakage and other similar situations, both in the knitting process and in the finished product.
- It is possible to hand wash ready-made items in cool water, if their dimensions allow it.
But it also has some drawbacks:
- A small degree of stalling of products.
- Hand wash is not available for all wool products - large items are dry cleaned only.
Taking into account all the features of a particular material, you can highlight the important aspects for yourself.
Calculate the amount of yarn needed
Calculating a sufficient amount of yarn is no less important than choosing it. Especially considering that this material is far from cheap. To do this, the following method is often used:
- 1 skein of the material needed for knitting is purchased;
- with the selected pattern and tools, a fragment is knitted, about 7 * 5 cm in size;
- it should be washed and dried;
- after the sample has acquired the final size after drying, the density is calculated, i.e. the number of rows and loops in each row;
- now the knitted sample is unraveled and the length of the spent thread is measured.
All the necessary data for the calculation have been received.
The footage required for a blanket can be determined by the following formula:
(the area of the desired product, expressed in centimeters * the length of the thread for the sample) /sample area in centimeters.
* - multiply;
/ - share.
Important! Washing the untied sample is mandatory, since only after it the product acquires its final size.
Knitting
For knitting, you will need to have some knowledge and skills. In this case, these are elementary skills in casting on loops, knitting knit and purl loops, as well as closing them. Other skills are not required, since the main pattern used for such blankets is the front surface. This is due to its simplicity - more complex manipulations will not be easy to perform on such material, as well as thickness - large patterns will add more volume and weight to an already large product.

The very manufacture of the plaid occurs in two ways: with tools or with hands. Knitting needles are most often used as tools, sometimes a hook.
spokes
To fulfill her idea, the needlewoman will need only the following:
- Suitable thick yarn.
- Spokes of the desired diameter. The usual size does not fit here, so you should take care of purchasing very thick knitting needles in advance - not all stores sell such products. Improvised tools are also often used, for example, plastic tubes with a diameter of about 2-3 cm are suitable as knitting needles.
The rest of the steps are no different from ordinary knitting.

Arms
This method is not classical, but rather an innovation. It is performed on the performer's wrists. The first step is a set of loops. To do this, measure about 3 meters and form the first loop on the right wrist, slightly tightening it. In the same way, they collect the required number of loops.
The first row is performed as follows: the thread from work is clamped in the fist of the right hand, after which the very first extreme loop on the wrist is pulled together. The thread in the fist thus forms a new loop. As in the case of knitting needles, it is worn on the left hand. Also knit the whole row.
All other rows are knitted in a similar way, with the purl rows being done in a mirror image and purl loops.
When closing, leave 4-5 meters of free yarn. Then the first 2 loops are knitted as usual. The 3rd is removed from the wrist, and the next one is left on the hand. After knitting it, the previous one is removed from the hand. Continue in this manner until the end of the row. A thread is threaded into the very last loop and simply tightened.
Features of care
An unusual piece of furniture requires some features in the care, which are due to its size, weight and material:
- small dirt is removed with a dry brush, carefully cleaning the desired area with it;
- when washing, it is required to observe the temperature regime of water - below 30 ° C;
- only special products with lanolin designed for this are suitable for washing;
- merino wool does not require stretching and friction during washing, a wet object should be slightly wrung out and laid out on a flat horizontal surface until completely dry;
If necessary, you can use dry cleaning. Proper care will preserve the beauty and qualities inherent in merino wool.
Beautiful and unusual item - a great decoration for the interior. And creating such a masterpiece with your own hands is a special pleasure.