Hi all! The series of gifts will never stop, so today I offer you something interesting. You will find a fascinating article on how to make a keychain with your own hands.
This is a necessary, but at the same time, a miniature gift for all occasions. I have prepared 25 master classes and just original needlework ideas that will help you make the very keychain that you want.
First of all, advice: if you want to make a cool keychain, then be sure to get good fasteners (rings, laces, etc.) At the end of the article, I will tell you what to buy and where to do it.
How to make a keychain with your own hands: 25 workshops and ideas
Soft keychain made of "Fluff" fabric
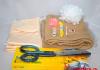
What do we need?
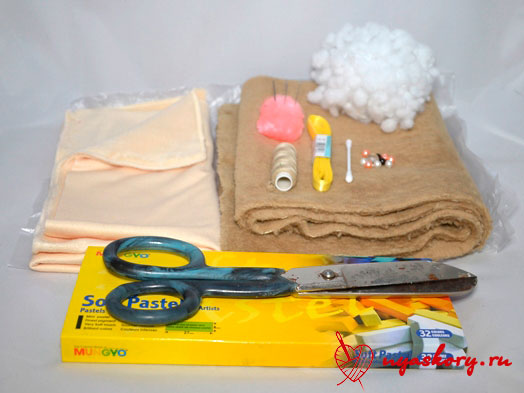
- velsoft (you can also use faux fur);
- fleece or minky fleece;
- satin ribbon for fastening;
- threads;
- pastel for painting the nose and cheeks (you can take acrylic paints);
- synthetic winterizer for stuffing;
- cotton swab;
- scissors;
- needle;
- eye beads.
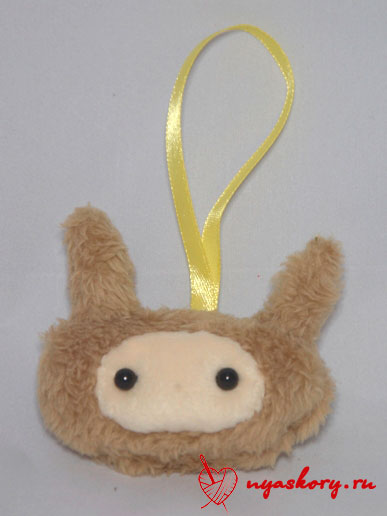
DIY keychain - sew a bunny Pushka
You can make Cannon patterns yourself by looking at the final version of the toy. You can print a photo and circle the elements, increasing each by about a centimeter so that there are seam allowances.
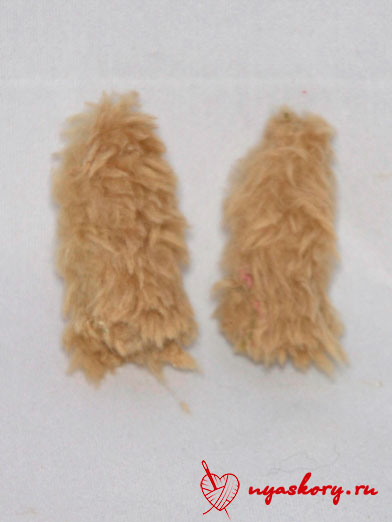
First, sew the ears, folding them with the right sides inward. Turn them out.
Now take a pre-prepared piece of tape. Fold it in half and attach it to one of the parts of the head approximately in the middle. Also attach the ears. So that they do not move out, you can attach them with a thread.
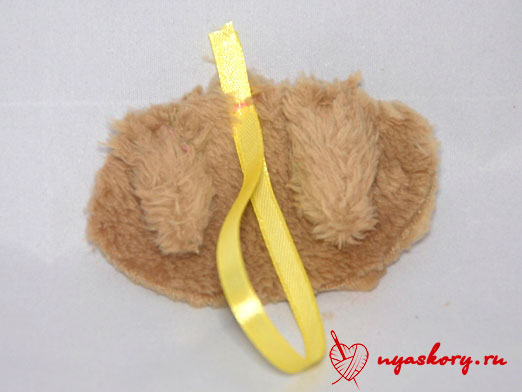
Now attach the second part of the head to our workpiece and sew, leaving a hole for eversion. Turn out the future keychain.
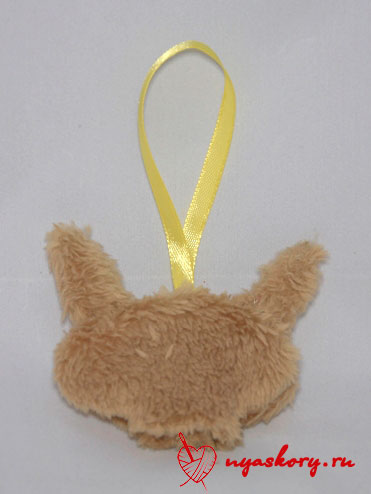
We fill the workpiece Cannon. Stuff tightly, but in moderation. Sew up the opening of the keychain with a blind stitch.
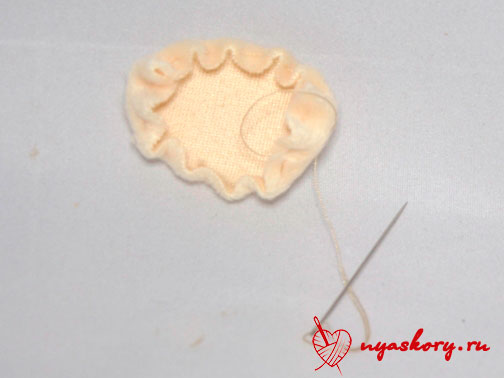
Take the muzzle detail and go over it with a running stitch. Pull off the future face a little (but not much).
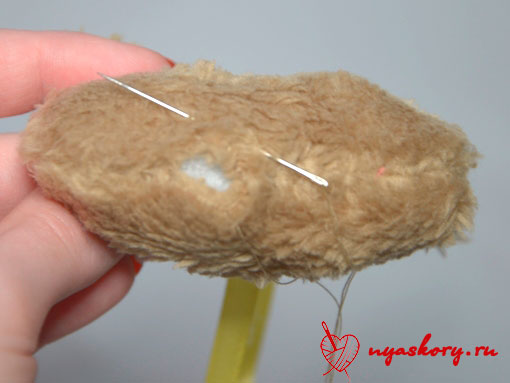
Lightly stuff the muzzle with a padding polyester. Attach the muzzle to the head with a hidden seam. While sewing, gently hold the face so that it does not “run away”.

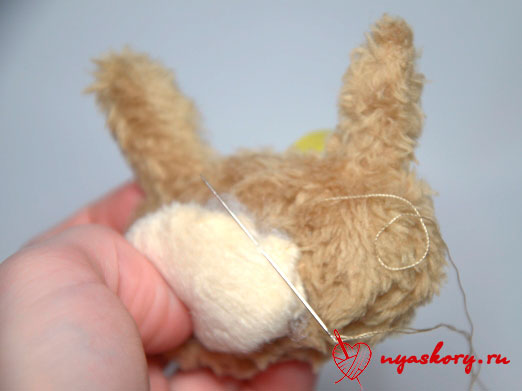
Now sew on the eyes and embroider a small nose on the hare with black thread, making a few stitches between the two eyes for this.

Take a cotton swab and lightly rub the desired color of the pastel chalk. Then just rub the muzzle of Fluffy in the cheek area with this cotton swab. You can also paint the nose area, but now with black pastel.
Keychain is ready

More Keychain Ideas
The matter will not be limited to one Fluff - as promised, 24 more cool ideas for making key chains.
Beaded orange
A fairly simple scheme, accessible even for beginners. You will need a thin fishing line and beads (for sure, monofilament is also suitable).

Blackies from fur
For them you will need a circle of black fur with a long pile, a little felt and the bindings themselves.

Leather keychains on the bag
A very stylish and simple option, obtained by folding a rectangle with a fringe at the ends into a tube. Inside is a piece of leather with a carabiner. By the way, any key chains of a simple shape from two parts can be made leather.

Cute animals for keys
Absolutely simple forms of such cats allow you to fantasize endlessly with colors, accessories and materials. And yes, you can use any mounts here.

Beads on the go!
You can make a very original accessory from wooden and plastic beads. Two beads, a keychain ring, knitting needles or sticks, paper tape, a brush, acrylic paints and an elastic cord will come in handy. First, color the beads as you wish, leave to dry on the needles. Fasten the elastic on the ring and thread the elastic through both beads, tie a knot at the bottom.

Fantasy on wood
All you need here is a wooden base and acrylic paints. And then only your artistic abilities and imagination.

Interesting key chains made of polymer clay
From it is just a fairy tale to sculpt simple little cuties. Cupcakes, animals, snacks - whatever! For you, as many as 6 ideas from this malleable material.


A great option for a gift for a guy for different holidays (including February 23) is two pieces of polymer clay puzzles. Roll out the pancake, cut out the puzzles, making holes for fastening, bake them and paint them.

Made of felt and wool
I want to show you some interesting ideas for making different animals (and not only with the help of these materials).


Other materials
Something is just not used when they want to make beautiful and cool key chains and more! Look, for example, at these seals - they are made of special beads that melt when ironed. You can find similar ones in the departments for children's creativity.

Do you throw away wine corks? And in vain - they make excellent key chains. All you need is paint and fasteners. 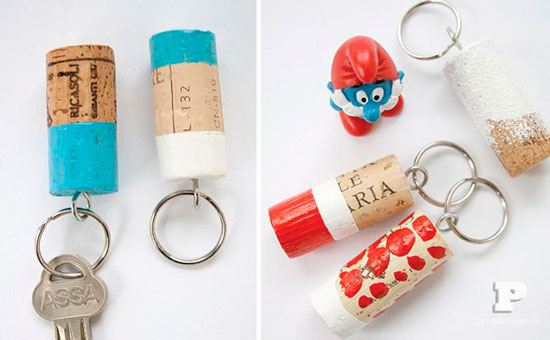
But even there you have to keep your eyes peeled. More recently, I successfully purchased some elements for making key chains there, I share the links:
Thread fasteners- perfect for soft accessories.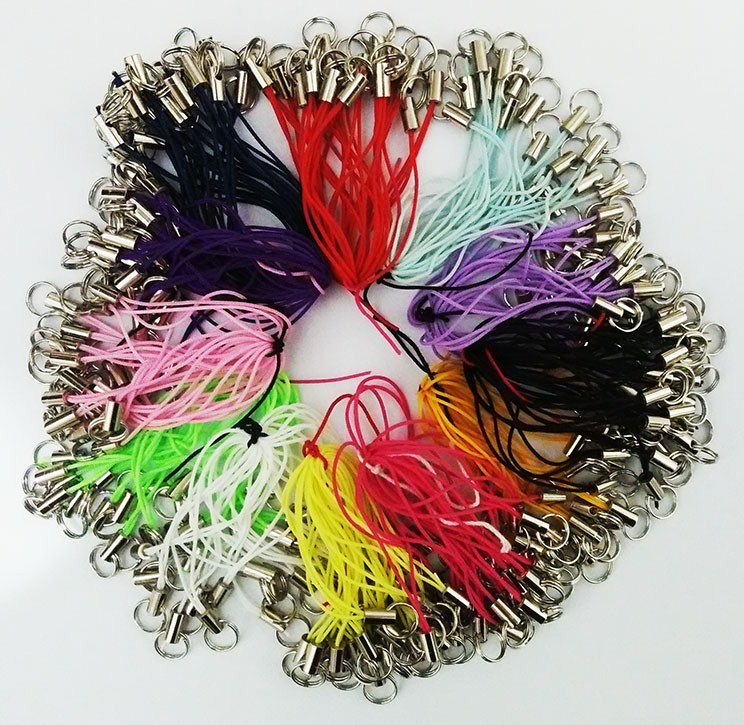

And finally small threaded loops for screwing into solid products (chains are attached to them).

These are the most profitable offers that I myself have used - I can recommend
On this I say goodbye to you! Share your impressions and a link to interesting material with your friends!
Sincerely, Anastasia Skoreva
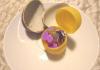
You probably immediately throw them into the trash - plastic packages in which we bring home cakes, ready-made salads from the supermarket, cookies ... But do not rush to get rid of them. With this trick, you can turn trash into an adorable masterpiece.
Need:
- plastic box
- hole puncher
- colored permanent markers
Let's start:
We take a clean package and cut out the bottom (flat part).
You can choose any picture of your choice, the main thing is that it should be easy to copy. For example, a character from the beloved cartoon about Winnie the Pooh. Keep in mind that at the end the figure will decrease by about 70%, that is, initially the drawing should be large enough. We draw a picture on plastic.  Now we color the picture and use a hole punch to make a hole above the top of the picture. Cut out along the contour, grabbed a small “loop” with a hole on top.
 We put the plastic blank on baking paper and “bake” for 2-3 minutes at 165 ° C. The heat will cause the plastic to shrink and curl, but don't worry, it will flatten out again in the end.
  After baking, small plastic figures will become not only smooth, but also thick and strong. Now you can make such a charming bracelet out of them.
  Sets of such plastic blanks with drawings are even sold in some children's stores - children are delighted with such a transformation. But why spend money if everything is at hand? You can choose any patterns, motifs and colors. Now what should have just rotted in a landfill will be pleasing to the eye for a long time to come. Beautiful and eco-friendly!
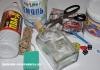
In order to get stylish jewelry, it is not necessary to spend a lot of money on buying them. You can make a necklace, earrings or. Moreover, from such materials that many, without hesitation, are thrown into the trash. For example, the bracelet you see in the photo is made from pieces of plastic cut from a disposable food container. Well, how interesting?
Master class: the necessary materials and tools for making a bracelet
For this master class, you will need a container (in supermarkets they sell salads and cakes) made of PS-6 polystyrene.
Eat everything edible, and wash the container with warm soapy water, removing the stickers and glue that remains after them. Let the container dry well.

In addition to the container, you will need:
Multi-colored permanent markers;
Sharp scissors;
6 mm jewelry rings;
Small pliers;
Hole punch (for punching holes in belts);
Electric oven or gas oven with the possibility of heating up to 120 degrees;
Polyurethane clear top coat (optional).
How to make a bracelet with your own hands
Cut off a flat part from the container and draw your drawing or pattern with markers (you can give the kids plenty of fun here). You can cut the plastic into small pieces of the desired size and paint them individually (if you are good at drawing miniatures).
Note: Buy thin markers so that the drawing is neat and clear. Dark colors become almost black after baking, so don't overdo them.

Cut a large piece with a pattern into small pieces of the desired size. In this master class, rectangles measuring 3.5x4.5 cm are made.
Punch four holes in the corners of each rectangle with a hole punch.

Use scissors or nail clippers to round off the corners of each rectangle.

Note: You can also sand the corners of the plastic after baking in the oven. But you can’t cut with scissors at this stage.
In this master class, the bracelet turned out to be baked. That is, the plastic parts of which it consists were baked in the oven.
Preheat oven to desired temperature. Place the plastic on a baking sheet lined with waxed paper. Place the tray in the oven. After 30 seconds, the plastic will begin to bend, but after a minute or two it will become smaller and straighten out. It's time to take the "pie" out of the oven.

Once the plastic straightens out (even if it took 30 seconds), remove the baking sheet from the oven. After cooling, you can cover the plastic with a top coat (optional).

If you decide to make the bracelet with a protective varnish coating, both quick-drying polyurethane varnish and clear nail polish will work for you. But not sprays with acetone-based acrylates, as they will lighten your paints (although this is also a good effect).
Now it's time to fasten the bracelet pieces together. Use jewelry rings for this, which are sold in needlework stores.
Open the first ring with pliers. Pass it through the hole in the first plastic link of the bracelet. Close the ring using pliers. Pass the next ring through it and immediately grab the next piece of plastic. Repeat on the other side of each piece.

Having fastened two elements with the help of rings, move in the same way to the end of the bracelet until you connect all the links.

At the ends of the bracelet, connect the rings, as shown in the photo. Attach the clasp for the bracelet on one side.

If necessary, on the opposite side of the clasp, at the end of the bracelet, instead of one ring, add a few more so that the bracelet can be “fitted to size”.
Now is the time to show off your new jewelry to your friends.
Note: Before you make such a bracelet, think about whether you might want to make some other jewelry to go with it. In the last photo you see a stylish pendant that matches the design of the bracelet. It can be made according to the same scenario, but made in a different size.
Poke one hole in it, bake in the oven. Lacquer if you painted the bracelet. Put the ring on the pendant, and attach it to a special wire for pendants, lace or chain. You can also buy them at a craft store.

And here is another idea for making a bracelet -.
In this article, we will analyze how to make original multi-colored pendants, bracelets and cool badges from the oven with your own hands at home.
Do-it-yourself plastic key chains
In order to make cool keychains and badges from the oven, we will need scissors, a hole punch, permanent markers or acrylic paint and, of course, transparent plastic packaging (container) for cakes, cookies, etc.
Look, the package must have an emblem with the number 6. Only completely flat transparent plastic, which is even, is suitable for us, we don’t need everything else. Since we don't need all the ribbed plastic, we just get rid of it.

Making plastic badges
We take a clerical knife and cut out only the plastic that we need, namely flat. Then we choose any pictures we like for the icons. The easiest way is to find them on the Internet through a smartphone or planets, so that it is more convenient to work. You need to choose larger images, because when heated in the oven, they will decrease in size by 5-7 times and become too small if you make them initially like this, but at the same time they will increase in thickness up to 3 mm.

After we have found the pictures that suit us, we take the plastic prepared in size, put it on top and transfer the image with a permanent marker, since it will not be erased in the future. At this stage, you can immediately decorate your product with colored markers. Also, if you draw well, you can draw your future badge on paper and then transfer it to plastic in the same way.

We take scissors and cut out our blanks. We move them to a baking sheet covered with parchment paper, otherwise you will hardly separate them from the baking sheet.


We set the oven to heat up to 150-170 degrees. Then we take a baking sheet with our blanks and place in the oven for a few minutes (2-3 minutes, it all depends on how the transformation process goes). Do not be alarmed when the blanks begin to curl up before your eyes. After about a minute, they will straighten up, but decrease in size. After this process, we take them out and lightly press something flat so that they straighten up to the end.
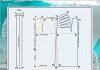
See what the blanks were and what our badges became after the oven


If you have not previously painted the blanks with permanent markers, then we take acrylic paint. We mix the colors we need and paint the icons on the back (required). The result is very cool icons, almost store quality.


Making fasteners for badges
Next, attach the pin to the back of the badge with super glue. For better adhesion of the glue to the surface, sprinkle the place of gluing with soda. If you make a hole in them, then these badges can be used as key chains. You can also create original multi-colored pendants and bracelets from them.

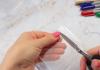
Crafts from plastic bottles are an excellent, useful and interesting hobby, because bottle plastic is a fairly versatile and easy-to-work material that any needlewoman can turn into a beautiful and useful household item.
If we can use the top of the bottle and the bottom to create decorative flowers - decorating the interior, then the remaining plastic can be used to make smaller flowers that are perfect for creating filament curtains or an original do-it-yourself keychain.
What we need:

Operating procedure:

1. Cut off the middle part of the bottle with a clerical knife or scissors.
2. We transfer the flower from the stencil to plastic.
3. Cut out a flower from a plastic bottle along the contour.
4. Carefully remove bumps and sharp corners with fire.
A decorative piece for crafts made from plastic bottles is ready! We continue to work by cutting out several of the same blanks.

We paint plastic flowers with acrylic paint or regular nail polish.
We make a hole in the center of the flower with a soldering iron. You can start assembling the keychain!