At the request of our readers, we have prepared a master class in which we examined the decoupage of bottles with napkins with our own hands step by step.
The lesson is suitable for beginners of all ages. A gift for a man is taken as the basis, hence the corresponding design. However, you can choose a different pattern and decorate containers of any shape according to the same principle. Try it! It is very exciting, beautiful and really simple and fast!
Material preparation
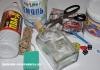
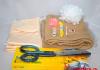
To do decoupage, prepare materials and tools:
- a glass half-liter bottle, the same as for a marine style and made of leather;
- a three-layer napkin with a thematic picture (it is better to buy a special one);
- acrylic water-dispersion paint of white color;
- PVA glue;
- varnish glossy water-soluble;
- a new sponge for washing dishes;
- soft brush;
- decorative rope;
- large beads or pendants;
- scissors;
- nail polish remover;
- cotton wool;
- disposable utensils for glue.

How to make decoupage from napkins on a bottle
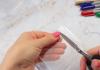
First, soak the discarded bottle in warm water for one hour to soak the label paper. Clear glass from paper.
As a rule, glue remains on the surface, which is problematic to wash off with water. Use nail polish remover to completely remove residue. Dry the dish.

Cut the dishwashing sponge into two pieces.

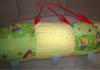
Before you decoupage a glass bottle with a napkin, create a uniform background. This will hide possible errors when gluing the picture. Apply white acrylic water-based paint to the surface.
Paint do not sponge, but make frequent tangential movements, as if “bang”. Wait for the paint to dry completely.

Select a drawing. A suitable option may be photos of cities, cars, all kinds of geographical maps, images of large and strong animals, fish. Consider the character of the man, his hobbies and your relationship with him.
If this is a loved one, then romance is acceptable, if a colleague or boss, then everything should be in a strict style. Peel off the top layer carefully.

Wrap the bottle with a colored layer of napkin and determine which fragment will be needed for decoupage. Carefully tear it off with your fingers. You can cut it off, but then the edge will be clearly visible on the craft. It is better to cut with a margin, and then cut off the edges.

Dilute PVA glue with water in a one-to-one ratio in a disposable container. Lay the fragment face down on a stationery file. Gently stretching the napkin, apply diluted PVA glue with a brush.

Attach the drawing on the file to the glass. Remove the file carefully. Use a brush with glue to correct the drawing where necessary.

While the glue dries, prepare the pendant for decoration.
Since the image of one of the cities of Cuba, which at the beginning of the last century was the center of the gambling business, was chosen, beads in the form of dice and chips were taken as pendants in this bottle decoupage master class.

Coat the surface of the craft with varnish.

Tie the pendant by tying the neck with a rope in several rows.

Decorate the cork if you like. It also needs to be pre-coated with acrylic paint.


A master class on decoupage from napkins on a bottle for beginners was prepared specifically for the online magazine Women's Hobbies. See other decoupage lessons at. Needlework is ideal for those who do not know how to draw, but want to create masterpieces.
Visit us more often, and in order not to miss the release of new publications, subscribe to our news on social networks. We always have a lot of interesting lessons and articles for women.
More recently, in Russia, people began to relax during the New Year holidays with the whole family. Not only schoolchildren and students, but also the working population has the opportunity to visit relatives, take a walk, go in for sports and devote time to their favorite hobby.
Decoration of interior items in technology is gaining more and more popularity among the fair sex. You can decorate in this way not only cutting boards, photo frames and other little things, but also bottles, for example, with champagne. These works will decorate the table, refresh it, make it special. Even if you didn’t have time in the bustle to master a new technique of creativity all year long, you can do it just on New Year’s days.
In this master class, we will consider the technique of direct decoupage from a file, while we will apply the pattern on the bottle around, with the edge over the edge. When decorating directly with a napkin, champagne will stand, and not lie on its side, as when gluing a small motif.
Here it will be useful to indicate the terms used by the masters of this technique.
A motif is a drawing from a napkin or decoupage card, which will be located on the surface. The primer is acrylic paint or a mixture of paint with PVA glue, which is applied to the glass in the first and second layers.
For decoupage, PVA glue is usually used, slightly diluted with water. It is also important to remember that when wet, the size of the napkin increases by approximately 0.5 cm on each side, which is very noticeable if you first apply a dry napkin to the surface to determine the boundaries where the motif will lie.
Materials and tools
The craftswoman should always have toothpicks, cotton buds, sheets of paper or newspapers, cotton wool at hand. All this can be found in every home. Pay attention to the reasonable arrangement of the workplace, to the protection of hands, face (especially eyes) from the effects of varnishes and paints. Therefore, it will not be superfluous to purchase gloves, masks, etc. In addition to the above, prepare:- acrylic paints: white and mother-of-pearl;
- regular brushes, as for watercolors;
- a sponge sponge or a piece of dry dishwashing sponge attached to a clothespin;
- acrylic lacquer;
- sandpaper the smallest;
- acrylate putty for decorative work;
- napkins of a suitable theme, I took New Year's ones;
- branches of an artificial Christmas tree, real cones;
- for artificial snow foam balls;
- PVA glue for paper and cardboard or construction;
- scissors;
- clerical file, better dense.
Inspiration, creative message and free time, as well as a good mood, will also come in handy. In time, work can take several days, since it is necessary to dry each layer thoroughly, but when using a hair dryer, it can be accelerated to several hours.
Beginning of work
Purchase good quality champagne.
As in the case of reworking an old one, old decorative layers must be removed before applying any type of coating. When decorating a bottle, these are labels and excise stamps. First I soak the glass in water, then I remove the label with a brush. Paper and glue residue can be easily removed with vegetable oil and sandpaper, rubbing the bottle vigorously.

Choose a napkin in advance.

Before you start priming the glass, degrease it with window cleaner or alcohol.
Add PVA glue to the paint and prepare a foam sponge.

Apply the primer to the surface with small dotted movements.

Two or three layers is enough. Let the bottle dry or dry thoroughly with a hair dryer on all sides.
Now take fine sandpaper and sand the surface.

In the process of grinding, you will realize that the graininess is not completely removed. In order to prepare the surface for decoupage from a file, take an acrylate putty.

Apply the paste to the bottle in the thinnest layer. To do this, take a plastic card of any bank instead of a spatula, or just use your finger. You can also remove excess with a thread. The bottle should be on its side.

Let's use the hair dryer again. The paste dries very quickly.

Cover the bottom of the bottle with it as well.

If necessary, go over the surface with a jumper again. Here is how smooth the bottle turned out as a result. Now she is ready to apply the motive.

Decoupage
The easiest way to decoupage for beginners is to decoupage from a file. I chose a motif depicting Christmas balls, cinnamon, fir branches. The drawing does not end on a quarter of the napkin, as usual, but is located on the half, as shown in the figure.
If you wrap a bottle with a napkin, it becomes clear that you will have to reduce it a little. But let's not rush.
Make the edges of the motif uneven by cutting them off. Unfold the napkin.


You may have to iron the motif from the inside on the “silk” mode.

Lay the colorful layer of the tissue paper on the file, pattern side down, and start dripping water on top of it, from the middle to the edges. It is necessary that the entire napkin is in the water. In fact, by straightening it, you will not touch the paper with a brush, you will touch the water, and the napkin will straighten itself.

Smooth out the motif, expel the air from under it, the folds will straighten out. However, do not keep the tissue in the water for too long! The edges of the motif can be safely removed, as the paper has increased in size.
The motif on the file can be raised in this way, as shown in the figure.

Lubricate the bottle thickly with PVA glue, while diluting it is not necessary in this case.


Now the most interesting and most difficult part of the work begins. Starting from the middle of the motif, lean the file against the bottle, but not all at once, but only the middle, and iron the file with your hands up and down, and also a little to the sides.

Next, you need to put one edge of the napkin on the glue and slowly separate it from the file. If necessary, straighten with a wide brush with water, but it is better to stick evenly immediately.

The photo below clearly shows that one part of the napkin is still on the file, and the other is already on the bottle.

Now overlap the rest of the napkin, adding a little glue. This whole process requires skill, attention and concentration. If necessary, carefully cut off the excess part of the image.

Take a look at the following photo. It shows that the last part of the napkin did not stick very evenly, and when trying to smooth the motif, it began to tear. At this stage, if this happens to you, it is best to exhale. Let the napkin dry naturally, a hair dryer will only hurt here.

Glue now the top of the napkin, which previously remained just in the air. If creases form, they can be removed later with sandpaper.
Pick a color and finish the background with the same sponge.

While the paint dries, prepare the fake snow. To do this, mix white paint, PVA glue and semolina or such foam balls as in the photo.

Coat the bottle with two coats of varnish and let it dry. Before that, it was possible to depict patterns on the surface.
Close the lid with foil and apply artificial snow on it.

In conclusion, hide the bumps and the "seam" of the napkin with a few sprigs of an artificial Christmas tree or tinsel. I also glued real cones, covered the branches with artificial snow. You can attach this to a glue gun, which you can buy at the Fix Price store for no more than 100 rubles.

That's it, beautiful ready!


The direction of Decoupage is somewhere in the middle between Hand-made and art. The word decoupage came to us from the French language and literally means "cut", and in fact is a kind of application. It is based on the technique of sticking various patterns on paper, napkins, fabrics on hard surfaces. Decoupage is actively used in decorating art, techniques are actively developing, the list of materials used and objects that are used for decoration is expanding.
Passion for this technique has become rampant in recent years, more and more people are addicted to this type of creativity, bring their ideas. At the moment, there are entire schools that, on the Internet, and not only, are engaged in promotion and training.
Decoupage bottles photo
During the formation of decoupage in Russia, one of the first items that literally all masters began to decorate was bottles of wine and champagne. Particular attention was paid to bottles with a non-standard shape and three-dimensional texture. They were not thrown away, but turned into real interior decor.
They use various materials and techniques for decoupage bottles - napkins, putty, decorative elements, or in general, everything that was at hand.


What you need for decoupage, a list for beginners
As mentioned above, there are a lot of performance techniques in decoupage, while they are actively developing - new materials, techniques and directions appear.
But still, there are main directions that we will give:
Classic decoupage - sticking a napkin, decoupage cards, rice paper on a flat hard surface;

Artistic decoupage - differs from the classical one in that artistic techniques, drawings, painting, aging and more are added to the main image;

Reverse decoupage - sticking a picture on the back surface of a transparent base;

Volumetric decoupage - when decorating, various volumetric pastes, putty and decorative elements are used.

In order to work in certain techniques, a set of materials is required - different in each case, but there is a necessary set that any novice craftswoman should have:
Napkins, rice paper, decoupage card- the necessary components for almost any technique, the basis of any composition. You can now buy these materials at any art store, stationery store, or online. You can use regular table napkins if you find interesting ones with good image quality and a suitable subject.

Sandpaper- should always be in the arsenal for polishing surfaces, as a rule, there should be several types of granular - medium and fine, since there are several stages of polishing.

Alcohol or any alcohol-based surface degreaser, nail polish remover can also be used.

Primer- a special acrylic material, applied as a base for decoupage for good adhesion to the surface.

Acrylic paints- in decoupage, only acrylic materials are used, this is due to the fact that they dry quickly and are easy to apply. It is better to have a range of colors in the arsenal, as they are often used for painting.

Glue for decoupage- as a rule, it is acrylic, but ordinary PVA household glue is widely used.

Acrylic lacquer- there are many varieties of acrylic varnish - matte, glossy and chameleon. Many needlewomen use ordinary high-quality acrylic lacquer, but for beginner craftswomen it is recommended to use professional decoupage lacquer.

brushes- Synthetic brushes, mostly flat, have the greatest use in decoupage. Sizes may vary as they are used for different purposes.

stationery file- in some cases it is used for gluing a napkin.
Scissors- are used when cutting out images, many craftswomen use manicure.
Roller- a small construction roller is quite suitable, it is used to smooth the pasted image.

Stack- This is an artistic tool, very good for mixing paints.

What varnish is needed for decoupage
One of the most important materials is decoupage varnish; the overall result often depends on it. As a rule, varnish is applied at the very end to secure the image. The quality and composition of the varnish also affects the final appearance.

Varnishes are divided into several types according to composition and purpose (decorative and finishing).
Acrylic lacquer- the most popular, it is non-toxic, odorless and non-flammable, as it is water-based. Due to its composition, it dries quickly and does not turn yellow over time.
Acrylic lacquer used not only as a finish, but also as an intermediate - to fix the next layer. Intermediate varnish is further used as a basis for further decor.
Due to its wide compositional possibilities, there is a line of varnishes with decorative effects.
In order to be fully equipped, take care of the availability of several types of varnish in your workshop - ordinary acrylic (matte and glossy) and finish.
What glue is needed for decoupage
For decoupage, acrylic glue is mainly used. Art stores sell special glue for decoupage, it is sold in small jars and is quite expensive.

Most brands specializing in the production of goods for applied arts have glue in their lines. In addition, most professional craftswomen actively use PVA construction glue of various brands.

If you are a novice crafter, it is better to use professional glue, but if you do not have the opportunity to purchase glue in an art store, we will talk about the most important characteristics of the glue that are necessary so that it can be used in decoupage work:
- Colorless on drying;
- Medium consistency;
- Should not dry out quickly;
- Should not turn yellow over time;
- Should not have an odor.
Decoupage of bottles with napkins step by step, master class
If you have a desire to diversify your interior, we suggest decorating an ordinary glass bottle. It can be used as a decorative piece of furniture, or as a vase.

To decorate the bottle with napkins, you will need:
- The bottle is glass.
- Decoupage napkin or card, rice paper is also suitable, the pattern can be any.
- Alcohol, vodka or solvent for degreasing the surface.
- Acrylic paint.
- Decoupage glue or PVA glue.
- Acrylic varnish.
- Brushes, sponges (you can use a dish sponge), scissors.
The bottle must first be prepared - cleaned of labels and degreased the surface.


Before gluing the napkin, we will make the background with acrylic paint. Make the background color at your discretion, as long as it matches the pattern on the napkin. Dilute the paint for the background with water so that it turns out to be translucent like a haze. For relief, make several layers. Leave the space for the drawing unfilled.

You need to cut a pattern out of a napkin, but you can simply tear it out with your hands. Separate the bottom two layers of tissue paper.

We apply a napkin to the surface remaining under the drawing and coat it with a layer of glue on top. Try to expel the bubbles and gently straighten the folds. Let the glue dry. Try to work carefully as the napkin is very thin and can easily tear.

Now you need to fix the picture, for this you need to cover the bottle with a thin layer of acrylic varnish.

After the first layer of varnish dries, you can give the bottle an aged look. To do this, dilute black or other dark paint with water and splatter with an old toothbrush. It is better to practice on an unnecessary surface first. It must be borne in mind that when sprayed, the paint can scatter in all directions, so it is better to do this over a basin or bucket, no matter how dirty everything around.

After the paint dries, apply two more coats of varnish.

As a result, we got a full-fledged piece of furniture from an unnecessary bottle.
Decoupage of bottles with do-it-yourself tights step by step with a photo
Volumetric decoupage- one of the most popular techniques, for its implementation various auxiliary materials are used to create volume. Texture is achieved by decorative staining with contrasting colors.
We offer a master class in which ordinary women's tights act as a material for creating volume.
Materials used:
- Glass bottle with screw cap.
- PVA glue.
- Nylon tights.
- Glue thermogun.
- Peas.

Cut off the stocking part from the tights.

In a deep container, fill with glue and soak.

Put on the bottle and form a drapery, leave to dry.

For a hat, use a metal cap. Put a small piece of stocking soaked in glue on the lid. Connect the ends and twist on top of the lid. Curve the edges of the cap to create the shape of a hat and leave to dry.

Cut strips from the stocking part of the tights.

Collect on a thread each strip.

Form roses.

Saturate the roses with glue and also send to dry.

Glue dried roses on the dress and on the bottle.

Glue the bottle cap to the bottom of the hat.

Glue decorative elements in the form of beads and earrings.

Paint the finished composition with spray paint, first brown and then gold, while painting only protruding parts with gold paint.

Decoupage of bottles with paper master class
Another available material for decorating a bottle using decoupage technique is toilet paper. With its help, you can create any volumetric elements.
You will need:
- The bottle is glass.
- Degreasing liquid - alcohol, solvent, etc.
- Any PVA glue.
- Foam sponge.
- Stationery clip.
- Synthetic brush.
- Sponge with large pores.
- Toilet paper.
- Napkins.
- Acrylic paints.
- Acrylic varnish.
Clean the bottle of labels and degrease with an alcohol-based compound or a tissue.

Prime the surface with white paint or a special primer, do not paint over the neck yet. Let dry.

Attach a napkin to the bottle and cover with glue, try to gently smooth out all the wrinkles from the center to the edges with a brush.

Cover the rest of the bottle liberally with glue.

Lay pieces of toilet paper textured on the surface covered with glue. Leave the bottle to dry.


After the paper dries well, cover the entire surface of the bottle with varnish.

Paint the bottle with a color that matches the color of the napkin.

Draw a picture where necessary.

Dip a dry sponge into the paint, carefully beat it off and walk through the convex places - this will add extra volume.

Dry the bottle thoroughly again and coat with varnish, you can in two layers.


The original decorative bottle is ready.

Decoupage of eggshell bottles master class
Decoupage with eggshells in the final result is similar to the craquelure effect - aging by simulating cracks in the painting. The difference is that the surface becomes more embossed.

The advantage is that not expensive art material is used as a material, but an ordinary eggshell.
Another plus is that with the help of the shell we can hide various minor flaws in the decorated surface, for example, chips.
Many may have a question - what to do first: stick the shell or stick the napkin. In principle, there is not much difference, act according to the situation. The main thing is if you have already pasted the napkin, before you start sticking the shell - varnish the drawing, because when you stick it, there is a high probability that the glue will get on the napkin - it will get wet from this.
Start by covering a small area of the surface with glue and, as shown in the figure, glue the pieces of the shell. Work on small areas.
Below are step-by-step detailed photos.


Decorating with eggshells helps a lot to hide various inscriptions and therefore I often use it to decorate bottles. If you already have an idea how the bottle or object will be decorated - you can start by gluing the shell, if not - first decoupage, then stick the shell.
After covering the entire surface according to the plan, leave the bottle to dry. This may take a long time, but be patient.

Decoupage bottles by February 23
With a huge number of options for gifts for men by February 23, a decorated bottle is probably one of the most advantageous. You can use the contents and leave the packaging as a keepsake.
We offer several ideas for decorating bottles with holiday symbols.


Decoupage bottles for March 8


Decoupage bottles with cloth and lace master class
Decoupage using textile materials - fabrics, lace - gives a wonderful decorative result. The relief is voluminous and unpredictable. With the help of paints, you can give the effect of aging and antiquity.

Decoupage using fabric is done by analogy with the decor of tights. The material is impregnated with glue and laid out on a bottle in the form of a drapery. See what a great result you can get.
No less beautiful bottles are obtained using lace.
We offer a master class on bottle decoupage.

You will need:
- The bottle is glass.
- Liquid for degreasing of a surface.
- Napkin or decoupage card.
- Acrylic primer.
- Acrylic paints.
- Lace.
- White outline.
- Brushes.
- PVA glue.
Apply primer to the surface of the bottle with tomping movements, having previously degreased it. Dry, a layer of acrylic paint can be applied over the primer.


Glue the lace on the PVA glue.

Cut out additional decorative elements and stick on too.

Cover the lace with acrylic paint.

With an acrylic contour, you need to apply points at the base and on the neck of the bottle.

Paint the top of the bottle in a suitable color.

You can use white paint to tone down the color a bit if it's too bright.

Peel off the top layer of the patterned napkin, tear out the picture with your hands along the edges of the image.

Glue the picture on the bottle with a brush and glue, apply the glue on top of the picture.

On the reverse side, also stick a picture, you can the same.

In order to merge the images, make drawings.

To fix the result, the bottle can be coated with acrylic varnish in several layers.


Decoupage of wedding bottles
Decoupage is widely used in the preparation of wedding accessories, including wedding bottles and glasses.


Decoupage bottles of champagne
When we go to visit friends to celebrate an important event or just to chat, an elegant bottle of champagne is quite suitable as a present, try decorating it yourself.


Material for decoupage with Aliexpress
Materials for decoupage can now be bought freely, there are a lot of offers in retail stores. There are a large number of specialized sellers on the Internet - you can buy any materials in one place - from paints to molds. However, the prices are quite high these days.
Many experienced buyers have long chosen the online store. This is a Chinese store that brings together a huge number of Chinese manufacturers on its resource.
Napkins
 /category/202001947/rhinestones.html?spm=a2g0v.search0302.109.10.3d5f76fbdxFa27&g=y
https://www.aliexpress.com/wholesale?catId=0&initiative_id=SB_20180506034116&SearchText=%D0%BA%D0%B8%D1%81%D1%82%D0%B8+%D0%B4%D0%BB%D1%8F+ %D1%80%D0%B8%D1%81%D0%BE%D0%B2%D0%B0%D0%BD%D0%B8%D1%8F
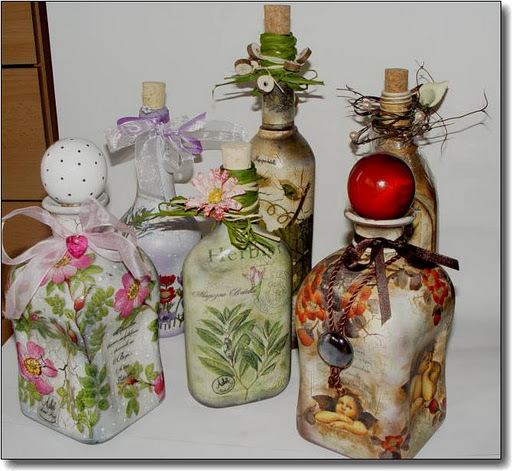
Decoupage of bottles in different versions (photo)Decoupage of bottles in different versions (photo)
Now, most needlewomen are fond of decoupage, namely, they decorate various items with paper appliqué. And, to be more precise, the decorations are made from special decoupage napkins, which are sold in a wide range on the shelves of specialized stores designed for needlework. Decoupage technique is done on many things made of wood, metal and plastic. But, the most popular is decoupage on glass, or rather decoupage of bottles.
Every housewife will always have an empty glass container, for example, jars for bulk products, intended for throwing into the trash, from the prescription of use. Do not rush to do it yourself. You can try to remake a completely unnecessary little thing into an interesting vase, which, in the future, will decorate your interior, for example, in a marine style. Especially when author's ideas are much more valued than factory decoupage on glass. 


Not only used alcohol bottles are subject to decoration, but also other glass objects that have lost their appearance. Decoupage of a vase will be very relevant.
Bottle for Women's Day
If you don’t know how to make decoupage on glass on a champagne bottle for the 8th of March holiday, then the presented master class and instructions tell you how to decorate and create decoupage bottles with your own hands.
Prepare a bottle of champagne by washing off all the labels. Then, degrease it with alcohol or window cleaner. Now, you should paint the bottle with acrylic light paint, in several layers, as shown in the photo. 

Select
, from which you can make a figure eight for the holiday of the eighth of March. Cut out the circles and make them in pairs. 

Take acrylic-based paints, mix them to get a delicate shade of salad color. Thus, we will make a non-traditional bottle background. Apply this paint with a washcloth to the entire surface of the product. The bottle will turn out a beautiful spring shade, as shown in the photo. 


Now we do the usual decoupage for beginners. Attach the cut out circles from the napkin to the bottle and anoint them with decoupage glue. After the glue dries, we can assume that the master class is over, but that's not all. It is necessary to decorate the ornament with an acrylic outline or glitter, circling them around the picture, as shown in the photo. 


In the center of the bottle, make an inscription by the eighth of March, it will come in handy. When the green glitter dries, it will shimmer beautifully. Cover all the work done with acrylic varnish, which will give an incredible shine. Now, a festive bottle of champagne is ready to decorate the table on the eighth of March. On the video you can see how the vase is decoupage. 


Video: Decoupage glass vase
Decorate the bottle with egg shells
The technique of decoupage of bottles trimmed with eggshells can be safely presented to your friends or relatives. Since, such work looks original and beautiful, acquiring a three-dimensional look. For work you need the following accessories:
- wine container;
- alcohol;
- eggshell;
- napkin, decoupage glue and brush;
- priming.
Rinse the bottle well under running warm water so that the labels can be easily removed by hand. Then, the entire surface is degreased with alcohol or washing liquid. 

For primer, acrylic paint is perfect. Apply it to the bottle using a dish sponge. Leave the product for a short amount of time to dry, as shown in the photo. 


To make the layer look more even, apply another tier of paint, as shown in the photo. Using a sponge will help get rid of streaks. This time, it will take about 30 minutes to dry. 

And at this time, it is necessary to continue the eggshell master class and start cutting out pictures from napkins in the decoupage style. Put the pictures on a stationery file and blot them with water. With meticulous movements, place it on the main part of the bottle. The following manipulations take place in the same way as for beginners, using glue and brushes. The blank remains to dry for one day. 


Decoupage with eggshells begins with the manufacture of the base material. Rinse the shell under water and dry. Lubricate the entire plane of the bottle with glue and lay out the shell in the form of a mosaic with tweezers. The eggshell ornament will be made on two sides, and in fact, the upper and lower parts of the bottle. After a break of 20 minutes, apply the background paint. This decoupage takes on a voluminous look. 


The last step is to paint the resulting eggshell areas with a darker shade and open with varnish. Now, decoupage on glass, completely handmade. How to make reverse decoupage on glass, in an interesting style, you can see on the video. 


Video: Making a reverse decoupage bottle
wedding bottle of champagne
Wedding attributes are always given special attention. This applies even to wedding glasses and champagne. Decoupage bottles of champagne for a wedding, you can do it yourself. The example that presented the step-by-step photo master class is great for beginners, using a postcard or picture. Prepare the following materials:
- champagne;
- pictures or postcards;
- acrylic based varnish;
- acrylic paint;
- washcloth.
Remove all labels from the glass bottle by soaking it in water. Then, degrease the surface with alcohol. Paint the product with primer. The master class involves the use of postcards. Cover it with acrylic varnish and dry. Now, peel off the top tier of paper and cut out a suitable motif. 


The bottle is smeared with glue, and the selected pictures are applied on top. Gently smooth the drawing to avoid bubbles and wrinkles.
It is necessary to dilute the paint, which, in your opinion, matches the color of the bottle. Draw a darker outline with the brush. Dip the foam washcloth into a light tone of paint and create a haze by smoothing the edges of the image. 


Now, it remains only to paint the veins in silver using an old brush and draw the details. The final touch is varnishing the entire surface of the champagne. Decoupage of a bottle of champagne for a wedding, successfully done. This craft will perfectly decorate wedding tables. A master class on how to decoupage bottles with a cloth, watch the video below. 

Video: Cloth bottle decor
Bottle decoration with tights
In order to implement such an interesting and voluminous master class, and create glass decoupage with pantyhose, you will need the following list of materials: a bottle, craquelure, alcohol, pantyhose, PVA glue, acrylic varnish and napkins, as well as
, washcloth and acrylic paint.
Take the bottle and degrease it using alcohol. Take nylon tights and dip them completely in the glue solution. Then, stretch them over the item to be decorated and form folds. Napkins are also impregnated with glue, you need to make flowers out of them. Drying time is one or two days. 

After that, the product is covered with black paint based on acrylic. Let dry for a while. Choose the picture motif you like and apply it to the bottle, covering it with several layers of glue. Don't forget to take breaks between layers. 
Wait for it to dry, and boldly apply golden acrylic paint with a washcloth, painting over black. Next, the craquelure is applied with a synthetic brush, and after four hours, the second layer is being adjusted. When another two hours pass, and you will see how the craquelure turns into cracks. Using a bituminous patina, we make the effect of aging crafts by overwriting cracks. The final touch that appears after using the craquelure is the application of acrylic varnish to secure the creative work. 

Toilet paper decoupage
Decoupage on glass with toilet paper begins with the preparation of accessories:
- bottle or jar for bulk products;
- toilet paper;
- acrylic based paints;
- napkins;
- glossy varnish;
- scissors;
- brush, PVA glue and washcloth.
Prepare a bottle, and if you want, you can use several cans, after wiping it with alcohol. Cut out suitable miniatures from the napkin. Small squares are cut out of toilet paper. To apply glue to paper, you need a thin brush. Now, evenly attach the cutouts to the bottle, as shown in the photo. We leave it to dry. 


Toilet paper is very thin, so we paint it with white acrylic paint. Large pictures are glued in the central part of the bottle, and small ones on the cap. 

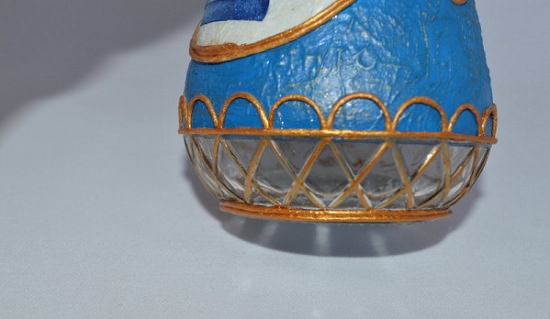
After everything is dry, paint the entire light part of the bottle with blue acrylic paint. The next step is painting with a golden color, applying it to a washcloth. 

Twist from a napkin, thin bundles and paint them in gold. When they dry, you need to make an ornament out of them and stick them on the bottle. After that, the entire surface is varnished. Decoupage of a glass bottle, safely made with your own hands, toilet paper. 

Craquelure in decoupage bottles
The next master class for beginners will teach you how to use craquelure when working on crafts. We wash all the tags from the bottle and degrease it with alcohol or nail polish remover. We prime the container with white. 


Now, you need toilet paper, with which we will decorate the bottle. Wet the paper in glue and attach it to the bottle, making small folds. This procedure must be done very quickly. After that, the craft will take on a three-dimensional look. Tear out a suitable motif from a decoupage card and glue it on PVA glue. The photo shows the result. Leave the bottle to dry for about 6 hours. 


Take acrylic paint of the same color as shown in the photo. Apply it on the surface, but not on the whole, but in parts to make the craquelure more spectacular. Apply craquelure and wait for about two hours. Then, cover the product with light acrylic paint. Paint over those metas where the toilet paper lies, also in white. 


After drying, the bottle is covered with a finishing varnish, as shown in the photo. The voluminous master class on this is over. If you want to learn how reverse decoupage on glass or decoupage of bottles with napkins is done, we suggest watching a video showing work on a nautical-style bottle. 

As you can see, the instruction and master class for decoupage of bottles, as well as jars for bulk products, is simple and interesting. It will be clear even for beginners. The variety of master classes and even voluminous ones will let your imagination fly.
Don't know what to give a loved one? Don't rack your brains - the answer is simple! Create a gift with your own hands, it will come out elegantly and with soul. Decoupage of champagne bottles is not only beautiful, but also a necessary present for the holiday. Such a surprise will decorate the festive table, and then it will show off in the kitchen and delight the happy owner, reminding you of you.
Do not know how to make decoupage on glass? Let's take a closer look at the master class decoupage bottles with napkins.

Necessary materials
Decoupage is a technique for decorating any planes. It looks like a familiar application. Early decoupage creations date back to the 15th century, and by the 17th millennium, the craftsmanship earned wild popularity and gained fans. Italian craftsmen quickly learned to copy Chinese motifs, decorating furniture and other interior items.

To get started, you need to purchase the following materials:
- glass cleaner;
- acrylic-based varnishes and paints;
- napkins for decoupage;
- brushes of various thicknesses;
- sandpaper;
- waterproof varnish.


Master class on decoupage of bottles with napkins:
- remove the sticker from the bottle;
- dry and treat with glass cleaner;
- it is recommended to do everything with gloves so that fingerprints do not remain.

The paint does not fall on non-degreased areas;
- prime the entire bottle;
- in the process of priming, acrylic varnishes are used;
- paint the bottle with white acrylic paint;
- transfer the pattern from the decoupage card or napkin;
- special napkins are not required, use those that fit the pattern;
- paint the background separately.

The background can be contrasting or similar in tone to the main pattern:
- open everything with acrylic-based varnish;
- a brush for varnish needs a wide and soft;
- irregularities must be sanded;
- wrinkles and folds should not be;
- at the end, do not forget to apply waterproof varnish.

These are the basics of decoupage that are important to follow. There are many secrets that help improve the result of work.

Looking at the master class above, everything seems easy and banal, but it is not. In the process, a lot of pitfalls emerge, even when everything is done strictly according to the master class. Consider a step-by-step master class for decoupage bottles with a photo.


You begin the first stage - separating the label from the bottle. They rubbed it well, soaked it for a couple of hours in water. Despite all the efforts, traces of glue remained on the bottle. How to be?!

The exit is very simple. It is necessary to take nail polish remover, wet a cotton swab and wipe the bottle thoroughly. The pellets will gradually be washed off and the surface will become smooth. Useful advice for the future: the bottle must be soaked in soapy water and the label will be removed easily and with glue.

Priming the surface with acrylic paint and the result is not impressive? What to do? After priming 1 layer, the brush leaves traces, and after applying the second layer, bald spots form. It's OK. After everything dries, sand the surface and go over the paint again.

In the future, so that such problems do not arise, paint with a sponge, dipping it in paint. The result will surprise you. - And finally, the most pleasant and exciting moment - transferring the picture from the napkin. Does it wrinkle when glued? Fixed and ruined everything? No problem! Remove the soil and repeat everything from the beginning.

With PVA glue, it is necessary to cover the area on which we will glue the napkin. Take a stationery file and spread a napkin on it, moisten it slightly and straighten it. You need to apply a napkin along with the file, gradually expelling the remaining air. Remove the file and.... miracle. The drawing is so smooth and even that you can’t distinguish it from the drawn one.

You know from the Internet that you can sand if there are folds. They took sandpaper, a couple of movements and nothing was left of the drawing. Naturally! You have not yet covered with water-based acrylic varnish. Now you can sand, but only in places where it is required. After opening with varnish, preferably several times.

Do-it-yourself decoupage of bottles is not only a laborious and complicated procedure, but also a lot of impressions and emotions from the result.


How to properly care for decorated bottles
It's no secret that handmade items require delicate and reverent care than factory goods. So that the decoupage bottle does not lose its appearance and delight its owners for a long time, do not forget and ignore a few rather memorable principles:

- All polishes turn yellow over time. Therefore, when implementing ideas with light scenes, use only acrylic varnish from a spray can;
- wipe the dust from decoupage bottles with a damp cloth, but in no case soak in water!
- do not put the decoupage item in the refrigerator for a long time. Condensation can soften the coating and it will come off.

Remember the simple rules and try not to break them. Then your work of art will serve for many years!

Photo decoupage bottles