Soon we will be celebrating the most terrible and, at the same time, the most fun event of the year - All Saints Day or Halloween. You can read in detail about the origin of this holiday in our article "Halloween or All Saints' Day: History and Traditions". In the homeland of Halloween - in Ireland, as well as in the USA, where it has gained great popularity, it is not customary to give gifts. There are no established rules in Russia, so do not miss the opportunity and give your friends and family a pleasant surprise made by yourself.
Bright pumpkin pillows
Sleep is one of the most enjoyable pleasures in life. And after the Halloween Sabbath, you will definitely need to sleep well. And you can do it most pleasantly on a beautiful pumpkin pillow, which is not difficult to create with your own hands.
You will need:
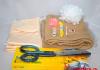
- textiles (cotton, chintz, linen, etc.) of a bright color;
- threads;
- yarn for knitting;
- synthetic winterizer or other filler;
- special sewing marker or soap;
- roulette;
- scissors;
- long needle with a large eye;
- needle or sewing machine.
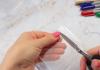
First you need to prepare the base-bag for the future pillow. Cut off a rectangular piece of fabric. It is important that the length is twice the width. Fold the fabric in half lengthwise, right side inward. Now, with soap or a marker, draw the lines along which the seam will go. Sew the short line tightly, making a strong knot. But at the end of the seam on one of the long sides, do not make a knot. After you finish the seam on this side, fold the fabric tightly. Now tie the thread into a knot and make a few more stitches so that the seam does not come apart.
Turn the piece right side out. Now tight! fill the workpiece with synthetic winterizer. Do not spare the filler, otherwise the pillow will turn out to be very ugly. Let part of the stuffing even peek out of the workpiece - it's okay.
Now we need to create a “ball” from our blank. Sew on the non-sewn side (long) in the same way as you did with the first long side of the workpiece. At the same time, stuff the synthetic winterizer inside the pillow. If you find it difficult to cope alone, invite an assistant. Do not be afraid to make sloppy stitches and protruding threads - they will all hide under the pumpkin stem.
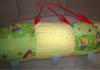
Now it's the turn to give our future pillow a beautiful shape. To do this, thread a knitting thread into a long needle. The higher the pillow, the longer the needle will be needed. Turn the pillow over and stick the needle in the center of the pillow where the fabric is gathered. Fasten the thread to the knot inside the pillow. Now pull the thread and pierce the workpiece through. Pull well, just make sure that the thread does not break. On the reverse side, firmly fasten the thread to the knot, but do not cut it.
Next, we will "divide the pumpkin into slices", so the thread will be visible from the front side. Return to the bottom edge, pulling the thread - it should be impossible to stick a finger under it. Pierce through the pillow again and bring the needle out from above. Do these steps first, dividing the pillow into seven equal slices. At the end, again, firmly fasten the thread to the knot and make a few "control" stitches.
Now it's the tail's turn. Cut out a pumpkin stem from the fabric, fold right side inward and sew on three sides. Turn the workpiece inside out and stuff it tightly with padding polyester. After that, sew the remaining side well so that the filler is not visible. Sew the stem to the pumpkin, trying to keep the stitches as deep as possible - so the pumpkin will turn out beautiful and neat.
That's all, the bright pumpkin pillow is ready!
Mug cover "Cute spider"

A mug cover is a very romantic gift and, moreover, very useful. After all, Halloween coincides with Samhain, a holiday that the ancient Celts dedicated to the arrival of winter. And in order to keep tea or coffee hot for a long time in cold weather, let's make such a beautiful “clothing” for a cup. Anyone who has at least basic knitting skills can make such a gift.
You will need:
- orange cup;
- wool yarn in black and orange;
- Crochet hook;
- salty dough;
- colors of orange, green, black, white;
- glue gun;
glue; - scissors;
- sewing centimeter.
First you need to determine which case needs to be knitted. To do this, take a centimeter and measure the diameter of the mug. After that, start knitting. First you need to knit a blank of their black yarn. Based on the size of the mug, draw yourself a pattern according to which you will knit. Remember to leave a "connector" for the handle of the cup. The base for the cover is knitted with single crochets. Tie the cover with orange yarn on top. Do not cut the orange thread tails on both sides - you can tie a bunch of black threads to them and make such pretty strings on which the cover will be attached. The edges of the black base must be sewn, leaving room for the handle.
And now the most interesting thing - we will decorate our case. Decorations are made from salt dough, which can be prepared according to this recipe:
- 200 g of wheat flour of the highest grade;
- 200 g of very finely ground salt;
- 200 ml of water;
- 2 tbsp. spoons of PVA glue.
You need to knead the dough until it is elastic, it should not stick to your hands.
Now you can start sculpting. Make figures of a spider, cobwebs, pumpkins. One side must be absolutely flat so that the decorations can easily stick to the case. After that, leave the figurines for a week - they should dry well. When our decorations have become solid, it's time to paint them. For this, it is better to use acrylic paints, but if you do not have such, then gouache will do. Once the paint is dry, use a hot glue gun to carefully glue the figures flat side down onto the case.
Everything, a cup can be worn and given.
Bookmarks for the book "Funny Spiders"

Book lovers can be presented with an original and useful thing - a bookmark. It is done very simply. All you need is to know how to knit a little.
You will need:
- yarn for knitting;
- suitable hook;
- 2 beads;
- threads;
- needle;
- scissors.
You can choose between cotton and wool yarn. If you want to make the spider more terrifying, then give preference to the latter option. You can both separately tie all parts of the spider: the head, the web, the lace that connects the two previous elements, or tie the bookmark in one piece. After this is done, it is necessary to sew the beaded eyes on the spider. Beads choose a color so that they are clearly visible to the yarn from which the spider is knitted.
This is such a cute gift you can give to anyone who loves to read books.
Terrifying magnet "Eye of Dracula"

Want to scare your friends a little? Then you've hit the nail on the head! Prepare a terrifying fridge magnet in the shape of the famous Count Dracula's eye as a gift.
You will need:
- thick felt purple and white;
- thin felt in red, blue and black;
- threads in the color of felt;
- magnet;
- regular or hot glue;
- needle;
- scissors.
First you need to prepare some kind of round shapes, for example, cups of different sizes. With their help, it is necessary to cut out circles from which the eyes will be made. You can also use a compass - draw and cut circles of the required diameter on thick cardboard and circle them on felt. The circles on the felt of each color should be of different sizes: on purple - the largest, white - a little less than orange, red - a little less than white, blue - a little less than red, black - a little less than blue.
When all the blanks are done, we begin to make the eye of the sinister Dracula. With the help of red threads, we sew a red circle in the center of the white with small stitches. We also embroider a capillary grid with the same red threads. Sew a blue circle on a red circle with blue threads. In the same way, we sew the pupil using black threads. Now we sew all four circles sewn together with white threads to a purple base.
We glue the finished eye onto a magnet using regular or hot glue. That's all, a scary gift is ready!
Mummy bottle

How to present wine or any other drink for Halloween in an original way? There is an original idea: to make a real mummy out of a bottle!
You will need:
- bottle;
- plaster or bandage;
- eyes for toys;
- double sided tape;
- glue gun;
- hot glue.
There is two ways bottle design in this style: you can use either a patch or a bandage.
The first option is easier. First you need to glue the eyes with double-sided tape. Eyes can be found in any store that sells art supplies. After that, the bottle is simply wrapped with the most common plaster.
Mummy can be made a little differently. As in the first option, first glue the eyes with double-sided tape. After that, lubricate the bottle with hot glue from a gun and immediately glue the bandage. Try to lay it beautifully the first time, because tearing off the gauze without damaging it, most likely, will not work. When you make the second layer, then the glue must be applied to the first layer of the bandage. Press the cheesecloth firmly against the bottle. Pay special attention to the area around the eyes - here you need to carefully place the bandage on the glue.
If desired, the mummy can be decorated with various themed accessories - orange and black tags, small witch hats, origami bats, etc. Connect your imagination here!
Soft pillow-toy "Ghost"

A ghost is one of the symbols of Halloween. So why not please your loved ones with fun toys that can also be used as a pillow. And making them is quite easy.
You will need:
- cotton fabric or thin white felt;
- synthetic winterizer or other stuffing material;
- paints and a brush or thread and an embroidery needle;
- crayon or special marker;
- white threads;
- sewing machine or needle;
- scissors.
First of all, it should be noted that such a toy pillow can be made in two ways, depending on how you will decorate the muzzle - using paints or embroidery.
Method one (using paints)
- Draw the "body" of the future ghost on the fabric (you can also use templates - they can be easily found on the Internet) in the desired size and carefully cut, leaving 0.5-1 cm for the seam.
- Fold the fabric so that the right side is inside. Sew with white thread using a sewing machine or by hand. Leave a small area unsewn around the tail for padding.
- Turn the piece inside out and iron well, paying special attention to the edges.
- Now stuff the ghost with filler. At the same time, do not spare the padding polyester, otherwise the toy will look thin and ugly.
- Sew the stuffing carefully with a blind stitch.
- Now draw the ghost's face and decorations. As the latter, you can use various Halloween symbols - pumpkins, mice, cats, etc.
- Use paints and brushes to color the drawn elements.
When the paints dry, the toy pillow can be beautifully packaged and presented.
Method two (using embroidery)
If you can’t wait for the paint to dry and you love to embroider, then the second method will suit you.
- Do steps #1 and #6 described in the first method.
- Now embroider the drawn elements with floss threads. Choose the embroidery method to your taste - you can embroider both with a satin stitch and with a cross (you can even use beads).
- Do steps #2, #3, #4, #5.
Everything, our gift is ready! Now you can scare your friends and acquaintances with such an original toy pillow.
Candlestick with spider

Dip a sponge into the yellow paint and paint over the top of the jar about a third. After that, use orange paint in the same way to paint the middle of the container. Paint the bottom brown. Paints should be applied one after another, without waiting for the previous layer to dry.
Now wait until the jar dries thoroughly. As a rule, it takes about 12 hours.
Take a golden marker and draw a web on top. When the jar dries a little again, draw a spider on the web with a black marker with the effect of creating beads. Leave the jar for another day.
Thanks to the techniques described above, the spider looks very realistic and mysterious in the colors of yellow light.
It is even easier to make the jar shown on the right in the picture. Instead of paints, it should be decorated with paper cutouts. And it's quite easy to do so.
Sweet nuts with predictions

Divination is a mandatory rite of passage on Halloween. People always want to know their fate, so by giving a pleasant prediction, you will definitely please your loved ones.
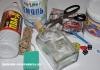
You will need:
- walnuts;
- small sweets;
- yellow / orange and black paint;
- brush;
- curly scissors;
- beautiful paper;
- a pen;
- glue gun;
- hot glue;
- braid / cord.
Halloween is not considered a holiday in our country, on the occasion of which one should present expensive serious gifts to each other. Everything is exactly the opposite. On this holiday, Halloween, it is customary to provide all kinds of signs of attention, sometimes not always pleasant, but always leaving the most vivid impressions and emotions in memory.

The news portal "site" in this article has prepared for you some ideas of original Halloween gifts that you can give to absolutely everyone: friends and girlfriends, beloved and beloved, relatives and friends, work colleagues and even ordinary passers-by as a token of apology for a slightly shaky nervous system from your petty pranks.
And we offer to give sweets on Halloween! It's just that they need to work a little on their presentation. And how to do it in an original and fast way, we will tell in this article.
Halloween gifts
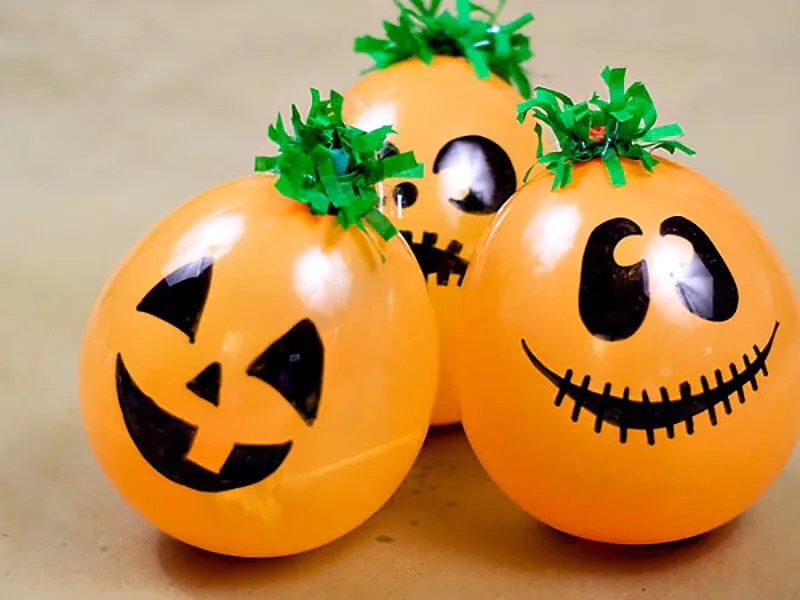
The first gift is an ominous pumpkin balloon with a sweet surprise inside.
To make such a gift, you will need a bright orange balloon, small sweets (they should easily fit into the neck of the balloon), some green corrugated paper and a black marker.

We stuff sweets into the not yet inflated balloon. Now let's blow up the balloon. Armed with a black marker, draw an ominous smile on the ball. We decorate the crown with a fringe of green corrugated paper.
For more effect, you can fill the balloon with confetti!
Halloween gifts
The next Halloween gift is a candy on a stick (like Chupa Chups). You think, well, what kind of gift is this?! But the main thing is to arrange it correctly and unusually.
With the help of small pieces of decorative paper or napkins, you can turn an ordinary candy on a stick into a funny ghost or an ominous pumpkin.
And if you use fluffy wire and “live eyes” for decoration, you can make creepy spiders.
DIY Halloween gifts

The next Halloween gift is a rubber glove filled with candy.
If the glove itself, after filling with sweets, is decorated accordingly, then you will definitely make the right impression with your gift. Put plastic spiders on your fingers, artificial cobwebs, sprinkle with artificial blood.
DIY Halloween gift
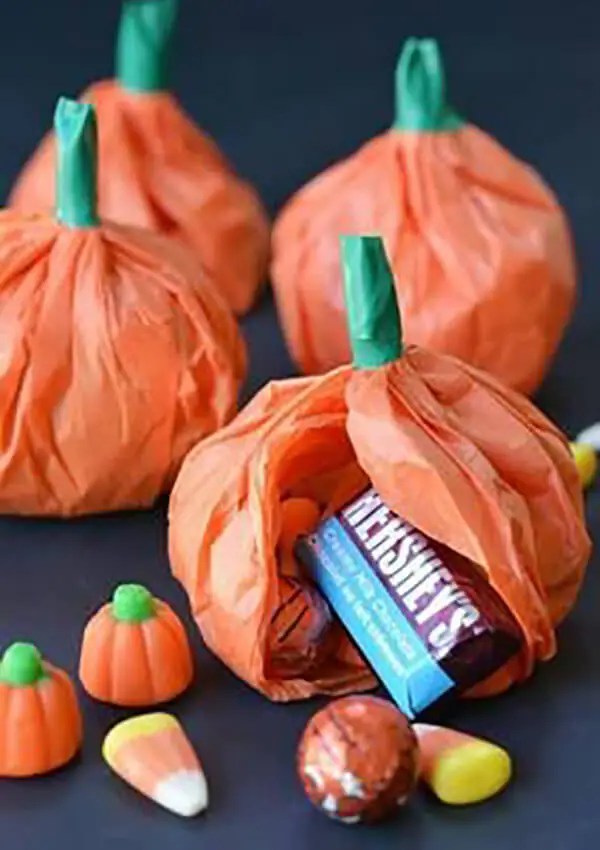
Another Halloween gift option is a paper pumpkin filled with candy.
For manufacturing, you will need bright orange and green corrugated paper.

Cut out a neat circle from orange paper. Put a handful of sweets in the center of it and roll it into a bag. Wrap the tip with a strip of green paper.
What to give for Halloween?

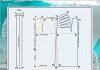
And one more unusual way to please your dear people - give them chocolates in themed wrappers.

The news portal "website" provides you with ready-made wrapper templates that you need to download, carefully cut and place chocolate in them.


Dikmi: Although the night of all Saints is considered the time of the triumph of evil spirits, the main goal of Halloween, after all, is not evil and meanness in its nightmarish and offensive essence. Do you remember the history of the holiday? Yes, yes, the one according to which once a year the most terrible demon leaves his place of imprisonment and goes out to destroy good. And in order not to fall into his clutches, kind and good people turn outwardly into similar, terrible and evil creatures. But only externally! And inside - we are all sincere, glorious and sincere human beings. Consequently, the gifts should be outwardly in tune with the general atmosphere of fear, but inside - tasty and beautiful. If you agree with me, welcome to my article!
GIFTS-SYMBOLS IN HONOR OF HALLOWEEN
black cat
This poor creature was also once unlucky. Someone somehow decided that the black color of her fur coat brings bad luck to those passing by, flying by, etc. This is how she lives, actually doing no harm to anyone (sour cream stolen from the table does not count!) But in eternal fear get a kick, or an unkind word after. However, some Indian tribes consider the black cat the goddess of fertility and wisdom. And therefore, black kittens are always presented to each other at a housewarming party. So that there were children in the house, and the mind was enough to increase wealth and protect the hearth. Like this! If you like the Indian version too, give your boyfriend or girlfriend a tiny handmade black cat for Halloween.
It only takes 15 minutes to make this wonderful creation! And, of course, some improvised materials.
So, we take a black plain sock of a large size. We cut off the elastic just above the heel in the form of a semicircle (later there will be ears in this place).

We fill the sock with synthetic doll fiber or cotton wool (we form the head and torso)

We sew the "crown" and form black ears

We decorate the muzzle with two green buttons-eyes and a felt pink mouth. And also - we tie a big orange bow around the neck of the pussy! The gift is ready!

We continue the theme of black unlucky cats! Although, it is better to say cats! Look at this handsome papier-mâché boy! He smiles so sweetly at you, as if he wants to please you with all his heart! Take it to your house, put sweets in a pumpkin, and make your friends happy with "twin brothers"!

ghosts
Kind Kaspers and evil ghosts from other cartoons and feature films are almost the main characters of Halloween. There are many different variations on the theme of ephemeral afterlife, but we will offer you a few that we especially like.
So, felted ghost keychains. Such a gift will not only please (and not frighten) even your smallest guests, but will also warm your hands in cold weather. Felt is a very gentle, warm material, and making a weightless ghost out of a white piece is as easy as shelling pears.

Another interesting do-it-yourself haunted gift option is the ghost bell tower.
What will you need?
. 2 liter plastic bottle
. Thick foam disc
. tennis balls
. toothpicks
. Wallpaper glue
. Acrylic paints in orange and black
. Dry shine (orange)
. Gauze
. fishing line
. Newspaper
. thin branches
. black marker
. sequins
. Knife, sharp pencil, brushes, large, sharp needle
How to do?
To get started - cut off the bottom of the plastic bottle, remove the label, dry the container. Carefully “hide” the uneven, cut edge in the soft foam of the disc-bottom of the bell tower. Paint the foam base orange and cover with glitter. Let dry.
Next, make the ghosts.
Insert one wooden toothpick into each tennis ball. Cut out circles with a diameter of 5-7 cm from gauze and soak them with wallpaper paste. Remove excess glue and cover the balls with gauze, forming beautiful folds. Draw the eyes and mouths on the ghosts using black acrylic paint and a thin brush or black marker. Attach the ghosts to the branch using fishing line. Then, carefully stick the branch into the foam disc, cover the structure with a plastic cap, fix it at the bottom with glue.

Decorate the top of the bottle with glitter. Such a gift can even be presented to a teacher at school! Surely he will appreciate your creativity and skill!
Another gift option is a ghost washcloth.

To make such a cutie is also not difficult. You will need a white lavsan washcloth, a wooden or plastic cane, a flower pot, artificial moss, polystyrene foam, glue, a couple of sheets of white cardboard and doll eyes.
How to do?
Fill a flower pot with Styrofoam, stick a stick in and fill with construction adhesive. Let dry and dry out. Then, carefully cover the styrofoam in the pot with a circle of artificial moss, secure with glue. Cut out handles and a tombstone from cardboard. Attach a washcloth to the top of the stick, glue handles and doll eyes to it. To the moss below - a stove. And then - start your fun journey to the party, already with a gift!
If you do not feel enough skill in yourself, but really want to give someone a ghost, use the option ghost-packing. Simple and tasteful! And most importantly - within the theme of Halloween!

Pumpkins with gloomy faces, bats, cobwebs in the corners... All these are the attributes of one of the most popular American holidays, Halloween. In our country, Halloween is not a generally accepted holiday, but in recent years the number of its fans has increased dramatically, especially among teenagers and young people.
Want to decorate your home for this holiday? We offer DIY crafts for Halloween.
Whether store-bought or DIY Halloween decorations, many of them look quite gloomy and scary. This is explained by the history of the holiday. It originates from the ancient festival of Samhain, which marked the end of the harvest and the beginning of winter. The ancient Celts believed that on this day the border between the worlds of the dead and the living weakens, blurs and the souls of the dead, as well as otherworldly creatures, can break through it.
Before you buy something or do it yourself for Halloween, think: would it be too scary? Do you have impressionable relatives at home or small children whose psyche may suffer? After all, you don't have to make monsters. And witches, vampires, ghosts and other Halloween decorations can look very cute and friendly.
Here are just some of the Halloween ideas that are not difficult to implement.
DIY Halloween Ideas
pumpkins
Pumpkin is one of the main attributes of Halloween. But did you know that the pumpkin was originally... a turnip? According to legend, as a punishment for deceit, the devil forced a man named Jack after death to wander forever in purgatory. Jack cut a hole in the turnip and put a ember in it to light his way. So he got the nickname Jack Lantern. The Celts carved lanterns with scary faces from turnips and placed them near doors to scare away evil spirits. When this tradition migrated to America, turnips were replaced with pumpkins, a vegetable more familiar to those places.
Therefore, the first thing you need for Halloween is pumpkins. You can make a variety of Halloween crafts from this vegetable: bowls for sweets, stands for large candles, garlands for decorating doors.
If there are no pumpkins, then they can be made with your own hands from a variety of materials. For example, if you know how to sew or knit, you can make pumpkin-shaped pillows and rugs.
- The Jack Lantern is the most recognizable symbol of Halloween. To make it, first draw the contours of the face on the pumpkin with a permanent marker. Carefully cut off the top. Carefully remove all seeds and pulp. Cut out the face with a sharp knife. Now the pumpkin needs to be washed and dried - and you can install a small candle (real or electric) inside. Instead of a candle, you can put a vase or a pot of flowers in such a pumpkin so that only flowers look out of the hole. You will get a charming monster with a flower hairstyle.


- If the holiday is just around the corner, and you haven’t stocked up on pumpkins, it doesn’t matter. Inflate a dozen bright orange balloons and draw eyes and toothy smiles on them. Air "pumpkins" are ready.

- A funny pumpkin-shaped baby hat can be made from a plastic bowl. To do this, paint it orange. From green colored paper and chenille wire, make a stalk, leaves and antennae on the bottom. Attach a rubber band to the headband that will hold the hat on your head - and you can dress up.

- If you have a supply of orange and green buttons, make an applique with the children (instead of buttons, you can use pumpkin seeds, having previously painted them in the desired colors). On a dense fabric or burlap, apply the outline of a pumpkin. Use glue to fill it with orange buttons. Put pumpkin leaves and stalk with green buttons. Frame your masterpiece and hang it on the wall.

Halloween pumpkin templates


Sweets or passions
The Celts believed that on this day, spirits disguised as ordinary people knock on doors and ask for treats. If you refuse them, the family will be cursed for the next year. Therefore, we propose to make, among other things, sweet DIY crafts for Halloween.
pumpkin lollipops
Take orange and green wrapping paper (such as tissue paper or crepe paper). From the green cut out one circle with a diameter of approximately 14 cm, and from the orange - two circles with a diameter of 12 cm. Assemble a sandwich: two orange circles, one green on top, put a small flat candy in the form of a pill (or a small cardboard circle) in the center to give stability designs. Place a round lollipop on the circle. Carefully wrap the orange and green paper around the lollipop and secure with ribbon or twine. With a black felt-tip pen, draw triangular eyes and a smile on the orange part. It turned out to be a lovely pumpkin.

Ghost lollipops
If there is no time to mess around with multi-colored paper, you can do it easier: wrap a lollipop with a white napkin, secure with a ribbon and draw eyes and a mouth. Stick a stick into some base and admire the cute ghost.

Packaging for sweets in the form of a pumpkin
Cut out a circle from orange felt or loose fabric (the diameter depends on the number of candies). Make small holes along the edge, through which you thread the green cord. Put the candy in the center of the circle and tighten the string. To enhance the similarity, you can add a felt pumpkin leaf.
You can come up with many other options for packaging sweets.


How to Decorate a Room for Halloween
Pumpkins have already been mentioned above - these vegetables (or crafts in the form of these vegetables) must be included in Halloween decorations.
Here are some other Halloween ideas.
Witches and black cats
These are common themes for Halloween. The Christian church portrayed witches as evil and ugly accomplices of evil spirits. Often single women were accused of witchcraft, many of whom had cats in the house. Therefore, they were also considered devilish animals.


- Cut out many cat faces from black paper. Cut holes for eyes. Take an LED garland with small bulbs and hang muzzles on it so that a light bulb enters each hole for the eye. You will get a garland of cats with glowing eyes - these are really mesmerizing DIY Halloween decorations.

- Paint the pumpkin black with spray paint. From multi-colored paper, cut out and stick cat ears, eyes, nose and tail on it. Make a mustache from chenille wire. Such a "cat" will look great among pumpkin lanterns. By the same principle, a witch's head or a bat can be made from a small pumpkin.

- Disposable paper plates are a wonderful material for children's DIY crafts for Halloween. Paint the plate green, draw a face on it, and glue a black witch hat on top. Hair can be made from multi-colored threads or thin strips of paper. In the same way, pumpkins, cat faces, vampires, zombies and other evil spirits can be made from plates, which will perfectly decorate a children's room for Halloween.


Bats and spiders
Bats and spiders were considered animals that accompanied ghosts and witches. According to legend, if a bat flies around the house three times, soon someone will die there. And if she flew into the house, it was believed that a ghost entered the dwelling with her.
- Cut out many different sizes of bats from black paper and decorate the walls with them. Kids can make bats out of toilet paper rolls or kitchen napkins. To do this, you just need to paint them black, stick wings made of black paper and draw faces.


- A funny web is obtained from ... black garbage bags. To make this Halloween decoration, remember how you cut out paper snowflakes as a child. The principle is the same. Cut a large trash bag into a square, fold it into a triangle, then in half and then in half again. Secure in several places with tape so that the triangle does not fall apart, apply the lines of the future web with a light marker and cut it out with sharp scissors. Attach the web to the wall with tape and decorate with small spiders. Small cobwebs can be cut out of plain paper.
- Children can make funny spiders from cones or balls of thread and chenille wire.
ghosts
What is Halloween without guests from the underworld?
- Make a concentrated starch solution. From gauze, cut out two squares with a side of 30-40 cm. Prepare the base: inflate the balloon and place it on the jar. Now soak the squares in the solution, lay them on top of each other and carefully cover the balloon with them. When the cheesecloth is completely dry, gently pop and pull out the ball. The starched fabric became similar in shape to a real ghost. Stick paper eyes on and place it on a table or window sill. You can make the ghosts smaller and hang them on strings from the chandelier.


- If there are no small children in the house, you can make a more intimidating decoration. Print out an image on the printer that resembles a reflection of a ghost, insert it into a frame under glass. Coat the frame and part of the glass with black or gray spray paint and hang it on the wall. It will seem to guests that a ghost is trying to break through the glass to your apartment.

- Toddlers can make a ghost garland. Help them cut out little ghosts from white paper. When the child draws a funny face for everyone, string them on a cord and hang them on the wall.


Despite its dark roots, Halloween is a fun and noisy holiday these days. And do-it-yourself Halloween crafts will help make it even brighter and more exciting. We are sure that our ideas will also come in handy if you have a Halloween-style party planned, for example, for a birthday. Finally, we offer some more Halloween paper templates.
In our country, it is customary to give gifts on holidays. And this well-established tradition should not be broken, even if the holidays come from outside.
Relatively recently, the tradition of celebrating Halloween has entered our lives. This holiday is very ancient, preserved from the time of paganism. On the last day of October, the ancient priests performed rituals to scare away evil spirits. Over time, new customs appeared, and today few people remember the original meaning of Halloween, for many it is just a fun carnival, during which it is customary to dress up in costumes of a certain style.
The custom of exchanging gifts in honor of Halloween is a domestic "invention". In the homeland of the holiday, gifts are not prepared for this day. Only children can count on receiving sweets, because according to tradition, children dressed up in costumes go to their neighbors' houses on this night. And the hosts, at whose house the “mummers” knocked, should not refuse to those who came in treats and generously presented the guests with sweets.
In our country, despite the relative youth of the holiday, our traditions have already formed. And one of them is the exchange of small surprises.
A Halloween gift, of course, you need to choose a themed one. It is not customary to make expensive presents on this day; usually, various souvenirs and sweets are given.

When deciding what to give for Halloween, you can contact specialized departments or souvenir shops that bring themed gizmos for the holiday. Or you can make your own gift. In this case, the surprise, for sure, will turn out to be exclusive.
Purchased gifts
In the departments of gifts and souvenirs for the holiday, you can pick up a variety of little things. The most popular options include:

- T-shirts with themed prints. You can choose relatively "harmless" options, for example, a T-shirt with a picture of a pumpkin and the wish "Happy Halloween!" Or pick up a T-shirt with really frightening pictures. You can choose a black T-shirt, on which an imitation of the bones of the chest or an imitation of a terrible wound is depicted in luminous paint.

- Cups, plates. There are always a lot of various dishes in souvenir shops. For Halloween, you can choose a cup and an image of a spider, or a skeleton. If you want to make an exclusive gift, then you need to buy a plain cup and order a drawing on it as you wish.

- Magnets and key rings with the image of various evil spirits. This option is especially good if you need to make a lot of small gifts.
Of course, when choosing a present, you need to take into account the degree of closeness with the person being presented. If it is quite appropriate to give a keychain or a small souvenir to colleagues or just friends, then it is customary to give close people more substantial things.
You can give to a friend original jewelry- a bracelet on a hand or on an ankle, a brooch, beads. It is not necessary to choose jewelry with the image of skulls or spiders, you can limit yourself to the fact that the products will be made in black and orange. Since these colors are the symbols of the holiday.

You can give your best friend a computer accessory, for example, mousepad or the mouse itself of the original design, for example, decorated with the image of bats. You can buy and scary mask, this gift will be especially appropriate if a friend works a lot and does not have time to prepare a themed costume for a party.
You can give your beloved girl vintage box for storing jewelry or various small things. You can pick up a box in the form of a pumpkin or choose an option decorated with an image of a pretty witch.
Scary movie lovers, you can present selection of horror films. This gift is almost universal, it can be made to mom, and your soul mate, and friends.

Cool gift option for a girl - nail pads, thematic design, that is, with the image of spiders, skulls and other "horrors". Such stickers will allow you to make an original manicure for the holiday in a matter of minutes. You can even pick up a variant with a 3D effect, they look very unusual. Such a gift can be given to a sister or a loved one.
Usually given to children on Halloween variety of sweets, but it is quite possible to present a toy. For example, a witch doll or a toy monster. When choosing a gift, you need to take into account the age of the child, the chosen toy should not scare the baby.
A very practical gift case for smartphone or tablet. You can choose a product in black and orange colors or decorated with a thematic picture. For people who have a healthy sense of humor, you can make a creative gift: bath towels or a bath curtain with a picture of blood spatter or bloody handprints. Such a gift can scare anyone.
Homemade gifts
Handmade Halloween gifts are very popular.
The most popular option is Jack lanterns, that is, lamps that are carved from a pumpkin. They are quite simple to make, even a teenager can handle the job. Necessary:
- cut off the top of the pumpkin from the side of the stem;
- remove the pulp and seeds, leaving the walls at least 1 centimeter thick;
- cut out a face (eyes, mouth, nose), it can be given both a ferocious and a funny expression;
- place a lit candle inside and cover with a previously cut lid on top.
This gift is good for everyone, except for one thing, it is not durable. The pumpkin will go bad pretty quickly. If you want to make a present that will last for a long time, then you can make a pumpkin out of paper (of course, you don’t need to insert a candle into a paper pumpkin) or out of fabric. For example, you can sew a sofa cushion in the shape of a pumpkin - you get a very practical gift.
Can be done and various lamps. It is very easy to make a lamp from an ordinary glass jar (it is better to choose a jar of an original shape, for example, in the form of a ball). The jar needs to be painted on top with acrylic orange paint, and then draw a face on it. A short candle is installed inside the jar - and the original lamp is ready.


Can be done and sweet gifts they will especially appeal to children. Just giving candies in a bag is not interesting, so you should make the original packaging. For example, from a glass jar. Pour sweets into it, close the lid, and then do the decoration. You can draw spiders on a jar or make a "vampire" out of a jar. To do this, a head, a cloak and a suit are made of paper. A jar of sweets will depict a body, a paper vest and a raincoat are “put on” on it, and a head is fixed on the lid of the jar.
You can make homemade sweets, now you can find many interesting recipes for Halloween, such as witch fingers cookies or monster eyes jelly. Just do not overdo it with realism, especially if the sweet gift is intended for children.

An excellent option for a surprise for the holiday will be home-made decor elements - an embroidered picture or a soft toy that matches the theme of the holiday.
So, Halloween gifts can be very different. When choosing, you need to take into account that the present should surprise, but not scare, especially if it is a surprise for a child.