To make your own nail polish, you should use certain tips. At home, you can create a unique manicure.
Lacquer with ink
In the photo of homemade varnish you can see the original shade of varnish. In the event that you do not like the color of your varnish and want to change it, simply combine the varnish with ink. You should also purchase ink of a certain color. You can also use the budget option. For example, for these purposes, you can use helium ink, or a ballpoint pen. During the work process, you should be careful.

Matt lacquer
You can make an ordinary glossy varnish matte varnish. Using corn starch, you can easily do this. Thus, the matte varnish you received will become a few tones lighter.

To achieve this effect, it is worth mixing a few drops of varnish along with starch. Enough of the last component about a teaspoon. Apply the mixture to the nail area. It should be noted that after complete drying, a pleasant shade of matte texture will be obtained.


You can achieve the same shade using ordinary powder. You can also use shadows with a matte texture.

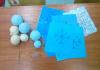
You need to change the varnish with your own hands. Just add a little loose powder to the bottle area. Rolling the paper using the funnel method will keep the powder from spilling past the bottle area.

You can add a few balls to the bottle. Thus, you qualitatively, much better mix the bottle. A matte effect is obtained by combining light, loose powder together with a colorless varnish.

Nacre
To make glitter polish, add glitter to the bottle. This mixture should be lubricated nails. Often, in order to make your manicure more beautiful, original, it is worth sprinkling the tips of your nails with sparkles. At the end, cover the surface with a clear varnish to strengthen, maintain an attractive appearance.

To add mother-of-pearl to your nails, use the master class on how to make a manicure at home. To do this, you can simply add shadows for the eyes.

To do this, you need to grind the shadows. To do this, you can crush them in a bowl with any hard object. They should turn into a fine powder after such manipulations. Thus, the varnish coating will be uniform. Powder should be added directly to the varnish.

You can also make a varnish of the same color as the shadows you use. To do this, you need to take a transparent varnish. To complement the image, you can make a manicure to match the color of the makeup.


Using the applicator, crush and apply shadows on wet nails. Then blow off the excess, with the help of a transparent varnish it is worth fixing the base.

Making a new varnish
Follow the instructions on how to make varnish at home. It is worth choosing two varnishes that are combined with each other to begin with. Then you should pour them into one jar.

Many people use one secret how to make varnish thinner or thicker. You can also put one varnish on top of another. While you go about your business, the varnish will blend naturally. After the end of the procedure, mix, shake the bottle vigorously. With simple steps, you will prepare a completely new varnish.

With gradual darkening, you will get an attractive ombre effect. This effect is quite popular today. The positive thing is that such a varnish can be made independently.

Glowing varnish
To obtain this effect, you should combine an acrylic helmet and varnish. Thus, fluorescent acrylic paint can be purchased at a regular office supply store. For these purposes, also use a helium pen.


To get the best shine, you should use a transparent varnish base. It is often applied to the top of colored lacquer. Also, the fluorescent substance goes well with any color. It is best to use white. To obtain this effect, you can use a light emitting stick. One stick is enough for these purposes. The main thing is to use one important condition - a combination of both colors.

To make such a varnish, it is worth kneading the stick well over its entire surface. In particular, this applies if it is made in the form of a necklace, or a special bracelet. To do this, cut off one end with scissors. Next, cut off the tip of the stick in the area of \u200b\u200bthe vial. Gradually squeeze the contents from the stick into the inside of the vial. Then you need to apply nail polish.

It is worth remembering that when making varnish in this way, a similar effect lasts only for a few hours. To prolong the desired effect, cover the varnish with a transparent base.

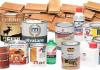
To prepare the varnish, you should start preparing the necessary materials for this. You need a water-based clear varnish. Use the polish you already have. It is best to use a bottle bought at a pharmacy.


Also for the process you will need a brush, eye shadow. You should use the food coloring of the color that you like best.

Also prepare henna and white clay. The main advantage of self-made varnish is that all the ingredients are natural, improvised, and have a low cost. Also, in addition to all the above ingredients, you can add olive oil. The use of such a varnish can be considered a therapeutic procedure for nails.


conclusions
To create an interesting varnish at home, you should use different methods. Follow the instructions, use interesting videos to get the desired effect. Remember that the main thing is not to be afraid to experiment. From improvised materials, old varnishes, or long-forgotten bottles, you can create a truly original and beautiful varnish. A manicure created in this way will undoubtedly set you apart from the rest.

DIY nail polish photo


They say men are always children. Whether this is true or not is hard to say, but it’s easier to believe that a little girl lives in every woman. We also, as in childhood, love to dress up, we will certainly rush to our mother in trouble and never mind creating something useful for our beauty with our own hands. If in childhood it was experiments with the creation of perfumes from some fragrant plant, then in adulthood the field for fantasy is much larger. What if we conjured up the creation of ... say, nail polish. For the sake of economy, curiosity, the desire to decorate nails with a unique color - it doesn’t matter ..
- Transparent varnish (water-based). Can be bought at a pharmacy
- tassel
- Any eye shadow
- Food coloring of desired color
- White clay
- Olive oil
As you can see, almost all the ingredients are natural and this is already an important advantage of homemade nail polish. However, olive oil, white clay or henna can also be used here. Such nail polish at home will also be healing.

We conjure over the “potion” - we make a healing varnish
What do you need: olive oil and any of the natural dyes.
How we do:
- Mix the dye (henna or, say, clay) until the density of a smooth dough.
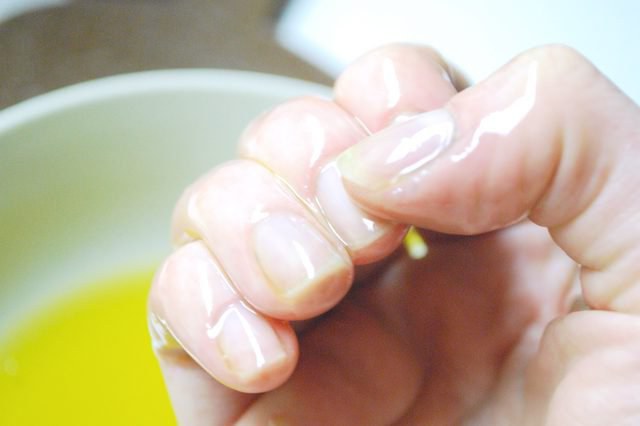
- Apply this mass on pre-treated and degreased nails with acetone.
- Leave on for twenty minutes to dry.
- Wipe your nails with a wet cotton pad.
To make nail polish at home resistant, repeat the procedure for such staining two to three times a week. Thus, the nails will acquire not only a healthy color, but also the same shine. And in general, health, because olive oil perfectly nourishes both the cuticle and the nail itself, and henna or, say, white clay even out.
Option 2, colored varnish with dye
What do you need: food coloring of the desired color, colorless water-based varnish, metal ball.
How to make nail polish:
- Grind food coloring in a container
- In a colorless varnish (necessarily water-based), add pounded food coloring.
- Place a small metal ball into the container. It is needed for good whipping of the contents.
- Stir the resulting mixture and use as directed.

Option 3, Colored nail polish with eye shadow
What you need: To make nail polish at home, use good eye shadow.
How to do: all actions repeat the option with food coloring. The option with shadows is advantageous in that the latter have a richer palette of colors, which will allow you to make nail polish with an absolutely unique shade. And not just one, but a whole collection.
Option 4, Making varnish with alkane root
What you need: half a teaspoon of alkane root (a plant with medicinal properties, actively used in cosmetology, for the production of soaps, lotions and creams), three tablespoons of olive oil, a quarter teaspoon of beeswax and a couple of drops of vitamin E oil.
How to do:
- Heat olive oil and alkane root in a water bath.
- Remove from heat and leave for five to seven minutes.
- Strain the mixture through a fine sieve, return to the steam bath.
- Add beeswax to it.
- When the wax melts, add the vitamin E oil and mix everything thoroughly.
- Remove mixture from heat.
- When it cools down, you can apply it on your nails.
Nail polish created in this way at home is applied with a brush or drawing so that it does not get on the skin of the hands.
Alcona, as well as blue, white clay, as well as oil with vitamin E, can be bought at a pharmacy.
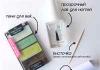
How to make gel nail polish shiny or glowing
Lovers of shiny or glowing marigolds will need glow-in-the-dark sticks or the same resin powder (the latter is preferable, but will cost more). For shine, dry sparkles are used, which are simply added to hand-made or purchased varnish.
To make the varnish glowing, add six caps of glowing resin (caps from a jar of resin) to it. Resins are sold in different colors, so there will be plenty to choose from to your taste. Don't forget also.
Today it is easy to buy ready-made therapeutic nail polishes: with calcium, various oils and protein complexes. But no matter what useful additives a purchased varnish is endowed with, it is still a chemical agent, i.e. of synthetic origin, because in addition to them, it usually contains toluene, formaldehyde, aspartame ... And it has long been proven that these substances can cause serious harm not only to nails, but also to health in general, if you use purchased varnishes often. This is exactly what most working women do - beautiful nails are the very “finishing touch in an ideal image”. Now imagine that you also often paint your nails with healthy homemade varnishes made from natural ingredients. Agree, a good reason to conjure over your own masterpieceJ).
The varnish must meet the following requirements:
- dry quickly;
- give a strong film;
- the film must be flexible;
- have as much shine as possible;
- gloss should be preserved for a long time and not be afraid of atmospheric influences.
Below are recipes for some varnishes.
Aniline varnish. Dissolve shellac in alcohol and add to them aniline paint, soluble in alcohol. The object to be varnished must be warmed up.
black lacquer
- Boil in an iron pot over low heat for 6 hours 2 kg asphalt, at the same time in another bowl boil 2.8 l drying oils. While cooking drying oil, gradually add 300 g of litharge to it, boil until it begins to stick between the fingers. After that, pour it all into a bowl with boiling asphalt. Boil until the sample rolls into balls. Then cool and mix with turpentine. Take as much turpentine as necessary to obtain the desired density.
- Pour small pieces of broken gramophone records into a vial and fill with double the amount of alcohol (you can also use denatured alcohol). Close the vial tightly with a cork and place it in a warm place for two to three days. When the pieces are completely dissolved, you will get a thick black varnish. To make the varnish liquid, add alcohol to the finished varnish and mix thoroughly.
Light for furniture. Dissolve 700 g of shellac in 4.5 liters of technical alcohol.
Table varnish. 450 g of turpentine, 57 g of beeswax and 2 g of rosin.
Celluloid varnish. Dissolve 5 parts by weight of celluloid, 5 parts of camphor and 50 parts of alcohol.
Lacquer for watercolors. 135 g of light shellac, 28 g of borax, 0.5 l of water. Bring almost to a boil so that everything dissolves, and then filter. Drawings covered with this varnish are protected from water.
Lacquer for tools. Dissolve 250 g of white shellac in 250 g of alcohol. Dip the tool in this solution and hang to dry.
Black varnish for iron objects. Boil in iron pot 2.2 kg asphalt 4 hours. After the first two hours, add 300 g of red lead, 300 g of litharge, 100 g of anhydrous copper sulfate and 450 g of drying oil. Then add 570 g of dark shellac dissolved in 900 g of hot oil. After that, boil until the sample begins to roll into hard balls. When cool, dilute with turpentine.
Insulating. Melt 2 hours of asphalt with 0.4 hours of sulfur and 4 hours of drying oil. Keep on fire for 6 hours at a temperature of 160 °, then add turpentine to the required density.
How to make homemade varnish for wood from improvised materials at home It is noteworthy that you can not buy varnish, cook it yourself. Below are a few recipes for such varnishes. “Varnish for wood in 5 minutes”: I pour a third of the volume of acetone into a container (about 100 ml) and add finely chopped foam plastic (from equipment packages). In volume, this is approximately 0.3 dM cubic (depending on the density of the original foam). A transparent jelly-like mass is formed, with which I cover. Moisture resistant. It has good impact resistance properties. And most importantly - it's cheap and affordable. Oil varnishes, which are a mixture of drying oil with expensive resins (amber and copal), are the best of all varnishes both in beauty and durability. By mixing turpentine with them, they try to make them dry faster, but these varnishes, winning in drying speed, always lose strength and durability. Copal oil varnish. Take 100 weight parts of good linseed oil and boil it in a cauldron with gradual heating. When bubbles begin to appear, you need to maintain an even fire so that the oil boils slightly. At the same time, 15 parts by weight of East Indian copal are melted in a water bath and brought to a boil. When bubbles begin to appear in the melted copal, immediately pour hot linseed oil into the resin in parts, stirring all the time. When all the resin is well connected with a part of the oil, then it is poured, with constant stirring, into the oil, boiling in a large cauldron. Then pour 1 weight part of manganese borate into a large cauldron and continue cooking for about 2 hours, removing the resulting foam, until the varnish becomes thick and slowly flows from the veil with transparent, golden threads. If you drop varnish on glass, then the drop should be high in the form of a hemisphere. Cooled, the drop should be like a thick syrup, stretching into threads. These are signs that the combination of oil and resin has taken place. After that, the fire is extinguished under a large cauldron and the mixture is allowed to gradually cool down to 60 + C. Then 70 weight parts of turpentine are poured in in parts, making a test after each addition whether the cooled drop retains the consistency of a viscous syrup. If the viscosity of the lacquer noticeably decreases, then the addition of turpentine should be stopped and the lacquer is considered ready. A good varnish should be golden in color, lie smoothly on the surface to be painted and dry after 6-8 hours. For painted surfaces, where the yellowish tint is not important, this varnish can be considered excellent. Preparation of dammar, copal and mastic varnish For objects painted with light colors, and for paintings, the so-called dammar varnish is used. It is prepared as follows: take 4 parts of dammar resin, 5 parts of turpentine and 1/4 part of bleached (without lead) linseed oil. This mixture is boiled until completely dissolved, after which it is filtered through a thin metal sieve, allowed to settle and drained. To prepare copal varnish, mix 1 part of light soft copal with 2 parts of turpentine, and if you want to get an elastic varnish, add another 3% camphor. Then the bottle is filled up to 3/4 with this mixture, corked and placed in the sun or kept warm, shaking from time to time. When the mixture is completely dissolved, it is allowed to settle, drained and filtered through cotton wool. If the varnish prepared in this way is not completely transparent, then it should be boiled in a bottle for an hour, placing the bottle in a water bath. Mastic varnish is prepared as follows: for 12 parts of purified, well-washed mastic, 1.5 parts of pure Venetian turpentine, 0.5 parts of camphor powder, 5 parts of well-ground glass and 30 parts of purified turpentine are taken. The mixture is dissolved in a water bath, then allowed to settle and after a day it is drained and filtered through cotton wool. Castor Lacquer The dry distillation of castor oil yields a rubbery residue which, when dissolved in hydrocarbons (gasoline) or alcohol, makes an excellent, impermeable, sun-resistant, highly durable varnish. Wool, linen, etc. smeared with this varnish. become impervious to water. When varnish is mixed with earths or metal oxides, a very strong putty is obtained. Asphalt varnish. Here are some recipes for such varnish. I. Melt 1 part of asphalt, allow to cool, grind, add 2 parts of turpentine and dissolve. Add soot if desired. II. Take 3 parts of asphalt, 1 part of coal pitch (solid residue from the distillation of coal tar) and dissolve, with gentle heating, in 6 parts of turpentine. III. Take 250 parts of asphalt, 475 parts of linseed drying oil, 120 parts of rosin, 180 parts of turpentine. This varnish is especially suitable for tin. IV. Take 6 parts of asphalt, 1 part of boiled linseed oil, 8.5 parts of turpentine. This varnish is especially suitable for iron. V. Take 20 parts of asphalt, 5 parts of rosin, 2 parts of soot, 50 parts of kerosene. VI. Take 1 part of asphalt, 1 part of rosin, 8 parts of turpentine. Japanese varnish. Take 45 parts of turpentine and 60 parts of lavender oil, dehydrate it with calcium chloride, separate the liquid from the sediment, dissolve in it when heated 1 part of camphor with 15 parts of copal resin and filter. Dutch varnish "Elemi" for oil paintings Take 8 parts of mastic, 1 part of resin "Elemi", 2 parts of Venetian turpentine, 29 parts of turpentine. Mastic varnish for oil paintings Dissolve 6 parts of sandarac, 2 parts of mastic, 1 part of Copay balsam, 1.5 parts of Venetian turpentine, 1 part of French turpentine, 20 parts of alcohol (96%).
A healthy lifestyle, naturalness and naturalness are increasingly becoming fashionable. This applies not only to food, but also to everything else that surrounds us every day. Today, healthy lifestyle has reached cosmetics. Now ladies make beauty products with their own hands, from natural materials. How to do at home? Let's get the recipe!
Why not buy varnish in the store?
Indeed, why are ladies today increasingly looking for information on how to make varnish at home? It turns out that not so long ago, bottles with the mysterious inscription 3Free began to appear on the shelves in cosmetics stores. Curious fans of the perfect manicure immediately found out that eco-varnishes have such a marking, which do not add harmful toluene, formaldehyde and camphor. These substances can provoke many diseases in the female body, and during pregnancy they are completely contraindicated.
As a result, some ladies refused to trust any varnish manufacturers, even with eco-labels. But not everyone knows how to make varnish on their own. We will give you some instructions.
Varnish with olive oil
The basis of the first natural varnish recipe is olive oil. As you know, it has a beneficial effect on the condition of nails and cuticles and gives the handles a healthy, fresh look.
How to make varnish based on olive oil? To do this, it must be mixed with white clay in a ratio of 2: 1. Instead of clay, you can use henna or another natural dye of a similar consistency. The resulting mass should cover the nails and let them dry. After 20-25 minutes, the mass should be wiped off with a damp cotton pad.
Lacquer with alkane root and beeswax
Alkana is a miraculous plant, the root of which is actively used in the manufacture of cosmetics. Beeswax is a universal remedy that is added to creams and is also used in traditional medicine. These two ingredients can only benefit nails: they will improve the general condition of the nail plate and cuticle. How to make varnish from alkanes and
It is necessary to take a quarter teaspoon of wax, half a teaspoon of alkanes, three tablespoons of olive oil. Experts advise adding a couple of drops of definitely useful vitamin E, but without it, natural varnish will also work.
To prepare the varnish, it is necessary to heat the olive oil along with the root in a water bath. Then you need to remove the product from the heat and cool for 5 minutes, then wipe the infusion through a sieve. Then you need to return it to the water bath and add beeswax to the resulting mixture. When the wax melts, the mass must be mixed and allowed to cool. Ready!
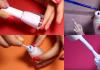
Colored varnish from colorless
How to make a varnish of an unusual shade from a medical colorless one that is sold in a pharmacy? Very simple! In a bottle with colorless varnish, you need to fill in a dye made by yourself. It can be made from food coloring or eye shadow. Of course, the choice of the latter should be approached responsibly, because they should also be as harmless as possible.

A small amount of varnish must first be poured from the bottle, otherwise it will be difficult to add dye to it, or there will be difficulties with mixing. It is more convenient to add shadows or other paint through a funnel made from a paper mug. You can mix the new varnish with a toothpick.
How to make varnish at home in other ways? Share your recipes!