Almost every fashionista can create the perfect manicure - a lot of fashion bloggers love to share their photos of creating a beautiful manicure so that other people can use such options for their images. However, what if you can’t find the necessary shade of varnish in any store, and you want to have a beautiful manicure as soon as possible? In this case, it is better to know how to make varnish yourself.
What do you need to make varnish?
There are several ways to create nail polish. All of them are quite simple and do not take much time. All you need to prepare for this is a clear varnish, maybe glitter if necessary, eyeshadow in the right color, an empty bottle where everything will mix, and a few clean brushes.
First of all, you should pay attention to eye shadow. When choosing the right shade, it is better to focus on crumbly shadows, as they will be much easier to mix with varnish, and the overall likelihood of lumps is zero.

How to make eyeshadow nail polish
The first option includes varnishes at home, which are not so expensive. To do this, pour the right amount of eye shadow into the mixing container, then glitter (if needed) and fill with colorless varnish. For example, pink varnish can be made not only with shadows, but also with small sparkles. After that, in order for everything to happen quickly enough, and the varnish does not have time to start to thicken, it is necessary to quickly and gently stir everything until a homogeneous mass without various lumps is obtained.
Such a homemade varnish can be applied immediately to the nails, and then wait until it dries and gently touch up the manicure with a toothpick or acetone. If the container is open, such a varnish is obtained for one-time use.
But for those who need to make a whole bottle, it is best to take a piece of paper, twist it with a neat tube, the tip of which can easily enter the bottle with transparent varnish, and fill in the eye shadow, and then mix everything well with a brush or shake the bottle in hands. It should be remembered that the more shadows you add, the darker the original color will be.

How to make matte manicure nail polish
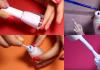
The second point is a matte manicure. No need to think that it is done quite difficult and takes a lot of time. The way to create it is quite easy. The first option is using ordinary boiling water. To do this, you need to pour water into the saucepan and wait until it boils - then the steam will be the most, and it is exactly what you need.
Then you need to paint your nails on your hand with varnish and, without waiting for it to dry completely, hold your hand over boiling water. The lacquer matte will be made from water, so no special expenses are needed in this matter.

The second option is when you want to create either a whole bottle of such varnish, or a little, for a one-time painting. In this case, regular corn or potato starch will do. A little starch must be mixed with varnish until a homogeneous mass is obtained. And then it can be safely applied to the nails. For such experiments, the one polish is perfect, thanks to its bright color.
Another important point to pay attention to is thick varnish. It happens that the shelf life of the varnish will not end soon, but it is already starting to slowly thicken and dry out. In this case, it is necessary to check the bottle - it is possible that the cap does not close well. You should also remove all hardened varnish from the neck.
Of course, it is easier to throw away the bottle, unless it is a favorite shade that is not sold anywhere else. Then acetone will save the whole thing: a little solvent - and the varnish will become more liquid. If there is a fear that everything can be ruined with acetone, then you can add a transparent varnish.

Luminous nail polish
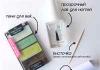
Also recently, a luminous manicure has become quite popular, which will not be so easy to do with your own hands, like all other options. For its production at home, it will be necessary to buy in advance a luminescent pigment, which is sold by weight, and choose from paint one that does not have UV filters that absorb light.
First of all, one rule should be remembered: it is better to do all experiments on creating luminous varnish in a well-ventilated room and in the absence of children who can accidentally eat something.
When all the ingredients are ready, you can do the following: add all the ingredients in a ratio of 1: 3 to a clean and dry lacquer jar, and then mix everything well with a toothpick. If one is not at hand, then a match will do just fine. Stir such a varnish should be thoroughly so that the powder can dissolve. You can also use colored varnish as a basis, but without a transparent varnish, the glow will not be so bright. By the way, for a better understanding of what, when and how to mix, you can watch various videos on similar topics.

Somehow I had to buy a bottle of varnish from an unknown company, because I liked the color so much. But the trouble is - after the first application, the color is not as bright as we would like. What to do in such situations and how to prevent them?
Every woman must have a white polish in every manicure set and arsenal of varnishes. It is great for making the desired color brighter. To do this, first apply white and then colored varnish on the nails. If the final version does not suit you, then you can make several layers of colored varnish.
Video on the topic of the article
Many girls will agree that the stores do not always have exactly those shades of varnishes that are so necessary for one of the outfits. But do not despair and paint your nails with anything, while a perfectly matched color will make you feel like perfection! It is absolutely easy to make varnishes at home with minimal cost and time.
In order to make the varnish yourself, it is enough to prepare the following items:
- plain colorless nail polish
- shade of your choice
- blank sheet of paper
- a couple of toothpicks
- simple teaspoon
How to make varnish with your own hands:
Step 1. Place a blank sheet of paper or a simple notebook sheet on the table. This is not so important. The main thing is that the size should be average, not a small piece, but not a drawing paper either.
Step 2. Scrape your favorite shadows from the substrate. When all the contents are on the sheet, it must be properly crushed so that there are no lumps left. This can be done with a simple teaspoon.
 Step 3. Next, open the colorless varnish and set its brush aside. See that she doesn't mess anything around.
Step 4. Gently fold the eyeshadow leaf into a tube. It is important that the diameter of the tip can freely enter the neck of the nail polish bottle.
Step 5. After you pour the contents of the bag into a colorless varnish, you need to mix it properly. For these purposes, a simple cheap toothpick is best suited. It is better not to use a lacquer brush, as particles of shadows that have not yet dissolved can remain on it and form unpleasant sticky lumps. You need to mix thoroughly, do not skimp.
So, the varnish with your own hands is completely ready! It remains only to paint the nails. If something is not clear to you, then you can watch this video and see everything in detail. Thus, at home you can collect your favorite shades of varnishes without running around the shops and without trying to get the right color.
Lacquer is a type of coating that protects the surface from moisture and mechanical damage, besides, it does an excellent job with its aesthetic function. Modern manufacturers are constantly releasing new types of this finishing material.
Taking a course on organicity and environmental friendliness, experts recommend opting for a varnish based on acrylic.


What it is?
Acrylic varnish is crushed plastic dissolved in acrylic. After drying of such a composition, a thin colorless acrylic film is formed with high resistance to mechanical damage.
The main substances that make up the varnish fit in three points:
- liquid polymer (acrylic);
- antiseptic (to protect wood from moisture and pests);
- plasticizer (the main component that gives the coating maximum strength and durability).


Acrylic varnish is a ready-to-use substance: homogeneous, transparent, practically odorless. It is based on high-quality acrylic resins, not burdened with color, and water dispersions.
To get acquainted with this almost universal coating, its main properties and characteristics should be highlighted.
- Acrylic varnish is a liquid. It is characterized by high viscosity and the ability to dissolve in water.
- One of the amenities is the minimal presence of smell (at least unpleasant).
- Despite the fact that this type of varnish is water-soluble, it cannot be washed off after drying.
- The film that appears in place of the dried acrylic varnish has increased elasticity and wear resistance.
- The coating does not lose its transparency even with time and under the influence of sunlight.
- If necessary, such a varnish is even recommended to be mixed with water-soluble paints.
- Ideal for outdoor and indoor work. It interacts well not only with wood, but also with brick.


Peculiarities
The main and most pleasant feature of acrylic lacquer is its ready state, that is, you can buy it, bring it home and start processing right away. Also, professionals advise to stop their attention on it due to the fact that the coating has a high resistance to temperature extremes (it does not crack either in the heat or in severe frost). Acrylic lacquer is so versatile that it easily falls not only on wood or brick. There is information about the successful application of it on paper, wallpaper, cardboard, plastered surfaces, metal and plastic products, fiberboard and drywall, glass surfaces and more. Let's dwell on the positive and negative aspects of acrylic varnish.


Advantages:
- high level of moisture resistance and thermal conductivity;
- transparency and elasticity;
- environmental friendliness;
- pronounced antiseptic properties;
- excellent decorating solution;
- low fire hazard;
- resistance to household chemicals and alcohol solutions.


There are practically no shortcomings in the use of acrylic varnish, with the exception of the human factor and the simple inattention of buyers.
Professionals always advise paying attention to the date of manufacture and the expiration date of acrylic varnish, which can significantly affect its physical and chemical characteristics. If the coating has been stored in the cold for a long time, it may freeze and lose its main properties: elasticity and ease of application. Of course, the disadvantages include the high price for a quality product.


Required Tools
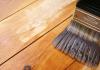
Preparing the surface for applying acrylic varnish is the main and important step in the work. First you need to clean everything from dust, dirt and grease. In the case of re-application, the old layer must be removed and sanded what will be varnished. The first application on wood is characterized by the use of three layers: the first is varnish, diluted with a solvent by 10%; the second and third are undiluted varnish.
It is recommended to apply an acrylic coating using a special roller. Professionals do not advise the use of a brush when it comes to large sizes of the varnished surface. The interaction of the substance with the skin is unacceptable, therefore, work should be carried out with gloves.
When decorating a room and its elements, you may have the idea of adding color to the varnish. Of course, bright colors cannot be achieved, but tinting makes it easy to give your favorite piece of furniture a new shade.


Kinds
Starting to purchase acrylic varnish, you should understand its main types. There are countless varieties of this finishing material on the modern market. Even before buying and applying acrylic varnish, you need to firmly decide what kind of coating you want to get in the end: matte or glossy, transparent, dull or with a certain shade.
There are several main characteristics by which varnishes can be divided into groups.
- Composition. One-component - a coating, which includes only acrylic. Two-component - varnish, supplemented with polyurethane.
- Appearance treated surface. Two polar subspecies: matte and glossy, and one adjacent - semi-matte. Matte varieties have a pleasant silky texture with the addition of velvety notes. Gloss, on the contrary, creates the impression of an impenetrable ice cover.


- Surface type:
- for the floor (acrylic-based urethane parquet varnish is suitable for perfectly flat surfaces; for uneven parquet, it is better to use matte varieties);
- for furniture (often used to give freshness and brightness to old interior items, so it is best to choose a polyurethane glossy varnish).
- Color. In its original form, acrylic lacquer is a liquid transparent substance that can be easily combined with any water-based paint, acquiring its unique shade. Just like paint, it can be tinted and be colored. From colorless it easily goes to extremes: white and black.
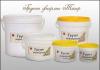
- Packing. It can be an aerosol in a can designed for processing wood and its tinting (such an aerosol universal acrylic varnish allows a flight of fancy to take part in decorating a room). The spray promotes even, lightweight application. The main container for coating is also a jar or bucket, depending on the desired volume.


You can list the types exactly as much as you can sing praises to all the advantages of acrylic lacquer. Insulating and antiseptic properties, a slight presence of odor also make it possible to distinguish a particular type of varnish into a separate category and subspecies.
And such a universal remedy as VGT acrylic lacquer leaves no chance at all for any of its fellows, because it is VGT that has universal qualities for processing both parquet floors and other motley surfaces.

Selection and application
The choice of the right finishing material not only saves time and money, but also the successful processing of the selected surface. Acrylic lacquer is so unique and versatile that it can easily be used in any interior design with your eyes closed.
When processing wood, acrylic-based varnish has a practical and aesthetic effect. What is the processing of a wooden floor worth! In the case of working with a solid rough board, it is necessary to choose options that form the most dense layer. Also, such a coating should easily endure temperature fluctuations and be resistant to moisture. Acrylic varnish for parquet was originally created so that the coating was thin, transparent and almost weightless, however, if this type of varnish is applied to rough boards, the floor will soon crack. It is worth remembering that it will not work to quickly varnish the floor, because the first layer dries for at least 4 hours and at least 12 hours after finishing. In order to make life as easy as possible for the craftsmen, the acrylic floor lacquer was originally made white. When it dries, it acquires perfect transparency, which gives a signal for applying the next layer.


For outdoor work, the application of this agent as a finish is also applicable. Resistant to sudden changes in temperature and mechanical damage, it allows the surface to retain its original pattern and shade.
Smaller projects also need to be treated with acrylic lacquer. For example, it is very convenient to use it to cover stools and bedside tables, stairs, railings and plasterboard walls, countertops, decorative interior items (figurines, frames, and so on). Even painting requires processing - it is worth covering the picture with acrylic varnish so that it pleases longer with its bright pristine colors.


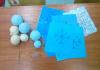
Due to the high cost of acrylic varnish, there are several ways to make your own wood varnish at home. The oldest and most common method is to mix acetone and Styrofoam. The consistency turns out to be jelly-like, not the most convenient for application, however, with its durability and wear resistance, it is not inferior to store-bought ones. You can use this mass to process small areas of the surface or to apply a protective layer on decorative interior decorations made by yourself.
Another creative area of application of acrylic varnish can be considered decoupage.- decorating various interior items with pieces of paintings, drawings, ornaments and monograms on a paper basis.


- Padding. After cleaning the surface of dirt, dust and grease, it should be primed with a special primer or impregnation. This will help make the layer of varnish as even as possible.
- Grinding. The ideal mirror surface will allow you to get the so-called wet sanding: wetted wood is hard sanded, and only then a primer and acrylic varnish are applied. Each layer, except for the first, also continues to be sanded with fine sandpaper.
- Wash. In the case of decorating an already lacquered object, you must first wash off the old layer of lacquer. Most often, it is enough to just sand the surface, prime and apply a varnish layer. Sometimes it becomes so difficult to remove the old coating that you have to resort to additional physical effort or mechanical grinding. For example, to remove a layer of varnish from a guitar, you have to sweat a little. There is a risk of spoiling the tree, but there are humane ways: sanding with a sandpaper (sandpaper) and drying with a hairdryer (better than a construction one, but the main thing is not to overheat the wood).


The thickest mixtures are best diluted. Since acrylic varnishes are made on the basis of water, they can only be diluted with water, but the amount of thinner can be no more than 10% of the total mass of the coating.
Among the important recommendations for the use of acrylic varnish is compliance with external conditions: temperature and humidity. The first indicator must necessarily be positive, and the second must be at least 50%. Any deviation from these standards will lead to a deterioration in the performance of the coating.
Do not apply too thick layers. The thinner the layer, the smoother the treated surface will be, and the more aesthetic it will look.


Manufacturers and reviews
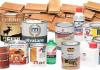
Among the most famous whales of the building materials market in the production of acrylic lacquer, the following brands stand out: Tikkurila, Neomid, Lakra, Optimist and Goodhim. Let's take a closer look at each.
Tikkurila- the queen of paints and varnishes. Acrylic lacquer for parquet - Parketti Assa received the maximum number of positive reviews. It has increased wear resistance, so it can be used in the most passable places. Easy to clean and does not deteriorate when using household chemicals of any composition. Even if there is a need to wipe off traces of paint from an already varnished floor, you can resort to White Spirit or any other solvent. Tikkurila varnished parquet flooring is not afraid of anything.


A healthy lifestyle, naturalness and naturalness are increasingly becoming fashionable. This applies not only to food, but also to everything else that surrounds us every day. Today, healthy lifestyle has reached cosmetics. Now ladies make beauty products with their own hands, from natural materials. How to do at home? Let's get the recipe!
Why not buy varnish in the store?
Indeed, why are ladies today increasingly looking for information on how to make varnish at home? It turns out that not so long ago, bottles with the mysterious inscription 3Free began to appear on the shelves in cosmetics stores. Curious fans of the perfect manicure immediately found out that eco-varnishes have such markings, which do not add harmful toluene, formaldehyde and camphor. These substances can provoke many diseases in the female body, and during pregnancy they are completely contraindicated.
As a result, some ladies refused to trust any varnish manufacturers, even with eco-labels. But not everyone knows how to make varnish on their own. We will give you some instructions.
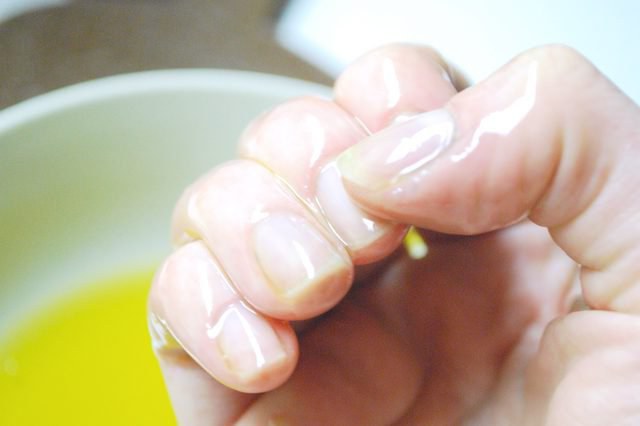
Varnish with olive oil
The basis of the first natural varnish recipe is olive oil. As you know, it has a beneficial effect on the condition of nails and cuticles and gives the handles a healthy, fresh look.
How to make varnish based on olive oil? To do this, it must be mixed with white clay in a ratio of 2: 1. Instead of clay, you can use henna or another natural dye of a similar consistency. The resulting mass should cover the nails and let them dry. After 20-25 minutes, the mass should be wiped off with a damp cotton pad.
Lacquer with alkane root and beeswax
Alkana is a miraculous plant, the root of which is actively used in the manufacture of cosmetics. Beeswax is a universal remedy that is added to creams and is also used in traditional medicine. These two ingredients can only benefit nails: they will improve the general condition of the nail plate and cuticle. How to make varnish from alkanes and
It is necessary to take a quarter teaspoon of wax, half a teaspoon of alkanes, three tablespoons of olive oil. Experts advise adding a couple of drops of definitely useful vitamin E, but without it, natural varnish will also work.
To prepare the varnish, it is necessary to heat the olive oil along with the root in a water bath. Then you need to remove the product from the heat and cool for 5 minutes, then wipe the infusion through a sieve. Then you need to return it to the water bath and add beeswax to the resulting mixture. When the wax melts, the mass must be mixed and allowed to cool. Ready!
Colored varnish from colorless
How to make a varnish of an unusual shade from a medical colorless one that is sold in a pharmacy? Very simple! In a bottle with colorless varnish, you need to fill in a dye made by yourself. It can be made from food coloring or eye shadow. Of course, the choice of the latter should be approached responsibly, because they should also be as harmless as possible.

A small amount of varnish must first be poured from the bottle, otherwise it will be difficult to add dye to it, or there will be difficulties with mixing. It is more convenient to add shadows or other paint through a funnel made from a paper mug. You can mix the new varnish with a toothpick.
How to make varnish at home in other ways? Share your recipes!
The varnish must meet the following requirements:
- dry quickly;
- give a strong film;
- the film must be flexible;
- have as much shine as possible;
- gloss should be preserved for a long time and not be afraid of atmospheric influences.
Below are recipes for some varnishes.
Aniline varnish. Dissolve shellac in alcohol and add to them aniline paint, soluble in alcohol. The object to be varnished must be warmed up.
black lacquer
- Boil in an iron pot over low heat for 6 hours 2 kg asphalt, at the same time in another bowl boil 2.8 l drying oils. While cooking drying oil, gradually add 300 g of litharge to it, boil until it begins to stick between the fingers. After that, pour it all into a bowl with boiling asphalt. Boil until the sample rolls into balls. Then cool and mix with turpentine. Take as much turpentine as necessary to obtain the desired density.
- Pour small pieces of broken gramophone records into a vial and fill with double the amount of alcohol (you can also use denatured alcohol). Close the vial tightly with a cork and place it in a warm place for two to three days. When the pieces are completely dissolved, you will get a thick black varnish. To make the varnish liquid, add alcohol to the finished varnish and mix thoroughly.
Light for furniture. Dissolve 700 g of shellac in 4.5 liters of technical alcohol.
Table polish. 450 g of turpentine, 57 g of beeswax and 2 g of rosin.
Celluloid varnish. Dissolve 5 parts by weight of celluloid, 5 parts of camphor and 50 parts of alcohol.
Lacquer for watercolors. 135 g of light shellac, 28 g of borax, 0.5 l of water. Bring almost to a boil so that everything dissolves, and then filter. Drawings covered with this varnish are protected from water.
Lacquer for tools. Dissolve 250 g of white shellac in 250 g of alcohol. Dip the tool in this solution and hang to dry.
Black varnish for iron objects. Boil in iron pot 2.2 kg asphalt 4 hours. After the first two hours, add 300 g of red lead, 300 g of litharge, 100 g of anhydrous copper sulfate and 450 g of drying oil. Then add 570 g of dark shellac dissolved in 900 g of hot oil. After that, boil until the sample begins to roll into hard balls. When cool, dilute with turpentine.
Insulating. Melt 2 hours of asphalt with 0.4 hours of sulfur and 4 hours of drying oil. Keep on fire for 6 hours at a temperature of 160 °, then add turpentine to the required density.