The scarf is one of the most versatile classic accessories in the wardrobe of both women and men.
Tying a scarf is quite simple, it is difficult to choose which style of tying is most suitable for different occasions.
Read also: How to tie a scarf beautifully?
Here are some creative and interesting ways to tie a beautiful scarf around your neck and head.
How beautiful to tie a scarf around your neck
1. Hanging scarf
This style is best for silk or satinas well as thin cotton scarves with tassels. He perfectly covers his chest from the gusty wind.


· Wrap the scarf once or twice around your neck so that the ends hang down.
· Tuck one end into the loop around the neck.
· Take the remaining end and thread one end to the opposite side of the loop.
2. Roll-up scarf

Roll up the scarf and tuck in the ends.
3. Pigtail scarf

This style of tying works best with long plain scarf or ombre, since the pigtail will be hard to see if the scarf is full of details.
· Fold the scarf in half so that the ends meet and wrap around the neck.
· Place the ends in the loop and pull them out.
· Take the loop and twist it.
· Place the ends into the newly formed loop and pull.
4. Collect it around your neck

This style of tying is suitable for cold weather, and it is better to choose a scarf with tassels.
· Wrap the scarf around your neck once.
· Thread one end into the loop from the top (but do not pull it all the way down), creating a small hole.
· Pass the other end through the small hole and pull on both ends to secure the knot.
5. Tie the ends in knots.to complete the look.

6. Bohemian style

· Fold the scarf in half and wrap it around the neck, leaving a loop on one side of the shoulder. Pull one end of the scarf through one loop and the other through the other.
7. Twisted scarf

Just wrap one end around the loop many times
8. Wrap the scarf around the neck until the ends are in front again, and pull them through the loops.

9. Another way to tie a beautiful pigtailand a video instruction to it.

How to tie a scarf
10. Turn the scarf into necklace

11. Or make from a scarf a bag

How to tie a scarf
12. Wrap it tightly around your neck

For this style, a silk square scarf is suitable, possibly with a geometric pattern.
· Fold the square in half to form a triangle.
· Fold the scarf from the pointed end to form a long rope 2.5-5 cm thick.
· Place the scarf behind the neck and wrap the ends around the neck again so that they are in front.
· Tie the ends twice, leaving a knot in the middle.
13. Try to make bunny ears

14. Or this one easy way

How to tie a scarf stole (photo)
15. The most easy waywearing a stole. Just wrap it around your shoulders.

16. More complex versionwearing a stole. Wrap the stole around your shoulders like a shawl and tie a knot in the back. The knot should be high. Pull the fabric down to cover the ends.

17. Try this oneoriginal way: Wrap the scarf around your neck and leave the ends hanging loose, then just tie with a belt.

Here's another many wayshow to tie a scarf-stole.
How to tie a scarf on a coat or chickens (video)
How to tie a scarf on your head
18. Method 1

· Wrap the fringed scarf around the front of the head and secure at the back of the head.
· Twist both ends of the scarf towards the front and tie into a knot.
· Hide the fringe by wrapping it around the rim.
19. Method 2

· Fold the satin scarf in half and wrap your head around the back.
Wrap the scarf around and tie in a knot in front
· Tuck in the ends of the scarf and align it so that the headband runs along the hairline.
20. Method 3


· Take a large square scarf or shawl, preferably silk.
· Fold it to form a triangle.
The scarf will now become your favorite accessory.
Watch the video, read the descriptions of the methods, and you will learn how to beautifully tie long and short, narrow and wide, thick and thin scarves.
Any scarf will work for this method. Fold it in half, wrap it around your neck, and loop the ends into the resulting loop.

For such a knot, a long and not too thick scarf is suitable. Wrap it around so that a loop forms in the front. Then pass the hanging ends of the scarf through it three times.

Such a knot can also be made from a scarf of any length and thickness. To do this, throw a scarf around your neck, take it at chest level and make a small loop. Then pass the ends of the scarf through it.

Such a necklace will turn out from a long thin scarf. Twist it into a bundle and fold it in half - the scarf itself will twist into another bundle. Wrap it around your neck and pass the end through the outer loop.

For this necklace, you can take a short thin scarf. It will also look good if the scarf is fringed.
Throw the scarf around your neck and tie in two knots at the side. Hide one end of the scarf in the back, and pass the front end from bottom to top through the loop and straighten it.

This knot can be made from any scarf you like. Wrap the fabric around your neck so that you have a loop at the front. Pass the ends of the scarf through it from the outside to the inside and hide them in the gaps between the fabric.

To make such an unusual knot, take any scarf. Wrap it around your neck so that you have a loop in the front. Fold the ends of the scarf in a crisscross pattern, pass one end inward through the loop, and straighten the knot.

Take a long, not very thick scarf and put it around your neck. Turn slightly to one side and twist both ends into one bundle. Pass the ends of the scarf through the neck loop and then through the rope loop. Flatten the resulting suspension.

Any scarf will work for this method. Place the scarf around your neck. Tie a knot in the middle of one half of it. Pass the other end of the scarf through it.

Take any scarf and put it around your neck. Wrap one half of the scarf around your palm, thread the end of the same strip through the resulting loop and turn the knot over. Then run the other half through it and tighten around your neck.

A long scarf of any thickness is suitable for this knot. Wrap it around your neck so that you have a loop in the front. Twist the hanging ends of the scarf into a tourniquet. Pass the part that will be on top through the bottom loop to the outside. Then pass it through the knot formed from the same strip.

For this method, a scarf of any length and thickness is suitable. Wrap it around so that you have a loop at the front. Pass the ends of the scarf through it from outside to inside.

This is a wonderful feminine version. Such a pendant is made from a not too thick scarf. And the longer it is, the larger the loop around the neck will be. A fringed scarf will look very nice. Throw it around your neck, tie knots on both sides. Then tie both strips in a double knot at the bottom. Pass one end of the scarf through the resulting loop and straighten.

Tie the ends of the long scarf in a knot. Put it on and wrap it around your neck several times.

For this knot, you can take any scarf. Even a short one will do, since this knot looks best under outerwear. Tie the scarf in a knot around your neck. Flatten the front strip and hide the ends under the jacket or coat.

Take a long scarf of any thickness, fold it in half, wrap it around your neck and loop through the resulting loop. Tie the ends of the scarf on the inside with a small knot, put it around your neck and straighten the ends over your shoulders.

A thick stole is perfect for this option. Place one half of the scarf on your chest, pulling one end back slightly, and wrap the other half around your neck. After wrapping, turn the strip over and wrap it around your neck again. Hide it under the second layer of the scarf and tie the ends of the scarf at the back. Spread the scarf over.

If the last step of the previous method is not to your liking, then just hide the ends of the scarf inside. The method is the same, but the scarf looks different.

Such a knot can be made from any scarf. Wrap the scarf around your neck so that you have a loop in the front. Pass one end through it from the inside out, but do not pull. Pass the other end of the scarf into the resulting loop.

For this method, a long scarf will do. It needs to be wrapped around the neck so that a rather tight loop forms. Then tie the ends of the scarf in a knot and straighten the front strip.

Take any scarf and wrap it around your neck. You can leave the scarf straight or hide the ends under the jacket.

Thus, it is best to tie the scarf under the jacket. Take a scarf of any length and width and wrap it around your neck to form a loop. Then wrap the ends around your neck. It is not necessary to hide them, since they will be hidden by outerwear.

To make a shawl, you can take a thin long scarf or shawl. Tie it in a double knot at the front, straighten it and slide it slightly to the side.


Wrap a long, not too thick scarf around your neck twice and hide the ends at the back. So the scarf can be worn both with outerwear and with light things.

Take a long and rather thin scarf and put it around your neck. From one end, make a wide loop on the side and wrap it around the other end. Straighten the resulting bow.

Take a thin small scarf or shawl. Fold in half and secure one end with an elastic band. Spread out, wrap around your neck and tie the ends in a knot in the front under the fabric.

Take a long, not very thick scarf and wrap it around your neck. Fold one side of the scarf over the other. Then thread it through the bottom loop from outside to inside and flatten the knot.

For this method, you can take any scarf. Fold it in half and wrap it around your neck. Thread one end through the resulting loop, turn it over and thread the other end of the scarf.
A tie is an important part of a man's wardrobe. To create a stylish and unique look, such an accessory is often necessary. This clothing attribute originated in the 17th century and then spread everywhere. Over the past millennium, the tie has changed many times. It had different widths, colors and lengths. For many men, the question is how to tie a tie in order to look stylish.
 The product is a great addition to a man's look. Some males do not like this attribute, because they find it uncomfortable, while others cannot imagine their life without it. Every man has worn a tie at least once in his life. You need to learn how to tie it correctly, because such a thing is an addition to a stylish and beautiful men's suit. There are so many ways to tie it correctly, it is impossible to remember them, much less apply them. To tie differently each time, you need to adhere to special patterns.
Men who are associated with business office work wear tailored suits all the time. Usually they know a huge number of ways to tie a double tie beautifully. But for those who first encounter this problem, the task may seem overwhelming. There are a lot of beautiful knots, so before you start practice, you need to master the theory. You need to master the step-by-step instructions. Which tying method to choose:
- In many ways, the task of how to tie a tie correctly is carried out in accordance with fashion.
- And also attention is drawn to the material from which the product is sewn.
- To make a wide knot, you cannot use a tight lined tie. Because in this case the knot will look bulky and cumbersome.
- The collar of the shirt is taken into account. Through trial and error, you can determine how best to tie for a particular pattern.
To look beautiful and to use correctly stylish attribute, you must follow the instructions. To make it easier to cope with a tie, it is tied immediately around the neck, and not on the arm. After the work done, the ends of the product should look symmetrical. The optimal length is 3 cm below the waist. The large end of the product should not be short or too long. A tie is needed to create an accent, but it should not stand out or be conspicuous. How to tie a tie, step by step instructions:

The four is well suited for beginners and men who are unassuming about their appearance. It does not take long to tie in this way, this method is ideal for different types fabrics, width and length of the product. The finished version is a triangle shape. When a knot is formed, you do not need to try to make it symmetrical, because different widths of the fabric do not allow you to make an equilateral triangle. This method creates a slightly messy look that looks unusual.
This method is also suitable for beginners. The method of tying a tie is not very popular, so it will look interesting and unusual. This style is suitable for men who do not like to spend a lot of time dressing, but want to look stylish. How to quickly and correctly tie a tie step by step using the semi-windsor method:

This tying method is not easy, so it is suitable for those males who are willing to take the time to practice dressing in this way. If you follow the step-by-step instructions correctly, you end up with a beautiful, bright and fashionable image... In this case, a large knot is obtained, so a long product is taken for this method. Step-by-step instruction by string:

The result is a Granchester node. Usually narrow items are made of thin material, so large knots look very effective.

This completes the procedure.
Cross either square knot it is also called Italian. It has an elongated shape, acquired its name because at first it was used on ties with ends of the same width. This method works well for narrow garments that are made of heavy fabrics such as cashmere or wool. For the product to look symmetrical and beautiful, the collar of the shirt must be high. How to tie correctly:

This method was invented in 1989 as how to tie a tie. The classic way not everyone likes it, some men want to stand out and tie an attribute in such a way that it is fashionable. A short tie is suitable for a pratt knot. Step-by-step instruction:
- The product is thrown around the neck with the wrong side, then wrapped around it.
- The large end is located on the left side, lower than the narrow one.
- The ends intersect with each other.
- Wide aimed at right sideand then held under the small side.
- The wide end on the outside is guided from bottom to top to the opening.
- Then from the top to the right and down through the ear.
- The large end is pulled to the left so that it can be folded onto the narrow end.
- Then it is threaded through the eyelet from the inside from bottom to top.
- At the end of the action, the wide end is in the ear that has arisen.
- The knot does not tighten tightly; if necessary, it must be straightened.
Now on the Internet you can find a huge number of methods on how to tie a thin tie. But do not study all the instructions in detail. The main thing is to learn several methods that are applicable to different products.
 The attribute is selected in such a way that it matches the tone of the clothing. Harmony is considered the main element of fashionable people. It is important for a man to feel comfortable in a tie. The width and length of the product are selected depending on the physique of the male representative.
If a person has a short neck, then there is no need to tie a wide knot, because he visually reduces it. Thin products are recommended for young men. At a mature age, it is better to use the classic version. The width of the product is chosen depending on the cuffs of the jacket. Usually their size is equal to 9 cm. In this case, the same width is selected for the large end of the product.
The product is tied in such a way that when finished, its lower end covers the belt buckle. If a colored and bright tie is chosen, then the shirt should be pastel and monochromatic. If the shirt is in a cage or strip, then in this case, a plain and dull tie is used. If the suit and shirt are of a dark shade, then the tone of the tie is chosen lighter. With a dark suit and a light shirt, a dark product is selected that will match the shade of the suit.
The success of a man is given out by a tie. The costume, complemented by such an accessory, gives masculinity and confidence to its owner. With a certain job, such a thing is irreplaceable. Some of the product models are appropriate for the casual style. There are not so many fabrics from which the products are made as it might seem. But this provides room for the choice of a masculine attribute to wear for every day. Several types of materials stand out:

There are many ways to tie a tie. When choosing a method, you need to consider the length and width of the product, as well as the fabric from which it is made.
Attention, only TODAY!
Finally, the long-awaited warmth came, and down jackets were replaced by light raincoats and jackets. But for the mood to become especially "spring", you need to supplement your everyday look bright accessory. In today's article, we have collected 17 visual photo instructions on how to properly and beautifully drape a scarf, stole or kerchief.
1. Hidden node

A beautiful, simple and rather original way to tie a long warm scarf. An accessory tied in this way will not only reliably protect the neck, but also decorate a coat or turtleneck.
2. Pretzel

A silk scarf folded into a triangle can be wrapped in a charming intricate pretzel. A scarf tied in this way will become an effective detail of a business or romantic look, and will also protect your throat from the wind.
3. Knot-braid

A simple and very effective way to protect your head from the wind and turn a warm scarf into a beautiful accessory.
4. Harness

Today, scarves are designed not only to protect from the cold, but also to decorate graceful and beautiful neck... For example, simple manipulations will help turn a light long scarf into a beautiful plait necklace.
5. Wild West

The original end of the everyday look will be a scarf tied in the wild west style. To do this, the scarf must be folded into a triangle and put so that the ends are on the back of the head. Cross the ends at the back, pull to the front and tie.
6. Flower

Instead of the usual knot, a charming flower can be weaved from a light chiffon scarf. To do this, twist the scarf into a bundle and do the manipulations shown in the picture, leave the ends of the scarf hanging free.
7. Big bow

Long warm scarf tied in a large beautiful bow will become an original decoration of a winter down jacket or coat.
8. Cute bow

The ends of a light silk scarf can be tied into a small neat bow, which can be fixed with a small elastic band. A scarf tied in this way will add a touch of elegance and French charm to your look.
9. Negligence

A simple way to create a stylish casual look with a touch of casualness with just one stole.
10. Cascade

Another simple way to turn a faceless scarf into a highlight. In addition, a scarf wrapped in this way will protect the neck from cold and wind.
11. Stylish simplicity

Perhaps the easiest way to tie a scarf that even a child can handle. It looks pretty impressive.
12. Variety

As many as eight ways to wear a scarf that will help you create different looks and moods with one single detail.
13. Under the belt

Want to refresh your appearance? Throw a neatly folded stole over your shoulders, securing it to your waist with a thin strap.
How to tie a scarf around your neck: theory and practice
“Beauty will save the world!”, As the famous slogan says. People want to be beautiful, and the modern fashion industry provides many opportunities for this desire to come true.
Stylish and complete image is achieved different ways, including with the help of accessories. This article discusses scarves, neck and headscarves. how the same beautifully tie a scarf around your neck?
There are many ways to do this. However, tying a scarf correctly is not all. It is important to choose the texture and thickness of the scarf correctly. For example, under summer dress with bare shoulders, a thick jacquard scarf is unlikely to fit.
Ugly and hot. Or wear a thin silk scarf under a winter harsh down jacket. Somewhat ridiculous and completely non-functional. Therefore, it is important to choose the right scarf for the occasion and tie it correctly around the neck.
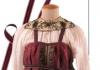
How beautiful to tie a scarf around a woman's neck
The huge selection of scarves gives rise to the same number of ways to tie them. So the beautiful half of humanity can use the described one both in summer and in winter, under any clothes. In summer, in central Russia, the weather is sunny and warm.

Therefore, cotton and scarves, light semi-natural fabrics are suitable for outfits. All methods of tying around the neck or over clothing are suitable for them.
A common and familiar knitted scarf. It usually has a rectangle, less often a square. Its length is different: from short, just over one and a half meters, to long five meters. They are wrapped around the neck several times, making it visually longer.
The ends of the scarf, often decorated with tassels, fringes, pompoms, create the effect of additional drapery and often look like an exquisite decoration.


"French knot"
The first method is one of the simplest, but charming. In order to tie a scarf with a French knot, it is necessary to wrap it around the back of the neck so that the ends of the product are thrown back and forth. Next, the ends of the accessory must be returned to the front again and tied in a tight knot.

"Bow"
From silk light scarf you can make a bow or a flower on the side: you need to wrap your neck and tie a simple knot so that the fabric fits snugly against the skin. One strip of scarf needs to be pulled through the knot - this is the first part of the bow.
Do the same with the second part. The resulting loops need to be pulled together and stretched in different directions. This is done in order to give the bow an attractive look.


"Pioneer tie"
The pioneer tie, despite its not fashionable name, is very popular way to tie a scarf around the neck... The principle of tying is similar to the first proposed method - the French knot. However, there is a slight difference, since after wrapping the scarf around the neck, the ends must be tied with a double knot.

By the way, in cold weather, over a dress or wardrobe trunk with a strap or belt, you can put a long scarf around your neck, but not tie it, but fasten it with a belt.

Once the scarf is secured, it can be straightened so that the ends lie straight and next to each other at the waist, hanging loosely. It turns out the effect of the second jacket. To make it look especially impressive, it is better to use a scarf with an ornament.

In the fall, all women of fashion are insulated by putting on coats and jackets. This is fine, because the scarves are universal accessories... A thin but warm cashmere scarf, a wool or acrylic scarf and other warming fabrics can be very nice and practical to tie over a coat.
For example, a particularly successful way is to fold the scarf and throw it around the back of the neck. Next, you need to thread one end of the scarf into the loop on one side, and the other "tail" of the accessory on the other.
"A loop"
Fold the scarf in half, put it around your neck, and thread both ends through the loop.


"Chain of loops"
1. Fold the scarf in half.
2. Thread both ends through the loop.
3. Wrap both ends of the scarf several times around the part of the scarf adjacent to the neck, each time threading both ends into the newly formed loops.

After the scarf is straightened, the resulting knot will look original. By the way, this a good option for a coat or jacket with a small.


"Nodes"
1. Wrap the long end of the scarf around the shorter one.
2. A simple knot is formed.
3. Tie another simple knot at the ends of the scarf.
4. Tighten the knot while guiding both ends parallel to each other in a horizontal plane. Nicely straighten a flat square knot so that it is slightly wider and tie both ends at the back.

For cold autumn weather or winter, the following is suitable method of tying a scarf, but not only on the neck, but also on the head. Recently popular snoods wrap their heads according to the same principle.
Snood. This type of scarf is also called a collar scarf or "pipe". Usually snood is knitted on knitting needles or crocheted and is a wide ring. Depending on the length and width of the ring, the snood can fit snugly to the neck, gathering in folds, and, if necessary, perform the function of a hood. Or it can be wrapped around the neck several times, or down to the chest in elegant folds.


In the photo, women's scarves snood

Pictured men's scarf snood

Children's scarves snood
So, returning to the scarf, you need to throw it over your head, leaving the tails of the same length. Next, the tails of the accessory must be crossed among themselves and wrapped around the neck with them.
Depending on the length, from one to several times. The ends can be tucked into the back or front underneath the rings of the scarf. If the fabric is very thick, it will be better to tie the ends in one knot.
This option is also suitable for light scarves made of fine fabric. Looks beautiful when a summer scarf is tied under the chin in several turns.
And at the end of the look - huge dark sunglasses. And those around them will have the feeling that they see a beauty from the 50s in front of them. By the way, it was the timeless style of the fifties that brought to the world the opportunity to wear scarves and headscarves as an accessory.
You can beautifully tie a scarf over warm clothes in a fairly simple and common way. Indeed, in the cold season, a scarf is an integral part of a wardrobe. Take your favorite warm and thick scarf with long ends. Wrapped around the neck several times.
For beauty, the ends need to be intertwined so that one tail lies on top of the other. This node can be positioned at the front or side, depending on preference. In windy or snowy conditions, this method of tying a scarf is the best way to protect your throat from draft.

"Harness"
1. Twist the scarf around its axis to form a tourniquet. Fold in half and pull on both ends.
2. Hold the ends of the scarf in one hand and allow the tourniquet to twist slowly and spontaneously.
3. Place the tourniquet around your neck and thread both ends of the scarf through the loop. Tie the ends with a knot that secures the loop, and if the ends are still long enough, you can twist them into a bow or rose.


Stole. This is a rectangular cape, the size of which made it possible in the past to even use it as outerwear. They appeared in the 17th century and at that time were often trimmed with fur, and sometimes they were completely fur. Now stoles are made from different materials, but more often, their woolen fabrics.


In the photo, a women's scarf stole
Shawl. Initially, this was the name of a large scarf, which covered both the head and shoulders, and often went down almost to the ground. V. Dahl called the shawl "an English scarf" and, indeed, the fashion for shawls came to Russia from England. But the shawl itself has a very ancient history and was brought to Europe from the countries of the Arab East and India.

Pictured is a women's shawl
Nowadays, shawls are also worn as headscarves, but more often they are used as bulky, very warm scarves. And sometimes the shawl turns into bactus.
Bactus is a triangular scarf, usually knitted with garter stitch. He came into our fashion from the countries of Northern Europe. It has two very long ends and one shorter one. Its length is up to one and a half meters.
It is worn with the short end forward, and the long ones are wrapped around the neck, go down to the chest and sometimes tied into a voluminous knot. Often the edges of the baktus are decorated with tassels, pom-poms, or wooden beads.


Women's scarf bactus
Neckpiece. This type of scarf is now less common. It is a small fur cape, which in the past was worn by ladies, covering their bare shoulders and neckline. Now, of course, the boa is worn not only with ball gowns.

Pictured scarf boa
How beautiful to tie a scarf around a man's neck
A scarf is not only an off-season accessory, but also between the sexes. So, it is also important for men to learn how to tie a scarf around their neck beautifully. Depending on the chosen method, this accessory can give an informal look to the image, or vice versa, business and serious.


Of the free and informal options for tying a scarf, you can select the French or Parisian knot, which is described above in the text. Attracting attention, the scarf not only insulates the neck, but also allows you to complete the dandy look.

Also, among the male options, the most popular variation of wearing a scarf is quite common: put it around your neck and leave the ends free to lie on your chest. This method is good for wearing over a coat or even a jacket.

It is very nice to tie a scarf under a men's shirt or an Ascot-style jumper. Wearing a scarf this way will not warm you, but it will protect you from drafts and add elegance, if not prestige.
In order to tie an Ascot style scarf, you need to wrap it around the neck and lower the tails of the same length. One tail of a scarf or neckerchief should be wrapped around the other and threaded into a loop, tightened, but not tightly. Looks like a small tie knot. Nice, fashionable, stylish.

It is not difficult to tie a beautifully scarf over clothes, under it or on a bare neck. It is important to show your imagination and choose the right clothes with a neck accessory. The scarf will be a great addition to any look.

Arafatka. In fact, it is a scarf that is wrapped around the neck several times. Arafat came into our fashion from the East, where it was worn by men, and in the past its main materials were cotton, linen or silk.
Now, woolen fabrics are also used to make this type of scarf. Perhaps the main feature of the arafatka is its color. Traditionally, it is a black and white check, although other colors are now found.