Sizes: 38/40 (42/44) You will need: 300 g of brown melange yarn Fashion Trend Stripe (51% sheep wool, 49% polyacrylic 90 m/50 g), 50 g each of olive and anthracite, the remainder of white Fashion Trend ( 51% lambswool, 49% polyacrylic 90m/50g), 150g white Sheela (48% lambswool, 48% polyacrylic, 4% polyamide, 30m/50g); knitting needles No. 6 and No. 7; 3 hook-and-eye closures.
Facial surface: faces. R. - persons p., out. R. - purl P.
Purl stitch: knit. R. - purl p.. purl. R. - persons P.
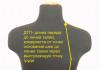
Star: embroider with olive thread using a “loop” stitch according to a counted pattern, on which 1 square is 1 p. Knitting density, Fashion Trend Stripe, knitting needles No. 6: 14 p. and 19 r. - 10 x 10 cm.
Back: on knitting needles No. 6, cast on Fashion Trend Stripe thread 64 (72) sts and knit 1 purl. R. purl. Then knit faces. stitch, while for fitting, decrease on both sides in the 11th row. 1 x 1 p. and in every 4th r. 2 x 1 p. = 58 (66) p. At a height of 18 cm, add 1 p. on both sides and in every 6th p. 2 x 1 p. = 64 (72) p. At a height of 30 cm, close 2 (4) p. for the armholes on both sides and in every 2nd r. 1 x 2 and 5 x 1 p. = 46 (50) p. At a height of 49 (51) cm, close the middle 18 p. for the neckline and close on both sides of them in every 2 r. 1 x 3 and 1 x 2 sts. At a height of 52 (54) cm, bind off the remaining 9 (11) sts of the shoulder on each side.
Left shelf: on knitting needles No. 6, cast on Fashion Trend Stripe thread 31 (35) sts and knit 1 purl. R. purl. Then knit faces. satin stitch, at the same time perform a fitted and armhole on the right side, as on the back = 22 (24) sts. At a height of 36 (38) cm, close off 5 sts for the neckline on the left side, in every 2nd r. 1 x 2 and 2 x 1 p. and in every 4th p. 4 x 1 sts. At a height of 52 (54) cm, bind off the remaining 9 (11) sts of the shoulder.
Right shelf: knit symmetrically.
Assembly: straighten the vest parts according to the pattern and dry under a damp towel. Embroider in the middle of the shelves, starting 9 cm from the cast-on edge, using an olive star thread. Sew shoulder seams. Along the edges of the armholes, using needles No. 7, cast on 45 (50) sts with Sheela thread and knit 3 cm purl. stitch, then bind off the loops. Sew side seams. Along the bottom edge of the vest, using needles No. 7, cast on Sheela thread 85 (95) l. and knit 3 cm purl. stitch, then bind off the loops. Along the edges of the shelves and short sides of the bottom bar, cast on needles No. 7 with Sheela thread, 35 (38) sts each and knit the bar in the same way. Along the neckline, including the short sides of the front strips, cast on 64 sts with Sheela thread on needles No. 7 and knit the strip in the same way. Sew fastener hooks, the 1st hook under the neckline, the rest at intervals of 10 cm.
ARMS
Description of work: knit from top to bottom; for each sleeve, cast on 6 needles with Fashion Trend Stripe thread 36 (40) sts and knit 1 purl. R. purl. Then knit faces. satin stitch in the following sequence: 3 cm with Fashion Trend Stripe thread, 2 r. white. 4 rub. anthracite color. 30 cm thread Fashion Trend Stripe, 4 r. anthracite color, 2 r. white and 2 p. Fashion Trend Stripe thread. After 15 cm, close 1 p. for bevels on both sides and in every 6th r. 3 x 1 p. * 28 (32) p. After 40 cm = at the end of the sequence of alternating stripes, continue working on needles No. 7 with Sheela thread. First knit 1 person. R. with knit stitches, evenly decrease 7 (9) sts = 21 (23) sts. Then knit another 5 cm purl with Sheela thread. 1 stitch and bind off stitches. Embroider stars in the middle of the sleeves, 7 cm from the cast-on edge, using olive thread. Make seams.
Previous models from the section gloves, mittens, mittens
You will need: 50 g of Fashion Trend Stripe brown melange yarn (51% lambswool, 49% polyacrylic, 90 m/50g), 50g each, or leftover white, olive and anthracite Fashion Trend yarn (51% lambswool, 49% polyacrylic , 90 m/50 g); set of double needles No. 6.
You will need: DROPS FABEL yarn 50 g. color no. 100, natural (50 g /205 m), 50 g. yarn DROPS ALPACA color no. 0618m light beige (50 gr /167 m).
The most popular gloves, mittens, and mittens in the section according to user ratings
You will need Silenzio Yarn (50% acrylic, 25% wool, 25% alpaca; 50 g/60 m) No. 00011 brown: 1000 g for the cardigan and 150 g for the mitts. Knitting needles No. 6-7 Circular knitting needles No. 5-6. Stocking needles No. 5-6. 8 wooden oval buttons.
Season: winter.
Hook/knitting needle/fork size: 5.5-6.5, 7.
Yarn composition: acrylic, alpaca, wool.
To knit a blue set you will need: 300 g of blue No. 641 Alpina GRFTA yarn (50% alpaca, 30% wool, 20% silk, 230 m/100 g), circular knitting needles GAMMA No. 3.5, double needles GAMMA No. 3.5, GAMMA hook No. 3, pin for open loops
Season: winter.
Hook/knitting needle/fork size: 2.5-3.5.
Yarn composition: alpaca, silk, wool.
Poncho is at the peak of fashion! Here it is waist-length, with expressive patterns, and a high ribbed collar. The knitted poncho is complemented with long mittens.
Size: 36/38
You will need: 750 g gray yarn
Merino 70 (100% merino wool, 70 m/50 g); long and short circular and double needles No. 7. Attention! Due to the large number of loops in the front and on the back, knit in straight reverse rows. on circular knitting needles.
Rib, straight and reverse r: after casting on stitches, start 1 purl. R. and knit as follows: chrome, * 1 purl, 1 person, repeat from \ 1 purl, chrome. In persons R. knit loops according to the pattern.
Relief pattern (from 159 stitches): knit according to the pattern, which shows only faces. r., in purl. R. Knit all loops according to the pattern or as indicated in the symbols, knit. cross. n. knit purl. cross. and knit yarn overs. The diagram shows 1/2 front with a central braid. Knit all the loops of the pattern with a central braid once, then symmetrically knit the 2nd half without a central braid, i.e. from the central braid, read the loops of the diagram from left to right, perform all crossings as in the 1st half. Knit 1 time from 1st to 80th row, on the central braid 1 time from 1st to 12th row, then repeat from 9th to 12th row. Elastic band, circular p: alternately knit 1, purl 1.
Central braid (of 5 stitches), circular pj knit the last 5 stitches of the pattern, which shows only odd circular rows, in even circular rows. Knit all loops according to the pattern, knit yarn overs. Knit 1 time from the 1st to the 12th circular row, then repeat from the 9th to the 12th circular row. Knitting density. Relief pattern: 18 p. and 24 r. = 10 x 10 cm; elastic band with a braid (measured in an unstretched state): 18 sts and 22 r in the round. = 10×10 cm.
Knitted poncho
Knit a poncho in 2 parts, starting from the bottom edge each time. The center seam is biased due to decreases.
Front/back: on long circular needles, cast on 159 sts and knit 2 cm = 5 r. with an elastic band. Then knit between the edges. with a relief pattern, while for the cape reduce before and after the central braid, as indicated. After 31 cm = 74 r. close from the elastic to bevel the shoulder on both sides of the loop, as indicated, while closing the edge. together with the first 4 p. After 33.5 cm = 80 r. set aside the remaining 61 stitches from the elastic for the collar. Assembly: sew shoulder/side seams. Transfer the postponed collar stitches to short circular needles and knit on all 122 stitches in circular rows. with an elastic band. At a collar height of 14 cm, close all the loops according to the pattern.
ARMS
Left sleeve: cast on 42 sts, distribute them onto double needles (= 2 knitting needles of 10 sts and 2 knitting needles of 11 sts), enclose the work in a circle and knit as follows: 37 sts of elastic, starting and ending with 1 purl, 5 sts of central braid. After 29 cm = 64 circular r. from the cast-on edge, divide the work for the thumb slot between the 29th and 30th stitches from the beginning of the circular r., knit according to the pattern with straight and reverse r. 6 rubles, then again enclose the work in a circle and continue knitting according to the pattern. After 35.5 cm = 78 circular r. From the cast-on edge, close all the loops according to the pattern.
Right sleeve: knit the same way, but for the thumb vent, divide the work between the 8th and 9th stitches from the beginning of the circular r.
Sizes: S/M (M/L) L/XL; product width according to chest circumference: 96 (112) 128 cm + lace trim; product length: approximately 40 (42) 44 cm.
You will need: yarn (100% alpaca wool; 50 g/127 m) - 7 (8) 9 skeins of dark gray; hook No. 3,5 and 4.
Knitting density: 2.5 repeats wide x 2 repeats high = 10 x 10 cm, crocheted with size 4. Important: The knitting density must correspond to the specified one! Therefore, before starting work, you should knit a sample pattern: knit the initial chain of 31 vp. and knit 14 cm with the main pattern. Then count the loops on the middle section of the made sample, 10 cm long: if there are more than 2.5 repeats on this section, take a thicker hook, if less, take a thinner hook. It is more important that the knitting density corresponds to the specified width than the length. If the instructions indicate only one number, then it applies to all sizes! Attention: The vest is knitted from the bottom edge of the back in a single fabric according to the pattern.
Description of work: cast on 1 p. on hook No. 4 and knit the initial chain of 121 (141) 161 vp. Turn and knit with the main pattern according to the diagram (1st row = purl row). When the length of the part is 18 cm, make according to the mark for the armholes. When the length of the part from the mark is approximately 20 (22) 24 cm, finish with the 5th or 7th p. and for the neckline, leave the middle 2 rapports untied.
Right shelf: Continue knitting the pattern and after 20 (22) 24 cm make another mark for the armhole. Having knitted approximately 18 cm from the mark, finish with the 5th or 7th p.
Left shelf: knit similarly to the right one.
Tying the edges of the product: performed with a hook No. 3.5 according to the given pattern - along the edges of the armholes, the front edge of the right front, the back neckline and along the front edge of the left front (the number of loops is a multiple of 12 + 9 sts). Important: Before starting the lace trim, tie the edges st. b/n = for each rapport there are approximately 8 tbsp. b/n, do 5 tbsp along the back neckline. b/n around each chain of v.p. and 1 tbsp. b/n in each pico. Then perform 1 r. Art. s/n = 1 tbsp. s/n in each st. b/n. Continue tying according to the diagram.
Assembly: Sew side seams.
Bottom edge binding: performed with hook number 3.5. Knit "fans" from 11 tbsp. s/n and 1 v.p. between the "fans". Start with 1 tbsp. b/n and make the first “fan” at the bottom corner of the shelf, then knit “fans” along the entire bottom edge at the same distance as the “fans” in the main pattern and finish with the last “fan” at the bottom corner of the second shelf.
Oversleeves
Sizes: S/M (M/L) L/XL.
You will need: yarn (100% alpaca wool; 50 g/166 m) -3 (4) 4 skeins of dark gray; knitting needles number 3.
Description of work: On needles No. 3, cast on 74 (82) 90 sts and knit with an elastic band = alternately 2 purls. and 2 persons. (1st row = purl row). After 20 cm, add 1 stitch on both sides (after/before the edge loop). Repeat these increases every 8th row, and include the added loops in the elastic pattern. When the length of the part is 49 (50) 51 cm, close the loops.
Assembly: make seams, leaving a hole for the thumb 5 cm long in each at a distance of 6 cm from the bottom edge.
A nice set - an openwork vest, crocheted, and thick arm ruffles, knitted. Can be worn together or separately.
You will need: yarn (100% alpaca wool; 50 g/127 m) - 7 (8) 9 skeins of dark gray; hook No. 3,5 and 4.
Dimensions: S/M (M/L) L/XL
Product width according to bust circumference: 96 (112) 128 cm + lace trim
Product length: approximately 40 (42) 44 cm
Knitting density: 2.5 repeats wide x 2 repeats high = 10x10 cm, crocheted with size 4.
Important: knitting density must correspond to the specified one! Therefore, before starting work, you should knit a sample pattern: knit the initial chain of 31 vp. and knit 14 cm with the main pattern. Then count the loops on the middle section of the made sample, 10 cm long: if there are more than 2.5 repeats on this section, take a thicker hook, if less, take a thinner hook. It is more important that the knitting density corresponds to the specified width than the length.
If the instructions indicate only one number, then it applies to all sizes!
Attention: the vest is knitted from the bottom edge of the back in a single fabric according to the pattern.
Join our groups so you don't miss anything interesting:
Description of work: cast on 1 p. on hook No. 4 and knit the initial chain of 121 (141) 161 vp. Turn and knit with the main pattern according to the diagram (1st row = purl row). When the length of the part is 18 cm, make according to the mark for the armholes. When the length of the part from the mark is approximately 20 (22) 24 cm, finish with the 5th or 7th p. and for the neckline, leave the middle 2 rapports untied.
Right shelf: Continue knitting the pattern and after 20 (22) 24 cm make another mark for the armhole. Having knitted approximately 18 cm from the mark, finish with the 5th or 7th p.
Left shelf: knit similarly to the right one.
Tying the edges of the product: performed with a hook No. 3.5 according to the given pattern - along the edges of the armholes, the front edge of the right front, the back neckline and along the front edge of the left front (the number of loops is a multiple of 12 + 9 sts).
Important: before starting lace tying, tie st. b/n = for each rapport there are approximately 8 tbsp. b/n, do 5 tbsp along the back neckline. b/n around each chain of v.p. and 1 tbsp. b/n in each pico. Then perform 1 r. Art. s/n = 1 tbsp. s/n in each st. b/n. Continue tying according to the diagram.
Assembly:
Sew side seams.
Bottom edge binding:
performed with hook number 3.5. Knit "fans" from 11 tbsp. s/n and 1 v.p. between the "fans". Start with 1 tbsp. b/n and make the first “fan” at the bottom corner of the shelf, then knit “fans” along the entire bottom edge at the same distance as the “fans” in the main pattern and finish with the last “fan” at the bottom corner of the second shelf.
ARMS
You will need: yarn (100% alpaca wool; 50 g/166 m) - 3 (4) 4 skeins of dark gray; knitting needles number 3.
Dimensions: S/M (M/L) L/XL
Description of work: On needles No. 3, cast on 74 (82) 90 sts and knit with an elastic band = alternately 2 purls. and 2 persons. (1st row = purl row). After 20 cm, add 1 stitch on both sides (after/before the edge loop). Repeat these increases every 8th row, and include the added loops in the elastic pattern. When the length of the part is 49 (50) 51 cm, close the loops.
Assembly: make seams, leaving a hole for the thumb 5 cm long in each at a distance of 6 cm from the bottom edge.


An armlet is not only a functional, but also a decorative piece of clothing. It can be pulled over a sweater and a knitted mitten, further protecting your hands from the cold. Tastefully made products interestingly complement not only outerwear, but also holiday outfits with a shirt or blouse. They are often knitted together with fashionable ponchos and leg warmers. Try to make both casual and dressy versions of knitted armbands - it won’t require a lot of time or a lot of material.
You will need
- - single-color yarn (optional - a combination of different colors);
- - knitting needles straight or circular;
- - centimeter;
- - needle;
- - sewing machine, lace braid, paper and pencil for a pattern or hook (optional).
Instructions
- You can knit armbands either with straight knitting needles or in the round. First, calculate the knitting density and make a test strip with a 2x2 rib (two knit stitches, then two purl stitches).
- Try the elastic band on your hand to correctly calculate the required size. Measure the thickest part of your arm; take into account the future clothing under the sleeve, as well as the expected length of the product. To ensure that the item insulates your hand well and looks stylish, it is recommended to make it no shorter than 20 cm.
- Using an elastic band, knit the fabric of the desired size in straight and reverse rows, then bind off the loops of the last row.
- Sew the connecting seam of the sleeve from the wrong side of the piece. When you perform circular rows on five double needles, you will get seamless products.
- You can knit armbands in the same style with homemade ponchos, sweaters, leg warmers, hats, etc. In this case, make the upper edge of the item with an elastic band (1x1 or 2x2), tying it about 5 cm in height.
- Then knit the product with the selected pattern, while in the front rows it is necessary to make uniform increases according to the individual size.
- At the bottom of the sleeve, decrease the loops (corresponding to the number of increases at the beginning of work). Tie the item with an elastic band.
- Another option for expanding the fabric of the sleeves is to make bevels on both sides. For example, you initially have 47 stitches cast on straight needles. Make short rows, starting with the middle five stitches.
- Insert three stitches seven times in every second row (on the right and left sides).
- When you finish 14 rows, start making bevels. To do this, in every tenth row you need to add a loop on each side of the sleeve eight times. As a result, you will have 63 loops.
- After 96 rows from the beginning of the product, make an elastic band of the desired height and close the loops. All you have to do is sew the side seams on the finished sleeves.