Everyone likes knitted toys - both adults and children. If you have ever held a hook in your hands, then you are capable of creating a toy yourself. Leftover yarn makes cute and funny pillows, animal figurines, cartoon characters and even Christmas tree decorations. We will tell you how to make crocheted toys with diagrams and a description of the procedure. Try it, you will definitely succeed.
In contact with
Classmates
Scheme selection
There are a lot of patterns for knitting toys. During the search, I want to immediately take on a complex, beautiful toy with many details. The temptation is understandable, but try to overcome it. Start with a simpler product. You can start knitting complex items when you have mastered the basics of knitting, can knit tightly enough, and understand the tricks of decreasing and adding stitches. Try to start with small jobs. This way you won’t get bored with the activity and lose interest in it. Read the description. The complexity will be clear from the order of knitting and assembly. Here we will give the simplest diagrams on how to crochet a toy.
Selection of yarn and hook
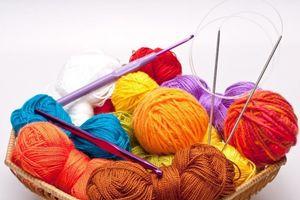
For knitting toys, choose non-elastic yarn. Perfect option - plain or mercerized cotton. It has an affordable price and a wide variety of colors. You can choose another yarn. Just check that the thread does not stretch. The elastic thread will stretch in the product. The loops in the finished toy will stretch, resulting in unsightly holes.
 Threads come in different thicknesses. Usually the label indicates how many meters of thread are in 50 or 100 grams of yarn. The longer the length, the thinner the thread. Toys knitted from thin thread, they turn out more elegant, but such knitting will take more time. It is also better not to use a thread that is too thick. Each loop will stand out sharply. To start, buy yarn with parameters 150 m/50 g.
For your first knitting lessons, it is better to take smooth threads. You can experiment with different textures later.
The hook must match the yarn. Usually the packaging contains information about what size knitting needles and hook it corresponds to. This hook will provide a medium density knit. Since the toy will need to be knitted very tightly, take a hook 1-2 sizes smaller than stated on the label. For example, for the thickness indicated above, use a hook from 1.5 to 2 mm.
Prepare the accessories
Prepare all kinds of eyes, ears, decorations, etc. in advance. Many of them are attached during mating. For example, safety eyes and a nose are inserted before filling the head with filler. Then you simply won’t be able to insert them well. And it’s better to string the bead eyes onto the working thread at the very beginning.
How to knit an amigurumi ring
The amigurumi ring is the beginning of every knitted toy. This is the name of the ancient Japanese art of making knitted toys. It is knitted instead of the traditional chain of air loops closed in a ring. The finished product is neater because it is pulled tight and there is no hole in the center of the toy.
Description of the ring:

Rules for knitting amigurumi toys

Knitting a smiley
The simplest crocheting amigurumi toy is a smiley face or bun. It has a minimum of details and can be knitted in a couple of hours.
It's easy to knit:

Knitting a kolobok smiley is based on a ball. It can be made larger or smaller by increasing or decreasing the number of rows with additions. For example, in the description above, you can continue adding: to every seventh VP, to every eighth VP, and so on. So the ball will have a large diameter.
Start knitting a ball:

In the future, when knitting toys, if a ball pattern is required, we will refer to this description.
New Year decoration
Christmas tree decorations can also be crocheted. If you decide to make balls, then use the description in the previous paragraph. Don't forget to attach hook or ribbon for hanging. Experiment with different colors. Crocheted balls can be either plain or with patterns. The simplest pattern is stripes. To do this, you need to periodically change the color of the thread. Pick up the desired shade with a crochet hook, and carefully pull the unused ones along the wrong side.
Knitted New Year's toys can be of other shapes. The easiest way is to knit two identical flat figures, sew them together, and fill the space between them with padding polyester. For example, Skates are easily and simply knitted according to this pattern:

Crocheted decorations will perfectly decorate your home and bring warmth and comfort.
Crochet teddy bear
Knitting a Teddy Bear is a little more difficult. But based on this scheme you can make almost any toy: bunny, tiger, even piglet. You just need to change the patterns of the ears and tail.
 So, a knitted bear consists of:
- ears;
- heads;
- torso;
- front paws;
- hind legs.
Knit the bear's head according to the description of the ball:

- cast on six loops into the amigurumi ring;
- Knit two stitches into each loop;
- column, three times two columns in one loop, finish the row with single crochets.
Bear body:

Front foot:

Back foot:

Dial chain of five loops and tie her up three rows of single crochets to make an oval. The diagram is shown in the figure:
The result is the sole of the bear. It can be knitted in a different color, then the knitted animal will turn out to be shod.
Then knit as described:

Now collect all the details, embroider the mouth and nose. The crocheted bear is ready.
Crochet toys for beginners

It so happens that some cute traditional things from one country find their fans all over the world. Amigurumi is no exception. After all, the birthplace of amigurumi is Japan, but if you look on the Internet, it becomes clear that small cute toys have already taken over the whole world. Descriptions of amigurumi can be found in Russian, English, Spanish, German and other languages.
What is amigurumi?
Amigurumi is the Japanese art of knitting or crocheting small cute toys. But recently, crocheted amigurumi have become most widespread. The size of amigurumi usually does not exceed 10 cm, although recently much larger specimens have appeared.
The Japanese love to give amigurumi eyes and a nose. A toy can be a prototype of some kind of animal - a bear cub, a bunny, or it can be an inanimate object - a cup, pan, cake, pastry, car, etc.
The revival of the art of amigurumi began in the 70s, when the concept of “kawaii” appeared in Japan - this is something pretty, arousing pity, charming, touching. The symbol of kawaii is the Hello Kitti doll, created by designer Yuko Shimizu. Kitty immediately fell in love with the Japanese, and then found fans all over the world.
How are amigurumi different from other toys?
- In terms of head size, amigurumi usually have a disproportionately large head. Regardless of whether it is an animal, a doll, or a fruit or vegetable, it may only have one head, but it is always cute and touching.
- Classic amigurumi are plain. The Japanese are famous lovers of minimalism, so their amigurumi are not multi-colored.
- The size of the toy is 8-10 cm, although there are exceptions both smaller and larger.
- Knitting technique. Amigurumi is crocheted with a smaller hook size than usual.
Knitting rules

If you plan to knit amigurumi patterns, then you will find them useful.
How to connect parts
If your amigurumi toy consists of several parts, then you should think about how to connect them. The easiest way is to simply sew the parts together with a needle. But, if you want the toy’s legs to be movable, then a hinged connection method will be useful to you. look on our website.
Crochet clothes for amigurumi
As we wrote above, classic amigurumi are knitted in one color or with a minimal set of colors. Clothes for such amigurumi toys, if necessary, are not removable. For example, if your Kitty’s dress should be green, then the body itself and part of the arm are knitted in green, and a flounce is tied at the bottom. It is impossible to take off such clothes and change the image of an amigurumi. People who are passionate about amigurumi knitting come up with different images for their charges and knit different clothes for dolls and animals. In this collection we did not present crochet patterns for amigurumi, but they are definitely in our digest.
Crochet amigurumi, works of our readers

Unicorn is a fairy-tale, mythical character. Known in many cultures around the world, it appears only to selected and pure-hearted people. The beautiful white horse with a graceful twisted horn on its head is a favorite of both children and adults. Not

New Year's Bear Claus. Work by Ekaterina Aleshina. Yarn "Alize Lanagold" (colors: red, black, white, yellow). Yarn "Softy Alize" is white. Hook No. 1.5. Sintepon filler. Beady eyes. You can also use any other yarn of suitable colors. Crochet bear, description sc - single crochet. HEAD: Knitting

Newborn cockerels and hens can serve as a Christmas tree toy, or simply as a keychain for a child, or as a refrigerator magnet. In any case, a cute and beautiful gift. Master class from Yulia Kononchuk. We will need: 1. Small

Good day to all! I suggest knitting gifts for the New Year. You can design them as key chains or as magnets, you can hang them on the Christmas tree, or you can just leave them as is - and you will have a toy for

Funny snowmen. Height 10 cm, yarn "Children's novelty", hook 1.5mm, buttons (3mm) and beads for eyes were also used. The main color is white. Accessories can be made in any color. Description of the toy: sc - single crochet Head: 1p: 6 sc in the ring

The New Year is approaching; according to the eastern calendar, 2017 is the year of the rooster. It's time to start preparing to create mini-talismans for good luck and prosperity in the form of the very symbol of the year :) Since I would like to wish everyone happiness and luck,

Hello! I would like to show you another version of my performance of the baby yo-yo - the simplest, in my opinion! According to the basic description, a doll is knitted, and the only removable decorations are a hat and a scarf. For a description of the Yo-Yo doll, see the link. At the same time, accessories

Hello everyone! Lately I’ve been very interested in creating interior toys and now I want to introduce you to this cute baby owl! The baby doll is crocheted from half-wool, crocheted No. 2, with movable handles on a thread fastening. Clothes - cap and dress

Bird from a Kindersurprise box (amigurumi). Master class from NewNameNata. I plucked up courage and decided to prepare a master class on making such a bird - amigurumi. I’ll say right away that when I start work, I don’t know in advance what kind of toy will turn out - kind, funny, sad,

Hello! My name is Tatyana. For the New Year I came up with this fluffy sheep. I have already imposed a lot of them. Everyone asks for a diagram or description. So I decided to make a tutorial on knitting this toy and at the same time

Hello! My name is Ekaterina. For more than four years I have been interested in knitting miniature soft toys using the amigurumi technique (the word is derived from two Japanese words - “knit” and “soft toy”). To create my bears I use

The bear in the cradle is crocheted from cotton yarn. Synthetic padding is used as padding, the bear cub is 6 cm tall, and thanks to the hinged mount it can move its arms and legs. Works by Katerina. Wedding bears are perfect for interior decoration. Bears are completed

To knit a toy you will need: 25-30 grams of yarn, a hook of a suitable size, stuffing for stuffing the toy, a pair of eyes or beads, threads for sewing on the eyes and limbs. The bear will be about 15 centimeters tall. A kind of bear-sized bear. Body and

“Amigurumi is a thing that you want to give.” Amigurumi are small and very tiny knitted or crocheted toys. Amigurumi comes from Japan. Their name is derived from a combination of Japanese words meaning “knit” and “soft toy”. Now there are more of them

Master class from Larisa (Rozetka). Larisa will tell you how to knit a Hello Kitty amigurumi toy. This is a “translation” of the diagrams with some explanations. Because You can’t do detailed explanations on one piece of paper, but there are enough details here - I decided to make a small one

Master class from Larisa (Rozetka) from Krasnodar. Continuation. Let's start sewing on the handles. To do this, take an orange thread, tie a knot at its end and pass the needle into any hole between the sc on the back of the tiger cub, bring the needle into

I present to you a master class from Larisa (Rozetka) from Krasnodar. Such a wonderful tiger cub can be knitted as a gift for the upcoming year of the tiger or just as a toy. The tiger cubs turned out so cool!...you can see for yourself what they are like. All they have is height

You will need: a plastic egg from a kinder surprise, a hook, 2 eye beads and the remains of thread. Description of work: The toy is knitted with single crochets (st. b/n). Place 6 tbsp into a ring of threads. b/n and tighten the thread so as not

The turtles are knitted based on a picture from a Japanese magazine. I got turtles of two sizes, mother and daughter. But you can knit from the thickest threads to the thinnest. Less is better. Basic pattern
Schemes from the Internet
Amigurumi crochet flowers
Crochet ballerina mouse
The feet are thread-fastened and movable. The mouse can be given different poses. Sits on her own, stands with support.
The nose and mouth are embroidered with pink Iris threads.
The head and body are connected as a single piece, the ears consist of pink and white circles sewn together.
Crochet amigurumi chihuahua
The tiny Chihuahua has recently become quite a popular dog breed among animal lovers. This is due not only to its miniature size. This is a very affectionate, unpretentious and devoted four-legged friend.
Of course, a knitted Chihuahua will not replace a real dog, but it will certainly give you positive emotions. This cute toy will appeal to both adults and children. A miniature chihuahua is crocheted according to the Kristel Droog pattern, translated by Maryana Chaban. The size of the toy depends on the thickness of the yarn you will knit with and ranges from 11 to 17 cm.
Crochet kitten
For knitting you will need:
- Yarn Yarnart Jeans
- hook
- eyes - beads
- spout
- filler
- ribbon
Crochet amigurumi kittens from the author Chertenok13
Cow Ladushka and bull Beloyar or rustic love story from Ioannina (jasmine)
Materials and tools:
- yarn of the main color (I knitted jeans 160m\50g number 21) - 1 or one and a half skeins, depending on the density of knitting;
- yarn for clothes (at least two colors - dress and pantaloons) at your discretion;
- some yarn for the horns and tail tassels;
- some yarn for a bucket;
- cotter pin fastening or 2 buttons (for a cow with a height of 20 cm, diameter 2 cm). or you can do without fastenings, just sew on the head));
- 2 half beads (beads, ready-made eyes) or just a little bit of black thread for eyes;
- 2 buttons for nostrils;
- 2 buttons for sandals;
- 2 buttons on the dress;
- plastic canvas (cardboard, plastic cover) for insoles and the bottom of the bucket;
- a piece of wire for a bucket;
- filler;
- sewing needle;
and, of course, a good mood!
Crochet amigurumi lion cub
You will need 30-40 grams of yarn in the main color, some yarn for the mane, some filler like holofiber for stuffing and a couple of beads or buttons for the eyes.
The head and body are one piece. The legs and arms are knitted one at a time and then sewn to the body. It is convenient to stuff and sew on the ears and muzzle when the head is already ready, but the body has not yet begun. The eyes can be sewn on when the toy is assembled, then the nose, mouth and eyebrows can be embroidered, and the mane last.
Amigurumi snail Goga crochet
Amigurumi giraffe crochet
Knitted dolls - how wonderful they are! They have a special charm and a magical ability to make you smile. You can knit such a doll for a child, for a friend, or for yourself, your beloved. If you exclude small plastic parts from the design, you will get an excellent toy for children, and if you use dry fragrant herbs instead of filler, then you will get an unusual sachet. In addition, crocheting a doll is easy. You can create such a toy with your own hands in just a few evenings.
Best wishes for your creativity, Jeiana Johanssen.

Crocheting is one of the most popular and sought-after types of handcraft. Decorative napkins and openwork cardigans, small toys and huge tablecloths - for crochet masters there are no limits to making their fantasies come true. Learning simple techniques is not at all difficult. But achieving the filigree of large products requires time. So let's not just dream and start our first lesson in learning the crochet technique.
Beginners tend to save on materials and tools. But in this case it is not worth doing this. Old threads or a bad hook will not add skill and desire to continue learning.
How to choose a hook
Cheap plastic hooks are bad helpers. They're never smooth enough, and small nicks constantly pull the yarn. In addition, plastic is quite unreliable in operation and can simply break. The tip of the hook must be metal.
Pay attention to the details of the crochet hook:


The handle can be made of different materials - plastic or wood. But for training lessons it is better to take a hook with a monolithic handle. This way, as you study, you will be able to feel the correct tension of the thread and form identical loops.

Standard hooks have a length of 12-16 cm. For Tunisian knitting, longer hooks up to 40 cm in length are produced.
How to choose yarn
Yarn can be synthetic, cotton and wool. The first thing you need to pay attention to is the presence of lint. The smallest fibers will bother you, so wool is not suitable as a material for beginners. Fully synthetic threads can be very unpleasant to work with and on the fabric. But they are the brightest colored.

The yarn should be evenly colored and have the same thickness along its entire length. For hand knitting, you should not choose a tightly twisted thread - it gathers into loops and does not allow you to create uniform links when knitting.
Boucle threads with thickenings will not be suitable for sure, but melange yarn will reliably hide small flaws in the work.
When purchasing yarn, always read the ingredients on the label. Do not throw away the labels until the job is complete. You may simply not have enough threads, and it will be much easier to find the same ones with a label. In addition, on the label you can note information about the quality of the yarn, which will subsequently help you make the right choice.
How to get started
- Start training in a comfortable position: it is difficult to keep your elbows up all the time, so it is better to sit on a chair with armrests.
- Sit closer to the window - in daylight all patterns are visible much more clearly.
- On black or dark blue yarn, the loops are difficult to see. It is better to choose a light or bright thread.
- If you are right-handed, then hold the hook in your right hand and take the working thread in your left hand.
Crochet patterns for beginners with detailed explanations
Each element in the diagram has its own execution technique and its own designation. You can create simple things using simple elements. This way you will not only master the knitting technique, but also see the real result of your efforts.
Basics of crochet for beginners
The chain is the most important basic element in all knitting patterns. But it is not as simple as it seems. Uneven loops immediately catch the eye and spoil the impression of the work done. So advice for beginners in crochet: knit the braid until you see that it is the same along the entire length. And no matter how many meters of finished braid you get, practice, undo and practice again. What the chain knitting technique looks like and its designation in the diagrams can be seen in the photo.

For variety, you can master the double crochet chain. How to do this, look at the photo.

The chain is used as a basic element (like a set of loops in knitting) and for air connection of different elements of the product.
The column is another important element of technology, with which you can knit a fabric from a braid. Columns are used to form transitions between knitting parts, secure individual parts, and in some other cases.
A simple single crochet stitch is performed as shown in the diagram.

Double crochet is already a decorative element. There can be 1 or more yarn overs, and they are designated as follows. The number of serifs in the diagram indicates how many yarn overs need to be made on the column.

Slingshot - several double crochets, which are made from one loop. They will help you knit a round center or a beautiful petal for a flower.


Knitting can be done in the round, or can be done using a transition stitch. You can see in the photo how to correctly carry out the transition in order to get a perfectly smooth edge of the product.

Filet crochet for beginners
Filet knitting is a sequential alternation of chains and single crochet stitches. As a result of your work, you will get a grid with different types of cells, as shown in the diagram.

A simple pattern at first glance is the basis for crocheting clothing items and beautiful decorative elements. Upon closer inspection, it seems that the details are not crocheted, but embroidered with plain threads. See what basic elements can be made using the fillet knitting technique.

And here is an example of a finished product based on the same small fragments.


An interesting combination of colors and a detailed pattern will help you create a blanket using the patchwork technique, but based on knitted fragments.


Crochet flowers and petals for beginners (step by step with photos)
Flowers and floral designs are the first thing that all beginners probably master. Using simple products you can learn to knit and read -crochet patterns-.


Here are examples of the simplest colors with knitting patterns. But don't be discouraged that your efforts will only be spent on training. See what compositions can be made from the simplest elements.


You already know how to knit a simple circle based on stitches and a simple chain. Now you can move from flat diagrams to three-dimensional toys. Even if you don’t have small children, you can knit a small keychain for yourself and your loved ones.


Crochet is so practical that you can create even the smallest details.


For the parts of the body and legs you need to knit a kind of cylinder. The base is the same circle as in the middle of the flower. When the diameter of the base is sufficient, simply stop adding loops. Knit the walls of the cylinder with a simple stitch using the loop-in-loop method. To narrow or widen the loops, perform uniform addition and reduction of loops.


Not only voluminous toys can be knitted. There are several ways to decorate a children's room with beautiful panels with all children's favorite characters. Funny owls can be simple.


Having mastered crocheting toys, you can create many holiday characters for children and their friends.


Crochet was probably invented by lovers of openwork napkins. Our grandmothers had no other way to decorate their home and give it coziness than with the help of crocheted napkins. Openwork details require careful adherence to the pattern. Otherwise, you will end up with a convex hemisphere, pulled together at the edges, or a wavy edge.


Before you start knitting napkins, you can start with simple coasters for plates or glasses. Please note that the basic element according to a simple scheme can be used separately. Or you can put together a chic tablecloth from a sufficient number of fragments.


Napkins as a decorative element have already slightly lost their relevance. But lace weaving, with which you can decorate dinner napkins, tablecloths or even items of clothing, is valued today more than ever.

Check out some simple chain and column designs that will help you create not just utilitarian, but also fashionable design elements.

On the eve of the New Year and Christmas holidays, everyone is preoccupied with decorating their home. From the fragments you can create wonderful balls, as shown in the diagram. In order for the parts to keep the shape of a ball, you need to use a little trick: starch the finished fragments and dry them under a press.


How to Learn to Crochet Practical Things (Beginner's Guide)
For many modern needlewomen, the mention of decorative napkins does not arouse any enthusiasm. Art for art's sake is no longer so popular; many people prefer utilitarian products. And with the help of crochet you can make not only beautiful, but also useful things that will also serve a decorative function.

- To work, you will need a special type of yarn - ribbon yarn. The thread is very thick, 7-9 mm, holds its shape well in the product and allows you to quickly create the intended model. And ribbon yarn also has a lot of beautiful pastel shades, so fashionable in interior design today. It requires a special hook No. 12 or No. 15.


- For example, several multi-colored skeins of thick yarn and a hook will help you knit baskets that you can use as an organizer.


- A convenient shopping bag will help out. Who doesn't like visiting supermarkets with plastic bags.

- You can create several interior items - a rug, covers for stools and storage boxes with lids.

- In the diagram you can see a diagram for the base of a bag or box. The diagram can be adjusted according to the size of the product.

- The diagram shows a step-by-step knitting technique that can be used to knit a basket of any diameter.


It is impossible to crochet socks in the classical sense. The technique does not involve knitting elastic. But knitting high closed slippers with soft soles is quite possible. And you can start training on your toes for the little ones. With a minimum set of basic techniques and some imagination, you can knit cute slippers, sneakers or even boots for your baby based on one pattern.


- . Tie a chain of the required length - this will be the central part of the sole. Start knitting in the round according to the pattern, adding loops where necessary. As a result, you should get a sole that fits your baby's feet. You can just touch the leg to make sure everything is done correctly.

- For the edges, continue to knit according to the pattern or simply work stitches without adding stitches. The height should be sufficient so that the toe does not fit too tightly around the foot. After that, move on to designing the upper part of the sock.


- Or knit a high freebie in the form of a boot. But you need to provide the possibility of putting on a sock.

- Socks for adults are knitted using the same principle. They are not suitable for walking on the street, but they can easily replace homemade crocheted slippers or warm your feet in the cold season.


- Booties can be worn outdoors, but require a factory sole. Buy flip flops and take the straps out of them. You will need an awl to pierce the sole. Make punctures evenly along the entire perimeter of the sole, immediately pulling the thread through them. Next, knit the booties according to the chosen pattern.


- But the soles of flip-flops are very thin and quickly deform. Do you have old booties or espadrilles that have worn through your fingers? So what to do? Take the sole to a shoemaker and ask them to stitch it around the perimeter. Or make a blank from felt and sew it around the edge with thread. Now you have a blank with which you can start working.


- Look at several knitting patterns and finished results from the work of thrifty craftswomen.


The Tunisian knitting technique is a mix of crocheting and knitting. You will need a hook, but its length allows you to knit fabric with more than one working loop. Using Tunisian knitting, craftswomen create large fabrics that can be arranged and stitched to create different patterns.


If you describe Tunisian knitting in words, then we can say the following:


Here are a few examples of finished products made using the Tunisian knitting technique.


Video with free crochet lessons for beginners
- Video with a circle crochet lesson, which is a basis for beginners in the technique of creating napkins. An example on large yarn will help you master lifting loops and correctly calculate the number of capes in each turn. This will help you later knit perfect circles without waves or tightness.
- A kind bear and a little sad bear will definitely become a friend for your baby. Video with a lesson for beginners in crocheting various toys based on one simple pattern. For the bear, you can knit clothes, a hat, and even small shoes. Not only toys, but also clothes can be created by mastering the technique of crocheting for children.
- A video with a step-by-step lesson on crocheting booties for little ones - what else could be more enjoyable for beginning craftswomen. Ruffles and laces will add cuteness to the product and help mom master the technique of working with crochet.
- Tall booties for an adult with a step-by-step video for beginners on crochet and a lesson on joining individual pieces. The author of the video introduces several techniques at once - knitting patterns, joining parts according to a pattern and attaching finished booties to a felt sole. Using this technique you can also knit short house slippers.
- Video with a lesson for beginners on crocheting a snood from pink yarn. Simple elements, executed with great skill, form a beautiful pattern. If the topic of hats interests you, learn more about - crochet hats -.
Every mother, having a minute of free time, tries to give a small gift to her baby. Crocheted educational toys are especially popular. Their distinctive feature is ease of manufacture, environmental friendliness, safety and the love and tenderness invested in it. Even a novice knitter can make such a product; it is enough to know how to make basic loops and air stitches. With a little effort, you can make your baby happy with a knitted rattle, squeaker, rustle, etc.
What toys can be crocheted?Believe it or not, it’s enough to get the hang of working with a crochet hook and, by unleashing your imagination, you can weave almost any toy. Using wire frames will allow you to get a knitted tree, a bunny with flexible ears and legs, a little man, a bear, etc. Now there is quite enough accessible and understandable information on how to crochet a toy; you just need to carefully understand the patterns and the required knitting technique.
A completely new and simple technique will help beginners crochet a toy - amigurumi, which came to us from Japan. These are small and funny characters made from individual elements that are crocheted and sewn together. A distinctive feature of this method is knitting in the round with adding or subtracting stitches.
Having found a suitable master class for crocheting a toy, you can clearly and step-by-step see the entire crocheting process in great detail. This is an invaluable help to those who picked up a hook for the first time in their lives. There are options for weaving online with a master, watching videos or photos with instructions. Everyone chooses the most convenient option for a pattern of crocheted toys.
We present to your attention several options for how to crochet small toys. The materials you will need are approximately the same, namely:
- yarn of different colors and shades;
- the hook itself, and of a thickness that allows you to obtain a dense fabric without holes;
- filler and weighting agents in the form of various balls or pebbles;
- various decorations and decorative elements;
- tinting products, mainly markers or cosmetics.
How to crochet a bear toy?
- We start weaving from the head. We put 2 loops on the hook and close them in a circle. Now we knit 6 six stitches from the middle of the circle, and in the next row we make 6 more additional stitches.
- Next, by adding and subtracting air loops, the desired shape and size of the head is achieved. Before the end of knitting, fill the head with filler and tighten the loops with thread.
- The body is knitted using the same system, only it should be thinner and smaller than the head. Fill and pull.
- We knit the legs in proportion to the body, lengthen them a little and fill them out.
- The muzzle, which is a round or elongated ball, is woven similarly. We design it and stuff it.
- Connect all the elements using fasteners or threads and don’t forget about the tail.
 |
 |
 |
 |
 |
 |
 |
 |
 |
 |
 |
 |
 |
 |
 |
How to knit a toy snake?
Knitting this animal is not difficult at all. We cast on the required number of loops, on which the thickness of the body will depend, and constantly knit in the circle, decreasing and adding stitches in the necessary places. We decorate and design the face.
You can see a detailed master class.
Crochet a cat toy
Let's move a little away from multi-element dolls and weave a cat pillow. In this case, it is enough to knit fabrics of a round, square or rectangular shape, fill and sew. Tie on the ears, tail, shape the face and sew on decorative elements.
 |
 |
 |
 |
 |
 |
 |
 |
 |
 |
 |
 |

Now it is clear that the question of how to crochet a small toy has a very simple and understandable answer. It’s enough to take the time and look for information on how to crochet a soft toy.
Knitting is a multifaceted and almost omnipotent type of needlework. What skillful hands can’t create with just knitting needles and a ball of yarn! Knit a warm winter sweater, table decoration, holiday napkin or soft blanket. But today we will talk about not quite ordinary things. We will look at how knitted toys are made with knitting needles with descriptions and diagrams.
Knitted and crocheted soft toys: basic aspects and knitting options
The options and patterns for crocheting and knitting toys for beginners are so diverse that when you first get acquainted with them, many people’s eyes widen. For example, a mouse toy looks very original and unusual.
By the way, crocheting it is quite simple, especially if you strictly adhere to the following description.

With knitting needles you can make a wonderful bear, which will be completely indistinguishable from a teddy bear. To do this, you just need to master the “loop” seam and learn how to cross threads of several colors.

But in addition, in your work you will need to take into account a few simple rules:
- It is better to select a working tool for threads with a smaller diameter so that the product turns out to be very dense. Agree that white stuffing sticking out through the slots in the rows will spoil the appearance of the finished toy.
- For stuffing toys, it is best to use padding polyester, padding polyester or holofiber. But thread trimmings and especially fabric are not suitable for these purposes.
- The legs and arms of the toy can be filled with weights: beads, pebbles or sand. The same applies to the body. But the head must be soft, otherwise the toy will tilt down.
- The eyes of a doll, mouse, bunny and other animals can be embroidered or sewn on ready-made. And the nose and mouth are marked with buttons.
- It is better to knit clothes for toys from yarn that is thinner than the main part of the product. Choose from iris, linen or cotton.
That's all the simple secrets and subtleties of needlework. And now we invite you to arm yourself with needles, threads and needles and start creating. Detailed master classes will help you with this.
Christmas bears
On the eve of the New Year, every needlewoman wants to at least somehow decorate her home with handmade products. We invite you to try knitting little cubs with clumsy feet that will become a worthy decoration for the Christmas tree.

Necessary materials:
- 100 g acrylic yarn;
- ribbon;
- needle and thread;
- knitting needles No. 2.5.
Process description:

If you wish, you can crochet these simple patterns for knitting a Christmas tree decoration for beginners. In this case, it is better to work in a circle using regular single crochets.
Lop-eared bunny
At first glance, crocheting or knitting a toy for beginners may seem like an unusually complicated process. In fact, it is enough to be able to work with knit and purl stitches, as well as read diagrams. If you have already mastered all these skills, then creating a cute bunny will be a matter of 5 minutes for you.