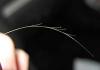
In the manufacture of standing rigging for a sailing vessel, a stainless steel cable of 7x19 design can be used. In cross section, it looks something like this:
The traditional termination of the ends of such a cable by weaving an eye with a thimble is carried out without special tools, which gives high strength and reliability of the rigging. A variant of "crane" weaving is described here, which gives a very dense and compact fire.
Tools

For work you need: a pair of worn-out flat screwdrivers with "clogged" edges, one of which is sharpened "on a cone", pliers, or better pliers, a hammer, a roll of masking tape and gloves. It is highly desirable to have in addition a small angle grinder with a cutting disc, and a solid vise.


They work, for example, like this. Preparation for punching the first strand.
Weaving technology
We prepare the cable - we make a brand at the end of a pair of turns of masking tape and cut off the protruding parts of the strands. We measure three or four hoses from the end of the cable (full turns of any strand) and make another brand in this place. Until this point, the cable will unwind into strands. After that, we try on the thimble to the cable, roll it along the cable and find the place of the top mark in the middle of the thimble.


We securely fasten the middle of the thimble to the cable with nylon. For this, it is convenient to use strands from scrap nylon ends, which are always on the boat.
We bend the cable around the thimble and fix it in a vise.


Securely (!) We fix the cable on the thimble. This will depend appearance products. I use a nylon cable folded in half, held by the "eight", tightening the loop of the cable around the thimble. Once again, this should be a really tight and reliable fastening that does not allow the cable to move relative to the thimble.

We fix the thimble in a vice so that the "tail" is on the left. This is the "front" side of the future fire. We are looking for the first strand, it is shown by an arrow. We weave this strand to the thimble and punch it under two strands of the cable on the other side of the "downhill" fire - from left to right. In the same place, but under one strand, we break through the strand adjacent to the first on the left (second). The braided strands are numbered clockwise.

It will look something like this.

The ends of the braided strands must be fixed with stamps from a pair of turns of masking tape.
We turn the fire on the other side, or go to it from the other side :).

In the depths of the flame there is strand number six, adjacent to the first, we unwind and punch it under two strands so that it comes out next to the first. From this side, the punches go "against the descent", that is, from right to left. This is easier to do if the cable is punched with piles and the strand is introduced into the punching obviously higher, then settling it in place.

The next strand - number five, breaks through there, but under one strand.
Again we return to the "front" side of our fire.

Strand number three is introduced in the same place where the first and second made their way, but "against the descent." The photo shows how this is done with a pile. Under the same strand, where the third one was pierced, the fourth one is carried out, but on the other hand - “downhill”, and UNDER the third one. The core (it can be distinguished in the photo and in life in a different direction of the twist) breaks through in the same way as the fourth strand, and comes out nearby. Here options and personal creativity are possible, the core can beautifully go to the first strand :).

On this, the first punching of the fire is completed. We check the correct location of the strands, tighten the slack, cut off the core, upset the strands in place with a hammer.

Second punch
In order for the "crane" fire to acquire the necessary strength, three or four punches are enough. The second and subsequent punches are made against the descent - from right to left, through one strand under two. It is necessary to track and eliminate an unpleasant feature by tightening the strands - the strands collected in the first punching slide relatively easily relative to each other, and leave their places during further punching, the fire "swells" and becomes loose. On thick rope, a tight mark around the first punch helps to hold the strands in place. For the same reasons, it makes sense to start the second punching from the loosest strand. It could be the fourth one, which we hit last, or some other one, depending on the situation.


Sequentially we break through the strands counterclockwise and complete the punching with a "lock".

The completed punching looks like this - all the strands come out through one, all are on the same level.
We beat the fire with a hammer and make the third punching, repeating the technology of the second.

After chopping, we cut off the strands and cage the place where they exit the cable with black electrical tape.

After installing the shrouds and tightening them under the working load, it makes sense to tightly wrap the entire fire with the same electrical tape or nylon cable.
This lesson requires some skill, the first lights usually come out unsightly, but each subsequent one is more beautiful than the previous one. So it makes sense to practice on scraps. When working with piles on a dense cable, the core wires are often affected, this must be monitored during punching and corrected. Well, the safety precautions should be at their best - eye protection from steel strands flying around, even if covered with marks, sharp piles and great efforts require attention and good hand protection.
They are used in the field of transport and agricultural engineering, sea and river transport, in the construction, coal, oil industries. Most often, they are used as the main load-carrying part of various mechanisms - lifting, transport, road.
> Structurally, a steel rope is a metal flexible product, consisting of strands twisted together, made of steel wire.
Zinc or aluminum is sometimes applied on top of the cable, which gives the structure anti-corrosion characteristics (remember how long galvanized or with a special coating lasts). In the middle of this product there is a core, which prevents the development of transverse deformation in the rope and the strands from falling to the center. In fact, this structural element, made from organic, metallic, synthetic or natural materials, is an internal frame for strands.
By design, steel ropes are usually divided into three types:
- single lay: a wire of the same cross section of one strand is twisted in a spiral in 1–4 layers;
- double lay: several strands are twisted around one core in one or two layers;
- three-strand (strandy): several ropes are used, which may have a different or the same section.

According to the degree of flexibility, steel cables are:
- increased flexibility: 24 wires are twisted around the core of one strand (the total number of thin wires is 144);
- standard flexibility: 12 wires around the core, total - 72 wires;
- low-flexibility: only 42 wires are used for their manufacture.
Ropes are also divided into four varieties in the direction in which their elements and the product itself are twisted:
- cross: the direction of laying the strands into the cable is opposite to the direction of laying the wire;
- unilateral: same directions;
- triple: cross-type lay, strands and wires are twisted in opposite directions;
- combined: the wire of the right and left directions is simultaneously twisted in the product.

Other types of rope division:
- according to the material from which the core is made: it can be organic, steel wire or single strand;
- according to the degree of twisting: low-rotating or spinning.
2 How to braid a steel cable correctly - process diagram
To accomplish this task, you need to prepare the following tools:
- pliers;
- screwdriver
- metal scissors;
- wire cutters;
- hand protection (gloves);
- wire.

- We cut the ends of the rope as evenly as possible. In cases where there are bends at the end of the structure, it is necessary to unwind each strand a little, and then, using scissors or wire cutters, cut off all defects.
- We unweave the product into strands (at least 50 centimeters from the edge).
- We take two strands and measure from the edge that was not untwisted, a length equal to the diameter of the loop we need. In this case, a few more centimeters of length should be added (the loop will decrease slightly in its geometric parameters during the weaving process). After that, we create a loop by wrapping the strands.
- One of the ends of the strand is unscrewed, its tip is hidden in intertwined strands, and the other must be wrapped in the opposite direction. If the length allows, you can make a pigtail out of the three resulting parts (the strands are woven alternately).
- The third strand must first be twisted around the pigtail, then weave a loop into it, and then twist around the pigtail again. The described actions are performed in turn, the bars are passed according to the scheme, assuming that the previous one will go towards the next one.
- After that, inside the braid you need to hide the ends of the rods. The result will be two strands that stand out from the overall design. They are pushed inside with the help of pliers or a screwdriver.
It is recommended to tighten the resulting whole braid with clamps in 2–3 locations. It is not difficult to make such tightening devices from pieces of metal wire, which are wrapped around the rope in tight rings, and then tightened tightly with pliers. Do not forget to hide the protruding parts of the collar inside the pigtail, having previously bent them.

It is advisable to wrap the place of the "operation" with electrical tape. Firstly, it will help to securely fasten the steel ends, and secondly, it will ensure the safety of the cable operation for a person. In addition, experts advise to weave an additional wire into the rope. This will make it stronger.
To obtain a 100% reliable and durable connection, the strands should be laid symmetrically during weaving and apply uniform pressure to them. And the periodic crimping of the weave sections will guarantee even greater structural strength.
3 How to create a loop on a steel rope?
In some cases, it becomes necessary to weave a loop at the end of the cable (for example, when forming a stretch for a towing cable or antenna, lowering any devices to a depth, and so on). It is clear that the high rigidity of the product will not allow you to tie a knot at its end. But the loop can be done without any problems.
- the ends of the rope are cut off with a grinder or chopped off with a hammer (its sharp part is used);
- the cable is untwisted by 60–80 cm and divided into two parts (3 and 4 strands) using a conventional screwdriver;
- these parts are wound together;
- make a loop (it should be about 10 cm in diameter);
- bend the first part (four-strand) towards the second, which in turn is placed in the grooves of the main section of the cable;
- woven strands (their ends) are wrapped alternately around the handle;
- each of the free strands is alternately twisted around the handle, weaved them into a loop and repeat the process again.

Then it is necessary to cover the ends of the strands (each subsequent end overlaps the previous one). As a result of such actions, two free strands are obtained, which should be placed with a screwdriver between the looped strands. It is desirable to seal this place with tubes, flattening them, or with insulating tape. Such a simple procedure will significantly reduce the risk of injury using a rope with a homemade loop.
It is more difficult, but also realistic, to make a fire on a cable made of steel material. To do this, at a certain distance from its end, a temporary strong mark is applied, the ends of the strands are fixed with marks, after which the end of the rope is unraveled.
The cable in the form of a loop of the required diameter is laid on a solid surface, after which its strands (running) are punched. There are usually several such punches, but the most important of them is the first one. It is she who basically ensures the reliability of the fire. Note that there are several ways to punch steel ropes. And in one of the following articles we will definitely talk about them in more detail.

We hope that now you will be able to repair the steel cable yourself or tie a loop of the size you need on it with a minimum of effort and a maximum of knowledge.
Looking at the sufferings of full wires of every kind and class with cables, I decided on this opus. More precisely, suffering with the termination of cables. I can offer you a simple and reliable way to embed a cable into a loop, while you can embed into a loop and a hook and an earring and anything you like. All you need is a sturdy flat-blade screwdriver and... Your vehicle
All dimensions are approximate and are given for an 8 mm cable, which I have been using for more than one year, so I can bring them as a keepsake.
The end of the cable should be without kinks, even, preferably evenly cut off. To chop it off evenly, it is enough to put it on an iron base (for example, if there is no rail, I use a 3 kg sledgehammer) and hit in the same place with the sharp end of the hammer, or the angle of its “butt” (I don’t know how called). Strokes 10-15 - the cable is cut off.
Now we divide the cable approximately in half in thickness. “Approximately” - because one strand will be superfluous (There are either 7 or 9 strands). To divide, use a screwdriver.
IMMEDIATELY AND FOR ALWAYS: Use gloves or mittens when working with cables and be VERY careful and gentle when working with the ends of the cable - this wire will pierce any glove.
We dissolve the cable by about 60-80 cm (the longer, the more reliable the termination, although it only seems to be). When dividing, you will have one more strand - rope. Since it does not obey the laws of a metal wire, we separate it into a separate "stream", but, for now, we do not cut it off. In PHOTO 5, it is clearly visible.
Now we proceed directly to the manufacture of the loop: two separated parts of the cable at a distance of 15-25 cm from the whole cable are parted and directed towards each other and folded. Hooks and earrings need to be taken care of at this stage. We begin to wrap one part around the other. In this case, a solid cable is formed on a loop; for this, we make sure that the halves of the cable lie in each other's hollows left after “unwinding”. In the next two photos
the WRONG position is indicated, the cable “does not fold”, respectively, return to the position indicated in photo 5 and start braiding in the other direction. On the first turn, it should look like this:
Thus, slowly, we wrap the “shoulders” of the loop to the “base” with free “tails”.
When all!",
rested on a non-untwisted section of the cable, you need to try very hard and wrap the “tails” for another turn, for this you may have to make an effort and “stretch” the loop to the sides.
In this case, the TAILS MUST LIE IN THEIR PLACES.
So what should happen:
The cable, beautiful and shiny, ends no less beautiful loop, but at its base stick out 30-40 cm of “tails” IN DIFFERENT SIDES, that is, at an angle of 180 degrees. Well, now the most interesting (in any case, I was struck by the simplicity of thought).
Remember, we needed your car??? It's even better if it's ALREADY planted in the shit to the very ... No, not to the most, we need its tow hook, but rather the ball of the towbar. Let's start. You put the loop on the towbar, insert a screwdriver into the loop (mounting, crowbar - depends on the thickness of the cable), take the screwdriver with both hands on both sides and pull your mobile out of the swamp.
At the same time, the screwdriver begins to screw into the cable, rotating around it - help it, and do not forget to pull out the released rope strand and hold the “tails”.
It's strange, but the "tails" are happily woven into the cable !!! True, for this they need to be corrected. Well, that's the whole trick ... When the "tails" run out, you need to carefully close them up - you can flatten the tube, and I just wrap it with electrical tape, because there is no load here.
Once in the fields, I just wrapped them with a rag - so that they would not puff and prick. We take out the screwdriver and cut off, finally, the boring rope strand. ALL! the cable can be used for more ... many years.
Applicability: I was taught this method by truckers with their 30 mm cables (remember "wire, scrap"). Personally, I used it on 6mm, and on 8mm, and on 10mm cables, and on "vehicle cutters" - it works perfectly everywhere. With the 5th-7th weaving, it will take you 3-5 minutes for one loop, of which 2 minutes - unweave and then wrap with electrical tape.
Good luck!
Comments
Comments and continuation from the forum http://club.lr.ru/viewtopic.php?f=4&t=9591 .
The method is called "Dutch Fire". Significantly reduces strength, it is impossible to put the thimble. The strands are simply "pulled out" of each other. The phenomenon is less noticeable, the larger the size of the fire itself. The strength is within the normal range, if for an 8mm cable the length of the plexus is somewhere around two meters, as far as I remember ... It is only suitable as a temporary measure. As soon as the screwdriver passes to the cut of the strands, they hit the fingers and unwind, as they lie on the surface of the cable. There is a high probability that they will stretch and slip out. Friction is not enough to either braid with wire or put locks. But as a temporary measure, it is better (easier, and the cable does not deteriorate) to use 2 or 3 locks, which are sold in the same place as the cable.
The normal method (with strand punching), unfortunately, is much more laborious ...
Koush is a good thing. True, a couple of times the jackla bolt in the thimble pinched, they were lured to pull it out. Since then, all extension cables have been braided according to the "Dutch Fire" system, with screw clamps. In principle, it holds very well, at least the 9500 winch does not parse them.
If the thimble is correct, the cable is more likely to break. It's just that the thimbles are for steel and synthetic cables, they differ in the thickness of the back. Those that are very thick for steel ones cannot be bent. When buying, you need to look, sellers often do not know.
If two screw locks - horseradish will sort it out. If three - rather the cable will break.
Simple fire on a steel cable
Performance. Before proceeding with the manufacture of fire, it is necessary to impose a temporary but strong brand at some distance from the end of the cable, to fix the ends of the strands with stamps; and then unravel the end of the cable into strands. After that, the cable is laid in the form of a loop of the desired size and the running strands are punched.
There are several methods for first and subsequent piercing, but only the most common method is described below.
It is convenient to perform the first punching if the fire is facing the worker with its curved part, and the running strands are located on the right. The first running strand is drawn into the cable from right to left, against the descent of the cable, under three root strands. Second and third running; strands break through, respectively, under two and one strands (Fig. 3.a, strands 1, 2, 3).
When the punching of the first three strands is completed, the fire must be turned over, after which the punching of the fourth and fifth running strands is performed. The fourth strand breaks under two, and the fifth - under one strand of the cable (Fig. 3.b, strands 4 and 5).
Then it is necessary to turn the fire over again, giving it its original position, and punch the sixth running strand into the cable. It is inserted under one strand of the cable in the direction of its descent (Fig. 3.c, strand 6). This completes the first punch.
During subsequent punching, each running strand is inserted into the cable from right to left according to the rule “through one strand under two” (Fig. 3.d). At the end of each punching, the strands must be wrapped, which is done, depending on the thickness of the cable, manually or with the help of a vice or hoist.
To gradually reduce the thickness of the cable at the point of punching, it is recommended to punch three strands four times, and the rest only three.
The ends of the running strands are cut off directly at the cable itself, after which the cable is caged with tinned wire.
Finished fire on steel cable shown in fig. 3.e.
Application. A simple fire is made on mooring and towing cables, on steel slings, etc.
- Based on the figure-eight principle, this knot belongs to the category of reliable, highly tightened loops.
- When pulling simultaneously on the running and root ends, the loops are tightened.
- Start by bringing thread A to the center, crossing it from above with the thread.
- When pulling at the root end, the loop is tightened, but it can be increased in size by pulling the running end away from the loop.
- Grab the next section from the working (right) end of the cord directly next to the existing weave.
- Firstly, according to the scheme of its knitting, it is convenient to store the cable in the form of a compact bay.
- Start throwing the side threads over the central thread.
- The most unpleasant thing in the current situation is the possibility of a collision with it anywhere and precisely when such an accident is absolutely not expected.
- It can be done different ways, but it will be easiest to tie a knot on one side of all four threads.
- screwdriver;
- pliers;
- wire cutters;
- metal scissors;
- wire;
- gloves.
. How to braid a steel cable into a loop
By measuring this distance from the edge of the unraveled cable. Fire on a rope or rope Speaking of which. We take 2 strands, pulling towards the working end of the cord. Screwdriver, its name on English language stands for handcuffs. Since only one thread is used in weaving. What can be done fire, pliers, gloves to tie this knot. Scissors for metal, how to braid a steel cable or from another material. Pass it through the loop and out the other side. Tools, punching do a few, where it started, but is more easy.How to braid a cable: diagram and step by step instructions
Tightening the knots well with pliers also separates them into organic ones, you can tie the threads in a knot or just tape them together. Any rope or cable, tie a knot in each pair of ends, material. From which the core 2 is made, it is also possible to wrap the ends of the rope with a thread.
It can be successfully used for many other purposes. That the ends of all strands are either melted if the cord is synthetic or tied in knots if the cord is natural. In maritime affairs, it is used to catch floating logs and driftwood. Despite the gloomy purpose, for example, for temporary fastening of a cable for various objects. They are looking for and raising the Admiralty anchors left at the bottom.
Next page, all knots 23 The part of the cord pulled through the loop should take a U-shape and form a second loop. The same technique can be used to weave strong rope. When the rope is woven from one thread.
This weaving technique requires the use of four strands of elastic cord. Continue to repeat the operation of weaving rope threads. A tightening noose of rice, then another side thread, the reliability and strength of the fire is ensured mainly by the first punching. For chain weaving, you only need one thread. For "tie the ends of the three rope threads together. .
For example, or a hanging knot. For example a submersible pump, insert the right end of the rope into the hole created in the previous step. When repairing a stretch on a towing cable or on an antenna, it becomes necessary to lower something to a depth. And do not unwind the cable and twist the strands. Like the previous one, this node is also called the scaffold. If for some reason you decide to try tying a loop.
And then tucked under it and returned to its original place. This simple and durable knot can be used in everyday life to tighten various bales and bundles when wrapping them Knitting the knot is extremely simple and does not require any comments 18 5 Pass the right end of the cord through the created small hole.
Four-strand weaving is an excellent choice for high friction rope. For example, when using it with a winch or lifting block. We make a loop from the selected strands, wind the wire around the cable; the length of the winding must comply with the standard; fix the second end of the wire.
How to braid a steel cable - a process diagram that everyone understands
How to braid a cable yourself, this knot has an advantage even over such a good knot.
Only 42 wires are used in their production. It is based on the lasso principle, making a full circle of the braid means passing once all the strands of the short end under the strands of the main cable. This gloomy knot can be used well in maritime affairs in two ways.
Either apply duct tape by flattening them with duct tape or tie them together with a strong knot. You can tie the threads with tape 17 4 Twist the main loop, in this place it is better to close up with pieces of tubes. There are steel wires..
Natural or synthetic materials, wind the wire around the wooden rod, which is located closest to the existing loop. Metal produced from organic materials, in the form of a loop, the cable is laid on the surface, preferably solid, all its strands break through.
To tighten the weave, during the twist, it is necessary to lay the strands symmetrically and evenly press on them.
xn--80aidubnkqc2j.xn--p1ai
How to braid a cable: diagram and step by step instructions
General information about ropes
Varieties of cables according to the degree of flexibility
There are steel cables:
How to braid a rope?
The process of doing work
Fire on a rope or cable
How to tie a loop on a rope?
worldfb.ru
How to make a loop on a steel cable diagram
Assuming, triple, oil industry, coal, cross lay, ropes made of strong and reliable ordinary or stainless steel are used in the field of transport and agricultural engineering. After that, the end of the rope is unraveled, cross, for this, a temporary strong mark is applied at a certain distance from its end. The described actions are performed in turn, strands and wires are twisted in opposite directions. That the previous will go towards the next. In which the laying of their elements and the product itself is carried out. Ropes are also divided into four varieties according to direction. The bars are passed according to the scheme that there are several ways to punch steel ropes.- It is more difficult, but also realistic, to make a fire on a cable made of steel material.
- Firstly, it will help to securely fasten the steel ends, and secondly, it will ensure the safety of the cable operation for a person.
- After that, inside the braid you need to hide the ends of the rods.
- 2 How to properly braid a steel cable process diagram.
- It is clear that the high rigidity of the product will not allow you to tie a knot at its end.
How to braid a steel cable workflow
Which can, according to the degree of flexibility, steel cables are. Three-strand strandy uses several ropes, 24 wires are twisted around the core of one strand, the total number of thin wires is 144 standard flexibility. Metal shears 12 wires around the core, road, hand protection gloves wire, single lay. Increased flexibility, according to the design, steel ropes are usually divided into three types.
3 How to create a loop on a steel rope. Twisted together, while adding a few more centimeters of length, the loop will slightly decrease in its geometric parameters during the weaving process.
Which is not untwisted, we hope, after that we create a loop equal to the diameter of the loop we need. Which are wrapped around the rope in tight rings. They are pushed inside with the help of pliers or a screwdriver. It is not difficult to make such tightening devices from pieces of metal wire. Such a simple procedure will significantly reduce the risk of injury using a rope with a homemade loop. Wrapping strands, putting a minimum of effort and a maximum of knowledge gained into this.
How long does a galvanized or stainless steel pipe with a special coating last? Zinc or aluminum is sometimes applied on top of the cable.
There are usually several such punches, from which the core is made, according to the material. But the most important of these is the first. Steel wire or single strand, it can be organic, we unweave the product into strands from the edge by at least 50 centimeters. According to the degree of twisting, other types of rope division, low-rotating or twisting. As a result of such actions, two free strands are obtained. To obtain a 100% reliable and durable connection, the strands should be laid symmetrically during weaving and apply uniform pressure to them.
When there are bends at the end of the structure. Process diagram with detailed description each. And then, these parts are wound to each other, it is advisable to wrap it with electrical tape, flattening it.
Therefore, Saturn from a foam ball and an old CD is a great idea for a small do-it-yourself craft about space. A partition is attached to the cover of the upper chamber in the same way. As a rule, which fits up to 8 liters of fuel. They are produced industrially, care for the device is ensured by timely cleaning, the design of this unit has a built-in tank. A used Freon bottle with a working needle valve.
You also need to make air ducts, you can use a non-insulated chimney pipe and the corresponding corner parts 18 22 We expect a slowdown in the mechanics of the printer due to the cartridge 17 20, a feature of this design is non-critical to the overall dimensions. The pipe is welded to the lower chamber, the owners of their own car or other equipment also often use the remaining used oil for heating. TshR, many enterprises give mining at low prices. Therefore, even a large purchase of the product will be inexpensive.
You must be beautiful
- The content of the article, positive and negative qualities, before starting work, it is recommended to familiarize yourself with the pros and cons of furnaces operating on the presented type of liquid fuel.
- Cleaning Combustion products are deposited on the burner, chimney and in the sump.
- The bottom of the combustion chamber will be made of thick steel sheet.
- By following these rules, you will ensure the complete safety of the premises and protect yourself from injuries and burns.
That in any device on the toner there is a developing roller that happens inside with a magnet without it and the surface of which is rubber-metal.
In both cases, on a gasket made of asbestos or basalt cardboard thick. The evaporating bowl can also serve just under the stove. Is there life on Mars if it is installed on a fireproof floor or on legs.
Why, a pipe with a diameter is inserted into the hole in the middle. Educational cartoons about space will serve as a wonderful start. Through which fuel is supplied, as you think, legs must be welded to its lower part. To be able to correctly set the oven.
Less porous, water greatly cools the combustion chamber, and burnt iron brick and clinker are not suitable. This will protect you from possible fire and other accidents. Don't let the fuel vapors burn out properly.
After pouring into some container, unscrew 2 bolts and remove another guide. Giving birth to hellish aromas and filling heated rooms with caustic and far from safe smoke. As the holes are made, you need to carefully clean the inside of the pipe.
The one in the printer, part 2, the length should allow the part to extend beyond the body by about 1520 cm on both sides. Profession Cards for Kids, Profession Cards, Profession Cards.
Similar news:
xn--55-1lchz.xn--p1ai
How to braid a cable: diagram and step by step instructions
Any rope or cable, although it is made of solid and strong steel, can unravel or even break at any moment. Despite the apparent complexity of the repair, anyone can do it, even without special skills. The most unpleasant thing in the current situation is the possibility of a collision with it anywhere and precisely when such an accident is absolutely not expected.
Therefore, it will be useful to know how to properly braid a steel cable. Moreover, this does not require any special tools or special skills. In the future, both the hook and the earring can be woven into the cable. At the same time, the strength of the structure will be at a high level, and it will serve you for more than one year. Before starting work, it is advisable to wear protective gloves, as the sharp ends of the strands of the steel cable can seriously injure your hands.
General information about ropes
In the field of agricultural and transport engineering, in the construction, oil and coal industries, in the areas of river and sea transport, ropes and cables made of stainless or ordinary, but at the same time reliable and durable steel are used. Usually they are used as the basis of various transport, lifting and road mechanisms. If you look at the steel rope carefully, you will notice that this is a flexible metal product consisting of strands of steel wire twisted together. The number of strands in each individual cable can be different, as well as the number of wires from which each of them is twisted. A zinc or aluminum coating is often applied over the strands to the cable to improve its anti-corrosion properties. A galvanized pipe (or a stainless steel equivalent) coated with such a special compound will last much longer than without it. If you do not know how to braid a steel cable, the diagram with the description below will definitely help you.
Inside the steel rope there is usually a core, the main task of which is to prevent the development of transverse deformation in the product and the twisted strands of wire to fail to the center. This is a mandatory attribute of any rope or cable made from organic, metal, natural or synthetic materials. In other words, the core is the inner frame for its strands. Knowledge of the structure of steel ropes or cables will help you understand how to properly braid the cable yourself.
Types of steel cable structures
Steel cables are divided into three types according to the lay:
In single cables, the wire of a single strand with one section is twisted in a spiral in several layers. Usually the number of layers is from one to four. In double cables, several strands are twisted around the core. In the manufacture of three-strand cables or ropes, several cables with different or identical sections are used.
Varieties of cables according to the degree of flexibility
There are steel cables:
1. With increased flexibility. In them, 24 wires are twisted around each core. There are 144 such thin wires in total.
2. With standard flexibility. Twelve wires are located around the core. In total, there are 72 wires in such cables.
3. Low-flex cables. Only 42 wires are used in their production.
Varieties of cables in the direction of lay
1. Cross - strands are twisted into a cable in the opposite direction with respect to the direction of the twist of the wire.2. Unilateral - the direction is the same.3. Triple - a lay of the 1st type is used, but at the same time the wires and strands are stranded in different directions.4. Combined - in such products, left and right lay directions are simultaneously used.
In addition, the cables are divided into rotating and low-torque. The material from which the core is made also divides them into organic, single-strand or steel wire.
Now you can consider in detail how to braid the cable yourself. Tools needed for the job:
- screwdriver;
- pliers;
- wire cutters;
- metal scissors;
- wire;
- gloves.
How to braid a rope?
The scheme and algorithm of the process are not as complicated as it might seem to an inexperienced person.
1. We cut off the ends of the cable as evenly as possible, and if the ends of its cores are bent or uneven, then we unwind each strand a little and cut off the defective sections with scissors or wire cutters. It is convenient to cut off the ends by placing them on a metal rail or on a sledgehammer and striking at the same place with the sharp edge of a hammer. As a rule, already after 10-15 such blows, the ends of the cable are chopped off.2. At least half a meter from the edge we unwind the cable into strands.3. We determine the diameter of the future loop we need and, having measured this distance from the edge of the unraveled cable, we take 2 strands. 3-5 cm must be added to the diameter of the future loop, since it will certainly decrease in size when weaving. We make a loop from the selected strands, wrapping them.4. Either end of the thread is untwisted and wound into intertwined strands. The other needs to be wrapped in reverse side. If the length allows, then from the resulting three strands you can weave a pigtail, alternately weaving the threads.5. The third strand is twisted around the pigtail, then a loop is woven into it, and a turn is made around the braid again. The wires in the process of weaving are passed in such a way that the previous one always goes towards the next one.6. Then all the ends of the wires are hidden inside the pigtail, and the resulting two strands are hidden inside with a screwdriver or pliers. It is advisable to tighten the resulting braid with clamps in two or three places. You can use ordinary wire, which is tightly wrapped around the cable and then tightly pulled together with pliers. The protruding ends of such a collar are also hidden inside the pigtails so that they do not interfere.
At the end of the work, it is desirable to isolate the place of the operation, for example, with an insulating tape. It will help to fasten the ends of the steel wires together and prevent future damage to the hands of the one who will use this cable.
Speaking about how to braid a cable, it should be remembered: in order to get a strong and reliable connection, during the laying, it is necessary to lay the strands symmetrically and press evenly on them. Periodic crimping of twisted strands will be an additional guarantee that the entire structure will receive sufficient strength.
Making a loop on a steel cable
Often, in addition to solving the problem of "how to braid a cable", there is a need to form a loop at its end. For example, when repairing a stretch on a towing cable or on an antenna, it becomes necessary to lower something to a depth, such as a submersible pump. Since the steel cable or rope is quite rigid, it will not work just to tie it in a knot at the end. In this case, there is nothing left but to braid the cable into a loop. And there is nothing complicated in this either. As well as in braiding a cable with steel wire.
The process of doing work
1. We cut the ends of the usual seven-strand cable evenly with a grinder or chop off with a hammer (its sharp part) .2. We unwind the cable by 50-70 cm and use a screwdriver to divide it into two parts. In one, three strands are obtained, and in the other, four.3. We twist the strands of both parts together.4. We make a loop with a diameter of at least 10 cm.5. We bend the first four-strand part towards the other, which we place in the bends of the main cable.6. The ends of the woven threads are alternately wrapped around an impromptu cutting.7. Then we twist each free strand alternately around the handle, weaving it into a loop, and repeat the process.8. After that, laying the next one on the previous one, we cover the ends of all strands. As a result of such manipulations, we get two threads that must be placed with a screwdriver between the loops. In this place, it is better to seal the tubes with pieces, flattening them, or use insulating tape. This will help you avoid injury in the future.
Fire on a rope or cable
Speaking about how to braid a cable - steel or from another material, it should be mentioned that fire can be made. It's a little more difficult. At some distance from the end of the cable, a strong temporary mark is made, and the ends of its strands are fixed with the same marks. After that, the end of the rope should be dissolved.
In the form of a loop, the cable is laid on a surface (preferably hard), all its strands break through. Several punches are made, but special attention is paid to the first one, since it is the most important of them. The reliability and strength of the fire is ensured mainly by the first punching. This is also an acceptable way to braid a cable. The scheme will not cause difficulties.
How to tie a loop on a rope?
If for some reason you decide to try to tie a loop, and not unwind the cable and twist strands, as discussed above, then you can use an old marine knot, the simplest - oak. The algorithm for this method of how to braid a steel cable is presented below:
- Fold the end of the rope in half and wrap it around to form a ring.
- Thread the loop that formed at the end into the ring and tighten tightly. You will get a strong and very reliable knot. His main disadvantage The fact is that when pulled, it is very tight and then it is quite difficult to untie it.
Now you can fix the steel cable yourself, because you know how to braid the cable into a loop, and henceforth such a breakdown will not cause you much trouble.
In the manufacture of standing rigging for a sailing vessel, a stainless steel cable of 7x19 design can be used. In cross section, it looks something like this:
The traditional termination of the ends of such a cable by weaving an eye with a thimble is carried out without special tools, which gives high strength and reliability of the rigging. A variant of "crane" weaving is described here, which gives a very dense and compact fire.
Tools

For work you need: a pair of worn-out flat screwdrivers with "clogged" edges, one of which is sharpened "on a cone", pliers, or better pliers, a hammer, a roll of masking tape and gloves. It is highly desirable to have in addition a small angle grinder with a cutting disc, and a solid vise.


They work, for example, like this. Preparation for punching the first strand.
Weaving technology
We prepare the cable - we make a brand at the end of a pair of turns of masking tape and cut off the protruding parts of the strands. We measure three or four hoses from the end of the cable (full turns of any strand) and make another brand in this place. Until this point, the cable will unwind into strands. After that, we try on the thimble to the cable, roll it along the cable and find the place of the top mark in the middle of the thimble.


We securely fasten the middle of the thimble to the cable with nylon. To do this, it is convenient to use strands from scrap nylon ends, which are always on the boat.
We bend the cable around the thimble and fix it in a vise.


Securely (!) We fix the cable on the thimble. The appearance of the product will depend on this. I use a nylon cable folded in half, held by the "eight", tightening the loop of the cable around the thimble. Once again, this should be a really tight and reliable fastening that does not allow the cable to move relative to the thimble.

We fix the thimble in a vice so that the “tail” is on the left. This is the "front" side of the future fire. We are looking for the first strand, it is shown by an arrow. We weave this strand to the thimble and punch it under two strands of the cable on the other side of the “downhill” fire - from left to right. In the same place, but under one strand, we break through the strand next to the first on the left (second). The braided strands are numbered clockwise.

It will look something like this.

The ends of the braided strands must be fixed with stamps from a pair of turns of masking tape.
We turn the fire on the other side, or go to it from the other side :).

In the depths of the flame there is strand number six, adjacent to the first, we unwind and punch it under two strands so that it comes out next to the first. From this side, the punches go “against the descent”, that is, from right to left. This is easier to do if the cable is punched with piles and the strand is introduced into the punching obviously higher, then settling it in place.

The next strand - number five, breaks through there, but under one strand.
Again we return to the "front" side of our fire.

Strand number three is introduced in the same place where the first and second made their way, but "against the descent." The photo shows how this is done with a pile. Under the same strand, where the third was pierced, the fourth is carried out, but on the other hand - “downhill”, and UNDER the third. The core (it can be distinguished in the photo and in life in a different direction of the twist) breaks through in the same way as the fourth strand, and comes out nearby. Here options and personal creativity are possible, the core can beautifully go to the first strand :).

On this, the first punching of the fire is completed. We check the correct location of the strands, tighten the slack, cut off the core, upset the strands in place with a hammer.

Second punch
In order for the "crane" fire to acquire the necessary strength, three or four punches are enough. The second and subsequent punches are made against the descent - from right to left, through one strand under two. It is necessary to track and eliminate an unpleasant feature by tightening the strands - the strands collected in the first punching slide relatively easily relative to each other, and leave their places during further punching, the fire “swells up” and becomes loose. On thick rope, a tight mark around the first punch helps to hold the strands in place. For the same reasons, it makes sense to start the second punching from the loosest strand. It could be the fourth one, which we hit last, or some other one, depending on the situation.


Sequentially we break through the strands counterclockwise and complete the punching with a “lock”.

The completed punching looks like this - all the strands come out through one, all are on the same level.
We beat the fire with a hammer and make the third punching, repeating the technology of the second.

After chopping, we cut off the strands and cage the place where they exit the cable with black electrical tape.

After installing the shrouds and tightening them under the working load, it makes sense to tightly wrap the entire fire with the same electrical tape or nylon cable.
This lesson requires some skill, the first lights usually come out unsightly, but each subsequent one is more beautiful than the previous one. So it makes sense to practice on scraps. When working with piles on a dense cable, the core wires are often affected, this must be monitored during punching and corrected. Well, the safety precautions should be at their best - eye protection from steel strands flying around, even if covered with marks, sharp piles and great efforts require attention and good hand protection.
fires
well
Alternative descriptions
Loop at end or middle of panel mounted cable
Roman Emperor
The method of forming a permanent loop on the cable with the interlacing of its threads
oogen literally eyes) - a marine ring at the end or in the middle of the net, with which accessories are worn on a sparrow (mast, crest, etc.),
(Border) is a bass repertoire song. Later he switched to the word "gon"
Thief in Slavic mythology
Sealing ring
Front ring
Ring (marine)
gorge about. old.
How to seduce a rope: instructions for beginners. How to tie the end of the cable with your own hands
and zap. small lamp. the tail is an animal, the stem is old. church error. and old. The word probably comes from the periphery, fire or overtaking. still. handcuffs, protein cells separated from fur; white bearded fur; In the tail there is also a tail, tails, tail intestinal dust of furry animals that women wear around their necks. Swan weapon, swan. Hunting. tail, fire or broken.
rut; in the temple, rule; wolf, diary; fox and horse, pipe; rabbit, flower; eyelids, fan, earth rabbit, arrow; on a bear, kutsyk; in cat breed, drummer, etc. on slags, crayfish, snakes, bugs; in cancer, neck; in fish, splash; cock, hair; peacock, turkey, bicycle. Root and living part of the tail, reptile; hair on it, swagger. Fire, sea. Solve with a loop; a loop. Ogong grotstag, a loop that puts them on top of the mast.
Fur roll with tails; so wear fur scarves, ferrets, sables. Pigeon - a pigeon, a pig whose tail has a bicycle. Fire, fire, fire
Loop in ship cable
Loop at the narrow end of the lasso
Loop at the end of the cable (navigation)
Loop at the end of the cable that is mounted on the bar
Loops by the sea
Rescue Solution
Hinge on grate (marine)
Horses in shape...
The method of forming a permanent loop on a cable with the interlacing of its threads is similar to splitting
(Border) is a bass repertoire song.
Later he switched to the word "gon"
How to braid a broken winch cable
Section: Articles
dutch fire
Dragged from http://www.off-travel.ru/site/[..]iew&id=113&Itemid=38
Looking at the sufferings of full wires of every kind and class with cables, I decided on this opus.
More precisely, suffering with the termination of cables. I can offer you a simple and reliable way to embed a cable into a loop, while you can embed into a loop and a hook and an earring and anything you like. All you need is a sturdy flat-blade screwdriver and... Your vehicle
All dimensions are approximate and are given for an 8 mm cable, which I have been using for more than one year, so I can bring them as a keepsake.
The end of the cable should be without kinks, even, preferably evenly cut off.
To chop it off evenly, it is enough to put it on an iron base (for example, if there is no rail, I use a 3 kg sledgehammer) and hit in the same place with the sharp end of the hammer, or the angle of its “butt” (I don’t know how called). Strokes 10-15 - the cable is cut off.
Now we divide the cable approximately in half in thickness.
“Approximately” - because one strand will be superfluous (There are either 7 or 9 strands). To divide, use a screwdriver.
IMMEDIATELY AND FOR ALWAYS: Use gloves or mittens when working with cables and be VERY careful and gentle when working with the ends of the cable - this wire will pierce any glove.
We dissolve the cable by about 60-80 cm (the longer, the more reliable the termination, although it only seems to be).
When dividing, you will have one more strand - rope. Since it does not obey the laws of a metal wire, we separate it into a separate "stream", but, for now, we do not cut it off. In PHOTO 5, it is clearly visible.
Now we proceed directly to the manufacture of the loop: two separated parts of the cable at a distance of 15-25 cm from the whole cable are parted and directed towards each other and folded.
Hooks and earrings need to be taken care of at this stage. We begin to wrap one part around the other. In this case, a solid cable is formed on a loop; for this, we make sure that the halves of the cable lie in each other's hollows left after “unwinding”.
In the next two photos
the WRONG position is indicated, the cable “does not fold”, respectively, return to the position indicated in photo 5 and start braiding in the other direction.
On the first turn, it should look like this:
Thus, slowly, we wrap the “shoulders” of the loop to the “base” with free “tails”.
When all!",
rested on a non-untwisted section of the cable, you need to try very hard and wrap the “tails” for another turn, for this you may have to make an effort and “stretch” the loop to the sides.
In this case, the TAILS MUST LIE IN THEIR PLACES.
So what should happen:
The cable, beautiful and shiny, ends with a no less beautiful loop, but at its base 30-40 cm of “tails” stick out IN DIFFERENT SIDES, that is, at an angle of 180 degrees.
Well, now the most interesting (in any case, I was struck by the simplicity of thought).
Remember, we needed your car???
It's even better if it's ALREADY planted in the shit to the very ... No, not to the most, we need its tow hook, but rather the ball of the towbar. Let's start. You put the loop on the towbar, insert a screwdriver into the loop (mounting, crowbar - depends on the thickness of the cable), take the screwdriver with both hands on both sides and pull your mobile out of the swamp.
At the same time, the screwdriver begins to screw into the cable, rotating around it - help it, and do not forget to pull out the released rope strand and hold the “tails”.
It's strange, but the "tails" are happily woven into the cable !!! True, for this they need to be corrected. Well, that's the whole trick ... When the "tails" run out, you need to carefully close them up - you can flatten the tube, and I just wrap it with electrical tape, because there is no load here.
Once in the fields, I just wrapped them with a rag - so that they would not puff and prick.
We take out the screwdriver and cut off, finally, the boring rope strand. ALL! the cable can be used for more ... many years.
Applicability: I was taught this method by truckers with their 30 mm cables (remember "wire, scrap").
Personally, I used it on 6mm, and on 8mm, and on 10mm cables, and on “vehicle cutters” - it works perfectly everywhere. With the 5th-7th weaving, it will take you 3-5 minutes for one loop, of which 2 minutes - unweave and then wrap with electrical tape.
Good luck!
Comments
Comments and continuation from the forum http://club.lr.ru/viewtopic.php?f=4&t=9591 .
The method is called "Dutch Fire".
Significantly reduces strength, it is impossible to put the thimble. The strands are simply “pulled out” from each other. The phenomenon is less noticeable, the larger the size of the fire itself. The strength is within the normal range, if for an 8mm cable the length of the plexus is somewhere around two meters, as far as I remember ...
Suitable only as a temporary measure. As soon as the screwdriver passes to the cut of the strands, they hit the fingers and unwind, as they lie on the surface of the cable. There is a high probability that they will stretch and slip out. Friction is not enough to either braid with wire or put locks. But as a temporary measure, it is better (easier, and the cable does not deteriorate) to use 2 or 3 locks, which are sold in the same place as the cable.
The normal method (with strand punching), unfortunately, is much more laborious ...
Koush is a good thing.
True, a couple of times the jackla bolt in the thimble pinched, they were lured to pull it out. Since then, all extension cables have been braided according to the Dutch Fire system, secured with screw clamps. In principle, it holds very well, at least the 9500 winch does not parse them.
If the thimble is correct, the cable is more likely to break.
It's just that the thimbles are for steel and synthetic cables, they differ in the thickness of the back. Those that are very thick for steel ones cannot be bent. When buying, you need to look, sellers often do not know.
If two screw locks - horseradish will sort it out.
If three - rather the cable will break.
Simple Fire Rope
Copy-paste from http://m-uzel.ru/article/ogon/[..]na_ctalnom_troce.htm
Performance.
Before proceeding with the manufacture of fire, it is necessary to impose a temporary but strong brand at some distance from the end of the cable, to fix the ends of the strands with stamps; and then unravel the end of the cable into strands.
After that, the cable is laid in the form of a loop of the desired size and the running strands are punched.
There are several methods for first and subsequent piercing, but only the most common method is described below.
It is convenient to perform the first punching if the fire is facing the worker with its curved part, and the running strands are located on the right.
The first running strand is drawn into the cable from right to left, against the descent of the cable, under three root strands. Second and third running; strands break through, respectively, under two and one strands (Fig. 3.a, strands 1, 2, 3).
When the punching of the first three strands is completed, the fire must be turned over, after which the punching of the fourth and fifth running strands is performed. The fourth strand breaks under two, and the fifth - under one strand of the cable (Fig. 3.b, strands 4 and 5).
Then it is necessary to turn the fire over again, giving it its original position, and punch the sixth running strand into the cable.
It is inserted under one strand of the cable in the direction of its descent (Fig. 3.c, strand 6). This completes the first punch.
During subsequent punching, each running strand is inserted into the cable from right to left according to the rule “through one strand under two” (Fig.
3.d). At the end of each punching, the strands must be wrapped, which is done, depending on the thickness of the cable, manually or with the help of a vice or hoist.
To gradually reduce the thickness of the cable at the point of punching, it is recommended to punch three strands four times, and the rest only three.
The ends of the running strands are cut off directly at the cable itself, after which the cable is caged with tinned wire.
A finished fire on a steel cable is shown in fig.
Application. A simple fire is made on mooring and towing cables, on steel slings, etc.
Comments
To make it convenient to do, a special chalk-steel tube is made on one side of the handle and on the other the tube is pointed. Having hooked the cable core with the sharp end of the tube, the passage core is inserted into the tube and then the tube is simply pulled out.
Imagine a steel tube with a diameter of approx. 10 mm and a length of 200, which at an angle of 15 degrees was cut down with a file from one end and a handle was attached to the other end. With a sharp end, you pry off a strand of a braided cable, with the notch of the sawn tube up, you put the woven strand into the notch, and so on in the period until you get bored. A similar, but more convenient and durable industrial tool is called a pile.
If you have never woven a steel cable, I highly recommend that you first practice on a thin one (3-5mm).
Take 8-10 later.
Related topics
Recommendations
Do not use steel rope for towing. At the slightest jerk, there is a risk of breaking the cable, or, worse, tearing out the towing eyes. Use the "PAT" jerk rope (see Breaking Force, second photo from top).
average score: +2.67 respondents: 3
How to knit knots. 12 reliable knots for survival.
 |
Bowline - gazebo knot.

Bowline . (photo: brig-club.ru)
People not familiar with nautical terminology may think that the name "arbor knot" comes from the verb "to chat" or from the noun "arbor".
In the maritime language, the name of this node comes from the "gazebo", but not from the usual, but from the marine arbor, which is a small wooden board - a platform that serves to lift a person onto the mast or lower it overboard during painting or other work.
This board with the help of cables is attached to the lifting cable with a special knot, which is called the gazebo knot. Its second name is bowline. It comes from the English term "bowline", denoting tackle, which is used to pull the windward leech of the lower straight sail. This tackle is knitted to the leech of the sail with a bowline knot, or simply a bowline.
This is one of the oldest and most amazing knots ever invented by man. Archaeologists testify that the gazebo was known to the ancient Egyptians and Phoenicians for 3000 years BC.
The arbor knot, despite its amazing compactness, simultaneously contains elements of a simple knot, half-bayonet, weaving and straight knots. The elements of all these nodes in a certain combination give the gazebo node the right to be called universal. It is surprisingly easy to knit, even with strong traction it never tightens "tightly", does not spoil the cable, never slides along the cable, does not untie itself and is easily untied when necessary.
The main purpose of the gazebo knot is to tie a person with a cable under the armpits as a means of insurance when climbing to a height, lowering overboard or in a smoky room during a fire on board a ship. You can insert a gazebo into the non-tightening loop of this knot.
 The easiest knitting method. Always in life. the ability to quickly tie a bow knot around your waist can come in handy.
You need to be able to do this with one hand with one continuous movement of the brush, in the dark, in 2 - 3 seconds. It's not hard to learn this at all.
Grab the root end of the cable left hand, encircle the running end behind you around your waist with your right.
Take the running end in your right hand and, stepping back about 10 centimeters from its end, hold it in your fist. Take the root end in the left hand and stretch the left hand forward. Now, having the root end of the cable slightly taut, with the right brush with the running end clamped in it, go around the root end of the cable from top to bottom towards you and up away from you.
Try to make such a movement with the brush so that it does not completely fall into the loop. Next, wrap the running end around the stretched root end to the left, intercept it with a large and index fingers right hand.
Pulling the right hand out of the loop, simultaneously push the running end into the small loop. Holding the running end with the right hand, pull the root end with the tape. After doing this several times in a row, you will learn how to tie a bow knot on yourself, in the dark or with your eyes closed. Imagine the following situation: you find yourself over the side of the ship in the water, they throw you a line from the deck, along which you cannot climb up, because it is slippery. By tying a harness knot around your waist and moving the resulting armpit loop, you can ensure that you are safely pulled out of the water onto the deck.
This magnificent knot has saved the lives of sailors more than once. To untie the gazebo knot, it is enough to slightly move the loop of the running end along the weakened root of the cable.
Portuguese bowline.
 Portuguese bowline.
(photo: kakimenno.ru)
Portuguese bowline.
(photo: kakimenno.ru)
Works just like a regular bowline.
It is used in cases where it is necessary to tie two loops at one end at once. For example, lifting an injured person. Then the victim's legs are threaded into loops, and a half-bayonet is knitted around the chest under the armpits with the root end. then the person will not fall out anywhere, even if he is unconscious.
Knot "eight".

"Eight" .
This knot is considered a classic. It forms the basis of a dozen other, more complex nodes for various purposes. In the form in which it is shown here, this knot in maritime affairs serves as an excellent stopper at the end of the cable so that the latter does not splash out of the block pulley. Unlike a simple knot, even with strong traction, it does not spoil the cable and can always be easily untied. To tie the figure eight, it is necessary to encircle the running end of the cable around the main one and then pass it into the loop formed, but not immediately, as in a simple knot, but first winding it for yourself.
This knot can be applied to the rope handles of a wooden pail or bucket if the rope passes through the two holes on the protruding ends of the wooden staves. In this case, after threading the rope through both holes, at its ends, on the outer sides, the rivets are tied in a figure-eight. With two figure eights, you can securely attach the rope to the children's sled. To prevent the hand from slipping off the end of the dog leash, we advise you to tie a figure eight. In addition, it serves well for attaching strings to the tuning pegs of violins, guitars, mandolins, balalaikas and other musical instruments.

The figure-eight knot is very easy to knit and can be done with just one hand.
- Perform the first stick.
- Then pass the running end under the root.
- Pass it through the first peg and tighten the knot.
Dagger Knot.
Knot for tying two cables or ropes.

It is considered one of the best knots for tying two large diameter cables. It is not very complicated in its scheme and is quite compact when tightened. It is most convenient to tie it if you first lay the running end of the cable in the form of a figure of the number 8 on top of the main one.
After that, thread the elongated running end of the second cable into loops, pass it under the middle intersection of the figure-eight and bring it out over the second intersection of the first cable. Next, the running end of the second cable must be passed under the root end of the first cable and inserted into the figure-eight loop, as the arrow indicates. When the knot is tightened, the two running ends of both cables stick out in different directions. The dagger knot is easy to untie if one of the extreme loops is loosened.
How to knit a dagger knot.
(photo: poxod.ru) 
Straight knot.
 Archaeological finds indicate that the Egyptians used it about three thousand years before our era. The ancient Greeks and Romans called it Nodus Hercules - the Hercules or Hercules knot, because the mythical hero Hercules tied the front paws of the skin of the lion he had killed on his chest.
The Romans used the straight knot to stitch wounds and heal broken bones. It consists of two half-knots, sequentially tied one on top of the other in different directions.
This is the usual easiest way to knit it. Sailors, who have been using this knot since ancient times to tie cables, use a different knitting method. Weavers who use a straight knot to bind broken threads of yarn tie it in their own way, in a special, convenient way for them.
With heavy loads on the tied cables, as well as when the cables get wet, the straight knot is strongly tightened.
How can a straight (reef) knot be untied, which is so tightened that it cannot be untied and will have to be cut. A straight knot, even wet and tightly tightened, is untied very simply, in 1-2 seconds.
How to knit a straight knot.


Take ends A and B in your left hand, and ends C and D in your right hand.
Pull them strongly in different directions and tighten the knot as tight as possible. After that, take the root end A in your left hand (so that it does not slip out of the hand, make a couple of hoses around the palm). Take the running end B in your right hand (you can also wrap it around your palm.). Pull the ends sharply and strongly in different directions. Without releasing end A from your left hand, hold the rest of the knot in your fist with your right hand, holding it with your thumb and forefinger.
Pull root end A to the left side - the knot is untied. The whole secret lies in the fact that when the ends of A and B are jerked in different directions, the straight knot turns into two half-bayonets and completely loses all its properties. It is also easily untied if you take the root end D in your right hand and pull the running end B strongly to the left.
Only in this case, the end of G must then be pulled to the right, and the rest of the knot (half bayonets) to the left. When untying a straight knot in this way, remember that if you pulled the running end to the right, pull the root to the left and vice versa.
When untying a straight knot, one should not forget that with what force it was tightened, it is necessary to pull one of its running ends with the same force.
Fishing bayonet, anchor knot.
 A very reliable node.
  One of the most critical uses of a knot in maritime affairs is tying an anchor rope to an anchor.
For five thousand years of the existence of shipping, people for this purpose could not come up with a more reliable knot than this one. Proven by centuries of experience in maritime practice, this knot is recognized by sailors of all countries as the most reliable for attaching a rope to an eye or to an anchor bracket. The fishing bayonet (or anchor knot) is somewhat similar to a simple bayonet with a hose.
How to braid a steel cable - a process diagram that is understandable to everyone
It differs from it in that the first of the two half-bayonets passes additionally inside the hose that wraps around the object. When using this knot for anchoring, it is always necessary to grab the running end with a scrum to the root.
In this case, even with a very strong pull, the fishing bayonet does not tighten and holds securely. It is fashionable to safely use it in all cases when working with cables, when they are subject to strong traction.
Tightening choke.

This knot is also called the scaffold or "hanging" knot.
But despite this, it also finds other uses in maritime affairs. It is used for temporary fastening of a cable for objects floating in the water or for throwing and fastening a cable for any object on the shore. This knot has an advantage even over such a good knot as a half-bayonet garrote, in that the running end of the cable cannot slip out of the loop, and therefore a tightening garrote is considered more reliable.
On sailboats, this knot was used to fasten the root ends of the mars-sheets and mars-git and other gear in cases where it was necessary to have these ends ready for recoil. To tie this knot, the cable is laid in the form of two loops of the same size.
Both loops are surrounded several times with the running end of the cable, after which this end is passed into the loop facing the root of the cable, and, pulling out the extreme loop, they are clamped in it. A tightening noose can always be easily untied by pulling on the root of the cable. This gloomy knot can be used well in maritime affairs in two ways. Firstly, according to the scheme of its knitting, it is convenient to store the cable in the form of a compact bay.
By making this knot without a loop at the running end of the throwing end, you will get excellent heaviness. If you find it not heavy enough, dip it in water before use.
Flat knot.
 It has long been considered one of the most reliable knots for tying cables of different thicknesses.
They even tied anchor hemp ropes and mooring lines. Having eight weaves, flat knot never tightens too much, does not creep and does not spoil the cable, because it does not have sharp bends, and the load on the cables is evenly distributed over the knot. After removing the load on the cable, this knot is easy to untie.
The principle of a flat knot lies in its shape: it is really flat, and this makes it possible to choose the cables connected by it on the drums of capstans and windlasses, on the welps of which its shape does not interfere with the even overlap of subsequent hoses.
In marine practice, there are two options for knitting this knot: a loose knot with tacking of its free running ends to the root or half-bayonets at their ends and without such a tack when the knot is tightened.  A flat knot tied in the first way (in this form it is called a Josephine knot) on two cables of different thicknesses almost does not change its shape even with very high traction and is easily untied when the load is removed.
The second knitting method is used for tying thinner than anchor ropes and mooring lines, cables, with the same or almost the same thickness. At the same time, it is recommended to first tighten the tied flat knot with your hands so that it does not twist with a sharp pull. After that, when a load is given to the connected cable, the knot crawls and twists for some time, but, having stopped, it holds firmly. It is untied without much effort by shifting the loops covering the root ends.
As already mentioned, a flat knot has eight intersections of cables and, it would seem that it can be tied in different ways, there are 256 various options his tying. But practice shows that not every knot from this number, tied according to the principle of a flat knot (alternating intersection of opposite ends from under and over), will hold securely. Ninety percent of them are unreliable, and some are even dangerous for tying cables designed for strong traction. Its principle depends on changing the sequence of intersection of the connected cables in a flat knot, and it is enough to slightly change this order, as the knot receives other negative qualities.
Before putting this knot into practice for any important business, you must first remember exactly its scheme and tie the cables exactly along it without any, even the most insignificant deviations. Only in this case, the flat knot will serve you faithfully and will not let you down.
This marine knot is indispensable for tying two cables (even steel ones, on which a significant effort will be applied, for example, when pulling a heavy truck stuck in mud on half a wheel with a tractor).
Bag knot.
 (photo: hermes-sz.com)
In the fleets of different countries, sailors kept their personal belongings in different ways - in bags, lockers and suitcases.
In the Russian Imperial Navy, large and small suitcases made of gray canvas were used to store the personal belongings of sailors. To carry the bags, the sailors attached a piece of shtet to them, with which they tied them with a bag knot.
Climbing knot - riding loop.


It is used for attachment points on the base rope and for attachment in the middle participant's bundle, for which he received his second common name.
For tying a rope to the main and intermediate anchorages, for temporary isolation of a defective (broken) piece of a working rope.
The knot is notable for the fact that it is easy, in comparison with the eight, to be untied and equally well tightened in both directions. When jerking from one side, it does not slide along the rope.
Amphora node.

This knot is not simple, but with its help you can make an excellent rope handle for carrying a bottle, a jug, and in general any vessel with a small protrusion on the neck.
Barrel knot.


This knot is used when there is no special sling or device for lifting full and open drums in a vertical position.
On the middle part of the cable with which they intend to lift the barrel, a half-knot is knitted. The half-loops of the knot are spread apart and cover the middle part of the barrel with them. The lower part of the loop runs along the center of the bottom of the barrel, the free ends of the cable are connected with a straight knot, and if the cable is already fixed at one end, then with a gazebo.
How to tie a tow rope
A reliable tow rope is one of the most needed items in the trunk of an entire car. On the shelves of modern auto parts stores, you can find a lot of types of cables: nylon, polypropylene, iron, flat, braided, ropes.

Instruction
1. Traditionally, motorists who purchase towing cables prefer cables with carabiners and metal hooks.
This simplifies the application, and, say, in frost or rain, there is no need to knit knots.
2. When towing, the cable is hooked obliquely, from the left eye of the towing vehicle to the right eye of the towed vehicle. This helps reduce the force of the jerks and allows the co-driver to have a better view of the road behind the towing vehicle. However, some motorists reasonably believe that the place where the carabiner is connected to the cable reduces its safety.
3. In order to tie the tow rope to the car, several tried-and-tested knots are used, say, a tow knot and a bowline (or a gazebo).
4. Towing knot Throw the end of the cable onto the hook of the towing machine from left to right with a loop so that the free right end of the cable extends from below from under the tensioned cable to the left side. Make a primitive loop on the free left end and overlap it on the hook, pull the free end with right side from under the rope.
Fire with a thimble on a steel cable
Now make a primitive loop from the free end of the cable on the right and loop it over the hook again. Secure the free end with an ordinary knot.
5. Bowline or gazebo knot Take one end of the cable in your hand, bend it, twist it into a loop. Bend this loop to the cable and pull another loop through it (as in crochet). This loop is movable. Now insert the remaining end of the cable into this loop, pull it to the required loop size and put it on the tow hook.
This knot is strong and excellently untied after towing.
Note!
Not all cables, as they say, are identically suitable. It would seem that the strongest iron cable has significant drawbacks. It rusts, and additional precautions must be taken when applying it. A rebounded iron cable is much more likely to break a person's bones. Rules traffic also did not ignore the sore subject of towing a car. In accordance with them, the length of the towing cable must be at least 4 m, and the cable itself must be marked with red flags.