Witch- this is the character class in Path of Exile, based on pure intellect, making her the undisputed master of Charms and Elements. She uses the powers of pure energy to destroy her enemies from a distance. Her terrifying will surrounds her with a shimmering barrier against physical and magical attacks, a barrier that must be broken before the witch herself becomes vulnerable. In addition to her incredibly damaging spells, the Witch can harm her enemies with curses and summon undead creatures to her will to aid her. The witch's starting stats are 14 Strength, 14 Dexterity and 32 Intelligence.
Witch related equipment: Crowns, Robes, Cloth Gloves, Slippers/Boots and Spirit Shield.
Ascension Classes:
Necromancer: Basically, the Necromancer is focused on calling minions. She can enhance the defense and attack of minions, as well as her own auras, thus strengthening her minions. However, the Necromancer is not limited to pure summoner builds, as the Mistress of Sacrifice skill can be used to greatly enhance the character itself.
Elemental Mage: Elemental Mages specialize in everything related to elemental damage. They use intermittent but powerful elemental damage buffs. They can also focus on applying elemental effects through the use of the Bringer of Ruin notable, allowing all three elemental effects to be applied to enemies even when using Chaos Damage or Physical Damage.
Occultist: Choosing the Occult class is a good choice for those Witches who specialize in dealing chaos damage or curses. The Curse skill significantly increases the effectiveness of curses, and Lamp of the Void and Blossom of Sin seriously affect chaos damage. Of great value for builds that use an energy shield is the branch with the important skills Stronghold of Evil and Unholy Guardian. For those who are looking for opportunities to generate energy charges, there is the Forbidden Power skill.
Bandit is the character class in Path of Exile, based on a combination of Dexterity and Intelligence. He prefers fast weapons (such as daggers or claws) to quickly move across the battlefield while laying traps and mines and controlling the progress of the battle. He is always more cunning than his opponent and carries out blows with medical precision, dodging attacks.
Bandit is one of the more difficult character classes to play due to its low armor, but it easily makes up for this if you handle the character skillfully. His hit-and-run fighting style, dictated by his natural evasion and energy shield, rewarded him with precise coordination of attacks, skills and trap-setting. The initial characteristics of the Bandit: Strength - 14, Dexterity - 23, Intelligence - 23.
The most suitable outfit for a Bandit: Masks, Jackets/Jackets/Jackets/Garments, Gloves, Boots and Barbed Shields.
Ascension Classes:
Murderer- a class focused on offense, using critical hits and energy charges to cast spells and attacks. The class tree also features options for damage over time and chaos damage.
Saboteur- the class is aimed at improving the skills of traps and mines with useful bonuses, but not such as direct damage or increased critical strike. This class also uses Blind as an offensive and defensive mechanic.
Dodger- a universal class that allows you to use a combination of intelligence and agility, mana regeneration, has great maneuverability and deals gradual damage.
Huntress.
Huntress– character class in Path of Exile, based on agility that suits her slim and graceful figure. She is nimble and fast, dashing in and out of combat and delivering powerful critical hits that often strike opponents in a single move. Her natural quickness gives her a good ability to avoid damage, and she tends to wear clothes made of light leather or fabric. She is very skilled with ranged weapons, but her strikes are as deadly as those of a sword wielding warrior on the battlefield. The initial characteristics of the hunter: Strength – 14, Dexterity – 32, Intelligence – 14.
The most suitable outfit for a hunter– these are Hats/Hoods, Leather Jackets/Vestments/Half-Caftans, gloves made of skins, boots made of skins and bucklers.
Ascension Classes:
Sniper- The class is the most attack oriented and focuses on projectile damage and area of effect. Obviously, this class is suitable for archers, but most of its modifiers apply to any type of projectile. This means that most attacks and spells that use projectiles will also benefit from this class.
Raider- The Reaver class focuses on increasing the duration of buffs by gaining Frenzy Charges, Combat Rush, or Wraith Form through kills. A character can specialize in one of the effects, strengthening it, and also significantly increase their speed and evasion. Contrary to the depiction of this class, it does not contain melee-only modifiers, and also does a good job of enhancing ranged attacks.
Pathfinder- For the Pathfinder class, the main emphasis is on bottles, the use of which can provide additional offensive or defensive bonuses. The Pathfinder is a flexible class; his skill tree allows him to use both normal attacks and spell attacks with equal effectiveness, regardless of any type of damage (elemental, physical or chaos).
Gladiator.
Gladiator is the character class in Path of Exile, based on a combination of strength and agility, which makes him unrivaled in dealing damage and dodging attacks. He can use a shield with equal effectiveness or strike with powerful two-handed or dual weapons. His strong hands are capable of pulling the most powerful and deadly bows. His highly honed reflexes give him feline agility to dodge and parry attacks, be it arrows or swinging an axe. The gladiator is a dangerous opponent and his reputation as a ruthless killer is well deserved. The initial characteristics of the gladiator: strength - 23, agility - 23, intelligence - 14.
The most suitable equipment for a Gladiator: Helmets, Scaled Armor/Brigandines/Doublets/Plate Armor, Scaled Gloves, Scaled Sabatons, and Round Shields.
Ascension Classes:
Slasher- The Slasher class focuses on health drain and stun. Due to pass nodes that increase attack speed and damage with two-handed weapons, this class is well suited for offensive skills using two-handed weapons and bows.
Dimacher- The Dimacher class is suitable for characters who use dual weapons or a combination of one-handed weapons and a shield. The skill tree makes it possible to focus on the use of bleeding and improving blocking.
Champion- The Champion class is defensive and is most suitable for “tank” characters due to provoking enemies and the strengthening effect. In addition, he can use an aura that increases damage to himself and his allies. Passable nodes of the Champion tree allow you to increase your armor and evasion quite well.
Savage– character class in Path of Exile, is strength based which means it has good hit resistance and is even better at dishing out punishment. His melee skills cover a wide range of attacks, from high single target damage to devastating area effect. This powerful man enhances his impressive physical arsenal with a variety of screams and cries, skills that rally allies and strike fear into the hearts of opponents. Savage's initial characteristics: Strength - 32, Dexterity - 14, Intelligence - 14.
The most suitable equipment for a Savage: Helmets, Plate, Gauntlets, Leggings and Long Shields.
Ascension Classes:
Conqueror- The Vanquisher class is based on defense, providing physical damage reduction through armor and stamina charges, protection from slows and stuns, and accuracy.
Berserk- The Berserker's skill tree is built around buffs when getting hit. The effects are based on the "recently" mechanic, and to maintain them you must constantly be in the thick of battle. Buffs include Life Leech, Attack Speed, Movement Speed, and Damage Reduction. Warbringer amplifies the player's war cries. The class is intended for use on characters who develop towards attacks.
Leader (Gay.)- The Leader class specializes in dealing fire damage. The Warchief can deal fire damage on its own, or by using totems that receive upgrades from defense nodes on the class tree.
Priest is the character class in Path of Exile, based on a combination of Strength and Intelligence. It's the perfect balance of brawn and brains. He is a skilled fighter, trained in the use of a variety of weapons, from sharp sabers to heavy two-handed maces. He can equally comfortably carry a shield, both for additional protection and for dealing lethal damage. In combat, this religious warrior specializes in dealing high damage with a wide range of magical abilities. The Priest is adept at reducing the power of punishments, and he is happy to be on the front lines, serving as a martyr and protector for his distant allies. Initial characteristics of the Priest: Strength – 23, Dexterity – 14, Intelligence – 23.
The most suitable equipment for a Priest: Chain Mail Coifs/Helmets, Chain Mail/Bailans, Half Chain Mail/Chain Gloves, Half Chain Mail/Chain Boots and Kite Shields.
Ascension Classes:
Inquisitor- Inquisitors specialize in elemental damage. Among other things, this class takes advantage of critical hits, ignoring elemental resistances, or buffs from creating consecrated ground. Most of the Inquisitor's skills are compatible with both attacks and spells.
Hierophant- The Hierophant avoids direct confrontation and relies on the strength of totems and fortitude. The class can effectively use totems and gain the ability to summon up to 2 additional totems at the cost of less damage from each totem. Hierophant is also great for builds that use a lot of mana, making it their defense. Priests who use multiple skills at once can take the Enlightened Devotion skill to enhance their 4-link items with one of three powerful effects.
Defender- The Defender is an excellent choice for the Priest who has chosen the support path. He has passive skills that will greatly benefit several party members. Even as a solo character, Defenders themselves can benefit from their choice of defensive passives.
Noblewoman.
Noblewoman- this is the character class in Path of Exile.
The daughter of corrupt nobles, the Noblewoman was banished to Wraeclast for murdering her husband on their wedding night. She combines all three key characteristics - Strength, Dexterity and Intelligence, which place her in the center of the passive skill tree. This unique position allows for almost any build, but at the same time loses some of the specialization that the other six classes have.
Due to the complexity of its development, it is not available to new players. The player must rescue the Noblewoman, she can be found in the last area of Act 3, right before the battle with the final boss of this act. Killing the boss is not necessary to free the Noblewoman. This can be done in the Overworld (in any league) to access this character class.
Initial characteristics of the Noblewoman: Strength - 20, Dexterity - 20, Intelligence - 20. Her starting skill is Phantom Throw. There is no most suitable uniform for her. Ultimately, you need to choose a specific armor type based on your build selection and passive/stat selections in the skill tree.
Ascension Class:
Ascended- The Ascendant provides the player with flexibility not available in other classes, allowing the player to select passive skills that build upon other Ascendancy classes. These passive skills provide the same effects, but with reduced power, and you can only choose one skill from each Ascendancy class, up to a maximum of two.
You are free to choose: whether to take skills from different classes, or continue investing in the chosen class, and get the opportunity to split your passive skill tree, starting from the starting point of one of the base classes.
Unlock noblewoman:
To unlock the character, find the noblewoman on the Upper Floors of the Finger of the Lord and free her from her cage.
After release:
Noblewoman: You and I are from different worlds, but exile has erased the boundaries.
In Oriath I was considered a wonderful child, but here flattery and titles are not worth even withered leaves. Talent, exile, monster, hero... Here the value is in deeds, not words. In Wraeclast, your name means as much as you put into it with your actions.
Thank you. You give me the most important thing - the freedom to complete what I started.
By freeing the noblewoman, you will receive the achievement:
Before the battle begins, shells must be loaded into the tank. Without them, the tank will not be able to fire and, accordingly, will be useless. The number of shells that can be loaded into a tank depends on the type of tanks in WoT, or more precisely on the type of gun (caliber) and turret. Different types of projectiles have different properties.
Regular shells
Armor-piercing (AP) shells
Armor-piercing shells are the main type of shell that can be fired by almost any weapon. This projectile deals damage only if the armor is broken enemy (accompanied by the messages “Breakthrough” and “There is a penetration”). He can also damage modules or crew, if it hits the right place (accompanied by the messages “Hit” and “There is a hit”). If the penetrating power of the projectile is not enough, it will not penetrate the armor and will not cause damage (accompanied by the message “Did not penetrate”). If a projectile hits the armor at too sharp an angle, it will ricochet and also cause no damage (accompanied by the message “Ricochet”). High-explosive fragmentation shells - have greatest potential damage, But insignificant armor penetration. If a shell penetrates the armor, it explodes inside the tank, causing maximum damage and additional damage to modules or crew from the explosion. A high-explosive fragmentation projectile does not need to penetrate the target's armor - if it does not penetrate, it will explode on the tank's armor, causing less damage than if it penetrates. The damage in this case depends on the thickness of the armor - the thicker the armor, the more damage from the explosion it absorbs. In addition, the damage from explosions of high explosive shells is also absorbed by tank screens, and the slope of the armor is also not affected, nor is its given value affected. High-explosive fragmentation shells can also damage several tanks at the same time, since the explosion has a certain radius of action. Tank shells have a smaller high-explosive radius, while self-propelled gun shells have a maximum radius. It is also worth noting that only when firing high-explosive shells is it possible to receive the Bombardier award!Sub-caliber (AP) shells
Sabot shells are the main type of shells for most medium tanks of the 10th level, some medium tanks of the 9th level and light tanks T71, M41 Walker Bulldog, as well as M4A1 Revalorisé, IS-5, IS-3 with MZ, T26E5. The principle of operation is similar to armor-piercing. They are distinguished by increased armor penetration and a higher projectile speed, but they lose more penetration with distance and have less normalization (they lose effectiveness more when fired at an angle to the armor).Improved projectiles
Sub-caliber (AP) shells
Sabot shells are the most common premium shells in the game, installed in almost any weapon. The principle of operation is similar to armor-piercing. They are distinguished by increased armor penetration, but have less normalization (they lose more effectiveness when fired at an angle to the armor).Cumulative (CS) projectiles
What are cumulative projectiles? These are improved shells for many tanks in the game, with the exception of shells for the top gun of the T49 light tank and the Ikv 103 tank destroyer, which are not improved. Their penetration is noticeably higher than that of standard armor-piercing shells, and the damage they cause is at the level of armor-piercing shells for the same weapon. The penetration effect is achieved not due to the kinetic energy of the projectile (as with an AP or BP), but due to the energy of the cumulative jet formed when an explosive of a certain shape is detonated at a certain distance from the armor. They are not subject to the normalization rule, three calibers and they do not lose armor penetration with distance, but quickly lose armor penetration when hitting a screen.A detailed device of the cumulative projectile is presented on Wikipedia.
High-explosive (HE) projectiles
These shells differ from conventional high-explosive fragmentation shells by either a larger explosion radius (when playing on self-propelled guns) or increased armor penetration (HESH shells on some British guns). It is also worth noting that only when firing high-explosive shells is it possible to receive the Bombardier award.Armor-piercing (AP) shells
Armor-piercing premium shells are found on several vehicles in the game and differ from regular armor-piercing shells or have increased armor penetration for the same damage ( 152 mm M-10 ( "type":"Cannon", "mark": "152 mm M-10", "data": ( "Level": "VI", "Penetration": "110/136/86 mm", "Damage" : "700/700/910 units", "Average damage per minute": "1750/1750/2275 units/min", "Rate of fire": "2.5 rounds/min", "Reload time": "24 s", " Spread": "0.6m/100m", "Adjustment": "4s", "Weight": "2300kg", "Price": "60000" ) )) and most guns of Japanese tanks, or less armor penetration with greater damage ( 130 mm B-13-S2 ( "type": "Gun", "mark": "130 mm B-13-S2", "data": ( "Level": "VIII", "Penetration": "196/171/65 mm", " Damage": "440/510/580 units", "Average damage per minute": "1650/1913/2175 units/min", "Rate of fire": "3.75 rounds/min", "Reload time": "16 s" , "Spread": "0.38 m/100m", "Convergence": "2.9 s", "Weight": "5290 kg", "Price": "147000" ) )).Penetration rules for cumulative projectiles
Update 0.8.6 introduces new penetration rules for cumulative projectiles:
- The cumulative projectile can now ricochet when the projectile hits armor at an angle of 85 degrees or more. During a ricochet, the armor penetration of the ricocheted cumulative projectile does not decrease.
- After the first penetration of the armor, the ricochet can no longer work (due to the formation of a cumulative jet).
- After the first penetration of the armor, the projectile begins to lose armor penetration at the following rate: 5% of the armor penetration remaining after penetration - per 10 cm of space traversed by the projectile (50% - per 1 meter of free space from the screen to the armor).
- After each penetration of the armor, the armor penetration of the projectile is reduced by an amount equal to the thickness of the armor, taking into account the angle of inclination of the armor relative to the flight path of the projectile.
- Now the tracks also serve as a screen for cumulative projectiles.
Changes to ricochet in update 0.9.3
- Now, when a projectile ricochets, it does not disappear, but continues its movement along a new trajectory, and 25% of the armor penetration is lost for an armor-piercing and sub-caliber projectile, while the armor penetration of a cumulative projectile does not change.
Projectile tracer colors
- High-explosive fragmentation - the longest tracers, noticeable orange in color.
- Sub-caliber - light, short and transparent tracers.
- Armor-piercing - similar to sub-caliber ones, but more noticeable (longer, lifetime and less transparency).
- Cumulative - yellow and thinnest.
What type of projectile should I use?
Basic rules when choosing between armor-piercing and high-explosive fragmentation shells:
- Use armor-piercing shells against tanks of your level; high-explosive fragmentation shells against tanks with weak armor or self-propelled guns with open deckhouses.
- Use armor-piercing shells in long-barreled and small-caliber guns; high-explosive fragmentation - in short-barreled and large-caliber. The use of small-caliber HE shells is pointless - they often do not penetrate, and therefore do not cause damage.
- Use high-explosive fragmentation shells at any angle, do not fire armor-piercing shells at an acute angle to the enemy's armor.
- Targeting vulnerable areas and shooting at right angles to the armor are also useful for HE - this increases the likelihood of breaking through the armor and taking full damage.
- High-explosive fragmentation shells have a high chance of inflicting small but guaranteed damage even if they do not penetrate armor, so they can be effectively used to knock down a grapple from the base and finish off opponents with a small margin of safety.
For example, the 152mm M-10 gun on the KV-2 tank is large-caliber and short-barreled. The larger the caliber of the projectile, the more explosive it contains and the more damage it does. But due to the short length of the gun barrel, the projectile flies out at a very low initial velocity, which leads to low penetration, accuracy and flight range. Under such conditions, an armor-piercing projectile, which requires an accurate hit, becomes ineffective, and a high-explosive fragmentation should be used.
Detailed review of shells
|
|
Imagine the gloomy and oppressive atmosphere of dark dungeons, tombs and abandoned cemeteries. Those who played the legendary Diablo 2 will do this with ease. Path of Exile has rightfully become the heir to this game, preserving, and in some cases increasing all the best.
Features of building construction
Beginner players think that the build in Path of Exile is only a tree of passive skills. In fact, a build is a combination of passive skills (wood), active skills, auras, defensive skills and a set of items - weapons, armor and jewelry. At the beginning of the game, you choose an active skill. It will become your main weapon for killing thousands of monsters.
Having chosen the skill that suits your play style, decide what and who you want to become in the future. For example, specialize in fast attacks and inflicting elemental effects, frequent crits, strong hits with a long-lasting stun effect, and so on. After that, choose a starting point in the passive skill tree, that is, essentially, a game class.
The more passive skills for health and defense you take, the greater your chances of surviving in an extreme situation.
When compiling a build, consider the importance of each point spent. The worst skills in the tree are those that give +10 to one of the basic characteristics. However, you can’t do without them, but try to take them less often. Take the shortest paths to large circles (nodes) that enhance several characteristics, avoiding +10 skills if possible. The largest mugs radically change the gameplay and you need to take them only after realizing their effects. For example, there is a skill that makes you invulnerable to chaos damage, but at the same time your HP becomes equal to one.
Here is an example of an economical and wasteful allocation of passive skills. Compare these pictures.

Economical skill tree

Wasteful skill tree
Don't forget about your health. The more passive skills you take that increase your defense and health, the greater your chances of surviving in extreme situations, which occur very often in the later stages of the game. For HP builds, take at least 150% increase in life.
Mechanics of active and passive skills
All active and passive skills have their own keywords with which you can navigate what exactly is needed to strengthen it. For example, let's look at one of the Molten Strike power skills.

At the top of the window, immediately after the name of the skill, its key features are displayed:
- Fire (Fire and elemental damage);
- Projectile (Projectiles, that is, everything that enhances the damage from projectiles will also enhance this skill);
- Attack (This is an attack skill, which means it is enhanced by support stones for attack skills);
- AoE (Skill hits area);
- Melee (Melee attack).
This skill has two phases - impact and flying projectiles. Some of the key skill features (and the skills that enhance them) only work in one phase. For example, a strengthening stone that increases the number of projectiles only works in the second phase, and a stone that allows projectiles to pierce through does not work at all. Which is easily explained - the stones do not fly along, but from top to bottom, which means there is nothing for them to break through.
The strengthening stone, which is shown in the picture below, affects both phases of our skill.

Enhancement stone that increases elemental damage.
Molten Strike converts 60% of physical damage to fire. If you increase physical damage in the passive skill tree, then the percentage of fire damage increases accordingly.
Some of the key skills (and skills that enhance them) only work in one of the phases.
Passive skills work much the same way. For example, the large passive skill Point Blank increases damage from projectiles at close range by 50%, and reduces damage from long range by the same 50%. Naturally, this skill will only harm archers, but for Molten Strike this is a good boost, because its stones fall near the character.
![]()
Point Blank is a buff that causes those falling from Molten Strike to deal 50% more damage.
Quests and rewards for them
Quests are very important in order to survive in this world, and at the same time get an initial set of active and supporting stones and other nice little things. Some tasks also give free passive skill points, so you need to complete them all, especially for beginners. The tasks that you can safely skip are those that give skill reset points. Ignore these quests if you are confident in your passive skill tree.
In the mission on Tidal Island you need to find and return a chest with medical equipment. As a reward, take a potion that increases running speed.
One of the most important tasks at the beginning of the journey is a visit to the island of Tidal. You need to find and return a chest with medical equipment. Beginners always take as a reward potions to restore lives or mana, which drop from every tenth monster. It’s more correct to take the potion that gives +40% to running speed. It will save your life, and in addition, it will speed up the process of leveling up and clearing locations.
Clothes: what to choose and what to wear
In the first or second act, the most important indicator on armor will be HP. By the end of the second act, look for equipment with resistance to fire, lightning and ice. In this case, you don’t have to pay attention to what kind of armor it is and what class it is needed for.
The main parameter of a weapon is DPS.
As for weapons, the main parameter is DPS. It is not necessary to count it. Just look at its value in the character window with one weapon, change it and compare it with another. However, calculating DPS is quite simple - using the formula
(minimum_damage + maximum_damage)/2 * attack_speed.
Important characteristics for magic builds are spell damage, elemental damage, as well as their casting speed and crit chances. D For physical ones - increased and additional physical damage, a chance to inflict a critical hit, and for summoner, trapper and totem builds - also elemental damage, attack speed and crit.
Nodes on the tree of passive skills increase elemental damage with weapons (increased weapon elemental damage). They are only active when using weapons. When casting spells, damage is not increased.
There is no currency in Path of Exile and all trade is carried out by barter.
When leveling up, pick up only yellow things and orbs. Of the blue loot, you should only pay attention to rings, pendants and belts. As soon as you get some identification scrolls, take two rings for the maximum number of lives, they will greatly increase survivability.
Economy and traders
There is no currency in Path of Exile and all trade is carried out by barter. It is important to constantly fill your chest with valuable things to increase your wealth. It is very advisable to enter the city at each level and check the goods from the merchants; sometimes they sell very good things for next to nothing. For example, if an item with three connected multi-colored sockets appears on sale, take it and exchange it with the merchant for a more expensive orb.

A piece of equipment with three linked multi-colored sockets

There are a great many different build guides on the Internet. You yourself have probably tried to create your own build. The proposed guide helps to sort out all aspects of the build. He will help you understand the philosophy of building your own or someone else's build. According to the author, you will be able to build a build suitable for a comfortable game, at least until the 3rd act of Merciless difficulty, and with minor changes to it, you will be able to complete the game to the end.
I. Damage type
First you need to understand the types of damage that are present in the game.
1. Physical damage: it is dealt by most monsters, including Exploding Suicides. Can be reduced by armor or Endurance charges. Tip: Molten Shell gives a huge amount of armor. All physical attacks can cause stun (a state where you can't do anything).
2. Elemental Damage: includes fire, ice and lightning. You can find out the type of damage a monster does by hovering over it and looking at its description. With the exception of some unique ones, monsters deal elemental damage from a distance. It can be reduced by elemental resistance (up to 75% without various nuances). You can exceed the 75% threshold with the Elemental Adaptation passive and the Resistance Flask.
Elemental damage consists of two parts: main damage and special effect. Fire causes burning (30% of fire damage). Ice causes slowdown (attack and movement speed) and freezing (same as stun). Lightning can cause shock (+40% per effect, maximum 3 shock effects).
3. Chaotic Damage: This damage type ignores armor, energy shield, and elemental resistances. The tree of passive skills contains skills to protect against chaos. You can also increase resistance with items and flasks. Sometimes this type of damage cannot be avoided (monsters with an aura that deals damage over time). Instead of collecting resistance, you can collect a lot of health, its recovery/stealing, and try to kill monsters before they kill you. Or you can make a build for Chaos Inoculation (leaves the character 1 HP and makes him immune to chaotic damage).
II. The basis of any build: survivability.
Why survival?
- You can't deal damage while dead.
- Your damage is 60% from items, 30% from resilience, and 10% from passives. Don't ask what it is or where these numbers come from, I'll explain later.
- You are your own enemy, as there are monsters with damage reflection. Until you establish a balance between defense and attack, you will kill yourself.
So, 3 types of damage. You need to make a build in such a way that you can defend against all three. The choice of defense style depends mainly on your preferences - passive skills and character class. The more you get hit on the head, the more points you need to invest in defense.
Melee: All classes, except the witch (it is difficult to gain both strength and agility), can effectively fight in close combat. However, they all differ in their style of defense.
Templar: The starting position of this class is closest to passive skills for improving shield blocking and increasing resistances. It is also close to the Marauder and Witch branches, so you have 3 options:
- Hybrid: scepter/magic wand + shield + a lot of health + armor items + block improvement + Endurance charges + Elemental Adaptation. In general, you use passive skills from your tree and marauder, some from the witch area.
- Power: scepter/mace + shield or two-handed weapon + a lot of health + health restoration + maximally improved Endurance charges + armor items + Elemental Adaptation + Resolute Technique. This option is for a melee Templar who uses passive skills from the Marauder tree.
- Intellectual: scepter/magic wand + things with Energy Shield + a lot of energy shield + Chaos Inoculation. Any build focused on ESH is not very suitable for low levels, because... a lot of electrical power is required, and this is difficult to achieve at the beginning. In general, you will have 0 armor, little health, and zero damage reduction. Use this option at high levels where it shows its full strength.
- It's also possible to make a Templar with a bow, but you'll find yourself having to look for agility wherever you can to upgrade your stones.
Witch: this class offers the fewest options for survivability. There are several weak passive skills for health (most at +8%). No health recovery/steal, low amount of strength. Therefore, it is logical to use a build with ESH and Chaos Inoculation. However, you can easily use a health-based build if you summon all sorts of evil spirits.
Archer and duelist: these two classes are similar in equal proximity from the starting point to passive skills for life, resistance, Blood Magic, Iron Reflect, Vaal Pact. Typically, builds for these classes use Iron Reflex, which in principle can provide a greater survivability bonus than pure armor + shield for a Templar and Marauder. But in the end, this option may turn out to be worse due to the refusal to use Endurance charge. The following build options are available:
- With the theft of health. Blood Magic + Vaal Pact + Life Leech support. Suitable for both melee and bow play.
- No health loss. Suitable only for playing with a bow, because... You won’t be able to survive in close combat without Endurance charges, a large amount of health and its recovery.
Marauder. The toughest guy in the game. Around the starting point on the tree there are passive skills for health, armor, resistance, and Endurance charges. Also nearby on the tree you can find passive skills from the Templar and Duelist areas - they will provide the necessary amount of dexterity and intelligence for many active skills. When playing a Marauder in close combat you need to use Resolute Technique. The Marauder can be a summoner. In short, there are a lot of options, but builds with an emphasis on evasion and ESP do not suit him.
- Lots of health + health recovery + block + armor + Elemental Adaptation + Endurance Charge.
- A lot of health + health steal (Blood Magic with/without Vaal Pact, if without, then health restoration) + Resolute Technique + Endurance Charge (optional).
- Lots of health + health recovery + armor + Elemental Adaptation + agility + intelligence + use of projectiles.
Any non-standard build will have some obvious drawback and to cover it, you will need certain things. If you are an experienced player and are not afraid to spend time looking for things, then you can play outside the box.
The reason why a life + shield block build can be better than just gaining a lot of life is because of learning the passive skills associated with the shield from the Templar tree if you are playing a Templar, Marauder or Witch. You will receive +30% resistance to all elements, which will allow you to invest more in protection against chaos on things. Reflected damage will also be less.
III. Attack
There are 3 things that affect your outgoing damage.
Note: Any active skill can be improved by increasing the critical strike power, I will not write about this anymore.
1. Type of active skill: attack or spell.
- Attack: every attack involves physical damage to a greater or lesser extent, with the exception of Elemental Hit. Even some elemental damage will be converted from physical damage. However, there are attacks that deal chaotic damage and cannot be improved in any way. The Faster Attack support will help improve any active attack-type skill.
- Spell: Almost all spells deal elemental damage, with the exception of Detonate Death, Shockwave Totem and Bear Trap. Among these four, physical damage can only be improved by passive skills. You can improve any spell-type skill with the help of Faster Cast and Iron Will supports (if you have a lot of strength).
2. Damage type:
- Physical Damage: Attack-type skills require weapons with high physical damage. Such weapons can only be two-handed (staffs, sledgehammers, axes). However, most builds focus on elemental damage.
- Elemental Damage: for “attack” type skills, you can use the Weapon Elemental Damage support or passive skills to increase the elemental damage of the weapon. If you use spell-type skills, then you need a weapon with a modifier to increase spell damage or passive skills to increase spell damage. Moreover, passive skills will increase elemental damage, both from attacks and from spells.
3. Skill type:
- Melee: Melee damage can be increased with the Melee Physical Damage support.
- Projectile: Projectile damage can be increased using the following supports: Faster Projectile, Lesser Multiple Projectile, Greater Multiple Projectile, Pierce, Fork, Chain. With the exception of Faster Projectile, the listed supports can turn single-target skills into semi-AoE skills. The calipers cannot work simultaneously. For example, if a projectile is upgraded with Pierce, it cannot be upgraded with Fork or Chain. Or, for example, when a projectile is upgraded with Fork, it cannot be upgraded with Chain.
- Single target: Everything is clear here, I just highlighted it for correct classification.
- AOE: AOE skills hit multiple targets in one use. Can be improved, for example, using the Concentrated Effect caliper by 1.5 times at the first level.
Two examples of skill analysis:
- Lightning Strike: Damage type: elemental (lightning), melee attack, projectile. Suitable supports: Melee Physical Damage, Faster Attack, Weapon Elemental Damage, LMP, Chain, Lightning Penetration, Increase Critical Damage, Life Leech.
- Fire Storm: Fire damage type, AoE spell with long cast time. Suitable supports: Concentrated Effect, Iron Will, Faster Casting, Increase Area of Effect, Increase Duration, Fire Penetration, Chance to Ignite, Elemental Proliferation, Increase Critical Damage, etc.
Don't forget about curses. You can only use one if you have not learned the passive skill Whispers of Doom. Choose a curse based on the main skills used.
Another important thing - when creating a build, do not forget to take into account the basic statistics required for skills (strength, agility, intelligence) and that they can be increased with the help of things.
IV. Sustainability
By resilience I mean controlling the use of mana. The more supports you add to a skill, the more it costs to use it. If you use auras, they will take a certain amount of mana. Without a resource for skills, even the most super-duper skills will be useless. There are several methods for saving mana.
- Passive skills: Increases maximum mana by n%, increases mana recovery speed by n%, decreases spell costs by n%. These three bonus stats will help normalize your mana consumption. Interestingly, the increase in the amount of reserved mana due to the supports attached to the aura stone is not reduced by using passive skills to reduce the cost of spells. For such a case, special passive skills are needed to reduce the amount of reserved mana, and they are only available in the area of \u200b\u200bthe Marauder and Templar.
- Reduced Mana Caliper: it will greatly simplify your life by reducing mana consumption, both with any skill and with aura. For example, you have 4L gloves and stones with auras Determination, Hatred, Purity. Stuff three auras into the gloves and add one Reduced Mana caliper.
- Using totems: You can use the Spell Totem support for spells or the Ranged Attack Totem for projectiles. The totem will use the active skill attached to it instead of you and the mana consumption will decrease, but there will be a penalty on speed and damage.
- Passive skill Blood Magic: if you learn it, your mana will turn to zero and all skills will begin to consume health, including auras. The advantage of this passive skill is that you can collect a lot of health and its regeneration/stealing and do not depend on mana. Also, you will have to carry one type of flask, not two. However, if you, for example, play a Templar and use a shield block build, then it would be better to carry Sacred Flask with you and therefore it is better not to use BM.
- Blood Magic Caliper: In addition to the passive skill Blood Magic, there is a support with the same name. If you have a lot of health and good regeneration, then you can not take a passive skill and use a support, for example, with the Clarity aura (or any other that does not reserve %). Or attach support to all skills, and leave mana only for auras.
- Passive skill Eldritch Battery: it is located to the right of Whispers of Doom in the north of the tree. Converts all ESC into mana. Why might this be needed? For example, if you want to use many auras at the same time.
V. Results
As you may have noticed, improving DPS has little dependence on investing in passive skills to increase weapon damage. It mainly depends on a set of active skills, resilience and a little on passive skills to increase the main type of damage: elemental damage, spell damage, melee physical damage, projectile damage, increased chance/damage of critical hits. I recommend learning passive skills to improve one thing (burning damage, increasing critical strike damage for a certain weapon, etc.), if you do not sacrifice anything when picking up other passive skills.
Finally, to make the best build, try to learn only large and very large circles in the tree. Avoid +10 to the characteristic if you can (the stones used allow it and the characteristics are presented in sufficient quantities on things). Look for passive skills with +30 stats or with life and +20 strength. Find the shortest and most profitable path to the fundamental skills of your build, and along the way collect all the most useful things.
As you, my astute reader, may have noticed, there are two types of damage in Star Wars: Galaxy of Heroes – physical, and special. Having multiple types of damage in an RPG game isn’t uncommon.
Separating magical attacks from physical attacks is an easy way to make sure a mage-type character isn’t as strong with a sword as a warrior-type character, effectively forcing you to choose a specific role. SW:GoH on the other hand, doesn’t force a choice – many characters have both physical damage and special damage attacks. Which, as you’ll soon find out, is not a bad thing.
Physical and Special Damage Stats
Special and physical damage each have their own set of defensive and . These two sets of stats match up and directly correspond to each other. Each pair can even be grouped together under a blanket term, referring to the overall effect they have.
| Offensive | ||
| Physical | Special | Both |
| Physical Damage | Special Damage | Damage/Offense |
| Physical Critical Chance | Special Critical Chance | Critical Chance |
| Armor Penetration | Resistance Penetration | Penetration |
| Physical Accuracy | Special Accuracy | Accuracy |
| Defensive | ||
| Physical | Special | Both |
| Armor | Resistance | Defense |
| Dodge Chance | Deflection Chance | Avoidance |
| Physical Critical Avoidance | Special Critical Avoidance | Critical Avoidance |

As you can see, the collective term for each pair lines up with the relevant mod stats. Offense mods, for example, will increase both special damage and physical damage, which is why our popular “ ” articles don’t specify which damage type you need to increase.
Gear on the other hand, does specify. A Mk 11 BlasTech Weapons Mod, for example, increases physical damage and resistance. This can, unfortunately, lead to “useless gear” which has no impact on the effectiveness of a character. The biggest example of this is Jawa Engineer. Since his bombs are neither physical, nor special damage, neither stat will make a difference. However, pieces which only increase damage are still needed to advance his gear level.
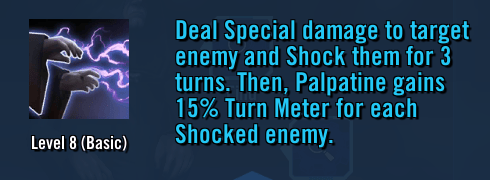
The Practical Difference
Now we’ve covered the basics of what the different damage types are, and how to increase them, it’s time to look at the game play effects. First and foremost, each attack will specify the damage type it deals, so you’re able to quickly tell the difference. The next, and most obvious, effect is the damage display during battles. The damage amount that pops up during battles is color coded – red for physical, blue for special, and yellow for critical. But, both of these, while helpful, are cosmetic differences, only affecting the game visually.
The truly practical differences require looking at the overall stats. Because gear doesn't always increase both stats in a pair, they diverge. A character might have much higher special damage than physical damage, or much higher armor than resistance. A prime example of this is. At max gear level, before mods, Baze has a massive 32.71% armor stat, and a much lower 15.95% resistance stat. As you know from my , this means Baze will block more than twice as much physical damage as he will special damage. Knowing this, you can tailor your team to suit – a character that can deal a lot of special damage will be more useful than a character that deals the same amount of physical damage. At the same time, you know your own Baze will survive longer if the opposing team has low special damage.

Other stat differences can have a huge impact on battles as well. for example, deals physical damage on his basic attack, special damage on his AoE attack, and has two very different critical chance values. At max gear level, before mods, R2-D2 has 24.16% physical critical chance, and 11.04% special critical chance. His AoE is much less likely to crit than his single target basic. His first unique gives him a 10% critical chance boost, which increases both physical and special critical chance, bringing them up to 34.16% and 21.04% respectively. If you’re running R2-D2 in a team that relies on critical hits, like an led team, this difference can lead to R2 performing worse than expected.
Summary
The correlation between the related stats, as well as the clear difference between the two types of damage makes it easy to keep track of, and easy to take advantage of, while still increasing the complexity of the game. Understanding the difference allows you to make informed decisions about who gets a piece of gear first, tailor your team to counter specific threats, and understand why something may not go as expected.