By February 23rd, DIY projects will be suitable for any age category, if they are made with the sincere desire of a person or acquaintance.
Features of crafts
- Military theme. In this category, the choice is quite wide: figures of soldiers, powerful equipment and weapons, military uniforms and paraphernalia, etc.
- Technique. It just so happens that civilian technology is more associated with men. Images and models of cars, etc. are popular.
- A man's hobby. If the gift takes into account the individual hobbies of a boy or an adult man, this will be especially appreciated. We can highlight such main trends as sports themes,.
- Crafts with a practical twist. Even small trinkets become useful attributes. It can be noted, simple ones for pens and pencils, shelves and.
- Decorative crafts. They can simply reflect your abilities in aesthetic and artistic terms.
Crafts for dad on February 23 can be made from a variety of materials - paper, cardboard, plastic, fabric, plasticine, clay and much more. Various improvised means are used - driftwood, branches, stones, tin cans and plastic bottles, matchboxes. If you apply a little imagination, almost anything you can get your hands on can be useful.
You can learn how to make an original craft on websites or from magazines. The manufacturing technique depends on the age of the child and the presence of certain abilities. Simple manipulations are often carried out - gluing, cutting, drawing, painting, stitching, sculpting.
Certain skills require sawing with a jigsaw, wood carving, burning, embroidery and knitting, sculpting from clay or plaster, assembling models from wood or plywood. Particularly highlighted are such design methods as applique, decoupage, and quilling.
You can learn how to make an original craft on websites or from magazines.
Paper crafts
Paper of various types is the most common material for children's creativity. Plain white paper, Whatman paper, corrugated and colored paper, and glossy sheets will be useful.
Paper crafts for February 23 can be made flat or voluminous. In the latter case, glue or origami techniques are used.
The following ideas can be highlighted:
- Flat crafts - drawings and postcards. Military themes predominate here. Entire battles can be depicted in the drawings. It is important to accompany everything with sincere and warm wishes. An original postcard can be made in the shape of an officer's tie. A figure resembling a man's tie is cut out of thick but fairly thin colored cardboard. 3-4 stars (red, gold, silver) are glued to the front side, which should stand out well against the colored background. 2 slits are made in the upper part of the workpiece, and a ribbon or paper strip is inserted. Congratulations and wishes are written on the back of such a postcard.
- Volumetric postcard. To make it, take a square sheet of thick paper and bend it along the middle line. On the fold, cardboard attributes from a military plot are vertically fixed - soldiers and tanks, sailors and ships, airplanes. When folded, everything ends up inside the postcard, and when it is opened, they take a vertical position.
- Bookmark. On February 23, such a necessary craft should be associated with a military theme. The dashing general's mustache will look original. To do this, it is enough to cut out the characteristic shape of the famous cavalry (Budennovsky) mustache from colored cardboard. The bookmark in the form of officer's (preferably general's) shoulder straps looks beautiful. It is cut out of thick golden or silver paper. A thin border is glued around the perimeter, and 1-3 stars (depending on the “rank”) in the center.
- Bonbonnieres. For boys in kindergarten, sweet bonbonnieres are suitable gifts. They are easy to do. 2 stars are cut out of colored paper. Candy is placed between them, the elements are glued together. Having made the required number of such crafts, you can give the same gift to all the boys in the group.
- Origami. This technique allows you to make a wide variety of figures. Even familiar paper airplanes and boats can become elements of beautiful compositions. On a sheet with a blue background you can attach an entire squadron of small airplanes or a squadron of ships. It is better to make them from multi-colored paper.
 Paper of various types is the most common material for children's creativity.
 Cardboard technology
Cardboard crafts, like paper, are available at almost any age. Even very young children can use it to put together a gift for dad or grandfather. This material is suitable for older children, preschool children and those who have entered 1st grade.
We can offer only a small part of the many ideas:
- Airplane. As a fuselage, you can use a cardboard cylinder or a cardboard toilet paper roll. It is recommended to wrap it in a sheet of colored paper, on which to draw portholes and the necessary inscriptions. 2 elongated rectangles are cut out of cardboard for the “biplane” wings, which are glued to the bottom and top of the cylinder. Jumpers are fixed between the wings. The tail unit is also cut out of cardboard, and a longitudinal slot is made in the fuselage to install the vertical part. The front end of the cylinder is closed by a disk on which the propeller is mounted. It can be mounted on a screw so that it can rotate. After the final painting, the plane is ready.
- Matchbox airplane. The box acts as a cabin. The wings are made from two strips of cardboard with a width equal to the length of the box. The edges of the wings are rounded. The strips are glued to the bottom and top of the box, and the ends are connected to each other. The aircraft body is formed from 2 cardboard strips with a width equal to the width of the box. One end of them is glued to the top and bottom of the box, and the other ends are glued together. The tail is also made from cardboard. Finally, just secure the propeller and the plane is ready.
- Cabriolet. It is made on the basis of a fairly large, deep cardboard box. The box is closed and secured with adhesive tape. A windshield is formed on the top surface. To do this, a long transverse incision and 2 short cuts are made, after which this element is lifted up, tilted slightly and secured in this position with tape. A rectangle is cut to the size of the car interior. 2 rows of seats and a steering wheel are fixed inside. The base of the car is painted with acrylic paint. The wheels are made from disposable plates. For headlights, you can use the bottom of ice cream cups. Sidelights and hazard lights are made from plastic bottle caps. The radiator is made by gluing 6-7 even wooden rods. You can also use them to make windshield wipers. The salon is decorated with colored paper. Final painting and installation of logos and other distinctive elements is underway.
- Cup. You can give a champion dad a homemade cup. To do this, the characteristic shape of a cup (bowl with stand) is drawn on a sheet of cardboard and then cut out. Its base can be made in the form of a cross, which will give stability. It is enough to make a vertical slot in the lower part and fix the cardboard element in it perpendicularly. Decoration is carried out using decoupage technique. The basis can be a photo or an expressive picture in the center of the cup. Decor made from pasta, coffee beans, jewelry, small buttons, beads, and beads are glued around. You can use everything that the master’s imagination indicates. Finally, everything is varnished.
Advice! You can make all kinds of souvenirs from cardboard. If you help your child, even a 4-5 year old child can make simple products.
 Cardboard crafts, like paper, are available at almost any age
 Crafts using modeling technique
For young children, plasticine is a common material. From it, children's hands can fashion original figures, which causes special delight among parents. Crafts made from plasticine for February 23 can be taken to kindergarten or given to dad, grandfather, or uncle. The theme corresponds to the event: tanks, planes, ships, guns, submarines, soldiers.
For older children, salt dough can be recommended as a modeling material. It is malleable and resembles plasticine, but after hardening it becomes hard. To prepare it you will need flour (1 glass), salt and water (half a glass each) and a little (1 tsp) vegetable oil or hand cream.
 Crafts made from plasticine for February 23 can be taken to kindergarten or given to dad, grandfather, uncle
 Idea! A popular option is a figurine with a magnet for attaching to the refrigerator. To do this, just place a magnetized plate inside the dough and make the back side of the figure flat.
After mixing, you can sculpt any figure from this mixture. Hardening in the oven is ensured at a temperature of +65...+70 C for 40-45 minutes. After painting it with acrylic paint, such a craft can be taken to school.
Crafts made from plywood
School-age children can make complex crafts where they can demonstrate their abilities.
Plywood is the material that allows you to make great gifts. The following areas of creativity are distinguished:
- Burning out. This technique is familiar to many children. Using the device, you can create real pictures on plywood.
- Cutting out. For teenagers who know how to use a hand jigsaw, plywood becomes an excellent material for creativity. The desired ornament or pattern is drawn on the workpiece, and then cut out with a jigsaw. This technique allows you to make beautiful frames for photographs and paintings, parts for boxes, etc.
- Volumetric figures. By combining plywood parts with wooden beams, slats and other profiles, you can make models of military equipment and. This is quite painstaking work that requires accuracy and patience. It begins with drawing up drawings of all the parts and a diagram of their connections. Standard designs are usually used.
All plywood crafts look solid and are varnished, which allows the structure of the material to be revealed and tinted. The connection of elements is most often ensured by glue, but small nails and screws can be used in load-bearing parts.
 All plywood crafts look solid
 Use of non-traditional materials
In order to surprise with a gift, the child strives to use unusual materials.
The following non-standard solutions can be distinguished:
- Stone. Multi-colored, small, river or sea pebbles allow you to create an original frame for a photo or painting (drawing). First, the frame frame is assembled from a wooden batten. Pebbles are fixed on top of the wood on the mortar in a chaotic or specific order. Another option is a candlestick made of stones. A base of pebbles is assembled on a cement form, and the shape can be very different. It is important to form a cup for the candle on top.
- Gypsum. Figurines with a magnet can be made from plaster. You can even use baby sand molds to shape them.
- Wooden blanks. From a round log, sawing off a piece 10-12 cm long, you can make an original and practical organizer for pens and pencils. It is enough to drill as many holes as possible with a diameter of 10-15 mm, and coat the craft with varnish. After walking through the forest, you can find driftwood of interesting shapes. With a little imagination, you can make a craft out of them for February 23rd.
- Corks from plastic bottles. Their bright color makes it possible to create colorful mosaics and create original paintings.
 In order to surprise with a gift, the child strives to use unusual materials
 It is difficult to list all the possible options for crafts. Both classic craft materials and improvised materials are selected.
Attention! You shouldn't be afraid to make people laugh with your gift. Any craft made with soul and love will please a loved one.
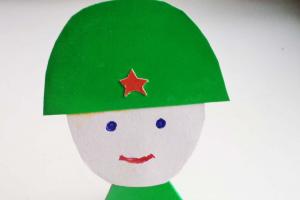
Crafts for Defender of the Fatherland Day are distinguished by their specificity. Military themes predominate, regardless of whether the recipient of the gift served in the army. This day is recognized as a men's holiday, regardless of age. Crafts express sincere attention and care.
for a defender of any age. And even a child can make it if he gets a little help from adults. For this you will need:
a sheet of white paper (you can take a regular landscape paper, but it is better to use paper for watercolors or sketches, it is denser and will wrinkle less), and another small sheet of white;
glue (a glue stick will also work, it will be easier to work with);
blue marker;
a sheet of blue (or any other, to taste) paper and an old unnecessary magazine with small drawings: if it is made for adults, we take an adult magazine, and if it is for children, we take a children’s magazine.
You can use stickers, transfers and anything interesting that is available and related to the theme or hobbies of the person to whom the gift is intended.
Let's get started.

We bend the paper sheet in half, and we get the base.

Fold the sheet in half - the base of the postcard
From blue paper we cut out a figure in the shape of a trapezoid with rounded edges.

Cut out a tie “knot” from blue cardboard
From the white one we cut out two right-angled triangles. To make it easier for your child, draw the shapes in advance and ask him to cut them out.

From blue we cut out the base of the tie - it looks like an elongated pentagon with a pointed tip.

Glue the previously cut trapezoid to the base, and you get a tie with a knot.

Gluing the “tie” and “knot” together
We make the knot brighter by tracing it along the contour.

We begin to decorate the tie: cut out the most beautiful pictures from the magazine and paste them on its surface. Or we use stickers, tearing them off the base and gluing them to the tie.

If the child sticks the pictures so that their edges protrude, it’s okay, everything can be straightened out later.

When the tie is ready, we glue it to the title page of the card. On top you need to glue the previously cut triangles - like the corners of a collar. We also outline them with a blue marker to highlight them.

Our postcard in the form of a shirt and tie is ready, all that remains is to sign it.

Craft “shirt and tie”
You can collect congratulations from magazine pictures, this will also be very interesting. If you try, a DIY postcard for “Shirt and Tie” will leave a bright mark in the memory of the person to whom it is presented on a holiday.
Well, of course, there is no way to leave dads without gifts on February 23rd. Both current and potential defenders of the Fatherland will be happy to receive a carefully crafted craft from their son or daughter. Be sure to check out this section. Having looked through its pages, you can easily find several (to choose from) ideas and master classes you like for creating original postcards, applications, small models of military equipment, medals and souvenirs. And the variety of creative execution techniques and materials used will really surprise you.
Let's surprise dads with unusual and touching gifts from children!
Contained in sections:Includes sections:
- Postcards for February 23. We make DIY gifts for dads for Defender of the Fatherland Day
Showing publications 1-10 of 2112.
All sections | Crafts for February 23. Gifts for dad
Target classes: involve parents in joint creativity with children Tasks: Educational: introduce parents and children to the technologies of making photo frames from cardboard and colored paper; learn how to create beautiful things out of paper crafts; ...
 I present to your attention a bright, cheerful craft for February 23. The most original and inexpensive have always been crafts made from colored paper with your own hands. Target:Creation DIY crafts for February 23rd as a gift for dad,grandfather or boys....
Crafts for February 23. Gifts for dad - OD summary in the senior group of kindergarten “Greeting card to Uncle Fyodor for February 23”
Publication “Synopsis of OD in the senior group of kindergarten “Greeting Card...” Summary of OD in the senior group Topic: “Greeting card to Uncle Fyodor” Using the game set “Froebel’s Gifts” Purpose: To create conditions for the manifestation of initiative, independence, and relaxed communication. Purpose: To train children in orientation in space, on a sheet...
 Image library "MAAM-pictures"
 Defender of the Fatherland Day is a great occasion to do such a creative and interesting activity with your children as creating a wall newspaper. To please our dear fathers, grandfathers and uncles, the guys and I prepared a festive wall newspaper for February 23rd. The children brought photographs of their...
The fairy tale “How Dad the Hedgehog Made Musical Instruments” Goal: Introducing preschoolers to the culture of the Komi people through music. Objectives: - to introduce preschoolers through a fairy tale to Komi folk musical instruments; - give the name of the instruments in the Komi language; - cultivate feelings of love and respect for your small Motherland. Ved. Lived...
 -I present to the attention of my colleagues wall newspapers made of plasticine “February 23”. February 23 is celebrated in Russia as Defender of the Fatherland Day. This holiday had several names: Soviet Army Day, Birthday of the Red Army, Birthday of the Armed Forces and Navy...
Crafts for February 23. Gifts for Dad - Master class on making cards for Valentine's Day and Defender of the Fatherland Day
 Master class on making cards for "Valentine's Day" and "Defender of the Fatherland Day" for ages 4 and up. Purpose: making a postcard for the holiday. Objectives: 1. Formation of creative abilities in children from 4 years old. Development of skills and abilities in working with glue, development of fine motor skills,...
How to make a craft for February 23 in kindergarten? Defender of the Fatherland Day is one of those rare holidays when a child can congratulate the strongest and bravest people for him - dad, grandfather, older brother, uncle. It doesn’t matter whether the craft for February 23rd was made with your own hands in kindergarten or at home -
the important thing is that the child invested a part of himself, trying to bring joy to his loved ones. With your child we make a military plane, a tank from a cardboard box, funny soldiers, an army boot and a fast rocket!
Defender of the Fatherland Day is one of those rare holidays when a child can congratulate the strongest and bravest people for him - dad, grandfather, older brother or uncle.
Children are always expected to give cute souvenirs and simple crafts for the holidays - these touching little things, made by children's hands, tell the best story that a little man is ready to give the whole world to the people dear to him...
Crafts with your child for Defender of the Fatherland Day can be done using various techniques - both those you already love and those that are completely new for your child. At the same time, the main thing is that the gifts made with your own hands on February 23 reflected the essence of this holiday.
Crafts for February 23rd from paper and cardboard
You can make a commemorative medal from foil and red cardboard.

It is not so important what exactly the gift will be by February 23rd - the main thing is that it is made with soul and a great desire to please your loved one. Kids in the senior and preparatory groups will definitely enjoy crafts using the origami technique.

A craft for kindergarten on February 23 can be made for participation in a children's creativity competition and the design of a thematic exhibition dedicated to the upcoming holiday, as well as for congratulating boys in a group or kindergarten guests invited to participate in the celebration.
A paper star craft using a disk is very impressive and easy to make.


The carnation is one of the most recognizable symbols of this holiday. It is customary to give it as a gift for memorable military dates and depict it on postcards in honor of February 23. A beautiful carnation can be made from red corrugated cardboard folded into a tube.

Watch how to make a beautiful carnation from corrugated paper in the video:
Thus, a funny applique in the form of army boots will remind men of how many kilometers they managed to march along the parade ground and run along country roads while they served in the army. A special decoration for this applique will be the lacing of the boot made of green satin ribbon.

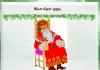
Those who served in the missile forces will be interested to see the image of a rocket rushing upward. Puffs of smoke from under it will perfectly replace lumps of white cotton wool.

Or you can simply give men small souvenir soldiers by gluing them together from cardboard, colored paper, using a toilet paper roll as the base.

DIY tanks for February 23
Tankers will love the tank model, which can be easily put together from empty boxes.

Men are generally partial to military equipment, so this will always be a win-win option.

Tank tracks can be made from painted cardboard rolls.

A tank can even be made from a painted cardboard egg cart.

A souvenir in the form of a tank, which is glued together from a thin box and strips of corrugated cardboard, looks interesting. We twist the black stripes into six identical rolls - we get the basis for the tracks. We wrap three rolls with one strip of cardboard - we get one caterpillar. We make the second one in the same way, and then attach them to both sides of the small box. All that remains is to roll up one more roll - the turret, glue the cardboard barrel to it, and then connect the turret to the tank body. The craft is ready!

You can have a real little battle.

Cardboard tank with cutting template
Make a beautiful tank for February 23 using our template. We cut out the base of the craft from brown cardboard.

Using the template, mark the brown base and cut it out.

Fold the brown base and glue the parts. Glue a sheet of green corrugated cardboard on top. We glue two strips of the same cardboard on the bottom.

From strips of corrugated cardboard we twist a turret with a cannon and other decorative elements of the tank. We glue the attributes of the Red Army flag and star onto the tank. The tank for February 23rd is ready!

Tank made from scrap materials on February 23
An interesting and easy-to-make tank is made from plastic corks and a dishwashing sponge.

Sponge tank
The barrel of the tank is rolled up from green paper and attached to the tank turret using plasticine.

Watch how to make a tank from a sponge in the video:
Plasticine tank for February 23
An impressive tank can be made from plasticine. To do this, we sculpt and connect all the parts of the tank.

We make a caterpillar from plasticine.

Crafted tank from plasticine - ready!

It can be made from any materials, but most often crafts for February 23rd in kindergarten are made from paper and various (textured or regular) cardboard; they can be made using the appliqué technique and in the form of a three-dimensional souvenir.
Different types of troops can have their own applique and souvenir. The tank can be made of plasticine. This is a wonderful gift for dad or grandfather on February 23rd.

On February 23, you can make a military plane from plasticine. We take three colors - yellow, green and blue and mix them together.

We sculpt the body and wings of an airplane from plasticine.

We sculpt the cockpit from our colored and regular blue plasticine.

We make a propeller from blue plasticine.

Using a match, we secure the propeller to the plane. We decorate the craft with a festive inscription and the Russian flag. A plane made of plasticine for February 23rd is ready1

An interesting craft for kindergarten on February 23 can be made using the cutting technique. Cut colored corrugated paper into small squares.

Wrap a piece of paper around the stick. Dip a piece of paper on a stick into glue.

Glue the piece of paper to the drawn template.

One by one we glue the pieces of paper onto the template using a stick. We make the numbers “23” using the same technique. The craft for February 23 using the cutting technique is ready!

Thus, a tank will become a symbolic image of the ground forces, which will look more advantageous if it is made not from paper, but from unusual materials - for example, buttons . The tank's body is lined with black buttons, and its tracks are decorated with buttons of a different color or shape.

Crafts for February 23rd from cereals
Naval troops can be depicted as a ship. It turns out more interesting if it is made using the grain-sprinkling technique. The sail can be made from real white fabric, the waves from white napkins, and the clouds in the sky from cotton wool.

The symbol of the air force - an airplane - can also be made using this technique. The aircraft body can be well decorated with coconut, semolina or rice.

There are many great craft ideas using grains. Look at the video on how to make a very beautiful card for February 23rd using corn kernels:
Children in the senior and preparatory groups of kindergarten will be able to make an airplane from Kinder Surprise and paper.


A real military aircraft can be made from cardboard or foam board. The wings and tail of the craft are inserted into the holes on the body.

You can make a military airplane out of cardboard and clothespins, which can hang, for example, on curtains.

A luxury military aircraft can be made from a plastic bottle. For a detailed master class, watch the video:
Craft for February 23rd from paper on a disk
Glue the disk and a sheet of white cardboard together - this will be the basis of the craft. Glue three green stripes onto the base.

Fold the red strip in half and make cuts at the fold. Then we roll the strip into a bud and fix it with glue. Wrap the flower in green paper. We make three such blanks.

Glue the flowers along with the leaves onto the base. We glue a paper St. George ribbon on top of the stems, as well as a paper star. It remains to complement the craft with a congratulation - “Happy Defender of the Fatherland Day.”

Volumetric stand - postcard for February 23
Many will like the original three-dimensional stand dedicated to February 23rd. To make it, we bend a sheet of cardboard and draw two rectangles of different sizes on the inside.

We make cuts along the rectangles. We bend the sheet of cardboard so that the rectangles bend at the places of the cuts.

We decorate places with protrusions with a rocket and a tank cut out of paper. We make a congratulatory inscription on the stand and decorate it with flowers. The craft for February 23rd is ready!

You can make a voluminous paper craft for February 23rd a little differently. We bend a sheet of colored cardboard in half and make small cuts at the fold. We bend the cuts in the opposite direction.

We decorate the background of the craft with the sun, clouds and a tree. Some distance from the background we fix two tanks and grass. Glue white paper snowdrifts onto the horizontal part of the postcard.

On the horizontal part of the craft we attach the congratulatory inscription “February 23”. A courageous and bright craft for February 23rd is ready!

Postcard with an airplane and a steamship for February 23
As one of the craft options for kindergarten on February 23, you can make an unusual postcard with your own hands depicting an airplane and a steamship. Cut out an airplane from blue paper and glue white portholes to it.

Cut out the boat and color it with felt-tip pens.

We glue smoke to the plane - a curl of white paper.

Sprinkle the clouds and numbers “23” on the front of the card with semolina.


Quilling card for February 23
A very interesting card for February 23rd is made using the quilling technique. We will need to make the base of the card. To do this, bend a sheet of cardboard in half. Glue yellow paper to the front side of the craft. On top of it we place green spots imitating a military camouflage pattern. Cut off a fairly large area from the top. The base of the craft is ready!

Let's move on to the quilling (or paper rolling) technique. We wind a yellow strip of paper onto a special tool or thin stick (it is better to use special quilling tapes). We make several of these paper curls. We fix the ends of the blanks with glue.

Using the same principle, we twist the green curls.

We place the yellow curls on the front of the card along the edge of the cut area. We put the number “23” on the inside of the card using green curls. Postcard for February 23rd using quilling technique - ready!

Postcard with a shirt and tie for February 23
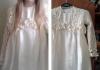
A postcard with a shirt is a great gift option for February 23rd. Fold the collar of the shirt and cut out the tie.


Jacket made of green paper.

Postcard with a black jacket and tie (dressy)
Glue a white sheet of paper folded in half between the “folds” of black paper.


Postcard "military uniform with stars"
A postcard with a military uniform is put together very simply, but the stars on the shoulder straps and the congratulatory inscription give the craft an incredibly festive and solemn look.

How to sew a pencil case in the shape of a tank for February 23?
Skilled needlewomen will be able to sew a funny military pencil case in the shape of a tank. We will need to sew in a zipper, lining and the top of the pencil case.


For a detailed master class on making a pencil case, see ““.

If you use your imagination and add your own touches to each product, you will get a unique craft that will take its rightful place among other crafts made by the hands of kids from kindergarten.
St. George brooch made of ribbons using the kanzashi technique


Postcard – triangle front letter


Socks have long become a classic gift for February 23, but decorated in the shape of a tank, they will turn into an unforgettable souvenir and a reason for joy and delight. For this craft you will need 3 pairs of gift socks, 6 golden chocolates, a beautiful pen, scissors, ribbon, and a piece of red paper.

To make the caterpillar of the future tank, put two candies on the first sock, then carefully roll the sock with candies into a roll. We make three such convolutions.


And of course, we couldn’t ignore the drawings for February 23rd. Here we have drawn the main attributes of the holiday: a tank and a flag.
First we make a pencil sketch and color it with a marker.

Drawing with pencil and marker “tank”
Then we color the drawing with pencils or paints.

Crafts for February 23rd in kindergarten reviews:
Beautiful crafts, there is plenty to choose from! (Sveta)
A tank made from socks is a great idea) (Nadezhda L)
I really liked the corrugated cardboard tank (Sasha)
You can create beautiful, original and creative crafts for February 23rd with your own hands from the simplest materials at hand. Don't know how? Then study our master classes and learn to make unusual and beautiful works from paper, cardboard, napkins and other usual attributes of creativity. For children who are still in the junior and senior groups of kindergarten, we offer very simple lessons that tell you how to quickly, easily and effortlessly prepare a cute, pleasant gift for dad. For schoolchildren, there are tasks that are a little more difficult, for example, making a model of a tank or a beautiful holiday coat of arms with your own hands. All you have to do is choose the master class you like and get down to business.
Simple DIY crafts for February 23rd from napkins in kindergarten in the younger group, master class with photos step by step
By February 23rd, with the children of the junior group of kindergarten, you can make simple, but at the same time beautiful and attractive gifts for dads, grandfathers and older brothers with your own hands - bright carnations from the most ordinary napkins. The work will not cause any difficulties for the kids, and the teacher will need to intervene in the process and provide the children with some help only at the final stage, when the flower needs to be attached to the stem. Boys and girls can easily handle everything else on their own.

Necessary materials for simple crafts on the occasion of February 23 for the younger group of kindergarten
- red napkins
- green napkins
- shiny serpentine
- plastic tube
- clear tape
Step-by-step instructions for children from the younger group - how to make a simple craft with your own hands for February 23

How to create crafts for February 23 with your own hands in kindergarten in the senior group - step by step photos

In the senior group of the kindergarten, the children should be asked to make a simple but very interesting craft with their own hands by February 23 - a ship with sails and flags. Children 5-6 years old will not have any difficulty in coping with this task, and without much effort they will be able to make an entire festive squadron or even a real navy. Ship models will then be appropriate to use as gifts for dads, grandfathers and older brothers. To make the craft have a more personal touch, on the widest sail you can write the name of the person for whom the gift is intended, or some short congratulatory phrase about the valiant and brave defenders of the Fatherland.
Necessary materials for crafts on the theme of February 23 for the senior group of kindergarten
- foam kitchen sponge for washing dishes
- bamboo stick
- wooden toothpick
- set of crepe colored paper
- fragment of satin ribbon
- felt-tip pen
- scissors
Step-by-step instructions for the older group in kindergarten - how to make a craft in honor of February 23

Easy and quick paper craft for dad on February 23rd - master class for preschoolers

This master class describes in detail how quickly and easily preschoolers can make a themed craft for dad out of colored paper on the occasion of February 23rd. The work is very simple and will not require any serious effort from the baby, and if the process is supervised by a mother, grandmother or older sister, the gift will turn out to be especially neat and attractive.
Necessary materials for paper crafts in honor of February 23rd for dad
- sheet of cardboard
- set of colored paper
- simple pencil
- ruler
- scissors
Step-by-step instructions for a master class for preschoolers - how to easily and quickly make a paper craft for dad by February 23
- Cut a 25x20 cm rectangle from thick white cardboard.
- On red paper, draw two strips measuring 2x20 cm and two more strips 2x25 cm. Carefully cut with scissors, coat the inside with glue and glue along the edges of a sheet of cardboard to form a frame.
- Cut out a rectangle 8x15 cm from blue paper, cut it with scissors and glue it vertically on a white background in the central part of the composition.
- Cut out two circles with a diameter of 5 cm from bright yellow paper, and three small triangles from orange paper. Glue the circles, one above the other, onto blue paper. Glue two orange triangles at the base of the rocket body, and one on top. Cut out a five-pointed star from red paper and glue it to the top orange triangle.
- Place the paper craft under a weight for 1-2 hours so that all the elements stick well to the cardboard and the edges do not protrude. On the day of the holiday, present it to your beloved dad.
Interesting DIY crafts for February 23rd for dad made from paper and cardboard

An airplane made of cardboard and paper is considered one of the most successful DIY crafts for dad on February 23rd. The model looks catchy and attractive, looks good in a cabinet under glass or on a shelf in a library. Having received such pleasant gifts, fathers often take them to work and place them on the table near the computer, so that even in times of emergency they remember home, family and their children.
Necessary materials for making interesting crafts from cardboard and paper for dad on February 23rd
- Matchbox
- blue cardboard sheet
- red and yellow velvet paper
- simple pencil
- scissors
- PVA glue
- ruler
Step-by-step instructions on how to make a paper craft with your own hands in honor of February 23rd
- Make preliminary markings on a cardboard sheet: measure 2 centimeters from the long edge of the sheet at the top and bottom. Using a ruler, connect both marks and cut off this fragment.
- For the wings, measure the width of the matchbox and cut two long strips of cardboard corresponding to these dimensions.
- Then cut two more short strips of 1x10 cm. They will serve as feathers for the tail.
- Bend the longest strip of cardboard in half and glue it perpendicularly to the matchbox, which acts as the body of the aircraft.
- Using scissors, round off the edges of the strips intended for the wings, and then attach them to the body of the aircraft.
- To create the tail part, carefully glue one short piece with rounded edges inside the longest bent strip.
- Fold the second one exactly in half, measure 0.5 cm on each side, draw a line and clearly bend the cardboard along it. Then attach this part to the outer rear part of the aircraft's tail.
- Cut out a propeller figure from yellow paper, and four stars (2 small and 2 large) from red paper.
- Glue the propeller in the middle of the front part of the matchbox, decorate the wings with large stars, and the tail with small stars.
Do-it-yourself themed crafts for February 23rd for children for school

Together with the kids at school on February 23, you can make a very interesting thematic craft - a small tank. This product is suitable both for a gift and for a children's talent competition, which is often held at school on the eve of Defender of the Fatherland Day.
Necessary materials for children's crafts for the holiday of February 23 at school
- matchboxes – 6 pcs.
- glue stick
- green medium weight paper
- thick brown braid
- scotch
- toothpick
- simple pencil
- scraps of colored paper
- metal lids
Step-by-step instructions on how children at school can make a beautiful craft for February 23
- For the tank body, fasten four matchboxes together using tape (two at the bottom and two at the top). Stack the remaining boxes on top of each other and also secure with tape. This will be a tower.
- Cover the blanks on all sides with strips of green paper.
- To indicate the caterpillars, cover the body of the craft on both sides with thick brown tape.
- Using glue, attach the tower to the base of the body.
- Wrap a simple pencil in green paper and fasten it in several places with small pieces of tape. Carefully remove the pencil, cut one end of the resulting tube, bend the edges, coat them with glue and glue them to the front of the tank turret. This will be a cannon.
- Cut out several circles from scraps of colored paper in black or brown shades and glue them to the sides of the craft in the area where the caterpillars are located.
- Cut out a star from scraps of red paper and glue it to the side of the tank.
- Attach a flag made from scraps of colored paper to a toothpick and insert it into the tower on top.
- Place one metal cover on the barrel of the gun, and glue the second one on top of the turret, thus marking the hatch into which the tanker climbs.
- Place the product on a small pedestal or base made of thick cardboard. On the day of the holiday, submit your work for a thematic competition or present it to your dad, grandfather or older brother.
Do-it-yourself creative crafts for February 23rd - master class for schoolchildren

This master class will tell you how to make a creative and unusual craft at school with your own hands on February 23 - a knight's shield from colored paper and cardboard. The finished work is colorful and bright, looks attractive and fully reflects the spirit and meaning of the holiday.
Necessary materials for creative DIY crafts at school
- set of colored paper
- medium density cardboard
- pencil
- scissors
- PVA glue
- serpentine of different colors
Step-by-step instructions for a master class on creating an interesting craft for February 23 at school
- Draw a figure on cardboard that resembles a knight's shield, and then cut it out. From paper of a lighter shade, cut out a slightly smaller shield and glue it onto the larger one.
- Cut out a large five-pointed star from red colored paper and glue it to the back of the cardboard shield so that the rays protrude and are clearly visible.
- Using scissors, cut out the number “23” from white paper and glue it on top of the small shield. Place a small red star below them.
- Decorate the edges of the shield with small circles of colored paper.
- Glue strips of serpentine to the back side of the structure between the rays of the star and lightly curl them with a pencil. Make a neat loop at the back so that the craft can be hung on the wall.