What is the procedure for applying makeup on the face and what products are used for this? Is it realistic to make a high-quality make-up at home? Since few people can carry a personal stylist with them everywhere, sooner or later any girl faces these questions.
The main thing here is not to panic. You just need to know how to properly apply makeup on your face, and learn how to apply this knowledge in practice. Therefore, let's see what these mentioned rules are.
Rule # 1: Learn to combine
In order to learn how to apply makeup at home, it will not hurt to first understand its purpose. As much as you like a bold black eyeliner or half-face lips, these solutions are not suitable for all types.
To make your look look the most advantageous, determine the following points before applying makeup.
What color type does your skin belong to?
Will the shades of cold and unapproachable "Winter" suit you? Or is your type a gentle "Spring"? Maybe a passionate "Summer"? Luxurious "Autumn"?
Which features of your face are advantages and which are disadvantages?
Sensual lips or expressive cheekbones? Lush and long eyelashes or a slightly upturned nose? Any one is based on the right accents. It is their competent use that makes the girl irresistible.
Why are you going to paint and what results do you want to achieve?
Bright makeup, perfect for a noisy party, would be completely inappropriate for sports or office work. Therefore, before applying, do not forget to consider where you are going to go and what you will be wearing.
If you want to learn how to apply makeup professionally on your own, you should not ignore these points. Otherwise, you will not get a harmonious image and not even a mesmerizing play of contrasts, but a clown coloring that will only make you laugh.
Rule # 2: Prepare what you need

Ready to learn the steps for applying makeup? Take your time, it is important in this matter to prepare the basis:
- The healthier, smoother and cleaner your skin is, the easier it will be to recreate the look you want, and the less effort it takes to apply makeup beautifully. Full and regular rest will help you in this, proper nutrition, lack of stress and various cleansers (for example) and procedures (peeling, moisturizing) for the face and neck.
- The room where you are going to preen should be bright, clean and have a shiny mirror. Without this, it will be quite difficult to properly apply makeup on the face. The risk is too great to miss smudged mascara in the corners of the eyes, lipstick that has gone beyond the border of the lips and other small (but unpleasant) blemishes.
- If you plan not just to put on makeup, but, for example, to recreate some difficult image, spied on in a fashion magazine, a TV series with your favorite actresses or somewhere else, keep the image of the desired result in front of your eyes. Themselves (before getting down to business) do not forget to analyze what is the sequence of applying makeup in this particular case. If you are not yet able to do this on your own, seek advice from more experienced friends and acquaintances in this matter.
She herself plays an important role. It is impossible to apply makeup professionally when the powder does not match your skin type, and mascara turns into ugly stains from a couple of drops of water. Anyone who tries to save money in this matter, subsequently, as a rule, pays twice.
However, this does not mean at all that it is necessary to spend all the money exclusively on branded cosmetics, because it often turns out to be defective. Study reviews related to specific brands, try new options, experiment, and there will definitely be cosmetics that are optimal for you.
Rule # 3: Start with General Processing
When all of the above is implemented, you can study the rules for applying makeup directly. It is always necessary to start with a general treatment of the face, gradually moving to specific areas.
The first step is to cleanse the skin with a special tonic. Apply it to a cotton swab or dry tissue and wipe your face thoroughly. Pay special attention to hard-to-reach areas in the corners of the eyes, under the nose, etc. This will help you unclog pores and prepare your face for makeup.
The next step is hydration. Anyone can help you here. Gently apply it to your fingertips, then massage it into the skin with light, massaging movements. Do not forget to let it dry completely if you want the cosmetics to lay down in even layers and subsequently do not "crack".
If your skin is not without flaws, first of all, you need to learn how to properly apply the foundation. The foundation will help to reliably mask minor imperfections. Also, with its help, you can even out the complexion, make it more lively and saturated. For large blemishes such as pimples and redness, concealer can help.
Note! The composition of the foundation used is no less important than the order in which the makeup is applied. For those whose skin suffers from excessive dryness, a “foundation” with a moisturizing effect is useful. For owners of oily skin, a creamy powder to match their natural shade is better.
You can proceed to the next step only when your skin is perfectly smooth and clean. In some cases, the phased application of make-up allows the skipping of this point. For example, when you are going for a run and just want to add a little expression to your eyes. In this case, the pores of the skin should be as open as possible so that sweat and dirt do not accumulate in them. As you can imagine, in a situation like this, the “foundation” is not appropriate.
Rule # 4: Go to the private, only after finishing with the general
- Brows
A detailed study of the image should start with the eyebrows. With the help of special brushes, about which we have not so long ago, they will need to be combed and painted. To make the bend more expressive, do not forget to remove excess hairs, and also erase any lines that are knocked out of the main outline. For the embodiment of strict forms, use a pencil, for greater density - specialized shadows.
- Eyelids and eyelashes
As for the shadows, here the rules for applying makeup on the eyes will depend on. But with ink, things are different. To keep your lashes as natural as possible, never use more than two coats of mascara. Want to add more expressiveness to your look? Curl your eyelashes with a special curling iron before applying cosmetics, and the result will surpass your expectations.
- Blush
Since blush helps to significantly correct facial features, when using it, the makeup application scheme plays a major role. Depending on the nature of the application, the same products in different cases will help you smooth out protruding cheekbones or highlight them, chin, narrow or widen the forehead, etc. Therefore, before using them, carefully study the areas of application and their features.

- Lips
The final stage is the lips. To beautifully apply makeup on them, stock up on a thin brush and napkin. The first will allow you to outline the required contour, beyond which the lipstick should not go. The second will help in fixing and giving volume. How? Elementary. Apply the first layer of lipstick to your lips, then blot them with a cosmetic tissue, powder your lips through it, and then apply the final layer of lipstick.
Proper makeup application is largely based on the right combination colors. For example, for adolescents and women of advanced age, bright, defiant shades will be inappropriate. Barely noticeable natural tones will be no less harmful to a lady who came to the evening in a spectacular, revealing dress.
Therefore, before dwelling on a specific color scheme, do not forget to check in advance whether it is appropriate for your particular look.
Rule # 5: Always keep makeup close at hand
Even knowing the sequence of applying makeup on your face, and knowing how to put it into practice, you will never be insured against surprises. Was the room much hotter than planned? After a passionate kiss, did most of the lipstick end up on your partner's lips? Situations may be different, but the bottom line is the same - applying makeup must be urgently repeated.

Of course, this does not mean that with the slightest flaws in the image, you need to disappear in the ladies' room for an hour and a half, going through all the above stages again. However, having liquid in your purse or clutch (which will allow you to clear the problem area) and (such as: lipstick, shadows, powder, etc. used in the process of creating an image) will not hurt. With them, you can always quickly make the necessary edits, and you will shine throughout the entire weekend event.
Useful advice! To add durability to your makeup, dust it with a compact powder. In this case, the T-zone, covering the forehead and nose, requires special attention.
Now you know how to properly apply makeup at home, which means that you can definitely apply this knowledge in practice. Do not be afraid to experiment with colors and shades, this will help you open up from different sides, create unique images for different outings and events. But the very procedure for applying makeup, which was discussed in detail above, try not to break it so that your charming face does not turn into an ugly grimace.
Strictly speaking, the first step in makeup should always be cleansing. As a rule, make-up artists prepare the face with a tonic or micellar water with low-activity surfactants (surfactants). If you wash your face with a foam or gel before makeup, there will be slight irritation, in addition, the acid-base balance of the skin will be disturbed. Therefore, even if you have washed your face with your usual cleanser, be sure to treat your skin with a tonic before makeup (it should not contain alcohol!) To restore balance. What should be the procedure for applying makeup after cleansing? Memorize the main steps.
© site
To keep the tone and makeup of the eyes as long as possible, use a primer. If you have dry skin, opt for a moisturizing make-up base (for example, Lancôme's La Base Pro Hydraglow), for oily skin, a creamy primer or lotion primer is more suitable (read on for how they differ).

© site
An excellent option would also be a silicone primer, it is not advised to use it only for girls with sensitive skin or acne-prone skin.
For the eyelids and the area around the eyes, use a separate primer: the skin in this area is thinner and softer, the product should have a more gentle formula.
Special primers for the eyes are produced, for example, by the Urban Decay brand. If you need to remove redness or hide yellowish skin tones, use color primers to correct complexion.
Tone cream

© site
Spread on your usual foundation, mousse, or with a brush for a thicker coverage. If not, apply the product with a sponge or with your fingertips, in a circular motion, being careful not to stretch the skin.

© site
Remember that when applying foundation, the main thing is shading, pay sufficient attention to this process. Read more in our video tutorial.
Concealer

© site
One of the most common make-up misconceptions sounds like this: you need to apply concealer before foundation. In fact, you need to do exactly the opposite: after you have distributed and properly shaded the foundation, let it "settle" a little on the skin and start using concealer.

© site
Apply it in an inverted triangle shape for the most natural look. Everything you need to know about the choice, application and features of using a concealer, we have collected in the material.

© site
To create the effect of tanned skin, add bronzer to those areas that are primarily exposed to the sun's rays: the top and side areas of the forehead, cheekbones, tip of the nose, and chin. Or try using the “rule of three”: draw the number three on both sides of the face so that the cheekbone is just in the middle of the “three”, and blend it.

© site
The bronzer is also useful if you want: not so long ago it was considered one of the make-up mistakes, today this approach is even in trend! Liquid bronzer is easiest to apply (and the hardest to overdo it with), cream bronzer is suitable for dry skin and will help smooth out uneven skin, and powder bronzer is best used only if you are confident in your abilities: you need a certain skill to handle it.

© site
If you are not sure which shade of blush to choose, go for a slightly brighter color from the presented ones. But don't overdo it to avoid getting an "allergic" blush.

© site
Our video tutorial clearly shows how to apply blush correctly.

© site
According to classic pattern make-up, powder should be used after applying cream products and before using dry ones, but today make-up products of various textures are perfectly shaded without preliminary "dusting". Therefore, more and more often, powder is used precisely as the final touch, so as not to overload the makeup. If you have oily skin, choose or an option that is lighter than your skin.

© site
More suitable for you compact powder, as it copes better with the task of mattifying the skin. In the case of dry skin, this stage of makeup can be skipped: there is a risk that the powder will dry out the skin even more. Can't decide which powder to choose - compact or loose? help you.
After you have mastered the tone, you can move on to the makeup of the eyes and lips: look for step-by-step photo instructions and.
- Tip: if you plan to do bright makeup eyes (for example), make-up artists advise starting from this stage, and only after that move on to applying the tone.
Not every girl is able to pay for the services of a personal makeup artist and contact him on a daily basis. Most ladies try to solve this issue on their own and apply makeup on their own. Makeup for beginners is not difficult and is available to every girl who wants to look attractive.

What it is?
Makeup is the art of changing and adjusting shapes along with complexion. Actions are carried out through decorative cosmetic products. Makeup makes it possible to eliminate minor defects, allows you to look younger, highlight the dignity of each woman and demonstrate individual qualities. Women's psychology is about supporting and emphasizing their natural beauty. This is due to the fact that every well-groomed lady gains self-confidence.
According to the execution, makeup is divided into two types:
- Difficult. The main goal is to adjust the shapes;
- Simple. This type of makeup is carried out on the face, which is inherent in correct forms along with perfect proportions. With its help, expressiveness and individual features are emphasized.
When working with makeup, you should follow the sequence and some rules with which you can create any makeup, even at home.


Benefits and Features
Applying makeup has its own advantages and features that every girl should become familiar with. The advantages include the following points:
- With makeup you can hide any imperfection in your appearance, as well as highlight the dignity. Having mastered the basics of this art, you will always feel your irresistibility and attractiveness;
- Using the advice of makeup artists, you will be able to look different every day. Usage decorative cosmetics makes it possible to experiment with images, choosing the most attractive;
- Using makeup you stop biting your nails, rubbing your eyes and biting your lips;


- Make-up gives self-confidence, singles out from the crowd. Every girl knows that it is enough to powder her nose in the morning to feel stunning throughout the day;
- Modern preparations for applying makeup have useful properties. With their help, you can take care of your skin, protecting it from the negative effects of the external environment.
Many males report that makeup gives a woman a zest. Applying cosmetics is an optional procedure, but without it, the image becomes "fresh".
Each girl must decide for herself whether she needs to use makeup. You can choose to be completely natural or master the lessons of makeup.

Application techniques
Every girl can do the perfect makeup at home. To create it, you should use the instructions that are described in this article. Make-up is performed step by step and without haste.
Step-by-step instructions for applying makeup:
- In the first step you will need to choose the right tone. A well-chosen toner must blend in with the natural skin tone. It should be distributed evenly, avoiding streaks and stains. Apply the product to the face with a sponge;
- Remember that that the application of tone in parts leads to rolling. Your skin will look unnatural in any light, different in color from the skin on your neck. These properties indicate that the tonal base is applied incorrectly and a different shade should be chosen;
- If you cannot make the right choice tonal basis , for beginners, there is a great alternative in the form of a matte primer. It is able to hide enlarged pores and gives the dermis well-groomed, smoothing its surface;
- The next step is to correct the eyebrows. This procedure can be easily done by yourself, having studied the rules for giving the eyebrows the desired shape. You should not make the line saturated, this will only lead to deterioration of all makeup. Bring your eyebrows to perfection with a small amount of shadows and competent shading;


- Shadows are typed on a brush and are located on the brow area. Brushing upwards, observing the growth of hairs. Use a special brush for these purposes;
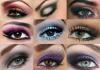
- Beautiful makeup depends entirely on the eyeshadow. This component of cosmetics is very noticeable, and, based on the chosen color, you can make your image defiant or natural. Before using the shadows, you need to apply the base. Then a light shade is applied to the entire eyelid and shaded with a brush;
- Now you should bring your eyes with dark shadows. You can apply a black or lighter palette to the beveled type brush using it for the movable eyelid. Alternatively, you can use a pencil to draw an arrow and tone down the shade using shading;
- The next step is to dye the eyelashes. The procedure should be performed from the center of the eyelids, spreading mascara from root to tip;
- The last step is to apply gloss or lipstick. There are no difficulties in this, so every beginner will cope with the task at hand. If you wish, you can use a lip contour that is similar to a natural shade.
With the help of these actions, you can create high-quality makeup step by step. This technique can be used for selfies, for work, walking with friends and any other event.


How to choose cosmetics?
If you decide to tackle the make-up issue yourself, you will need to choose the right cosmetics. This step refers to a responsible event, on which the quality of all makeup as a whole depends.
Tonal basis
Choose a foundation based on your skin type. It should be borne in mind that you will need a tonal foundation only if you have problem skin and it is required to hide its defects. For a dermis that does not need a specific masking, a regular concealer or corrector is suitable. If there is no severe redness or patchy areas on your face, you can only use powder. It will dry out the redness and restore the skin to its normal state.
For normal or combination skin, choose a foundation with moisturizing properties. For oily dermis, a foundation from the BB series is suitable. This is a matting series that has a slight moisturizing effect.


For eyebrows
The cosmetic series for the eyebrows must be chosen responsibly. yu, because this makeup element requires special attention and application skills. To learn how to dye your eyebrows, you will need a lot of time along with studying master classes from the masters.
Beginners should opt for a palette of two shades: brown and brownish-gray. Additionally, a white shade may be required. It is impossible to imagine filling the brows without a quality brush. You can purchase a set of multiple brushes or purchase separately.
Choose fairly soft products with natural bristles.


Shadows
In order for the shadows to hold better, you need to purchase basic framework for neither X. Due to this component, the shadows look more intense, bright, not prone to shedding and rolling.
When you start choosing your eyeshadow, test it in the store. Make sure that the cosmetics have good pigment and are easily transferred to your fingers. High-quality shadows should cast a rich shade.


If the shadow does not print well on your fingers, try a different brand. Choose a color palette based on your eye color, event and mood. The palette with black eyeshadows is very popular, the brown range is for natural make-up, and a turquoise shade is suitable for a youth party.
Shadows with similar properties are easy to apply and blend. They provide a smooth transition of shades. Performing makeup with such eyeshadows will have a high level of durability over the long term.
Eyeliner
Choose pencils with a high level of durability and. If you do not have extra finances, you can choose from the budget line. Such a pencil should have a bright and saturated color, creamy texture that blends easily.


Mascara
Makeup artists recommend that beginners buy mascara from famous brands ... It is of good quality and can withstand even the longest activities. Such products are not prone to shedding, do not float and do not spoil the image with poor durability.

Pomade
When choosing a lipstick or gloss, you should consider such qualities as durability, hydration, pleasant smell.... The color of cosmetics should be combined with your image, without making it too pretentious or, on the contrary, pale.
Having in your arsenal a set of these cosmetics, you can create makeup from scratch and think over an image for yourself for any occasion.


Makeup artist lessons for beginners are based on the idea that beginners can master the basic skills, learn the purpose of each type of cosmetics. This section contains a theory with which you will be able to create high-quality makeup with your own hands.
The initial stages are always concluded in the work with the face. You will need to learn how to work with it. Even for dummies, it won't be difficult to start painting. You will need to buy a foundation that is suitable for your skin type, primer, powder in light shades.
You should follow the procedure and apply the foundation with a special brush or sponge. The movement is carried out from the center to the periphery. If you are working at home, use a primer on the eye area, covering the eyelids and powdering it.


Facial sculpting consists in darkening or lightening certain areas of the face. If we start from professional make-up, in stages this procedure looks like this: the area of the cheekbones, cheeks, under the eyes, the back of the nose, the center of the forehead, the center of the chin, nostrils. The skin above the upper lip should be lightened by 2 shades. Areas such as the corners of the jaw, nasal wings, the forehead line along the hairline, the area of the temples and cheekbones are subject to darkening.
To learn the basics of cut-off correction, you should study its location visually with explanations.


Use blush to freshen up your complexion. If you master this course, you will be able to correctly emphasize facial features using make-up. High-quality makeup will help give your face a symmetrical shape. Makeup artists recommend using the following tips:
- Dry blush applied with a fluffy brush. Excess particles are eliminated by tapping on the palm;
- Exercise short and soft strokes;
- for "stretching" a wide face blush should be applied strictly vertically. You do not need to use shading. Draw a line from the center of the pupils to the dimples on the cheeks;


- To "tighten" sagging cheeks, you need to apply blush slightly above the level of the cheekbones;
- Soften the angularity of features a bronzer applied in a circular motion to the center of the cheeks will help;
- It will hide the fullness of the face well correct application blush under the cheekbone. The brush should be carried diagonally - from the fossa to the temples;
- For a narrow face the application should be carried out clearly horizontally along the level of the cheekbones.
To create high-quality makeup, you need to learn how to shape your eyes. Each form has its own technique.
If you have narrow eyes, makeup artists recommend using the following tips:
- Draw arrows. They should be located below one third of the inner corners. Extend the contour line, which is located in the middle of the eyelid, rounding its shape. Make sure that the lower arrow does not connect to the upper one. When taking a beginner makeup course, use dark shadows only on the outer and inner corners of the eyelids. The middle should be light. This method will allow you to make up correctly;
- For round eyes a long arrow should be drawn, which will protrude 2/3 beyond the outer side of the eyelid. The eyeliner should start from the line of the eye. Bend the top line of the liner along with the bottom up. Both lines must not cross;


- For close-set eyes you should only use shading at the outer corners. Matte light shades can be applied to the inner zone;
- For those girls with a wide distance between the eyes, you need to apply dark pigment on the inner corners, and the outer part needs to be lightened. It is impossible to withdraw the contour beyond the border of the upper eyelid;
- If you have small eyes, then makeup is to use light shadows over the entire surface of the eyelid. Don't forget to work on the crease with a darker pigment. Highlight the brow arch in white.
Applying lipstick is straightforward. Every girl can paint her lips. If you need, then the contour correction is made with a pencil. Make a choice that matches the color with lipstick or lips. It shouldn't be visible. The outline is also shaded a little.
Make-up should be applied from the center to the edges. Perform the procedure with a special brush. After the lipstick has been applied, you should use a tissue to remove the excess.
By applying a transparent gloss over the lipstick, you can make your lips visually fuller.

Ideas
Every girl can learn how to make a make-up for beginners. You only need to determine the type of dermis, as well as the oval of the face. After studying the advice of makeup artists, you can begin to navigate and become aware of how the colors are combined with each other.
- Smokey ice makeup is very popular and can be applied easily even for a beginner. Before starting work, you should smooth out the skin tone, apply a small amount of powder on the eyelids.
- You need to start the make-up with the arrows. They are applied using a cosmetic pencil. If you wish, you can use a flat-type brush or stroke the eye contour with shadows. Keep in mind that this technique excludes the use of liquid eyeliner, because you need to get clear and strict contours.
- Next, you should raise the line of the outer corner heading towards the temple area. Give the line a thickness that is much thicker than the inner corner. The contour should be shaded thoroughly. A thinner outline is drawn on the lower eyelid, which should also be shaded.

- Buy eyeshadows that are close to each other and create smooth transitions. Choose a color palette in such a way that it looks harmonious with a pencil. The darker eyeshadow pigment should be applied to the moving lids, using several layers to create the effect of sufficient thickness. Apply starting at the outer corner, working towards the inner corner. You can create a contour using shadows, and select an arc in the area of the eye sockets.
- Apply eyeshadow to the lower lids at the outer corners. The movement should be carried out towards the inside of the corner, lowering the intensity of the shades. Light pigment is applied from the age-old folds towards the eyebrows. All transitions with borders should be shaded.
"Smoky eyes" means a generous application of mascara to the upper and lower eyelids. Special attention should be paid to the outer corners.
How to apply foundation, how to blend concealer and use a concealer palette? We answer how to do facial makeup correctly.
What do you need for face makeup?
The list of cosmetics you need to create a flawless tone can look different. It all depends on the characteristics of your skin and personal preferences, but a complete list of products is described below.
- Tone cream, or
© site
- Primer

© site
- Concealer / Concealer

© site
- Blush

© site
- Highlighter

© site

© site
4 rules for perfect face makeup
To create an even tone and a beautiful make-up, heed these tips.

© site
Buy good makeup brushes. There should be at least four of them in the basic set - for applying and shading eyeshadows, for powder and blush, and for foundation. We've put everything you need to know about makeup brushes in one article.
Whenever possible, use funds only for their intended purpose. As a last resort, you can substitute one product for another (for example, use concealer instead), but for perfect results, use a full range of cosmetics.
If you are using powder, do not try to put as much of the product on your face as possible. The layer should be translucent, and it is generally better to apply powder only to those areas where it appears. greasy shine: for example, on the T-zone and chin. This way you will get the effect of light toning, and the skin will not look "overloaded" with cosmetics.
An example of beautiful makeup is in a video created specifically for the site by a professional makeup artist.
How to properly apply makeup on your face?
If you are starting to learn the rules of makeup "from scratch", first of all, figure out in what sequence to apply cosmetics. See our step-by-step photo tutorial on how to paint your face!
Cleansing and moisturizing
Absolutely any make-up - daytime, evening, art-make-up - you need to start with skin preparation. Cleanse your face and apply moisturizer. To enhance its effect and tone the skin, massage your face gently with your fingertips.

© site
Makeup base
Distribute primer - it prepares the skin for makeup application and prolongs its wear. How to choose your ideal remedy, we told in the material.

© site
Tone cream
At this point, apply your base foundation to your skin. It doesn't have to be a foundation, just pick the texture and shape that works best for you. Our simple one will help to understand the question.

© site
Sculpting
If you want to make the facial features look more chiseled and expressive, do. V evening makeup appropriate "full" contouring using dark and light sculptors, and for daytime or, for example, delicate wedding makeup, light sculpting is suitable, as in the photo below.

© site
Concealer & Concealer
Hide pinpoint skin imperfections - redness, pimples, scars - with a thick one, and apply a lighter one under the eyes. If you are planning a bright accent on your eyes, first do your eye makeup, and then apply concealer so that the crumbling shadows and mascara do not spoil the tone.

© site
Blushers can be dry or creamy for a more natural look. But in any case, blend the product well so that there are no bright streaks and spots on your face.

© site
Highlighter
Use a highlighter if you want to add radiance to your face and give it a fresher and more youthful look. The highlighter is appropriate for both daytime and evening make-up: it all depends on the intensity of application and the texture of the product. V everyday makeup do not use a highlighter with large shimmery particles.

© site
Anchoring
Brush

© site
The brush creates a tighter coverage, so this method is ideal for evening makeup or if you have problem skin.
- You can use a flat or fluffy brush, whichever is more comfortable for you. But in any case, it should be made of artificial pile: unlike natural, it does not absorb liquid cream.
- Do not squeeze the foundation directly onto the brush from the tube. First, apply a couple of drops to the back of your hand and wait for the cream to warm up slightly.
- If you chose a round brush, the strokes should also be circular. With a flat brush, respectively, you need to apply the product in "stripes".
- Try not to put pressure on the wrist so that the movement is light.
Fingers

© site
It is more difficult to evenly distribute the foundation with your fingers than with a brush or sponge, but the product will also be spent much more economically. Place several points all over the face and pat them over the skin. In the end, make sure that you have worked absolutely all areas, and there are no stains on the skin.

© site
Learn more about how to apply foundation different ways, in the video tutorial below.
How to use concealer?

© site
The main task of the concealer is to hide "bruises" under the eyes and other minor skin imperfections (but it also has).
Apply concealer under the eyes in an inverted triangle shape as shown in the diagram below.

© site
Also, with the help of a concealer, highlight those areas that sunlight usually falls on first of all: the bridge of the nose, the central part of the forehead, and the chin. This will make your face look fresher and healthier. Apply a little of the product to the area near the "wings" of the nose - as a rule, this is where the fine vascular mesh appears.

© site
If necessary, apply concealer locally to other problem areas - areas where there are acne, redness or dark spots.

© site
Beauty blogger Olya Red Autumn shows how to quickly hide skin imperfections with a concealer.
How to use a highlighter?

© site
Highlighter is a tonal agent that creates delicate "highlights" on the face and, due to this, provides the effect of the skin, as if illuminated from within.
- Highlighter texture can be creamy, dry or liquid.
- It is advised to distribute cream and liquid highlighter with fingertips or a small artificial brush, and dry with a flat natural one.
- Highlighter may contain small shining particles - shimmer. This product is best used in evening make-up. But a highlighter with a delicate satin shine will come in handy when creating a daytime look.
Advice! If you have oily skin, you shouldn't buy a highlighter with noticeable glitter; it can look like an oily sheen on your skin.
- For a detailed beauty dossier dedicated to the highlighter, search by.
As a rule, a highlighter is applied to those areas that need to be highlighted, "highlighted". Here are the main ones.

© site
Blend the highlighter along the cheekbones for a more sophisticated look. It is in this area that the largest amount of highlighter should be concentrated.
Above and below the eyebrow

© site
To balance your makeup, go over and under your eyebrow with a highlighter. Among other things, this trick will help to visually make the eyebrows more neat and sophisticated.
Nasal bridge

© site
Also spread the highlighter along the bridge of your nose to visually narrow it. But don't add a highlighter to the tip unless you want to visually shorten your nose.
Over lip

© site
A classic trick by professional makeup artists to make lips look voluminous and sensual. Just add a drop of highlighter to the area above your upper lip.
Inner corners of the eyes
Place light translucent "highlights" near the lacrimal openings to refresh the look, and with it - your entire image.

© site
The way a highlighter is applied directly depends on its texture. Learn more about each in this video tutorial.
How to paint with blush correctly?
The rules for using foundation and concealer are relevant for any girl. But when it comes to blush, it is worth starting from the shape of your face - she will tell you exactly where to apply them.
For an oval (elongated) face

© site
Apply the blush along the top line of the cheekbones, blending towards the temples. This will focus your attention on your cheekbones - and distract it from the rounded lower part of your face.
For a round face

© site
If you have a round face, chances are you want to visually reduce your prominent cheeks a little. It is very easy to do this with the help of blush. First, apply them to the "apples" of the cheeks - for this, smile and remember where the most prominent part is. Then blend the blush, trying to "take away" the pigment under the cheekbones.
For a square face

© site
Your task is to soften the facial features. In a circular motion, apply the blush directly to the apples of your cheeks to bring the focus to that part of your face.
For a triangular face

© site
To distract attention from the angular jaw, shift the focus of your makeup to the center of your face. Distribute blush along the top line of the cheekbones, add a highlighter here.
Advice! Tint can be a good alternative to the usual dry blush: the tool provides the most natural result.
How to use a face concealer?
Contouring is perhaps the hardest part of creating the perfect complexion. As in the case of blush, a lot depends on the shape of the face: you can study the features of sculpting for your face type. But if we talk about basic rule, then it sounds like this: everything that you want to highlight, highlight, everything that you want to hide - darken. The sculpting scheme in any case will contain the following steps.
Highlighting
The light corrector should be applied to the same areas as the highlighter. These tools are interchangeable, and many beauty brands, when creating palettes for contouring, include a highlighter instead of a light corrector. You can also replace the concealer with a light concealer without a shimmer - and vice versa.

© site
Blackout
Apply a dark sculpting agent under the cheekbones and along the sides of the lower jaw. This will help make the cheekbones more visible and the jaw more refined.

© site
Also apply a dark sculptor around the edges of the bridge of your nose and don't forget to apply blush for a harmonious finish.

© site
The most important part of the sculpting process is shading. First, blend the light corrector with a sponge or brush, and then move to a darker one, so as not to get the effect of a messy face. Make sure you blend all the borders perfectly.

© site
The visual process of applying the sculptor is in the video of the make-up artist Yulia Sizykh.
How to paint with a concealer palette?
Whereas a regular concealer is intended to correct minor imperfections of the skin, then a palette of colored concealers or color correctors (both names are found) are intended to mask specific problems. For example, age spots, a reddish or yellowish tinge of the face, traces of acne. Color correction works by literally neutralizing one shade of another.
PHOTO color palette
Typically, a color concealer palette includes several primary colors.
- The purple color neutralizes yellowness, therefore it is effective in the fight against age spots and a dull, yellowish complexion.
- Yellow overlaps purples and blues, doing an excellent job of reducing vascular network, bruising and acne marks.
- A pink or peach concealer helps to mask dark circles under the eyes.
- A green concealer perfectly conceals redness and acne.
For more information on how to properly use a palette of colored concealers (correctors), says beauty blogger Lena Sevelenium.
How to paint with powder?
The most difficult task is to choose the right one. Well, anyone can apply it correctly on the face, just watch our video tutorial once.
Now that you have learned how to create a beautiful complexion, connect your imagination - and try on the most extravagant images!
Guys, we put our soul into the site. Thank you for
that you discover this beauty. Thanks for the inspiration and the goosebumps.
Join us at Facebook and In contact with
How to properly apply foundation, how to emphasize all the advantages of your face with blush, how to hide minor skin imperfections with a concealer, and how to get rid of unwanted shine with powder? Almost all girls use makeup every day, but we don't always know how to use our favorite beauty products 100%.
site picked up for you best advice to create a perfectly smooth and beautiful skin... We hope you find them useful!
Base
Properly selected and applied, foundation can work wonders. The tone refreshes the face and gives it a sculptural appearance.
Apply your daily moisturizer to your face before using your foundation. Let it dry and blot the excess with a towel.
Remember to use a sponge, brush or beauty blender for a flawless application of foundation.
After you finish applying the foundation, be sure to blot your face with a napkin.
Always choose a foundation that will improve your skin type. Oil-free formulas are best for acne-prone skin, moisturizing formulas are best for normal to dry skin, and hypoallergenic creams are ideal for sensitive skin.
Never test tone on the wrist or elbow. The skin in these areas differs significantly from the complexion. Ideally, apply the foundation to an unpainted face and wait a few minutes. After a while, the cream will darken and you will be able to understand if it is right for you.
Apply foundation in a circular motion, moving from center to periphery.
Avoid applying cream in large portions. It is best to spread the base in small peas. This will make the base more even and natural.
Apply foundation in daylight whenever possible. Even if your bathroom has artificial lighting, it is very important to test it in daylight after you finish your makeup to reveal any imperfections and imperfections.
Concealer
Every girl needs a concealer in her makeup bag. It will help hide the traces of a sleepless night, disguise unwanted circles under the eyes and paint over unpleasant age spots and pimples that appeared at the wrong time.
11. Choose a concealer that is lighter than your skin tone.
12. Apply your daily eye cream before using concealer. It will be much more convenient to blend the corrective on pre-moisturized skin.
13. The shading process will be much easier if you warm up your fingers first.
14. First apply the foundation on the face and only after that - the concealer.
15. And remember the basic rule: never use foundation instead of corrective.
Powder
Compact powder is one of the most common beauty products. It is able to hide imperfections and make the skin perfectly smooth and even. The powder is also able to absorb excess oil and grease from the face and reduce shine.
16. Apply powder only after the moisturizer and foundation is completely dry.
17. Basic tools for applying powder: sponge, wide brush or puff.
18. Follow the sequence when applying powder: first cover the forehead, then the wings of the nose and chin, and only then - the cheeks, cheekbones and side zones.
Blush
Although many of us use blush, not everyone knows the basic rules for applying it. Smart use of this cosmetic product will help to highlight the dignity of your face and give it freshness.
18. Apply blush in several light coats. This will help them hold out much longer.