The celebration of the New Year and Christmas is based on the idea of bringing family members, relatives and close people closer together. A general occupation with creativity is a good opportunity to interest adults and children, and making New Year's toys out of paper with your own hands will be a topical occasion. On the eve of the holidays, it's nice to spend time with your family and beautifully decorate the house before the clock strikes 12 times.
DIY paper Christmas decorations can be hung on a Christmas tree, walls, ceiling. Bright colors of toys and garlands will fill the house with a festive atmosphere, give good mood in the last days of the outgoing 2019.
Christmas decorations made of white paper (master classes)
A simple and accessible material for creativity is white paper. The color is fully consistent with the New Year theme. Decorations are associated with fluffy snow, frosty patterns on the windows, snow-white hoarfrost. Snowflakes are cut out of white paper, funny vytynanki, figurines of angels are made, decorations can be used to decorate a room, windows, decorate a Christmas tree. The master class on the manufacture of such products is quite simple, adults and children will successfully cope with the work.
Snowflakes
A classic Christmas decoration is an ordinary bulky snowflake. White products look beautiful on windows, especially if you make snowflakes of different sizes with unequal patterns. The main thing is to fold paper snowflakes correctly.
Manufacturing process:
- Take a sheet of A4 paper, fold in half diagonally.
- Cut off the excess part, leaving a triangle.
- Connect corners, fold paper, repeat.
- Wrap a straight corner of the workpiece to the edge.
- Cut off excess paper, transfer the pattern of the pattern.
- Cut out the white snowflake and unfold.


It is more convenient to glue simple white snowflakes on the windows, made like napkins. They are easy to fold, apply a pattern, cut out. You can take circuit ideas from the photo below or come up with your own.
 6 variants of snowflakes with different patterns
 Vytynanka
Volumetric figures of a vytynanka with many holes can be handed over as a cute New Year's present, cling to a Christmas tree, or you can decorate a window with them. To create a craft, you need white paper, a tuck template, a stationery knife, glue, a cutting board (a cutting board is suitable).
How to make a vytynanka:
- You need to print the template of the figurine from the Internet.
- For a volumetric figure, 2 copies are printed.
- The paper is placed on the board, all the patterns are cut out with a knife.
- A strip of paper is left at the bottom of the drawing for gluing.
- The cut patterns are glued together at the top.
- The lower strips are formed into a ring-clasp, glued together.

The figurine turns out to be voluminous and stable, such paper decor looks beautiful in the room. You can take the pattern of the Christmas tree in the photo below as a basis.
 Download this picture and print on a printer
 Angels
New Year's and Christmas themes are ideally matched by paper angels. Traditionally, they are made of white paper flat or bulky.
Several options for how to make angels:
- Print the template using a printer, cut out a figurine, decorate with sparkles, rhinestones, hang on shiny threads.

- Cut out a volumetric angel, paper elements: two truncated cones, a head, a halo, sleeves, wings. The cones are folded, glued, and the rest of the figurine elements are attached to the dress.

- Craft according to your own drawing. The sheet is folded in half, draw on one half the figure of an angel with wings, a halo, cut out the craft, unfold - the figure is ready.

If you thread the strings through the angel's halo and prepare several figures, you will get an interesting decoration for the chandelier.

Small house
For New Year's decoration, you can prepare fabulous houses and decorate some parts of the craft with sparkles. The houses themselves can be made from old postcards, cardboard, unnecessary boxes. There are many options! The template for making New Year's decorations from paper is downloaded and printed.
 Template example
 Then the scheme is transferred to paper. Cut out the house according to the template, fold the paper along the fold line (a box is obtained). The roof, smoker, windows are cut out separately. All elements of the craft are glued to the finished box, decorate if desired.

From such New Year's paper decorations with your own hands, you can create a whole composition, decorate the windowsill with it, add figurines of fairy-tale characters, Santa Claus, Snow Maiden.

Christmas decorations made of colored paper (master classes)
Do-it-yourself beautiful and unusual Christmas decorations made of colored paper can be made for the holiday in advance. Such bright crafts used to decorate a room, hung on a Christmas tree. To make a simple garland-chain can even Small child.
You need to prepare scissors, glue, several sets of colored paper for craft blanks, optionally choose beautiful beads, beads, rhinestones, sparkles, colored ribbons. Simple DIY Christmas decorations made of paper turn out to be interesting and relevant.
Simple garlands
The simplest Christmas garland is a chain. For her, paper of different colors is chosen to alternate the links with each other. Workpieces of any length and thickness are cut, then all the strips are glued together - first, the first link is made, a paper strip is threaded into it, glued again and the steps are repeated until a garland of the required length is obtained.

Another interesting decoration option is a chain of colored hearts, and it is much easier to connect the elements with a stapler. By analogy with the previous master class, the required number of narrow strips are cut from colored paper. They take the first two strips, fasten them with a stapler, turn them inside out (as it were, open them), connect two free edges, add two new strips to them and then fix them with a bracket. It turns out an unusual decoration that looks elegant in the decor of the room.

A more complex decoration is a voluminous garland made up of multi-colored paper balls. In addition, a sewing machine is needed to make a craft, but if you don't have one, you can do the work by hand.
How to make a garland of paper balls:
- Cut 6 circles of the same size in different colors from colored paper.
- Prepare several sets of circles along the length of the garland.
- Sew a stack of blanks on a typewriter, then the next one to the end.
- Carefully wrap the fragments at the seam, forming bright balls.

For crafts, you can take crumpled or non-colored paper - the craft will turn out to be more fun. Garlands are hung from the diagonal corners of the room, they decorate the Christmas tree, walls, ceiling.

Garland of flags
A popular Christmas decoration for the home is a garland of colorful multi-colored paper flags. On colored paper, draw the shape of a flag with a fold line in the middle and cut it out. You should get a double-sided element. Flags of a different color are prepared in the same way. Each flag is opened, glue is applied to the fold line and a strong thread is glued until the required amount of paper parts for the garland is collected.

Alternatively, the flags can be made triangular by gluing the free corners of the products. Sometimes patches of colored fabric are used for such decoration. After the New Year, you can hang garlands with flags to decorate a children's party.

Christmas trees
What is New Year without a tree? You can decorate the festive beauty with your own colored paper crafts. To make a voluminous hanging decoration, you need to take paper, scissors, cardboard, glue and tape.
We make the Christmas tree in this order:
1. Cut multi-colored narrow identical strips and make a paper cone.

2. Glue the edges of each strip like a loop.

3. Glue the blanks to the cone starting from the bottom using tape or glue.

4. Decorate the top of the Christmas tree and the loops with any decor, you can also hang the decoration on the Christmas tree.

As an option, an interesting garland is collected from paper Christmas trees - the figures are sewn to a bright ribbon or fixed above and below (chaotically) on a colored lace.
Christmas balls
One of the most popular Christmas tree decorations is balls. Colorful, bright, shiny toys make the tree more beautiful and more fun. Christmas balls can be made of colored paper.
From paper strips
To make a simple ball, cut out thin paper strips (at least 18 pieces, more strips, a more beautiful toy) and two small circles. Choose a large bead, insert a thread into it, and thread both ends of the thread into the eye of the needle.
After that, a paper circle and all the prepared strips are strung on a needle by one edge. The next step is to string in order the second edge of each strip, the second circle and another bead, and remove the loop. If you loosen the thread, you get a beautiful ball-shaped toy, you can additionally decorate it.

From circles
Wicker paper balls
You can use ready-made schemes of New Year's decorations to make balls and make them out of paper with your own hands or weave complex toys. Curly strips and a small circle are cut out according to the templates. Lay out the details in the shape of a flower, glue a circle in the center. Next, the strips need to be weaved like a pigtail from many strands.
So that the structure does not disintegrate, and it is convenient to work, the strips are fixed with ordinary clothespins. By the end of weaving, a ball will form, the edges of the curly strips are again fastened with a circle and a loop of shiny thread is threaded.

 Option 1
  Option 2
  Option 3
 In the video: christmas ball from colored paper.
Magic lamps
Lanterns made of colored paper look unusual and original on the tree. Jewelry is easy to make, even children can handle the job. The lamps symbolize warmth, wealth, prosperity and good fortune. There are several simple master classes on how to make DIY Christmas decorations from paper in the form of lanterns on a Christmas tree.
The most popular option: take two sheets of different colors, glue a tube from one - the middle of the flashlight, and fold the second sheet in half, retreat from the edge 1 cm, draw a line. Then cuts are made from the fold to the drawn line. Open the cut sheet, wrap it around the cylinder tube, glue the edges and make a loop-handle at the top of the flashlight.


Flashlight made of stripes
To make a beautiful toy, you need to cut many thin strips of colored paper - all the details of the decoration should be the same size, approximately 15 cm long. The strips fold edge to edge, pierce each piece in this place with a needle, pulling a lace or thread through them.
The free edge of the lace is pulled through the hole from the other edge of the strip and pulled lightly to form an arc - an elongated loop. The upper part of the flashlight (where the edges of the strips are) is glued with a thin strip of paper in a circle, and the rounded loops will hang freely, forming a pear-shaped flashlight from thin strips.

Chinese lantern
The Chinese are the inventors of paper, they have learned how to make interesting decorative products out of it. New Year's Chinese lantern will decorate the festive tree. For work, use the scheme, you can draw the segments of the flashlight yourself. The size of one part is on average 10 cm, according to the diagram, there are circles at the top and bottom of each segment for fixing the flashlight.
How to make a piece of jewelry:
- Transfer the drawing to colored paper.
- The flashlight is made of six segments.
- Cut out the workpiece, glue the edges.
- Forms the top and bottom of the flashlight.
- Sew the lower circles with a thread, then the upper ones.
- Make fasteners and a loop. A cute Chinese lantern is ready.

 Use this template to cut out flashlight segments
 sky lattern
The decoration will be made according to the principle of a flying flashlight, but you do not need to launch it into the sky. The decoration is made of bright colored paper. It is necessary to prepare a large sheet - 24 by 60 cm. It is folded in half, and then in the form of an accordion. Next, the sheet is unfolded, triangular creases are made in the center (along the fold line). The same creases are made from above and below. A figured triangular cylinder is glued from the workpiece, a bright loop is glued.

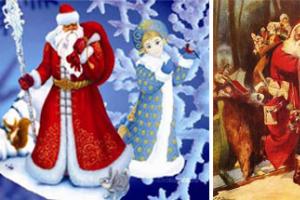
Ded Moroz and Snegurochka
New Year is unthinkable without the main characters of the holiday - Santa Claus and Snow Maiden. It is quite simple to make them using colored paper of cyan (blue), red, white, yellow color to cut out the elements of the Christmas figurines yourself.
A circle is cut out of blue paper for the Snow Maiden, and from red paper for Santa Claus. The circles are cut to the middle, rolled up with a cone and glued, getting the bases of the figures. Separately, a flat kokoshnik is cut out for the Snow Maiden, small slots are made on the cone and the resulting element is inserted into them. Previously, the face of the figure, drawn on a white oval, is glued to the kokoshnik, and a yellow braid is glued to the back. For greater realism, you can make small hands-cones, decorate the bottom of the Snow Maiden's coat with white fringe.

Santa Claus is painted with a face, glued to the cone-base. Then a small red cone-cap is cut out. A must-have decoration element is a bushy beard; if you wish, you can make a bag with gifts.

To make the figures of the main New Year's characters more durable and voluminous, you can use colored cardboard instead of paper. To make a fringe or beard, cut white paper into thin strips, wind each strip on a pen or pencil - it will turn out to be voluminous. You can decorate the finished figures at your discretion with snowflakes, stars, pieces of cotton wool.
New year wreath
A wreath is used in decorations for the New Year holidays, symbolizing wealth, longevity, hope and happiness. The wreath serves as a kind of guardian of the family hearth from various troubles. Traditionally, the decoration is hung over the front door. To make a very simple colored paper wreath, you need more green sheets. V creative process be sure to connect the child.
Master class on making door New Year's decor:
- Choose a large plate, circle its outlines on a sheet of colored cardboard (the wreath will turn out to be stronger) - this is the base.
- In the center of the large circle, a smaller circle is cut out under the saucer, the result is a wreath ring resembling a donut.
- On green paper, the child's palms are outlined with a pencil and many fragments are cut out - the more, the prettier the decoration.
- "Palms" are glued to the ring, partially overlapping each other. It's not scary if it turns out randomly - it's more interesting that way.
- Bright decorations - bells, bows, ribbons - are glued to the top of the "palms".

Volumetric paper decorations (master classes)
New Year's decor always looks more interesting if the decorations are voluminous. It is more difficult to make them than flat toys, snowflakes or garlands, but everyone can do it. For creativity, use paper of different colors, additional decor, bright ribbons, laces, shiny threads.
Bulky crafts - stars, snowflakes, balls, garlands - are hung on a Christmas tree or on the ceiling. With a little imagination and patience, you can create original toys, elegant and voluminous Christmas decorations with your own hands from paper.
Volumetric pointed balls
An interesting decoration made of white paper is quite simple. To make crafts, you need sheets, glue, a pencil, scissors, a small saucer, a coin, beads (rhinestones, sparkles), fishing line.
How to make balls:
- Attach the saucer to the paper, circle 4 blanks.
- In the center of each circle, outline the outline of the coin.
- Cut out the paper circles (do not touch the middle yet).
- On each circle, draw eight lines with a pencil, before reaching the central circle.
- Insert a pencil into each sector, wrap the edges, glue.
- For each ball you need 4 blanks, they are allowed to dry.
- The elements are connected with the inner sides, a hole is made with a needle, and the fishing line is pulled. The original Christmas decoration looks beautiful on a Christmas tree and in a garland.

3D asterisk
A popular toy for christmas tree is a pointed star. It crowns the top of the tree, giving the decoration a complete look. To make the product look more realistic, you can make a 3D star from colored paper.
Completing of the work:
- Two identical squares are cut out - the size and color are arbitrary.
- The workpieces are folded in half twice, two more times diagonally.
- They unfold a fragment of the toy - the fold lines are clearly visible.
- Each corner is wrapped inward to the fold (like a children's airplane).
- The edges of the corners are glued according to the principle of paper bags for volume.
- The second fragment of the toy is performed in a similar way.
- Connect the workpieces with their inner part to each other crosswise, glue them together.

It turns out a volumetric star with pointed rays. A ribbon or string is attached to it and the toy is hung on the Christmas tree. To simplify the work, a loop can be inserted between the fragments of the star before gluing.
In the video: a volumetric star made of paper.
Volumetric snowflakes
White snowflakes are used to decorate windows, they are used to decorate the area near the fireplace. If you stretch a silver thread through the products, you can hang garlands of snowflakes in the room. Christmas decorations made of white paper look interesting when snowflakes of different sizes with unequal patterns. To make snowflakes with a voluminous middle, you will need white paper, a pencil, and scissors.
Operating procedure:
- An A4 sheet is folded in half, cut into 2 parts.
- Each workpiece is folded diagonally, the excess is cut off.
- The resulting squares are again folded in half and diagonally.
- The core of the snowflake is made from the blanks by making two cuts.
- Cuts are made from edge to corner, without cutting the workpiece to the end.
- In the upper part, a curly cut is made to make the petals.
- The product is unfolded, the inner petals are glued to the center.

The second part of the snowflake is performed in a similar way. After that, the parts are crosswise glued together. As a result, you will get a two-sided volumetric snowfield, on one and on the other side there is a flower in the center.

New Year's decorations made of cardboard (master classes)
For the manufacture of toys and Christmas decorations, cardboard is often used. Thick paper holds its shape well, allows you to perform beautiful volumetric figures, four-sided Christmas trees, cones for making Santa Claus and Snow Maiden are ideally obtained from cardboard.
Volumetric balls
Decorating a Christmas tree is not complete without decorations in the form of balls. Large and small, monochromatic and multi-colored toys are hanged on a tree in a chaotic manner.
Volumetric balls made of colored cardboard or colored paper and white cardboard look interesting. They are easy and quick to do:
- Circles of the same size are cut out of thick colored paper - 20 pieces, radius 3.5 cm.
- Separately, make an equilateral triangle template so that it is clearly inscribed in a circle.
- On the inside of the blanks, a triangle is encircled, its sides will be the place where the circles are bent.
- Under the ruler, folds are neatly made on each circle, wrapping the paper on the front side.
- Five fragments are taken, the obtained valves of the circles are lubricated with glue, the blanks are connected - the top of the ball.
- A hole is made with an awl, a lace is inserted into it, the bottom is made in the same way from 5 other blanks, but without a lace.
- Of the ten remaining blanks, the valve strip is glued to the valve, the ring is closed, the top, bottom and middle of the ball are connected.

To make volumetric balls, you can use old postcards or colored cardboard. Toys are decorated with fine decor, sprinkled with sparkles, cut into rain.

Cardboard spruce
A variant of a New Year's decoration or toy is a Christmas tree made of colored cardboard. The most ordinary Christmas tree is drawn on a dense sheet, trying to maintain the symmetry of the spruce paws. On this blank, they make a second part of the same, bend the Christmas tree vertically, glue the blanks and decorate with small circles of colored paper, stars, beads, rhinestones, beads.

In order not to glue the figures, you can make cuts (cut one blank from the top to the middle along the fold line, and the second from the bottom to the center) and insert the parts into each other. Due to the density of the cardboard, the figures will not disintegrate.

How to decorate a Christmas tree with paper decorations
To make a Christmas tree decorated with your own crafts look beautiful, you need to properly hang paper toys and decorations. There are several options for placing jewelry - in a pyramid, in a spiral, vertically or horizontally. Each method is interesting, you need to pay attention to the shape, size and color of homemade paper toys.
Design options for the New Year's beauty:
- The top of the spruce is decorated volumetric star golden hue - the color of the Earth Dog.

- In the coming year, the Dogs decorate the spruce with medium-sized figurines of a restrained color scheme. The use of jewelry from natural materials- paper, wood, burlap, cones and twigs.

- In the central part of the tree, you can place a dog figurine to attract good luck and prosperity.

- Garlands of golden, brown, yellow, green, red, purple, beige colors are used.

- Paper beads, chains, flags, connected in a garland, are hung in one direction - horizontally, spirals, vertically, from top to bottom.

- In a chaotic manner, medium-sized balls are hooked onto a tree; toys can be the same or different.

- They complement the decor with figures of Santa Claus, Snow Maiden, angels, point-to-point cling to several voluminous snowflakes.

Before decorating the spruce with paper toys and crafts, a garland with light bulbs is hung on the tree. You can use a little shiny rain or add a fluffy "snowball" to the decor.
Spruce is decorated to your liking, but in the coming year, the decor should be chosen natural, restrained, in brown colors (all shades), with unobtrusive bright accents - several red bows, burgundy bells, paper cones decorated with beads. Then 2019 will definitely bring good luck and prosperity to the house.
Origami Christmas crafts (2 videos)
Hello everyone! Now everyone wants to decorate the Christmas tree with handmade toys! And this is not only a tribute to fashion, because such crafts carry a special atmosphere of kindness and comfort). They are unusual, unique and only yours. Memories and expectations are associated with them, because while you were making them, you dreamed of a holiday, comfort, a happy future.
Last time we did it ourselves. Now let's make some wonderful jewelry. You will be surprised how interesting the crafts turn out, and how easy it is to make them. And the materials for creativity are at hand and the most unexpected.
These toys can be used to decorate both home and outdoor New Year's beauty... And if there is a homemade competition at school, your child is guaranteed a prize!
Light bulbs, plastic bottles, shreds, buttons, dried fruits ... But let's start with the simplest thing - with paper.
The first thing that can be done from corrugated paper- Christmas balls. They are made according to the same principle as the trees in the last master class. The difference is that the toys are based on a foam ball. It can also be made of wood or papier-mâché. These blanks are now sold at any craft store or online.

The paper is cut into narrow strips 1 cm wide and 3-4 centimeters long. Next, the paper is curled into a rose.

Having made the required number of such flowers, we begin to glue them to the foam ball. If you add more beads, you get a very elegant toy.

Here's another decor option:

You can make snowflakes in a similar way. Cut out the shape from the cardboard according to the template. We twist roses or buds from corrugated paper in any way, glue them onto the snowflake blank. We make a loop to hang the craft on the Christmas tree and get a wonderful toy.

Using a styrofoam egg, you can make such an interesting candy cone.

To begin with, glue the blank with brown paper. Cut out rectangles from corrugated paper about 5x3 cm in size.

We glue them together and cut out an oval. Such blanks will need about 70-80 pieces. It all depends on the size of the foam blank. We roll up the finished scales and glue them to the toothpicks.

Now, starting from the very top of the egg, we pierce the foam with toothpicks and fasten the scales. We arrange them in a checkerboard pattern. We make several scales without toothpicks to glue the lower part of the egg with them. You can take chupa chups and insert them between the scales.
Here is another version of corrugated paper cone toys:

But, if you did not have paper at hand, but there are many plastic bottles, you can make New Year's crafts out of them.
How to make a Christmas tree toy out of paper - a step-by-step master class
And now we will make such a wonderful angel out of paper, which can be hung on a Christmas tree or presented as a New Year's card.

Everything is done quite simply. We take a sheet of paper. The color depends on the fantasy. You can white and then paint it, or you can take a colored one. Now we bend it in even strips into an accordion. The result is corrugated paper. We cut the sheet in half.

We decorate the lower edge of the craft with an adhesive colored tape, and glue the upper one. The result is a skirt. I pinched the top to make the glue solidify.

While the bottom dries, we make angel wings. To do this, take the second half of the paper, cut it in half and carry out similar actions as with the first large half.

That is, we glue the adhesive tape, and glue the upper part.

Now it remains to collect the angel. We glue the narrow part of the wing and the wide one (shown by arrows in the figure) and attach the wing to the figure.

We do the same with the second wing. It remains to make the head. To do this, we take a strip of paper 20 centimeters long, it is possible and more, and 1 cm wide. We roll it into a roll and glue it so that the paper does not unfold. We make a strip of colored tape, which we glue to the head. She plays the role of both a halo and a pendant. We glue the head to the angel.

Everything. the craft is ready. It took a little time. And the result is wonderful.
Making a toy for a Christmas tree from a plastic bottle
The easiest option is to make snowflakes that only need the bottom of the bottle. Toys made from this material are suitable both for a street tree and for an apartment New Year's beauty.
Everything is quite simple here. Cut off the bottom. It is better to take bottles of different sizes, then the snowflakes will be of different sizes. Next, draw a snowflake on the plastic. This can be done with felt-tip pens, or a marker, or paints - whatever is at hand.

We make a hole, skip the thread, and the toy is ready. Can be hung on a Christmas tree.

More snowflake patterns and patterns are available.
You can't do without bells on the Christmas tree. It will not be difficult to make them from bottles. Watch the video master class:
Here are some more inspiration:

If you cut off the top of the bottles and insert LED lamps into it, you get a garland.

If you have an old garland in which the caps are broken or lost, then you can replace the missing ones with homemade ones. Cut off the bottom of the bottle, make a hole in it for the lamp, and cut the edges and unfold them like petals.

In addition, by painting bottles, you can also make beautiful crafts, such as, for example, such a house:

Or such wonderful penguins.

If you need Santa Claus under the tree, do not rush to run after him to the store. Take plastic bottle and make it yourself. Such a Santa Claus under the tree will look much better.

And here is a variant of snowmen, also under the Christmas tree:

Even such beauty can come from unnecessary bottles:

So, show your imagination and you will succeed.
Homemade toy for the 2019 New Year tree from cones
The bump is a wonderful material from which to make various crafts... If you attach a thread to them, then such crafts can be hung on the tree as New Year's decorations. It will be pretty creative.

We collect such balls from several small cones. We decorate with ribbons, colored paper and, as a result, we get Christmas decorations.
If you use the dough for modeling, then you can make various funny figures, for example, such a Santa Claus.

And paint them.

And here's another original and simple decoration. A ring of cones with a snowman in it.

A snowman can be made in this way:

And, finally, several Christmas trees can be made from cones, which can be placed as decoration in different rooms, so that New Year felt everywhere.

A holiday with such homemade products will be unforgettable!
DIY corrugated paper tree step by step
In case you do not have the opportunity to put a real Christmas tree at home, I will leave you a video with a master class of 5 options for step-by-step making a Christmas tree from corrugated paper:
You'll like it!
DIY Christmas tree toy from a light bulb - master class
An unexpected material for manufacturing is an ordinary glass bulb. Its pear-shaped shape resembles many factory Christmas decorations... They use them, painting animals and New Year's characters in various figures. For example, you can make a snowman like this.

Or such fabulous animals.

Here you can see detailed master class How to make a penguin Christmas tree toy out of a light bulb that looks better than one bought in a store:
But if you don't know how to draw, don't despair. We take multi-colored sequins and glue. We glue the light bulb, and then immediately sprinkle with sparkles until the glue has time to dry. As a result, we will get such a beautiful decoration.

Applying the technique of drawing and applique, you can create Santa Claus.

And this is a fairly simple drawing that anyone can handle.

You can just draw some patterns.

In addition to painting, you can remove the base from the light bulb, leaving only the bulb, fill it with colored pebbles, confetti or colored sand (fill it with layers) and get a nice decoration too.

There are many options, try, fantasize.
DIY Christmas toy in kindergarten or school
If you have a small child, you will certainly have to deal with the theme of Christmas toys for kindergarten or elementary school. If suddenly a child participates in a school craft competition, such toys will provide him with prizes!
You can, in principle, do any of the above items. However, I would like to draw your attention to another unusual, but rather popular material - pasta... The store sells so many different types, shapes and configurations, which is very inspiring for creativity. For example, you can make such a Christmas tree.

But I would like to show you an easy-to-make craft - a snowflake. As well as from paper, so from pasta - there are a huge number of design options!

We start by drawing a snowflake scheme on our own, or find a suitable one on the Internet. Next, put the pasta, as in the diagram, and glue them. It remains only to paint with paint from a spray can and make a loop to hang the toy on the Christmas tree.

This is such a beauty).

And all this is done by hand!
DIY paper Christmas toy
You can make it simple enough, but beautiful craft from paper strips of different colors.
We start by taking several sheets of paper of different colors and cutting out the strips. In total, you need to make 8 such strips.

The width is 4 cm, and the length can be different and depends on the size of the future figure.

We fold the strips into a pile, bend them in half and make small cuts along the edges at the fold.

We do the same from the opposite side. Then we open the folded strips and tie them with a thread in the middle and at the bend.

Then in the center of the workpiece we coat with glue and take a strip at the beginning from one edge. We bend and glue. Then we glue the second strip, the third.

We hold the glued strips and glue the remaining ones.

Having done on one side, go to the second half and do everything in the same way.
When we finish gluing all the strips, we get such a figure.

We straighten and get a round craft.
We make a pendant and get a Christmas tree decoration. You can also decorate with rhinestones, ribbons. In general, this is already at the creative discretion of everyone.
The symbol of the New Year 2019 - do-it-yourself pig
Well, in conclusion, the craft symbol of this year is a pig. As without her. The symbol of the year must be on the tree, on a table or shelf. It doesn't matter where, the main thing is that he was.
So we watch, do and prepare for the main holiday of the year. Good luck!
Hello everybody. It turns out that if you are bored and do not know what to do with your child, ordinary paper, or rather paper toys, can save you. And today we will not just talk about applications, origami, carving animals, but about toys that will save you from boredom not for 10 minutes or even for half an hour. I guarantee at least 1 hour of fun. What do-it-yourself paper toys for children can you make?
Boomerang That Returns
Yesterday we played with such a cardboard boomerang for half a day. Surprisingly, he really does return, which was not seen for purchased plastic boomerangs.
The paperrang is not entirely made of paper, made of cardboard, but I think you have cardboard, you need a very small piece. Wonderful toy for boys and girls.

Kite

If a boomerang can be launched at home, then a kite requires not only an open area, but also special weather conditions. It will not fly without wind. So, if the wind is outside, feel free to make a snake and run outside. It is very fun and exciting to operate it. But not everyone succeeds right away. Olezhka (4 years old) has not yet mastered the control of the kite, he could not release the rope in time for the kite to fly higher. And I was happy as a child - I had never launched kites before.
Paper weapon
For real knights, I suggest making a weapon: sword, kunai, dagger, spear.
Why do they:
- Firstly, knowledge in the arms business is expanding.
- Secondly, you cannot buy such in a store: I have not seen spears on sale, and even kunai even more so.
- Thirdly, they can be fought all day long, they are quite durable.
- Fourth, you can sleep with them - they are safe. A joke, but maybe not. But my son fell asleep without letting go of them.
Here's what we got from the video tutorials:


Video tutorials on which we did:
Kunai
Reference: Kunai is a Japanese dagger with a large blade and a ring on the handle (for attaching a rope). There are large and small kunai. Necessary materials: six sheets of A4 paper, paper glue, scissors. Time needed to create crafts: about twenty minutes.
Dagger
What our knife consists of: blades, guards and a handle with a pommel. You can also additionally make a special scabbard that our paper weapons can easily fit into.
Materials: 5 sheets of A4 paper, glue, scissors.
The time it takes to create such a craft = 15 to 25 minutes.
Nunchucks
The craft consists of two handles and a chain between them. At home, such a toy weapon can be created by yourself in eight minutes.
What you need to use: from six to ten sheets of A4 paper (depending on the length of the flail chosen by you), glue.
We strengthened with scotch tape. It should be mentioned that by doing various freestyle exercises with nunchucks, the child strengthens his body. This kind of light gymnastics is very useful. For beginners, try to master one simple technique: to do this, you need to describe the conditional "eight" in the air.
A spear
The craft consists of a tip and a long shaft. As for the timing, at home, such a paper weapon is made within seven minutes. To do this, take: from two to six sheets of A4 paper, glue. The final length of the spear pole depends solely on your desire and the availability of a sufficient amount of material.
Morgenstern
It is a strike weapon, the warhead of which is a metal ball equipped with long iron spikes and resembling a star with outgoing rays.
It is believed that the name "Morgenstern", which in translation from German means "morning star", was the first to be used by the Swiss. The morgenstern itself weighed more than 1.2 kg, which had a strong moral impact on the enemy, frightening him with its appearance.
The most widespread was the chain morning star, in which the spiked ball was connected to the handle by means of a chain.
Paper katana for children
Katana is a Japanese samurai sword with an outwardly curved blade over 60 cm long (daito) with a long and straight handle, which makes it possible to use a two-handed grip. The mass of a Japanese katana is traditional for swords of this type (approximately 1 - 1.5 kg).
Gun
A paper gun with paper bullets quickly fails - the paper bends, but it will last for 1 hour of play !. If strengthened with chopsticks, it can become eternal. But who needs an eternal toy. According to statistics, on average, a toy gets bored in 25 minutes.
Our little master class on Instagram:
We'll probably finish with weapons, because we need the girls not to get bored either.
Spiner
Not a simple spinner, but on strings. It seems to me much more interesting than the usual one. What a beautiful rainbow you can see on it in motion. You can study how colors are mixed. And how he makes noise, whistles, blows the wind! Just be careful, he can make a wound if the spinning one is brought to the body. Almost like a saw. Take the rope tighter so that it does not fly away when the rope breaks.
Our quick master class... Subscribe to instagram, I often post there what is not on the blog.
Paper kaleidoscope
Yula made of paper
Paper spinner
This wind wheel craft can be a fun toy for kids. With its help, you can conduct real competitions. If you blow gently on the wheel, it will roll, and the winner is the one whose wheel rolls the farthest without falling. The step-by-step manufacturing of such a wind wheel is given in this master class.

For him you need to take:
- 4 squares of yellow paper;
- 4 squares of red paper.

Our wind wheel is made in technology modular origami... Therefore, we will begin its creation with the formation of one module. Take the red square and fold it in half.

We unfold it and bend the sides to the middle line.

We straighten and see that the square turned out to be divided by folds into 4 longitudinal stripes.

We need to make the same folds in a different transverse direction. As a result, the square is divided into 16 small squares.

Now you need to make diagonal folds in one of the squares located on the right in the second row from the bottom. We make the same fold symmetrically on the left side.

We bend the lower side corners.

The right side of the workpiece needs to be folded back. At the same time, its lower part should be located at an angle. 
We do the same with the left side.

We fold the upper part of our module (one square wide) back. 
This is how one ready-made module of the future wind wheel looks like.

We are making 7 more modules.

Now they need to be connected together. We take 2 modules and the protruding part of one of them (which was previously bent back) is inserted into the "pocket" located with back side another.

This is how the connected modules look from the front.

By the same principle, we connect the rest of the modules and close them in a ring.

Our wind wheel is now complete. You can blow.

Paper Christmas toys are the easiest and most economical way to decorate your home for the holiday. Using one of the simple schemes or instructions, even a beginner in this type of creativity can make cute jewelry.
Stereotyped does not mean ugly
One of the most simple ways making paper crafts is cutting out decorations according to certain patterns or patterns. Even graceful ornaments or silhouettes simply attached to the window, the templates of which can be found in the section and printed, will become a real decoration of the interior. A similar decor is attached to the window with scotch tape, klester or water - after the end of the holidays, no traces will remain on the glass.

When working with templates with a large number of small parts, the cutting of which will require filigree precision, it is better to use a breadboard knife, and place the template itself on a special rigid base that protects the work surface from damage.


In addition to chains, garlands can be composed of any images: repeating or united by the same style or color scheme.
Manufacturing workshop
To make Christmas toys in the form of corrugated balls, you have to work hard, but the result will exceed all expectations. Garlands of paper balloons will decorate any celebration, and pink balloons are perfect for. The manufacture of such balls is a very laborious and complex process that requires strict adherence to the scheme. Another step-by-step guide that does not require special training is suitable for beginners.
To create a simple garland you will need:
- 1 roll of corrugated paper of the desired color;
- scissors;
- glue.
Progress:
- A part of the roll should be cut so that the width of the cut part is 3 cm. Do not unfold the roll before this.
- From the resulting mini-roll, you need to unwind a small amount of paper, while twisting the strip every 3-4 cm. You should maintain the integrity of the tape, not allowing it to break.
- The paper between the places of the curls should be straightened and given a slightly convex shape.
- Repeat the required number of times until the desired length of the future garland is achieved. Glue or glue the joints of large fragments.


We decorate the doors
The custom of decorating your home is becoming more and more popular. On sale you can find both decorations made from real needles and various options from artificial materials. Traditionally, the Christmas wreath is attached to front door, which is associated with some inconvenience, since the purchased wreaths are quite heavy and difficult to fix on the usually metal front door, into which it is impossible to drive a nail or drill. Christmas wreaths made of paper are very lightweight, so they can be fixed to the door surface even with tape.


How to do it?
You can make and decorate a New Year's wreath yourself. This will require:
- sheet of double-sided green paper A4;
- pencil and ruler;
- scissors;
- glue;
- decorative elements.
Manufacturing:
- Bend the sheet in half.
- Draw lines from the fold with a pencil so that the distance between them is 1.5 cm, and the 2 cm lines themselves do not reach the edge opposite to the fold.
- Without unbending the sheet, cut through each line, starting from the fold.
- Expand the sheet and glue the edges along the long side of the sheet (its uncut parts).
- Connect the ends of the resulting cylinder to each other and glue.
- Decorate the wreath with beads, sequins, bows. You can also use decorations cut from paper of other colors.

The process of creating a wreath from a cardboard plate will become very easy. Cut out the bottom of the plate, and glue the remaining rim with green paper strips of the same or different lengths.

Fabulously beautiful toys for children
The creation of beautiful fairy-tale figures will become a fascinating pre-New Year's activity for children. One of the many layouts of paper toys should be printed, cut and glued in the places indicated on the template. If the child is still too small to be cut with scissors, then adults should cut out the parts of the toy in advance so that the child can glue them later.


Making toys from paper originated in Japan many centuries ago, it is known as origami. Later, a variety of crafts for the entertainment of children and adults from this material began to be made in Europe. Today they are still just as popular, especially since learning how to make a toy out of paper is not difficult at all, since master classes and photographs of the process of making them can be found everywhere.
Studying emotions
Would you like to learn how to make a DIY paper toy that will help your little one learn the world around him? Then take a look at the photo below.
To make it you will need a large sheet of plywood, cardboard, colored paper, glue stick, scissors and push pins with solid round heads.
Operating procedure:
- a piece of plywood is painted or pasted over with colored paper;
- a circle is cut out of cardboard, which will represent the face of the man;
- details in the form of eyes, a semicircle for a mouth, eyebrow strips, circles for cheeks, etc. are drawn on colored paper of the desired color and pattern;
- cut out the details and glue the eyes;
- the circle-face is glued to the center of the plywood sheet;
- with the help of buttons, eyes, eyebrows and mouth are fixed;
- glue the cheeks and nose.
That's it, the toy is ready, and now you can study human emotions together with your baby.
"Bear"
Anyone who wants to know how to make a toy out of paper for installation on a desktop can see a photo of a craft in the form of Winnie the Pooh.

To make it, you will need ordinary white paper, scissors and a printer, on which the silhouette of this fabulous character should be printed. In this case, you must first remove the face of the bear from the image using one of the graphic editors. Followed by:
- Cut the drawing along the contour and leave a strip below the legs half the height of the figure and the length equal to the distance between the notches multiplied by 4. It will need to be bent back like a stand so that the figure stands.
- Make cuts on both sides of the bear's "face" and cut out a paper rectangle so wide that it fits freely into them.
- Move the strip so that to the left of Winnie the Pooh's head it is indented by 1 cm, and draw eyes, nose, mouth, etc. on it.
- Pull out the paper tape 2-3 cm and draw a face with a different expression, for example, sad.
- Repeat the same procedure one more time, but now pretend to be surprised.
- Glue the ends of the tape together to form a ring.
- Glue a label with some suitable inscription on the bear's tummy.
How to make a paper toy for a Christmas tree
100-150 years ago, Christmas tree decorations were mostly made by hand. And although today there is no shortage of factory garlands and balls, hand-made options continue to be in demand. For example, consider how to make a paper toy for a Christmas tree.
For work you will need:
- decorative paper or colored, not very thick, coated;
- Super glue;
- polystyrene ball;
- silver thread;
- compass;
- long pin with a large head.
Operating procedure:
- circles with a diameter of 5 cm are cut out of decorative paper in an amount of 20-30 pieces;
- cut out spirals from circles;
- wrap them up to make buds;
- open the spirals so that the flowers open slightly;
- open the circle located below and pour glue into the middle or apply silicone from a pistol;
- glue the flowers to the ball very tightly, so that the polystyrene is not visible;
- using a pin, they attach a ribbon to the ball and hang the toy on the Christmas tree.

New Year's surprise
To prepare such christmas ball, would need:
- old glossy magazine;
- Scotch;
- scissors;
- glue.
Operating procedure:
- the magazine sheet is folded 4 times;
- draw a circle and after cutting they get 4 circles
- each circle is folded in half;
- tuck them so that cones are obtained;
- fix them with tape;
- glue the cones and get a ball;
- they attach a ribbon to the ball and hang it on the Christmas tree or on the ceiling of the room where it is supposed to celebrate the New Year.
Paper toy with beads
Such christmas craft it is done very simply, any child can handle it.

First, you need to cut a strip of paper 2-3 cm thick and 6 cm long, make an applique on it in the form of some ethnic ornament and roll it into a ring. At the junction of the ends of the ring, put them on top of each other and make a hole. Insert the ends of the ribbon folded in half into the hole and put on 3-4 bright beads. Having tied a knot, you need to pull out the ribbon from the side of the loop and hang the craft on the tree.
How to make a paper kitten toy
Veterinarians say that pets just need movement. However, today, for example, kittens are much less active than necessary. To get them to run and frolic, you need to interest the kids. In particular, if you are interested in how to make a paper toy for your fluffy pet, just fold the sheet like an accordion and tie it in the middle with a string. To such a "bow" you need to tie a string and tease the kid with it, forcing him to jump and catch the "butterfly".
You can also make a ball out of crumpled sheets of paper, or glue a box with a lid in which you have to cut many holes. They should be of such a diameter that a kitten's paw can fit into them, and a little dry food should be put inside the box.
Comic paper toy
Such a craft will require a lot of patience and skill, however, the result will delight both you and the one to whom you present such a gift.
Before making a joke toy out of paper, you need to decide which surprises you will use. Their choice should be made taking into account the person for whom the gift is being prepared.
Next, you need to make individual boxes with lids in the form of cake pieces. Each of them should be decorated with paper flowers and put inside small surprises.

Before "serving" the pieces must be folded on a tray so that a whole "cake" is formed.
Now you know what toys can be made out of paper, and you can keep your children busy with useful and fun activities.